
Nothing beats the simplicity and accuracy of pinch rods for making comparative inside measurements and squaring casework and frames. They allow you to see and feel measurements and thereby work quickly and intuitively while avoiding the confusion of using numbers.
How to make pinch rods
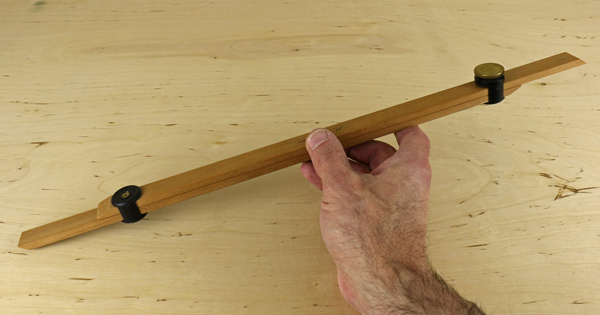
Pinch rods, also known as bar gauges, are basically a set of two wooden sticks that slide against each other along their lengths and are gripped together to produce a desired measurement of length, ensuring more accurate woodworking. The version shown here is very effective yet easy to make.
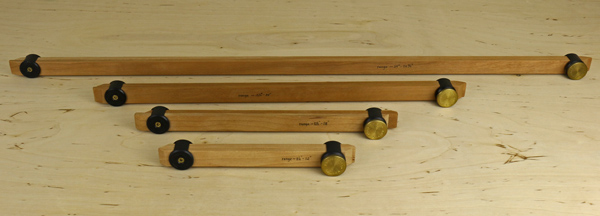
Start by ripping two equal lengths of hardwood, 1/4″ x 3/4″ in cross section. Choose the length based on the following formula: the maximum measuring capacity of the set will be about 3″ less than the combined length of the sticks, and the minimum measurement will be about 1″ less than the length of each stick. I keep several sets of pinch rods in my shop with different measurement ranges.
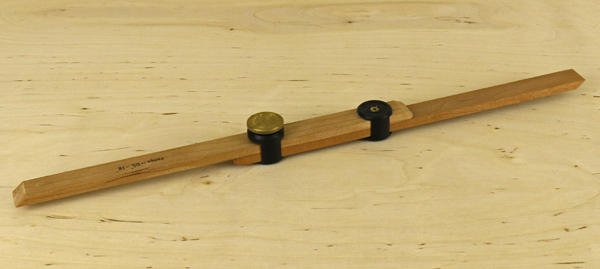
The sticks can be held together with shop made wooden or metal collars, or even with spring clamps, but I suggest using special plastic collars available for about $15 from Lee Valley. One collar is simply screwed to each stick. The brass knob makes measuring convenient and accurate.
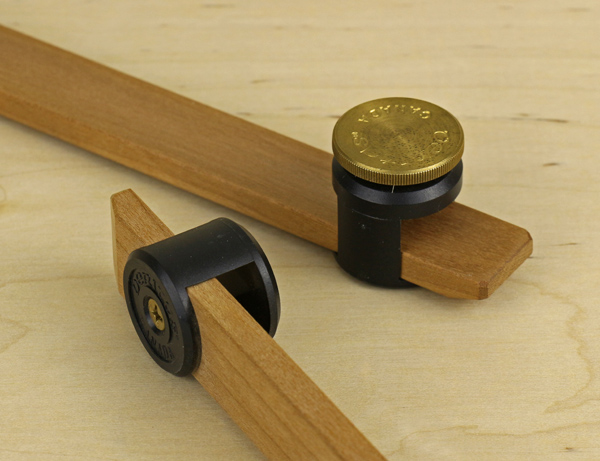
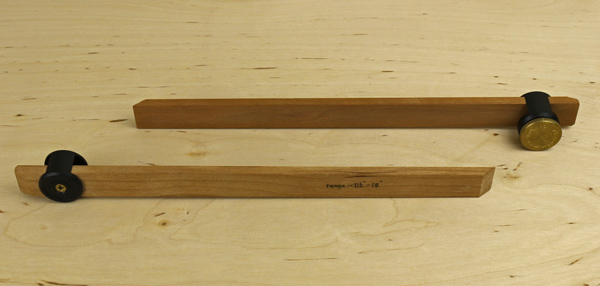
Note that the measuring end of each stick is cleanly beveled at about 40 degrees, while the other end is blunt or may be rounded. I protect the critical beveled edges by always storing pinch rods with the blunt ends outermost.

How to use pinch rods for inside measurements
In general, pinch rods are used by first loosening the thumb screw, then spreading the beveled ends apart until they meet the inside surfaces of the case or frame, and then tightening the knob to retain the measurement.
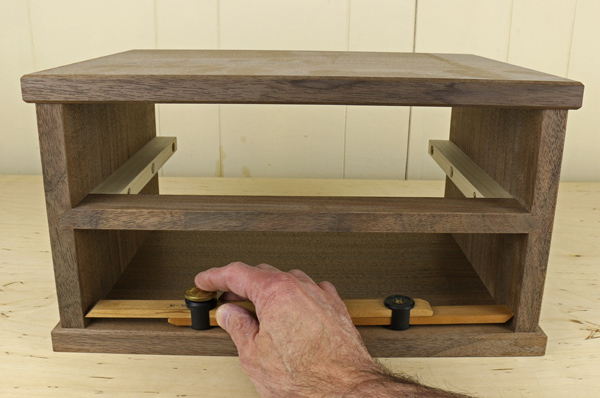
In the example shown below, I am using the rods to register the width of this drawer case at the front. I want to ensure that the back of the case is very slightly wider, on the order of 1/64″, which will enable a very precise fit of the drawers. Therefore, as the rods are moved rearward inside the case, the tips should release from the sides of the case so that a bit of play can be felt between the tips of the rods and the sides of the case at the rear. Attempting to assess this difference with a numerical tape measure is awkward at best and probably impossible to do accurately, yet this sort of nuance is just the type of refinement that distinguishes high quality woodworking.
Similarly, pinch rods can transfer measurements among components of woodwork such as case openings for doors and shelves.
Pinch rods are great for squaring frames and cases
When making a rectangular case or frame, one might think that if the opposite sides are precisely equal in length and the joinery is cut accurately, then the assembly should be guaranteed to go together with perfectly square corners. Unfortunately, gremlins lurk everywhere in woodworking and it is all too easy to glue up a parallelogram from those carefully produced components.
So, why not check it with a square? The answer is that pinch rods are more accurate, faster and have a much larger range of assessment than a square. Furthermore, they allow you to make corrections intuitively.
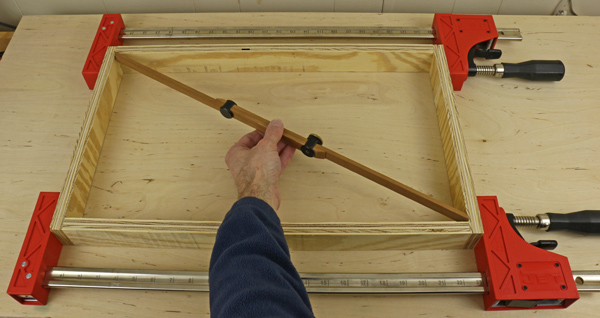
When the opposite sides of a case or frame construction are equal, a precise rectangle is formed only when the diagonals are equal. Pinch rods are used to compare the diagonals.
To illustrate this principal, I’ve constructed a simple frame. To assess if the inside surfaces form a true rectangle, I compare the diagonal measurements by meeting the beveled ends of the rods against the inside corners and comparing that measurement with the other diagonal. (Always put the beveled side of the end of the rod toward the shorter face of the frame.) When the ends of the fixed rods slip into each pair of corners equally tightly, the frame is spot on square. Don’t bother trying this with a tape measure.
One more trick
During the crunch time of glue up, pinch rods allow you to intuitively adjust the direction of clamp pressure to correct a case or frame that is initially out of square (a parallelogram).
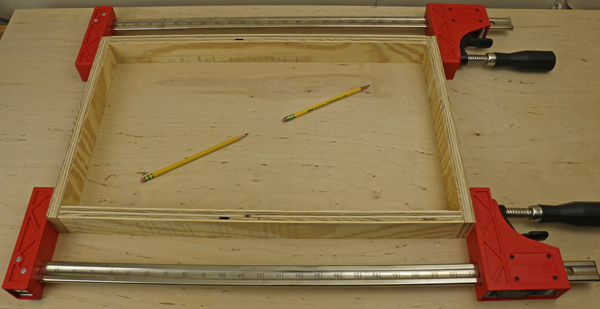
The rule is simple: align the clamps slightly more with the longer diagonal. Think of clamping across the longer diagonal to squeeze it shorter. As clamp pressure is applied, it will indeed shorten it to turn the parallelogram into a rectangle. It takes only a slight deviation of the clamps from parallel with the sides to make the correction. With a bit of trial and error, the diagonals are equaled and the assembly will dry square.
In the photo below, the pencils indicate which had been the longer diagonal. Therefore the clamps are applied slightly more in line with that direction and not parallel with the side of the frame. This will make the frame rectangular.
One of the wonderful things about craft is the effective use of clever low-tech tools and methods to impart nuance and refinement to the work.
Share tips, start a discussion or ask one of our experts or other students a question.
No Responses to “How to Use Pinch Rods for More Accurate Woodworking”