
Getting the fit just right is one of the most challenging parts of sewing clothes, mostly because the process isn’t a singular step. Rather, it begins before the first pattern piece is even cut, and continues throughout your sewing.
But it’s those first steps, taken before any cutting happens, that can be the most critical to getting the fit right. You have four key opportunities to ensure your pattern is the right size before the layout and cutting begins. Here’s how to make sure yours comes out like a pro’s.
1. Select the Right Pattern Size
The number one thing to remember about choosing a sewing pattern: the pattern sizes are not the same as the sizes of clothing you find in bricks and mortar stores — they’re actually about 1-3 sizes larger. Pattern sizes are based on three basic body measurements: the fullest part of the bust line, the natural waistline and the fullest part of the hips and buttocks.
It’s vital that you measure yourself accurately. Cutting patterns too small typically can’t be fixed, so you need to know the right size from the start.
2. Use the Finished Garment Measurements (FGM)
The FGM is the circumference measurement of the garment, once completed, at the same three basic body points listed above. This is particularly important if you’re in between sizes. By placing a measuring tape around each body point using the FGMs for both the smaller and larger sizes, you can get a feel of how the finished garment will fit around your body. Then pick the size that feels more fitting for you.
3. Measure With a Tissue Pattern Fitting
You can easily identify any critical fitting issues by pinning the base (tissue) pattern pieces together and placing them on the body. For the best fit, the tissue fitting should be done over any undergarments, but not over your clothing.
Pro Tip: Because tissue fitting is done on only half your body, make sure to secure the front and back pattern pieces to your center front and back. This will make sure the test is lined up correctly.
Here are a few common fitting issues to look for:
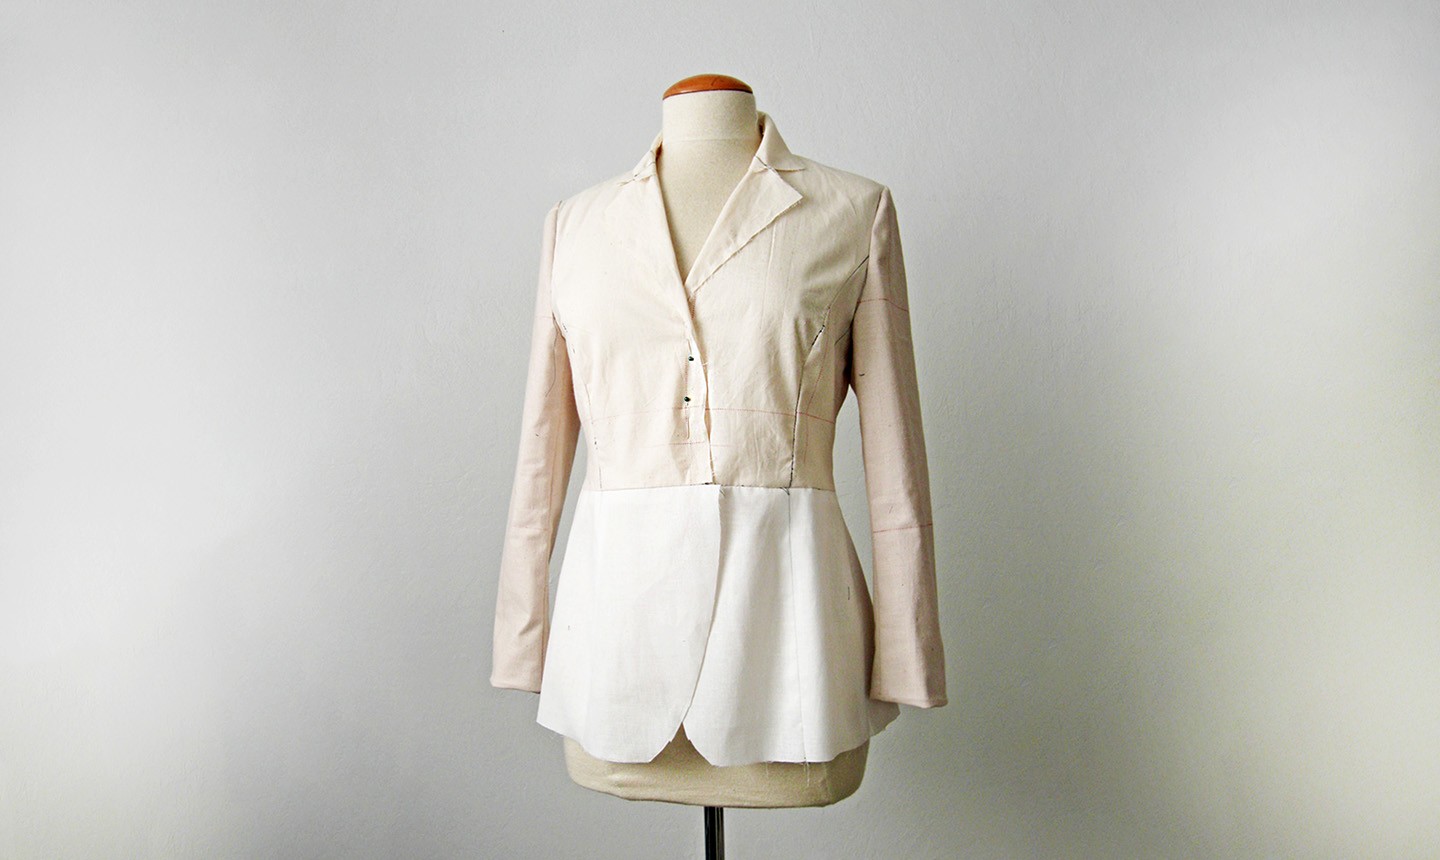
4. Prepare a Muslin
When you make a muslin, you’re essentially creating a prototype of the base garment using inexpensive fabric. This helps isolate all fitting issues and showcases the most comprehensive fitting adjustments you need to make. Not all projects require a muslin, but it’s a good idea for ones with intricate styling details or that require exact fitting.
Regarding tip #2, what if I use FGMs only and end up choosing a size that is too large above the high bust? What I try to do: (1) Choose my pattern size based on my high bust. (2) And then, I do what you recommend in tp #2. What do you think?