
With this effortless cake decorating technique, you will be able to create quick and seamless ombré shading on your cake. Even if you’re not an expert at airbrushing, you will be able to use this method; in fact, this is probably the easiest way to transform your cake from plain-looking to incredible! As an added bonus, I am also going to show you how to airbrush a gorgeous, ethereal peony.
Learn how to create a seamless or striped ombré finish on your cake in this how-to tutorial.
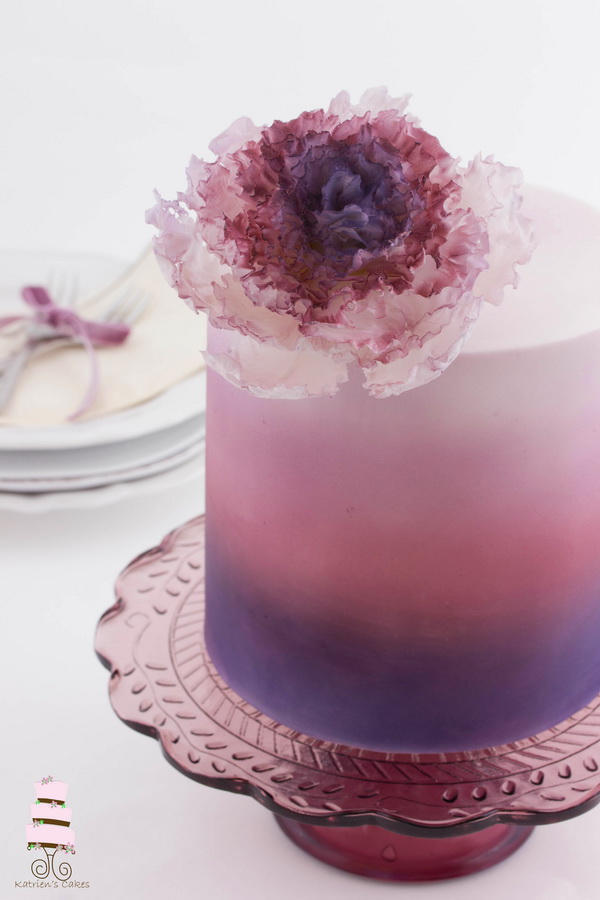
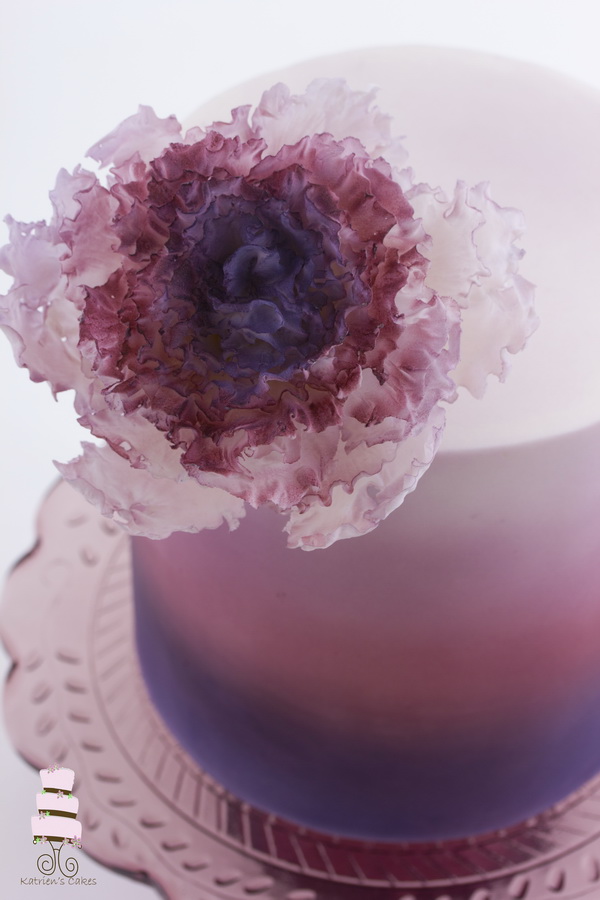
Photos via Katrien’s Cakes
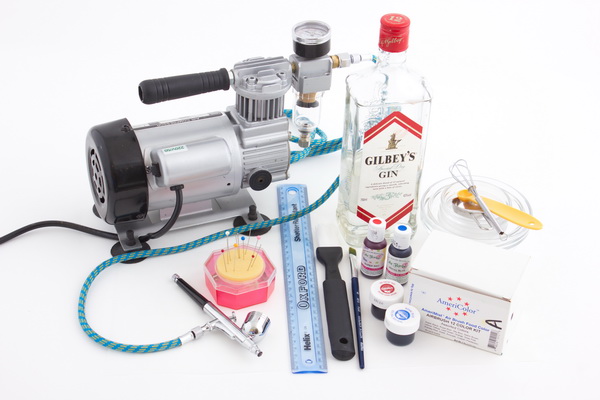
Materials:
• fondant covered cake
• Clear alcohol such as Vodka or Gin
• Food coloring such as red (or dark pink), blue and white gel coloring or airbrush coloring
• Small whisk such as a balloon whisk
• A tablespoon (15 ml) measuring spoon
• Four bowls or plastic container
• Paintbrush or pastry brush
• A4-sized sheets of paper
• Ruler
• Sterilized pins
• Airbrush and a 0.5 mm or 0.7 mm needle
• Compressor
• Spray booth (optional)
• Kitchen towels or ear buds
• A white sugar flower, such as a peony
You can use any kind of airbrush and any needle size, but I prefer a size 0.5 mm or 0.7 mm needle since it will cover a larger spray area in a shorter amount of time.
Instructions:
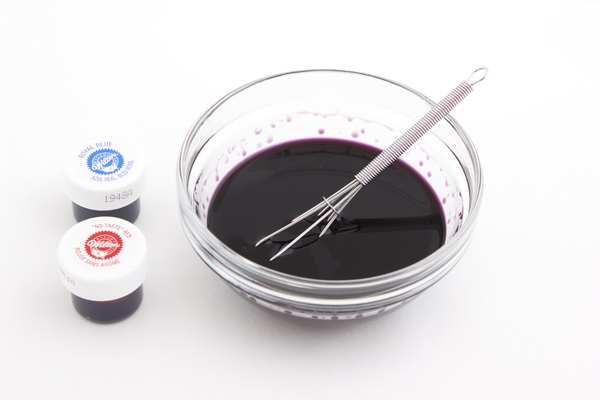
Step 1:
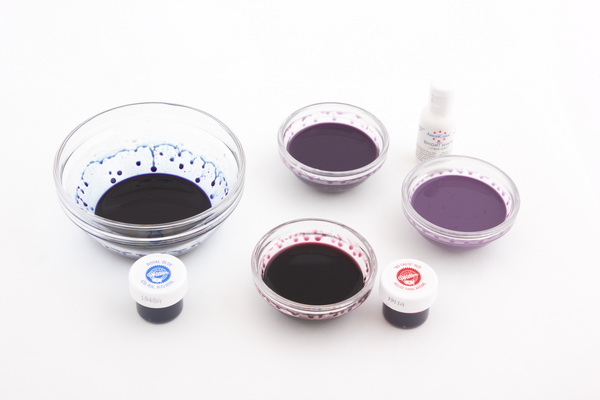
Measure ¼ cup (60 ml) of clear alcohol into a bowl or plastic container, and add ⅛ tsp (1.25 ml) red and a ⅛ tsp (1.25 ml) of blue gel food coloring into the alcohol. Stir it well with a small whisk to dissolve the food coloring. If you see any small particles in the mixture, strain it through a sieve, otherwise it might clog your airbrush nozzle.
Tip: If you are decorating a tiered cake, use double the amount of clear alcohol and food coloring.
If you do not want to use alcohol and normal gel food coloring, use specially formulated food coloring for airbrushing such as AmeriColor Air Brush Food Color. Mix together equal amounts of red and blue and then add blue, red or white coloring as described above. Mix your airbrush food coloring in such a way that you have at least one tablespoonful of each shade of purple.
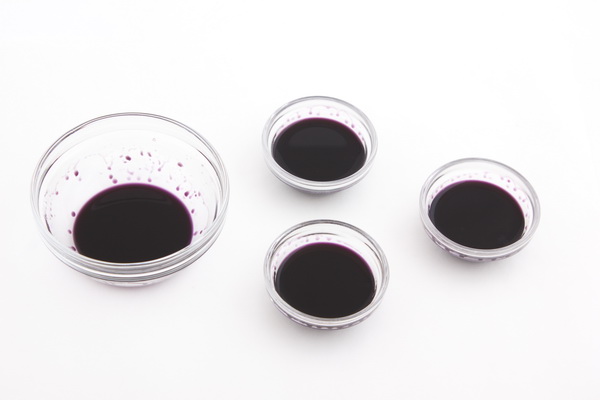
Step 2:
Measure out 1 tablespoon (15 ml) of liquid at a time, and pour it into three more bowls or plastic containers, so that you have four bowls or containers in total.
Step 3:
Add a drop of blue food coloring into the first bowl and a drop of red food coloring into the second bowl.
Add two or more drops of white food coloring into the last two bowls or plastic containers, and then add another tablespoon (15 ml) of clear alcohol into the fourth bowl or container.
Tip: White gel food coloring leaves small particles behind that do not easily mix into alcohol, therefore strain the mixture through a sieve to remove the small particles.
Step 4:
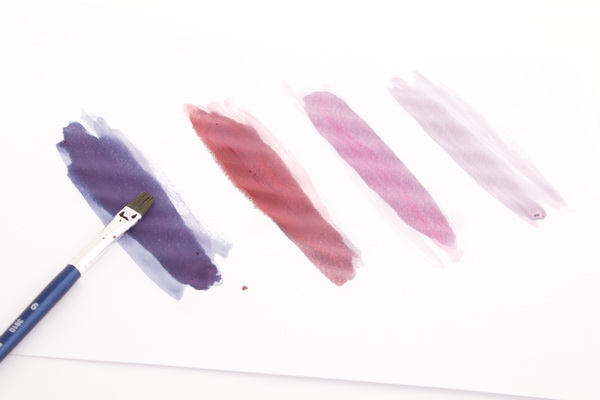
Use a paintbrush or pastry brush to paint each shade of purple on a piece of paper, to make sure that you like the color. If you do not, add a few more drops of food coloring to the separate paint mixtures. To lighten the colors add more white food coloring or clear alcohol. To darken the colors add more blue or even a drop of brown food coloring.
Step 5:
Place your fondant-covered cake on a piece of greaseproof paper to protect your work surface from too much food coloring. Practice on a rolled out, scrap piece of fondant or on a piece of paper, before you start on your cake.
Tip: If you do not own a spray booth work in a well-ventilated area or outside, using a lead to supply electricity to your compressor.
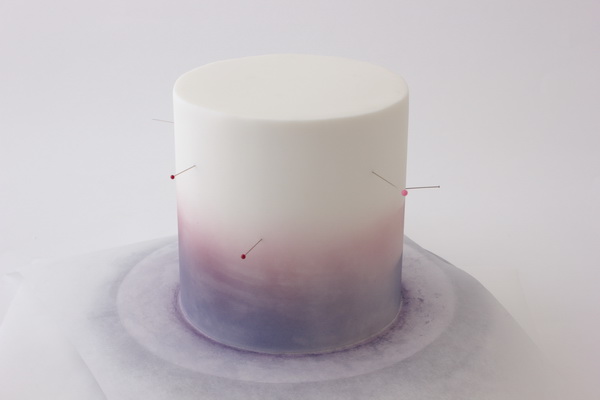
Step 6:
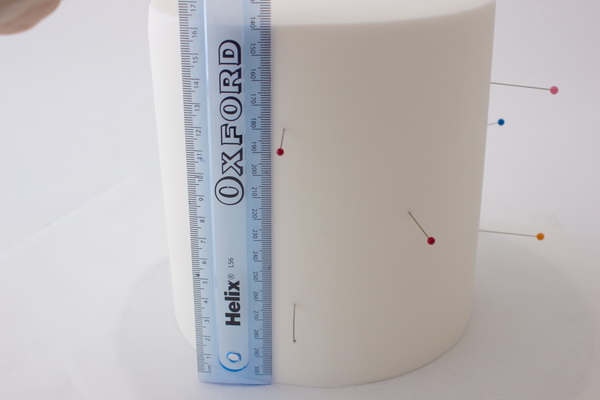
Measure the height of the cake with a ruler, and divide it by four. Use a sterilized pin to mark each quarter of the cake. Add a few more pins around the cake, each placed at a quarter-measurement to guide you when spraying the food coloring.
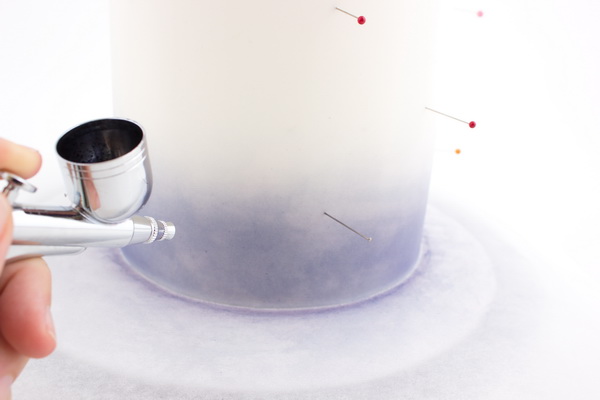
Step 7:
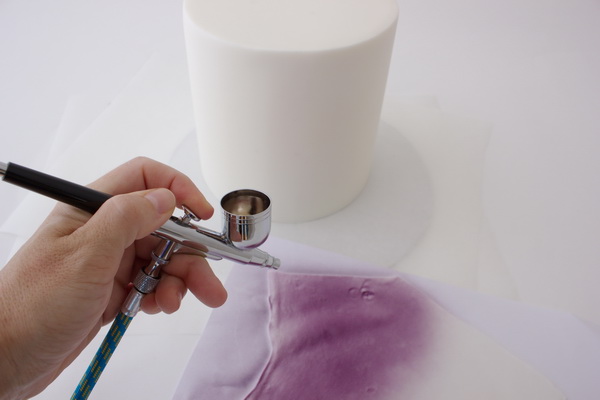
Either place the cake (on the greaseproof paper) on a turntable or turn the cake by rotating the greaseproof paper while airbrushing. Spray from side to side while spinning the cake around.
Use your tablespoon-measuring spoon to pour liquid into the airbrush’s reservoir cup. Place a small amount of the darkest color into the cup and start airbrushing the bottom quarter of the cake. To create seamless colors, just spray the food coloring casually without worrying about going over the allocated quarter.
Spray the darkest food coloring only on the bottom quarter of the cake, refilling the airbrush cup when necessary. Spray only one layer of coloring, and let it dry. You can always re-spray over the area, when it has dried, if you want it slightly darker.
Step 8:
Airbrush the second quarter of the cake with the second darkest purple, slightly going over the bottom color to blend the seams where the colors meet.
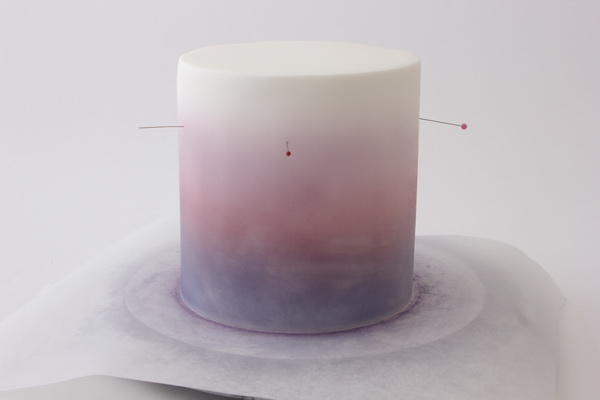
Step 9:
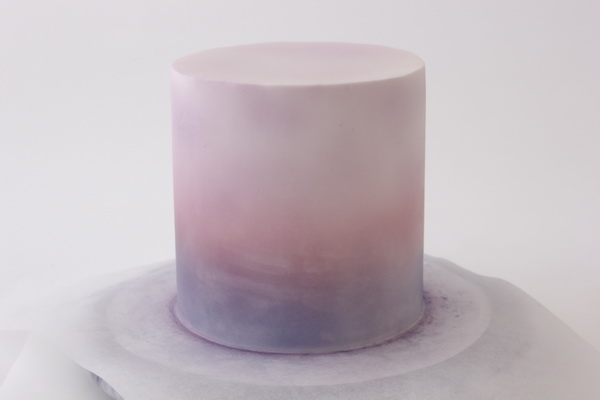
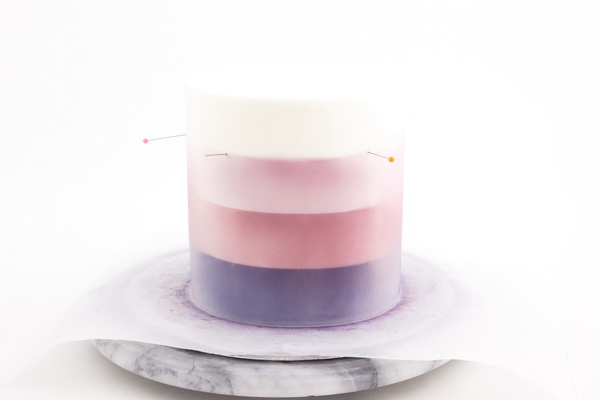
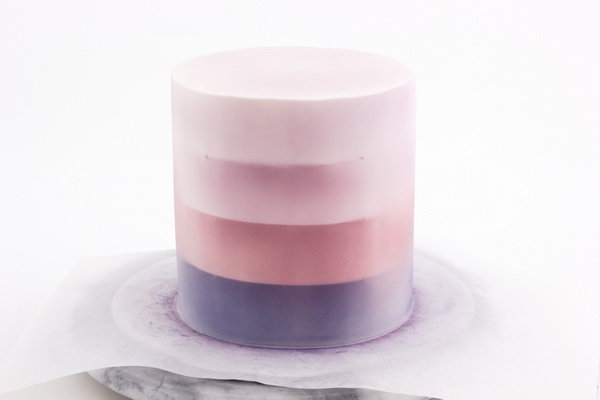
Spray the next quarter of the cake with a lighter shade of purple, and then spray the top quarter as well as the top of the cake with the lightest shade. By placing more distance between the airbrush nozzle and the cake, you will create an even lighter shade of color.
If you want to darken any of the shades, re-spray over that specific area with the same shade of purple when it has dried. Rather add a few layers of color, than to spray too much liquid on one area, otherwise small droplets of food coloring will form on the surface of the cake. If small droplets have formed, press lightly on the area with kitchen towel or wipe away a few droplets with an ear bud dipped in clear alcohol.
How to create an ombré stripe:
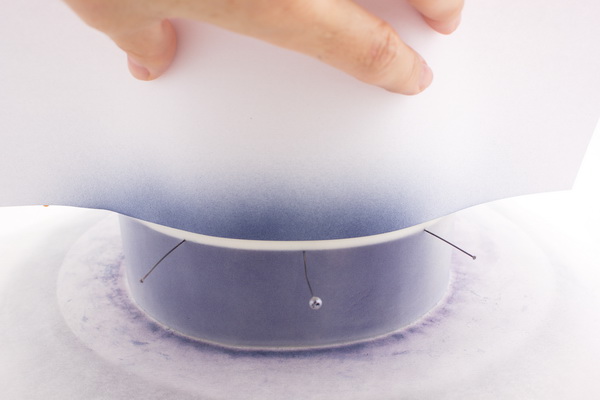
To create a definite stripe rather than a seamless ombré-look, take out all the pins except those at the top edge of the quarter that you are working on. Place a piece of paper over the top part of the cake, lightly resting it on the pins, to mask that area, so that only the bottom quarter of the cake is visible.
Airbrush food coloring on the open space, going slightly over the paper to create a darker line just underneath the paper.
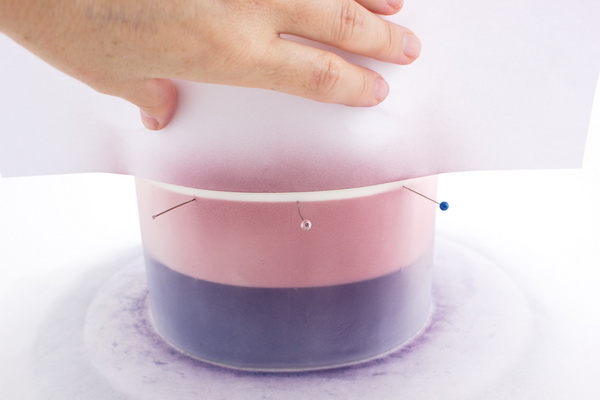
When you have finished spraying the bottom quarter, place pins on the top edge of the next quarter of the cake, in other words halfway up the cake, and move the paper upwards to create another open space. Use a lighter shade of purple to airbrush this quarter of the cake.
Repeat this technique with the rest of the food coloring to make definite stripes, spraying from the darkest to the lightest color.
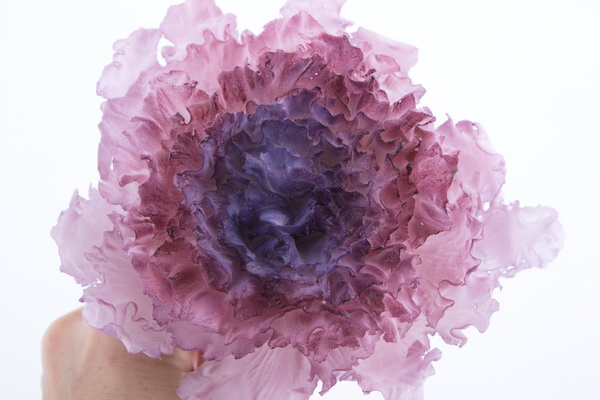
Ombré peony:
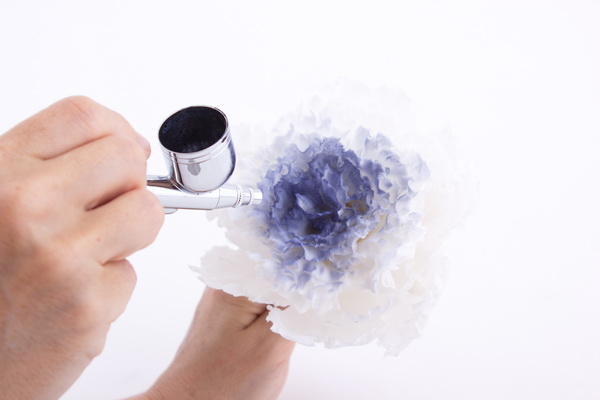
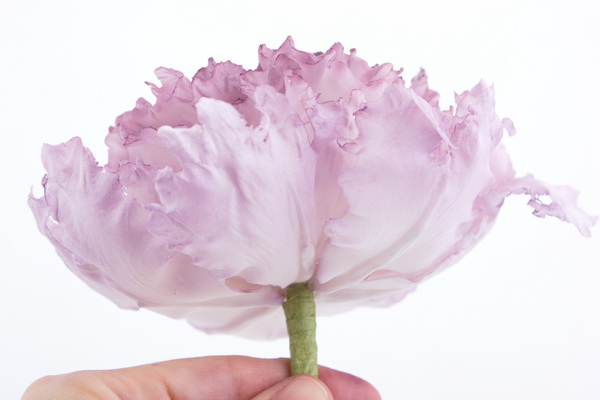
To color the sugar peony purple, use the food coloring in the order described above, spraying the darkest purple in the center of the flower and airbrushing the lighter colors towards the outside of the flower, as well as underneath the flower.
Hold the flower at least 12” (30 cm) away from the airbrush and spray light layers of color, waiting in between for the colors to dry. Re-spray the area if you want to make the colors darker.
If you have any leftover purple coloring pour all of it together, into a glass jar with a lid, and label the jar “purple airbrush color” to use for another project.
Off course, you could also use this ombré technique to color a variety of other items such as isomalt, edible icing sheets and wafer paper.
Acquire colorful, professional-level airbrushing skills.
Airbrushing adds unparalleled versatility & efficiency to your cake decorating toolkit. Get all the support you need to start airbrushing like a pro. Enroll here now »
Share tips, start a discussion or ask one of our experts or other students a question.
No Responses to “How to Airbrush a Wow-Worthy Ombré Cake”