
If you’ve spent any time making metal jewelry, you may have noticed that the more you work a piece the harder it will become.
Maybe you’ve been shaping a ring shank and gotten to the point where your hands hurt but your metal just won’t move more. Or, maybe you’ve hammered a piece of sheet metal until you loved the texture, but then tried to bend it into a cuff with results that are immovable and springy. Read on to learn about the process of annealing metal jewelry!
Here’s the simple rundown on the process of annealing metal jewelry:
The molecules inside of your metal become tightly compressed the more that you hammer, bend and work your metal. Annealing is a process of releasing those molecules a bit, softening them so they can move in the ways we want.
If a piece is work hardened and you continue to work that piece without taking annealing breaks, you run the risk of splitting your metal and destroying all of your hard work. It can be tedious, but trust me, it’s worth the time.
How to tell when you should be annealing metal jewelry:
Feel the vibrations
It’s worth the time for the sake of your work, but also for the sake of your hands. Working soft metal will allow you to move the metal where you want with less reverberations in the piece as a whole. This can translate to a lot less stress on your joints. Anneal often!
Listen to what the metal has to say
Soft metal will have a deeper sound as the hammer strikes it, while metal that should be annealed will sound higher pitched and tinny.
Watch it
Is it moving the way that you want with the proper amount of force? If you’re wailing away on a piece and it’s just not changing shape, you should probably take an annealing break.
How to anneal:
The process of annealing metal jewelry is relatively the same for different kinds of metal, but if you’re hesitant or unsure, do a little more research on your specific type of metal just to be on the safe side. In the example below I’ll be using silver.
Supplies:
- A torch
- Metal
- Fire brick
- Insulated tweezers
- Bowl of water
Step 1:
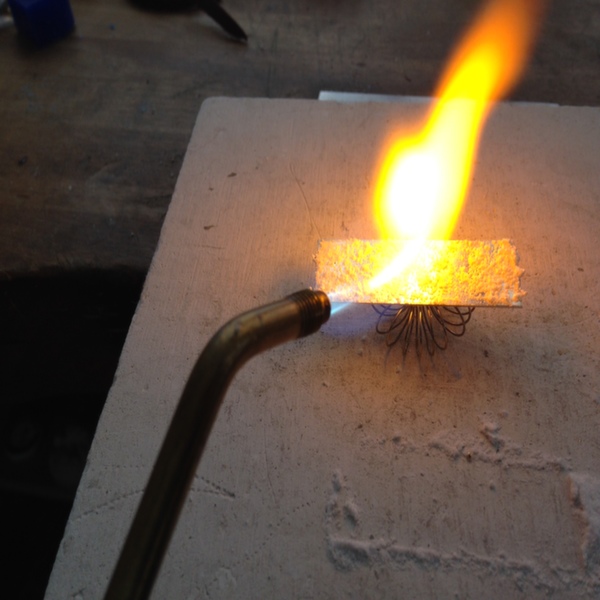
Working in a dimly lit room, put your piece of metal on a fire brick.
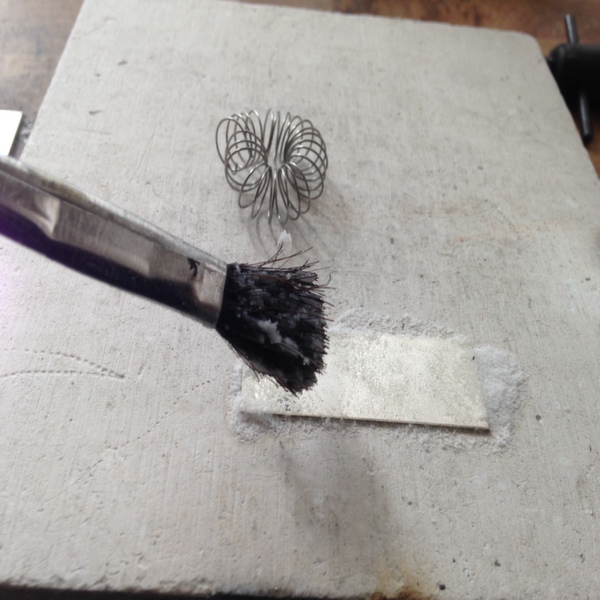
Step 2:
Brush your piece with a mixture of Borax and denatured alcohol. This will help prevent fire scale and oxidation if your metal gets overheated.
Step 3:
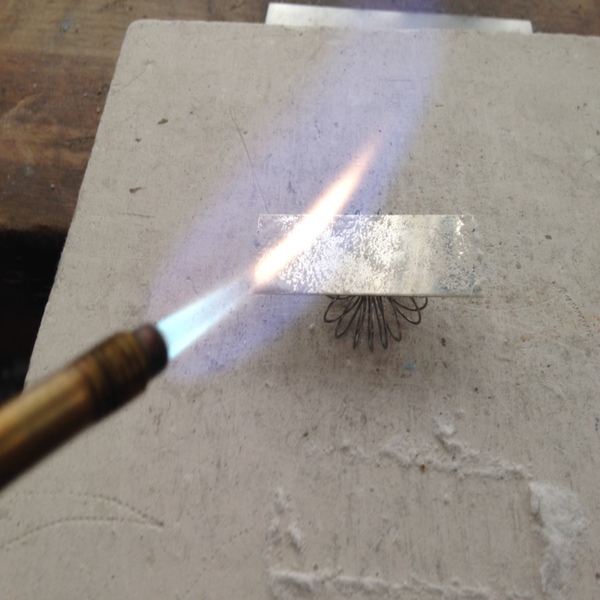
Begin by adjusting your torch to be soft and bushy — avoid making it harsh and hissing. Begin brushing your metal with the flame where blue meets orange and continue to move to cover the entire piece.
Step 4:
Heat evenly until the piece begins to glow a dark orange/red. The color and glowing of your metal will be more noticeable with less light. Working evenly across the whole piece, keep it at this temperature for up to 30 seconds. You’ll find good time periods as you practice and learn that differing gauges of metal will require different heating times.
Note: Watch out for very shiny silver as this means your piece might be on the border of melting.
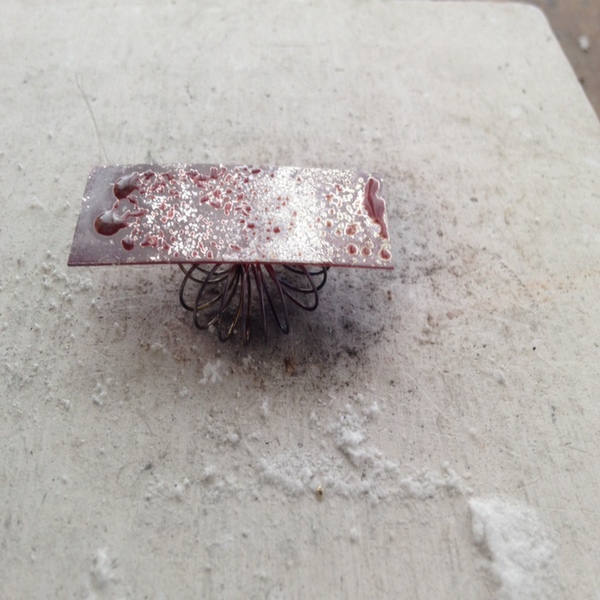
Step 5:
Grabbing your piece with tweezers, dip it in water to quench it. There will likely be some hissing and steam as the metal cools.
Congratulations! You’ve just annealed your metal. Get used to this process as it will save your joints, your work and your sanity!
Share tips, start a discussion or ask one of our experts or other students a question.
No Responses to “Making Your Metal Manageable: A Tutorial on Annealing Metal Jewelry”