
Yesterday on the Craftsy blog, we took a look at how to sharpen a chisel, where we covered flattening and polishing the back of the chisel. Today, we’re finishing the job by working on the bevel of the chisel. The good news is that from here on out, you won’t have to deal with the back until you wear down that 1” of the chisel that you’ve polished up. This will take years.
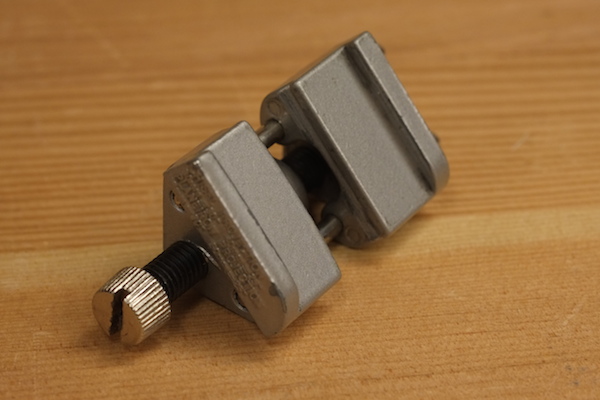
The honing guide
The process of working on the bevel is similar to working on the back, but because the area of the bevel is so small, it is difficult to keep the chisel balanced on that area. This is where the honing guide comes in.
Step 1:
The honing guide is designed to hold a chisel at a consistent angle while sharpening. The lower the angle, the sharper your chisel will be. If you go too low, however, the edge will become less durable, and you’ll find yourself needing to touch up the chisel very frequently. 30º is a good overall bevel angle for a chisel.
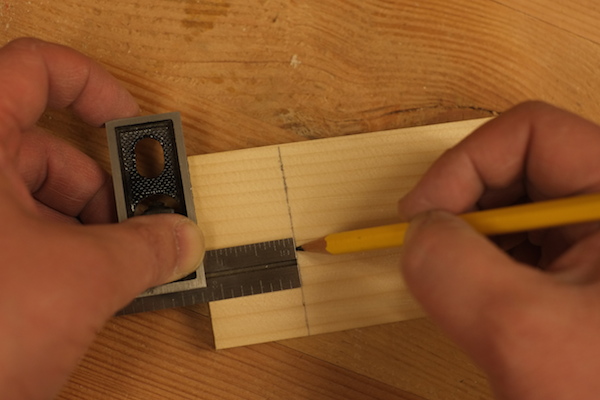
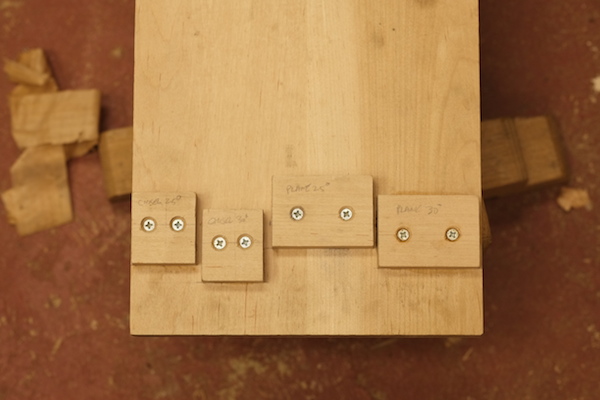
To set the honing guide for 30º, you need 1-3/16” (30 mm) of the chisel sticking out of the honing guide. You could measure this distance with a ruler every time you need to resharpen the chisel, but there’s a far easier way.
Take two scrap pieces of wood, and make sure each one of them has one square edge. Make a mark on one of the scrap pieces that is 1-3/16” (30 mm) away from the square edge.
Step 2:
Then position the other piece of wood so that the square edge sits right on the line. Use glue and screws to hold everything in place. Label the jig so you know what it’s for.
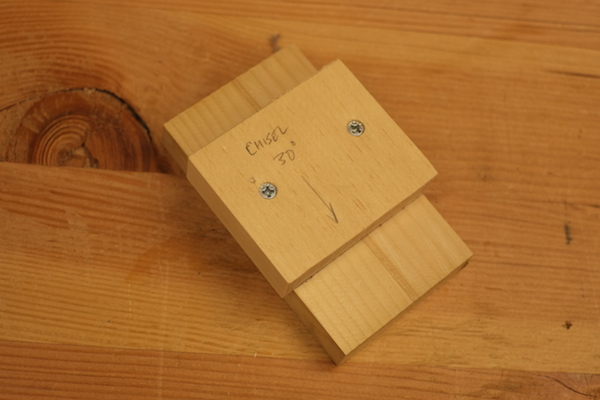
Now, when you use the honing guide, you can use this to set the chisel at the same distance every time. You can add additional blocks for different angles for different purposes.
Sharpening the bevel edge chisel
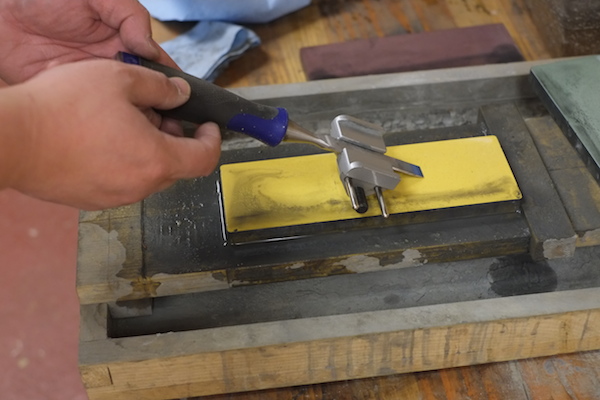
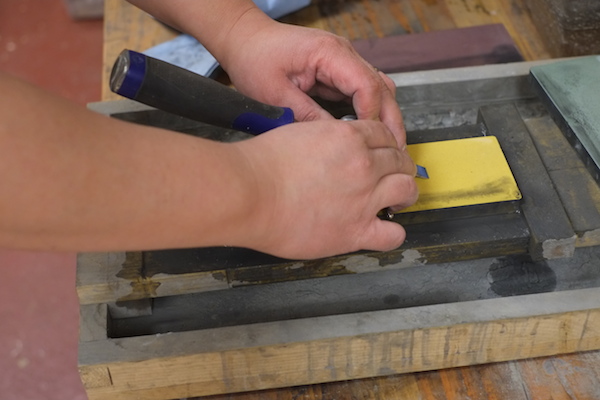
Step 1:
Make sure that the chisel is snugly held by the jig. Use a screwdriver to tighten the adjustment knob. You don’t want the chisel to come loose in the middle of this.
Step 2:
Take your chisel and honing guide, and use it to rub the bevel on your coarsest grit sharpening media. Put pressure near the cutting edge of the chisel to keep the chisel on your sharpening media. Just like you did with the back, take your time, and make sure the entire cutting edge is covered. Because this area is relatively small, this won’t take as much time as working on the back. If you want, use a magnifying glass to keep track of your progress.
Step 3:
Move on to the medium grit sharpening media. Just like when working on the back, if you took your time with the first step, this step will not take as long as the last one.
Step 4:
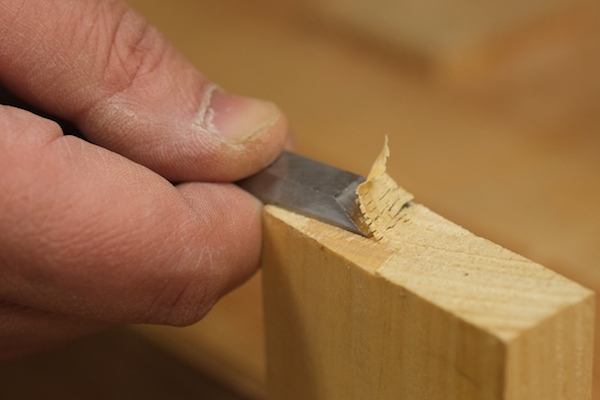
And finally, repeat the process with the honing guide on the fine grit sharpening media. After that, take a swipe or two of the back of the chisel on the fine grit sharpening media. If all went well, your chisel will be extremely sharp, and you will be able to pare off very fine shavings on the end of a board. This is the best proof that a chisel is really sharp.
What to do when your chisel becomes dull?
Using a sharp chisel is a joy, but the day will come when you need to resharpen the chisel. If that is the case, simply put the chisel in the honing guide with the setting jig, and work on the bevel again. You don’t have to rework the back side, since you set it up in the first part of this process. One day, when you wear down that first 1” of the chisel, you will have to address the back of the chisel again, but that will probably be years from now.
Share tips, start a discussion or ask one of our experts or other students a question.
No Responses to “Chisel Sharpening Made Easy: Working on the Bevel”