
Stencils have become very popular in paper crafting this year, and there are so many different ways to use them. This is the first in a series of posts where we’ll be showing how to incorporate stencils into your card making. I have really been having a lot of fun with all the different techniques out there that work with stencils and can’t wait to share them with you!
For today’s card, I’m going to show you how to blend three different colors of ink over a stencil to create a gradient that looks like I used more colors than I actually did.

How to blend dye inks
Supplies needed:
- Stencil
- Dye inks (I prefer the Ranger Distress inks for this technique because they blend so effortlessly)
- Blending tool(s) (I’m using the Ranger Mini Ink Blending Tools, which again I prefer, but sponges or sponge daubers will work as well)
- Painter’s tape
- Craft mat or scratch paper
- Smooth white card stock
- Supplies to finish your card (stamps, embellishments, adhesives of choice)
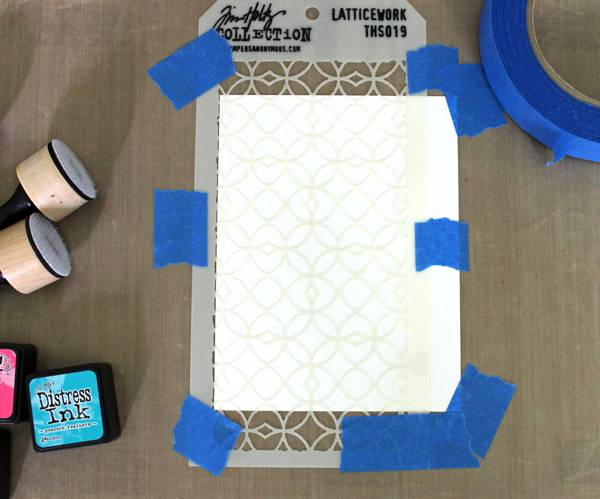
Step 1:
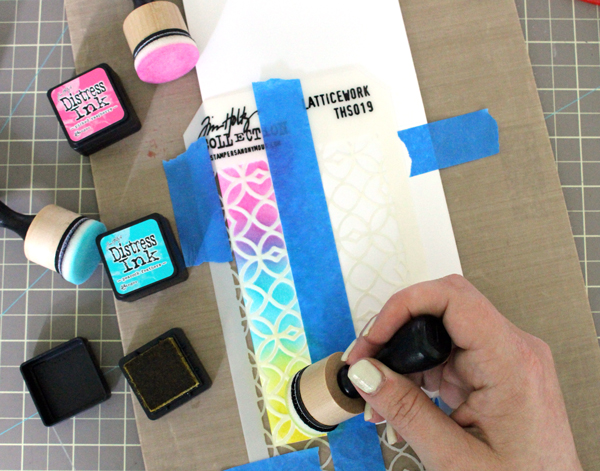
Tape down your cardstock to your craft mat or scratch paper. You want to make sure the tape isn’t covering any open areas of the stencil. Tape the stencil over the cardstock. I like using painter’s tape for this as it removes easily from the stencil and the card stock without tearing or damaging them.
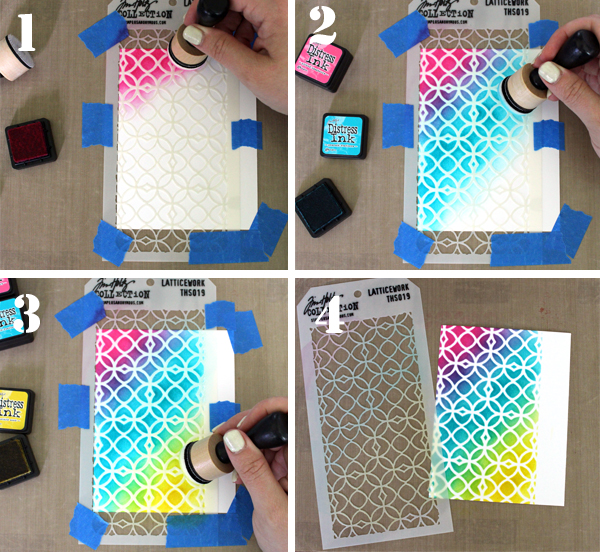
Step 2:
Apply your inks of choice, using a circular motion. (Here, I’m using Picked Raspberry, Peacock Feathers, and Mustard Seed Distress inks.)
I started at the top left of my cardstock and blended down toward the bottom right using Picked Raspberry Distress Ink. When I added the second color (Peacock Feathers), I blended it up into the first color, which created this pretty shade of purple. The same thing happened with the blue and yellow, which created a green. In the end, it looks like five or more colors were used when in reality I only used three.
Once you’re done sponging on the ink, remove the stencil and either wipe it off with a baby wipe (dye-based inks will clean up easily with one) or rinse it off in the sink with warm water and pat with a paper towel to dry.
That’s how easy it is to sponge ink over a stencil, and the possibilities are endless as you can create a background or focal point for your cards in any color combination you can imagine with any number of inks. You can use just one, blend two together or get creative and use multiple colors and blend them together.
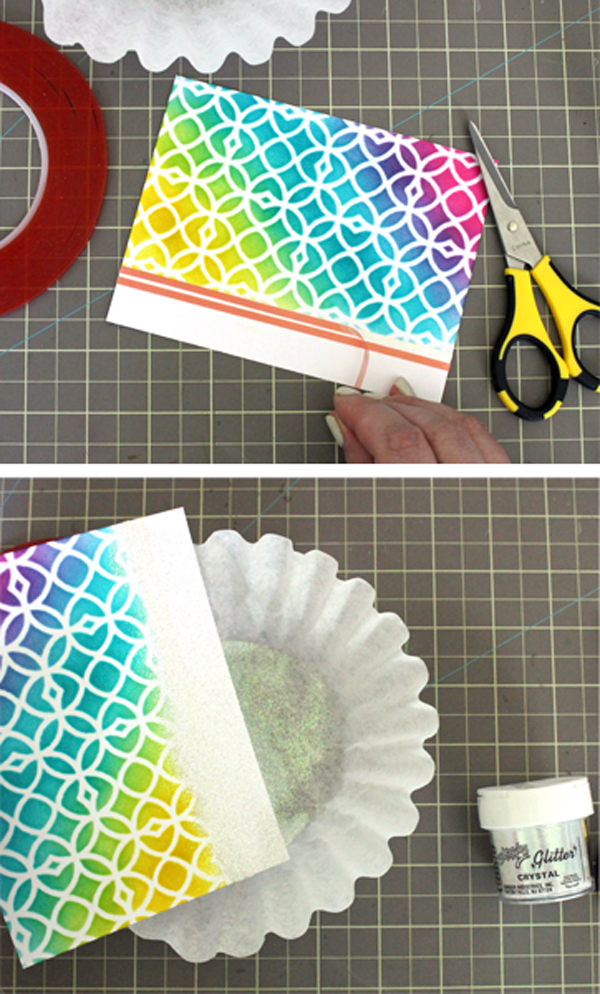
Step 3:
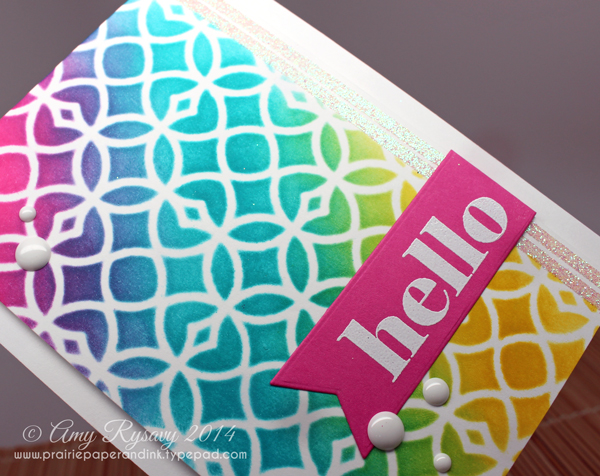
I decided to add some loose glitter to the card I’m making. To do so, I adhered two 1/8″ strips of red line adhesive, then poured on some loose iridescent glitter, catching it in a coffee filter so that I could funnel it back into the container.
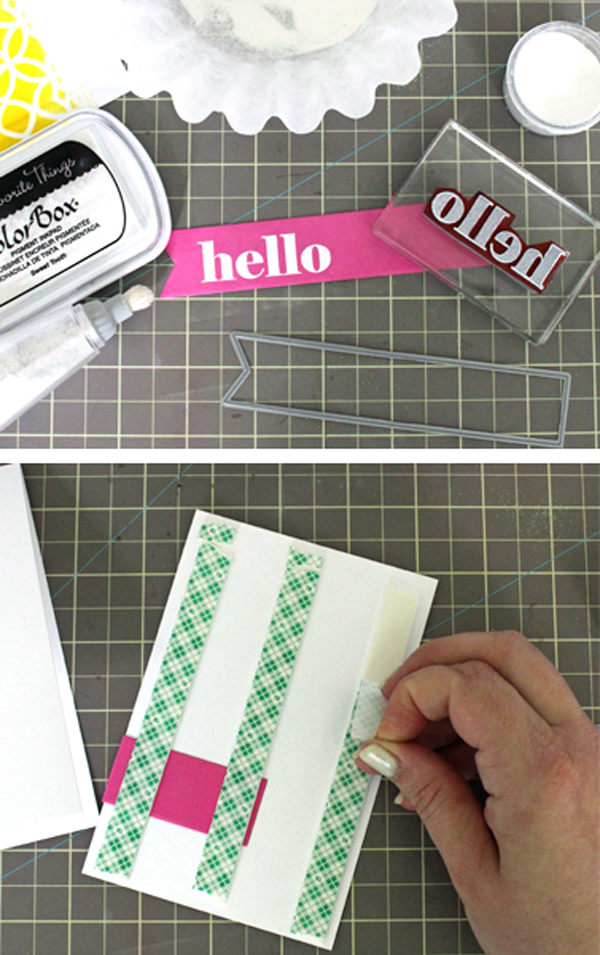
Step 4:
I die cut some bright pink cardstock with MFT’s Fishtail Flags Die-namics, then stamped and embossed the “Hello” sentiment from my Great Greetings stamp set using white embossing powder.
Note that I used different clean coffee filters for the white embossing powder so as not to contaminate it with any of the loose glitter.
I scored and folded the sentiment around the stenciled card stock, then applied foam tape to the back and adhered it to my note card.
Step 5:
To finish the inside of the card I taped down the card stock and stencil again, but this time I masked off most of the stencil with a piece of painter’s tape, leaving about an inch of cardstock exposed. I then used the same inks to sponge and blend down the left side of the inside of the card. It only took a minute and just helped finish it off.
I stamped a sentiment as well, which you’ll see in the picture at the end of this post.
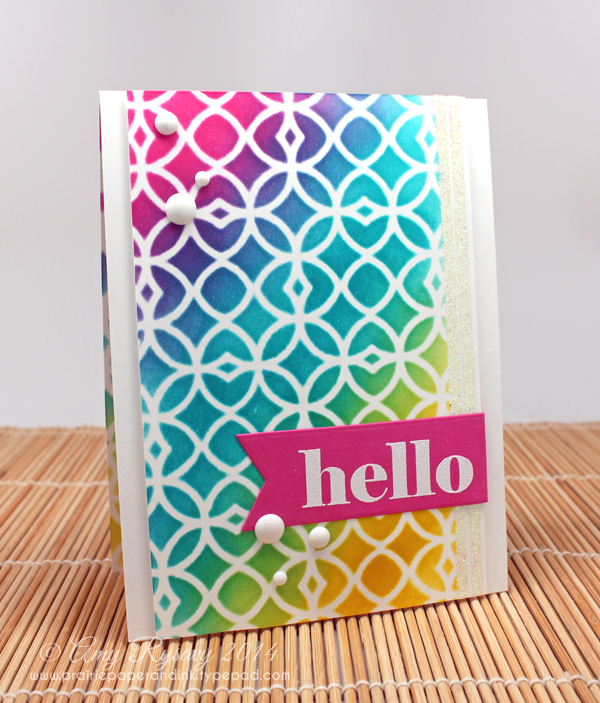
And here’s my finished card! I added a few white enamel dots, which are a quick and easy embellishment to add.
I just love how the colors blend together over the stencil. It is so fun and colorful, and the best part is it takes so little effort!
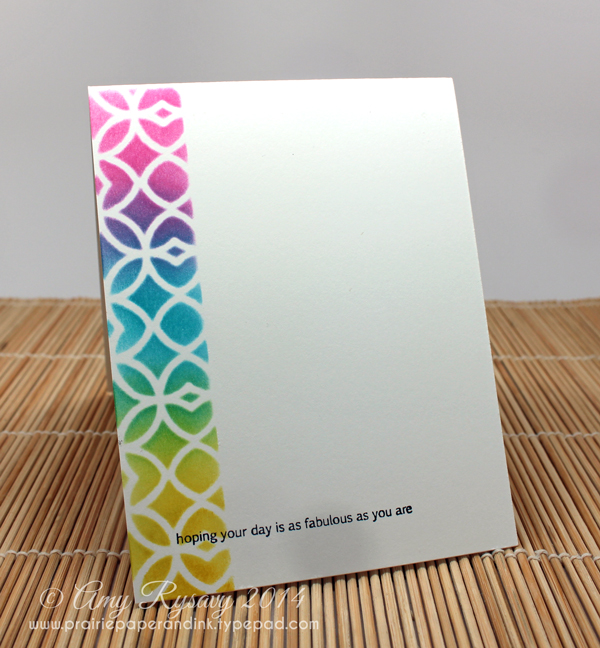
And of course, the finished inside, with plenty of space to write a personal message.
Share tips, start a discussion or ask one of our experts or other students a question.
No Responses to “Blend Dye Inks to Create Colorful Backgrounds for Your Cards”