
Granny squares are such a versatile crochet motif. They can be made any size, with a huge array of different colors and designs and joined together to make all kinds of projects.
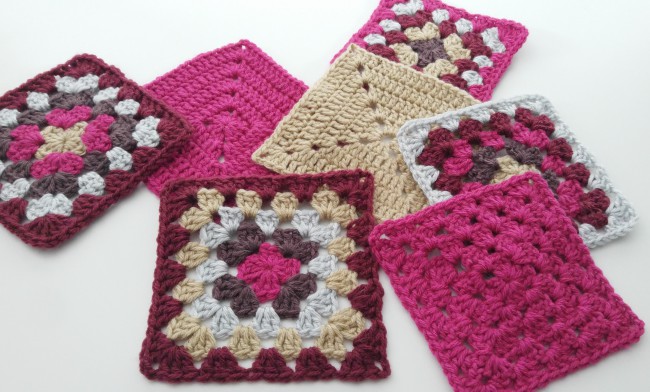
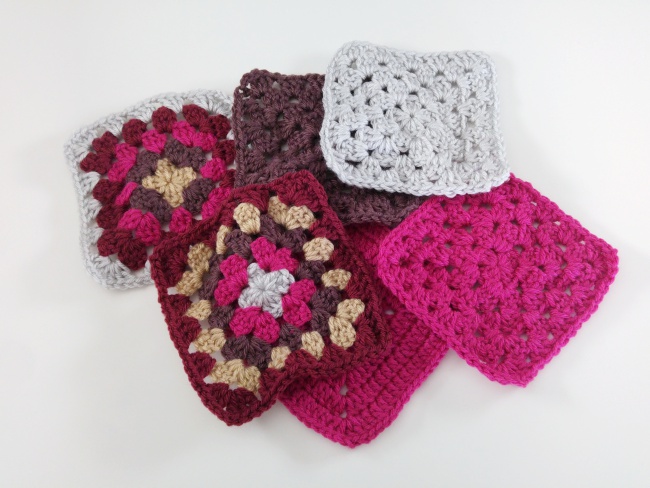
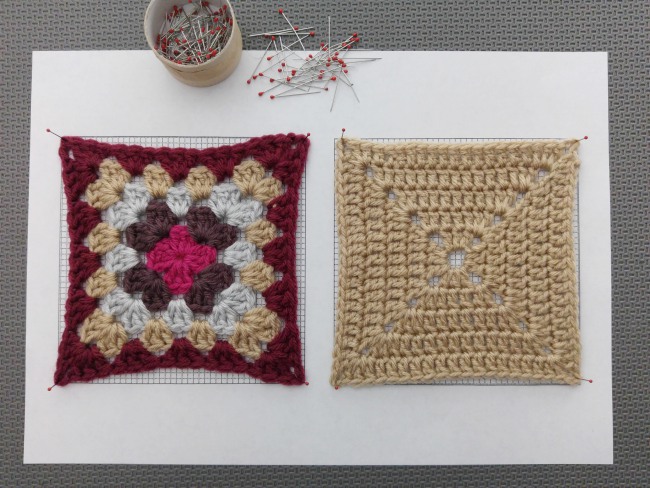
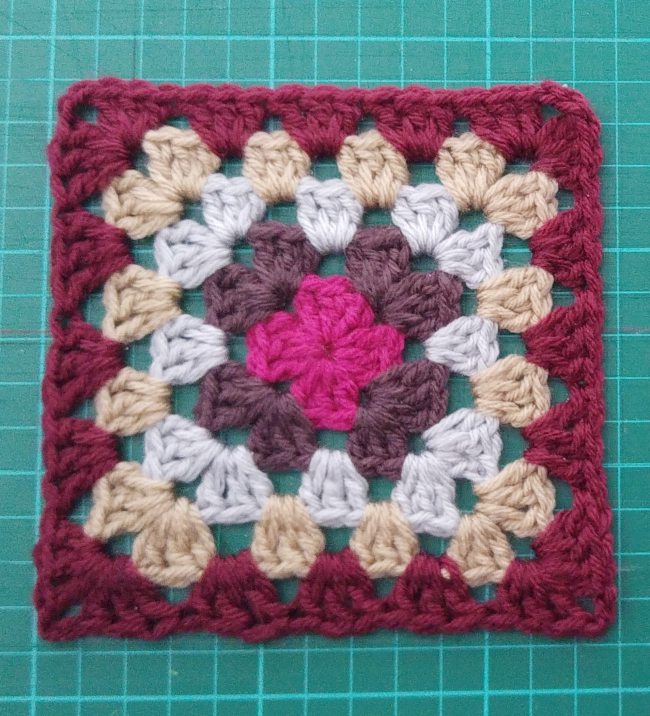
But when you first make your granny squares, they look a little misshapen and lumpy, like this:
The best solution to wonky granny squares is blocking.
Blocking a granny square neatens up the shape and gives it nice, crisp corners. It’s also useful for making sure each granny is exactly the same size, which makes joining them together a breeze.
How to block a granny square
This technique works really well no matter what type of yarn and fiber content you used.
What you need:
- Finished, unblocked granny squares of approximately the same size
- Cutting mat or graph paper with a grid
- Printer, computer paper and word processing software
- Straight pins
- Blocking mats
Step 1: Size up your granny square
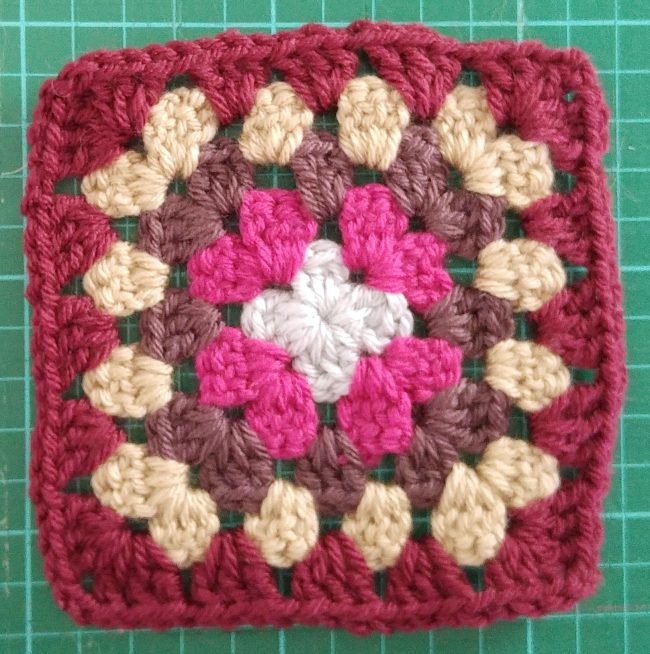
Place the unblocked squares onto a cutting mat or graph paper with a grid. This allows you to measure the granny and to see just how square (or not!) it is. If you don’t have one, don’t worry — you can always just measure with a ruler or tape measure.
In my example above, the granny square is approximately 12 cm square. However, some of the others in my pile were slightly larger, so I decided to block all of them to be 12.5 cm (5″) square.
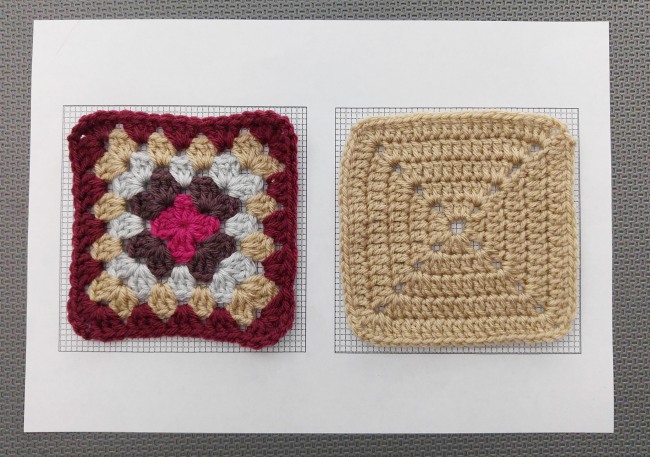
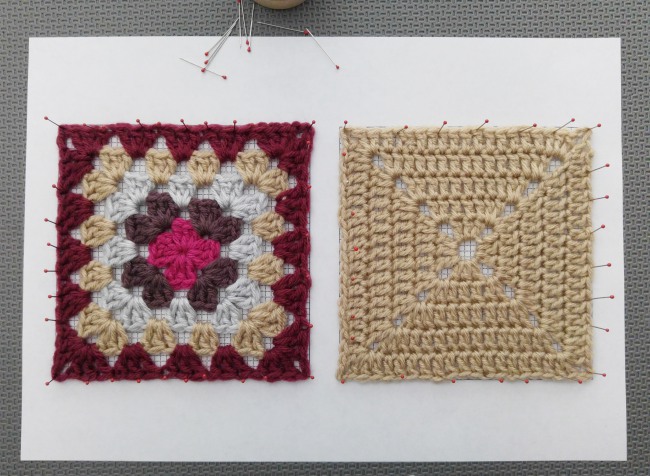
Step 2: Make a granny square blocking template
A template may seem fancy, but you don’t need any special tools. In this case, the template is actually just a piece of paper printed with two squares the size you want for your finished granny squares. You can easily make your own with your preferred word processor.
You may want to print several copies of the template so that you can block all your squares at the same time. Or, if you’ll need to block a lot of squares, you could laminate the templates so they’re waterproof and reusable.
As you can see, the smallest and largest square fit within the template square.
Step 3: Pin your granny square in place
Start by pinning two opposite corners. Place each pin is within the chains of the corner and directly on the corner of the template square.
Once the corners are done, use as many pins as you need to straighten out the edges of the squares.
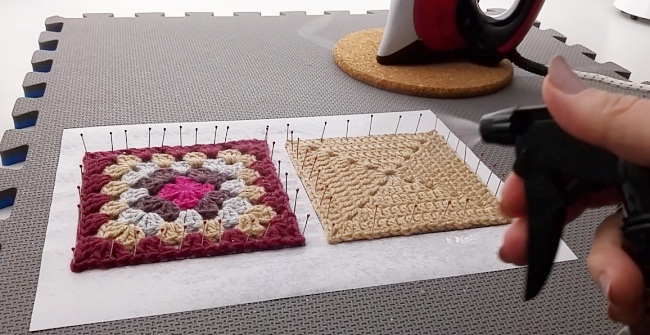
Step 4: Spritz!
Fill a small spray bottle with cold water and lightly spray the granny squares.
After spritzing the granny squares should be just damp, not soaking wet. The paper does get fragile when wet so make sure not to move it from your blocking mat until after the blocking process is completely finished.
If your squares are made with acrylic yarn, or a blend of acrylic and natural fibers, just spritzing won’t give you the best results. Acrylic requires heating to set it into shape, so you need to go onto Step 5: Steaming.
If you used 100 percent natural fibers (such as wool, alpaca, cotton or silk) for your granny squares, you can spritz the squares more thoroughly and leave them pinned out to dry. This takes about 24 hours, though, so you might want to steam them as well to speed up the process.
Step 5: Steaming (optional)
First, some important things to note:
- Safety first! Make sure you have a heatproof mat to put your iron down safely in between steams. Take care not to touch the iron with your arm when pinning out your next squares.
- Never touch the surface of the granny square with the plate of the iron. It will melt acrylic, ruining your granny square (and probably your iron, too). And it will scorch any squares made from natural fabrics.
- Do not press the granny squares as you would the pieces of a knitted garment. If you cover them with a damp cloth and then iron, this will flatten the stitches completely and will ruin the square.
It is possible to use specialist steamers, but I just use my ordinary steam iron. Put it on the highest setting and set the dial to maximum steam production.
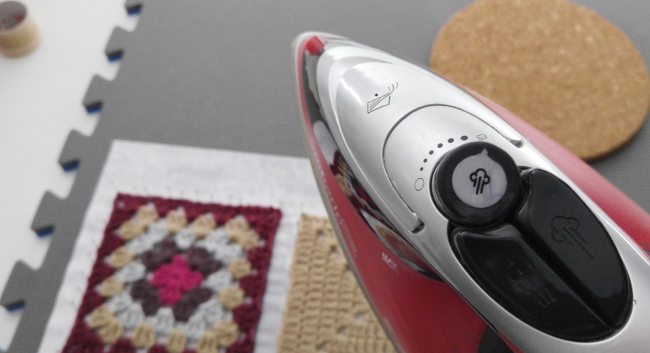
Hold the iron carefully over the granny squares, allowing the steam to plume onto the yarn. The iron should be about 1″ above the crochet fabric. The pins are a good guide: If you start touching any of them with the base plate of the iron, you are too close.
Hold the iron in place for 15-20 seconds, moving smoothly over the granny squares. They should be warm to the touch but will cool down quickly when you take the iron away.

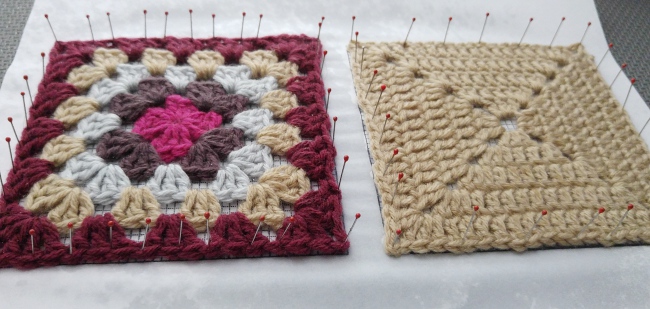
Step 6: Leave to cool and dry
Allow your granny squares plenty of time to dry.
For acrylic yarn, the squares should dry quickly. For natural yarn, you’ll need to leave the squares in place at least overnight.
Once dry, remove the pins. You can see that the blocking works its magic and the granny square is looking a lot neater and is the correct size.
Share tips, start a discussion or ask one of our experts or other students a question.
No Responses to “How to Block Granny Squares So They Look Flawless”