
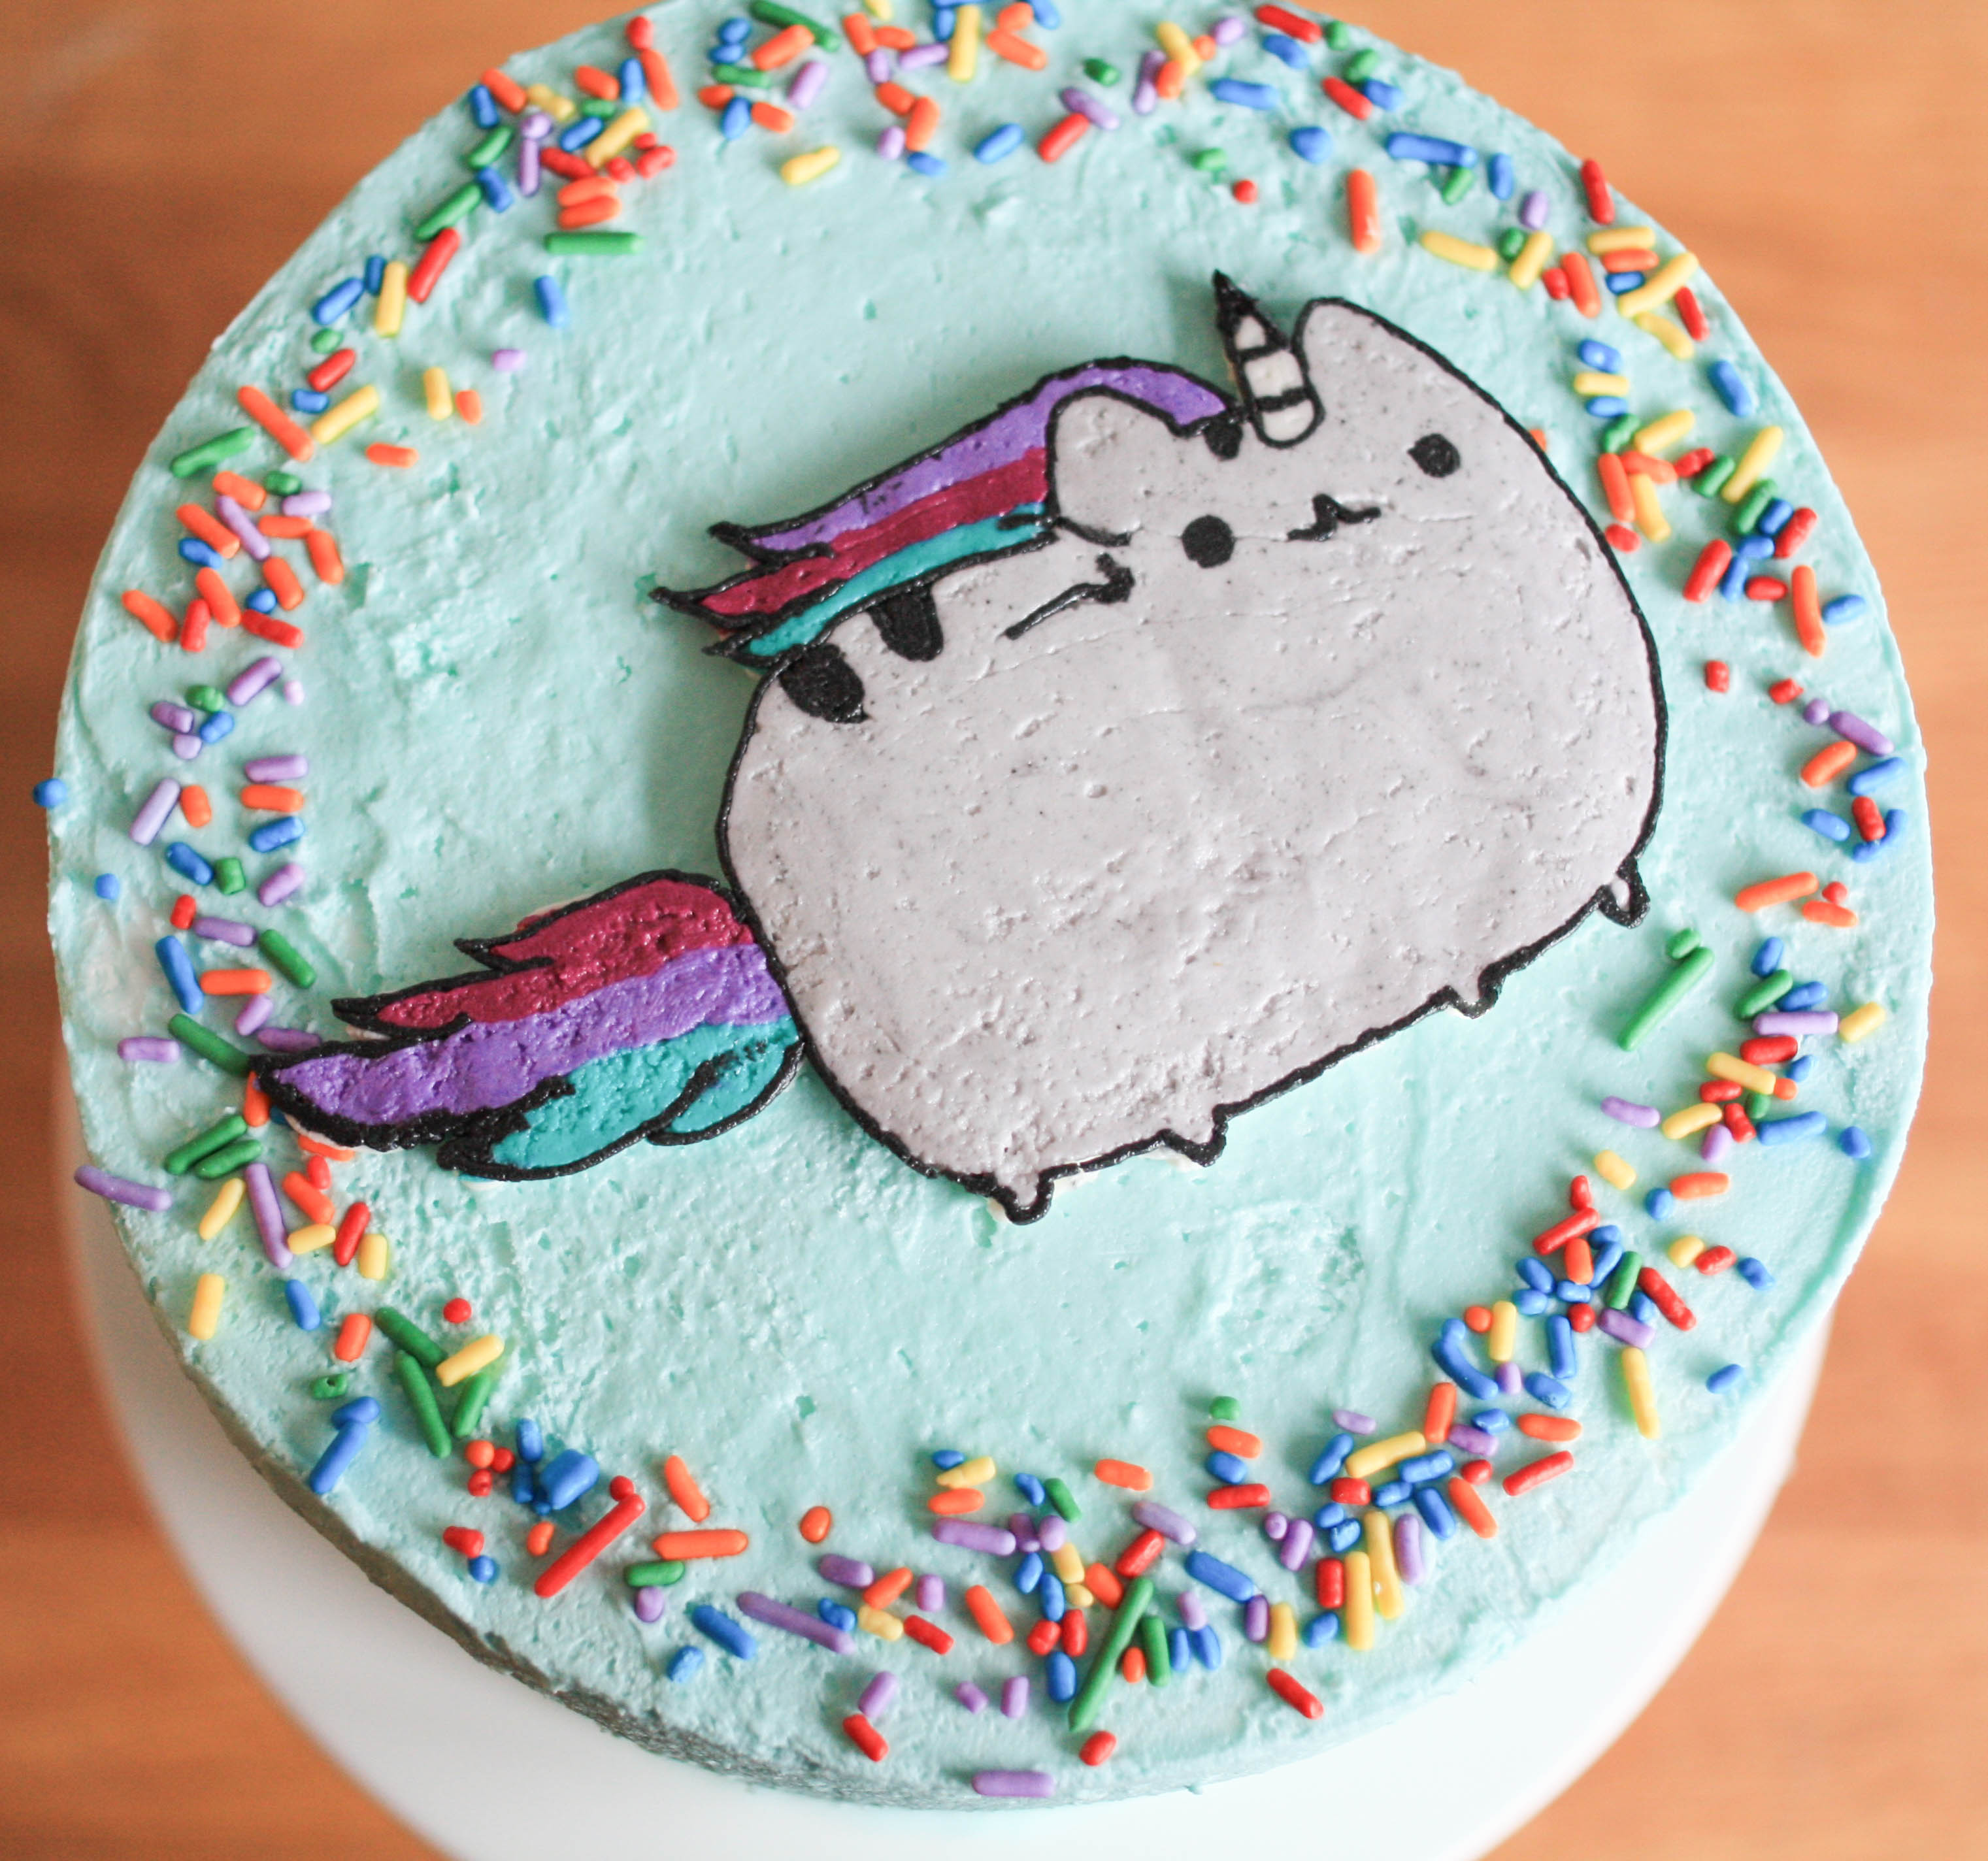
You can easily turn any image into a beautifully piped design by creating a frozen buttercream transfer.
All photos via Erin Bakes
What is a frozen buttercream transfer?
This is an old-school bakery technique for adding images to cakes. First, you use buttercream piping to trace an image onto waxed paper. Layers of buttercream help create the details in the image. Then, you put the sheet of piped buttercream in the freezer. Once it’s frozen, you can use the decoration on top of a cake!
The best part of this fun buttercream technique is that you don’t need to be an artist or have any special tools. If you can hold a piping bag and trace, then you can do this!
Why use a buttercream transfer instead of piping right on the cake?
Some designs — especially characters — can be SO tough! It’s a challenge to get all of the little features and details just right. By making a buttercream transfer image, you have the benefit of tracing a printed image.
Follow along to learn how to make a buttercream transfer image.
Supplies needed:
- Printed character or image template
- Waxed paper
- Tape
- Piping bags
- Piping tips
- Tinted buttercream
- Toothpick
- Small offset spatula
Step 1: Set up your supplies.
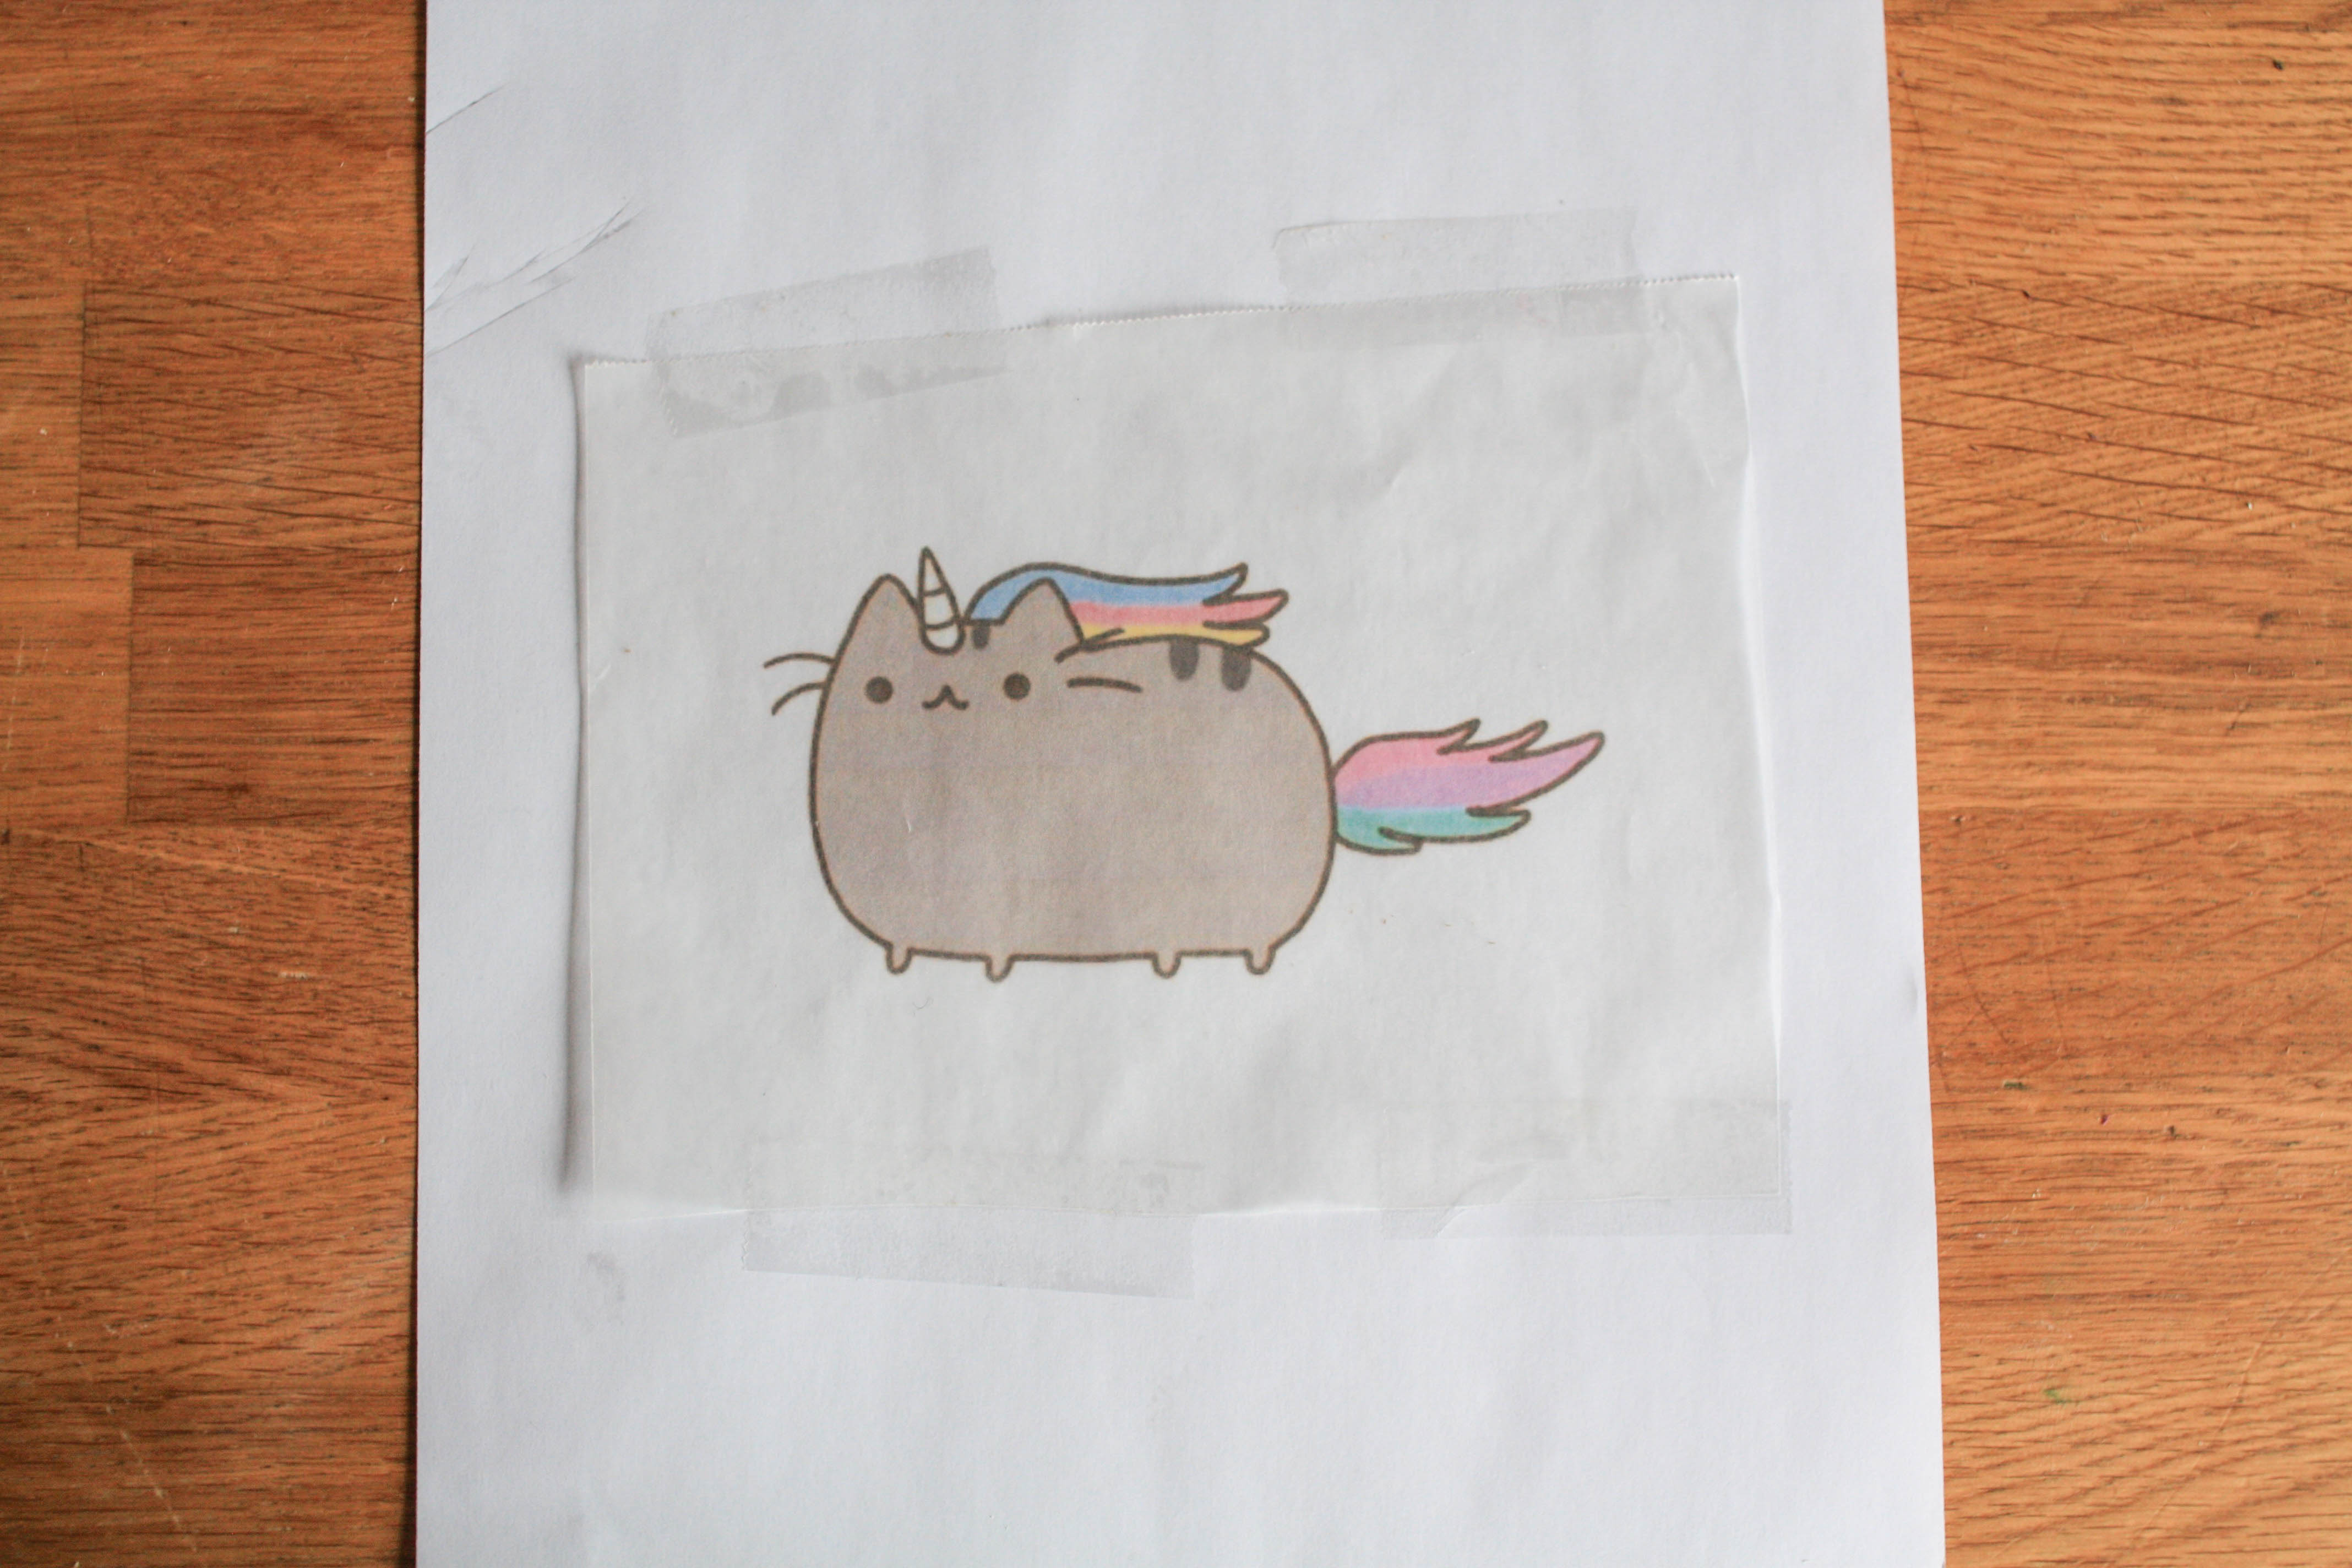
Tape a piece of waxed paper over your printed image. The image is going to eventually appear in reverse on your finished cake, so keep that in mind when printing your template — especially if you’re piping words.
Fill your piping bags with buttercream tinted in the colors you’ll need for your image. A crusting buttercream works best with this technique. I used this delicious recipe from blogger Jessie Oleson Moore, but you can use your favorite.
Step 2: Pipe the buttercream over the template.
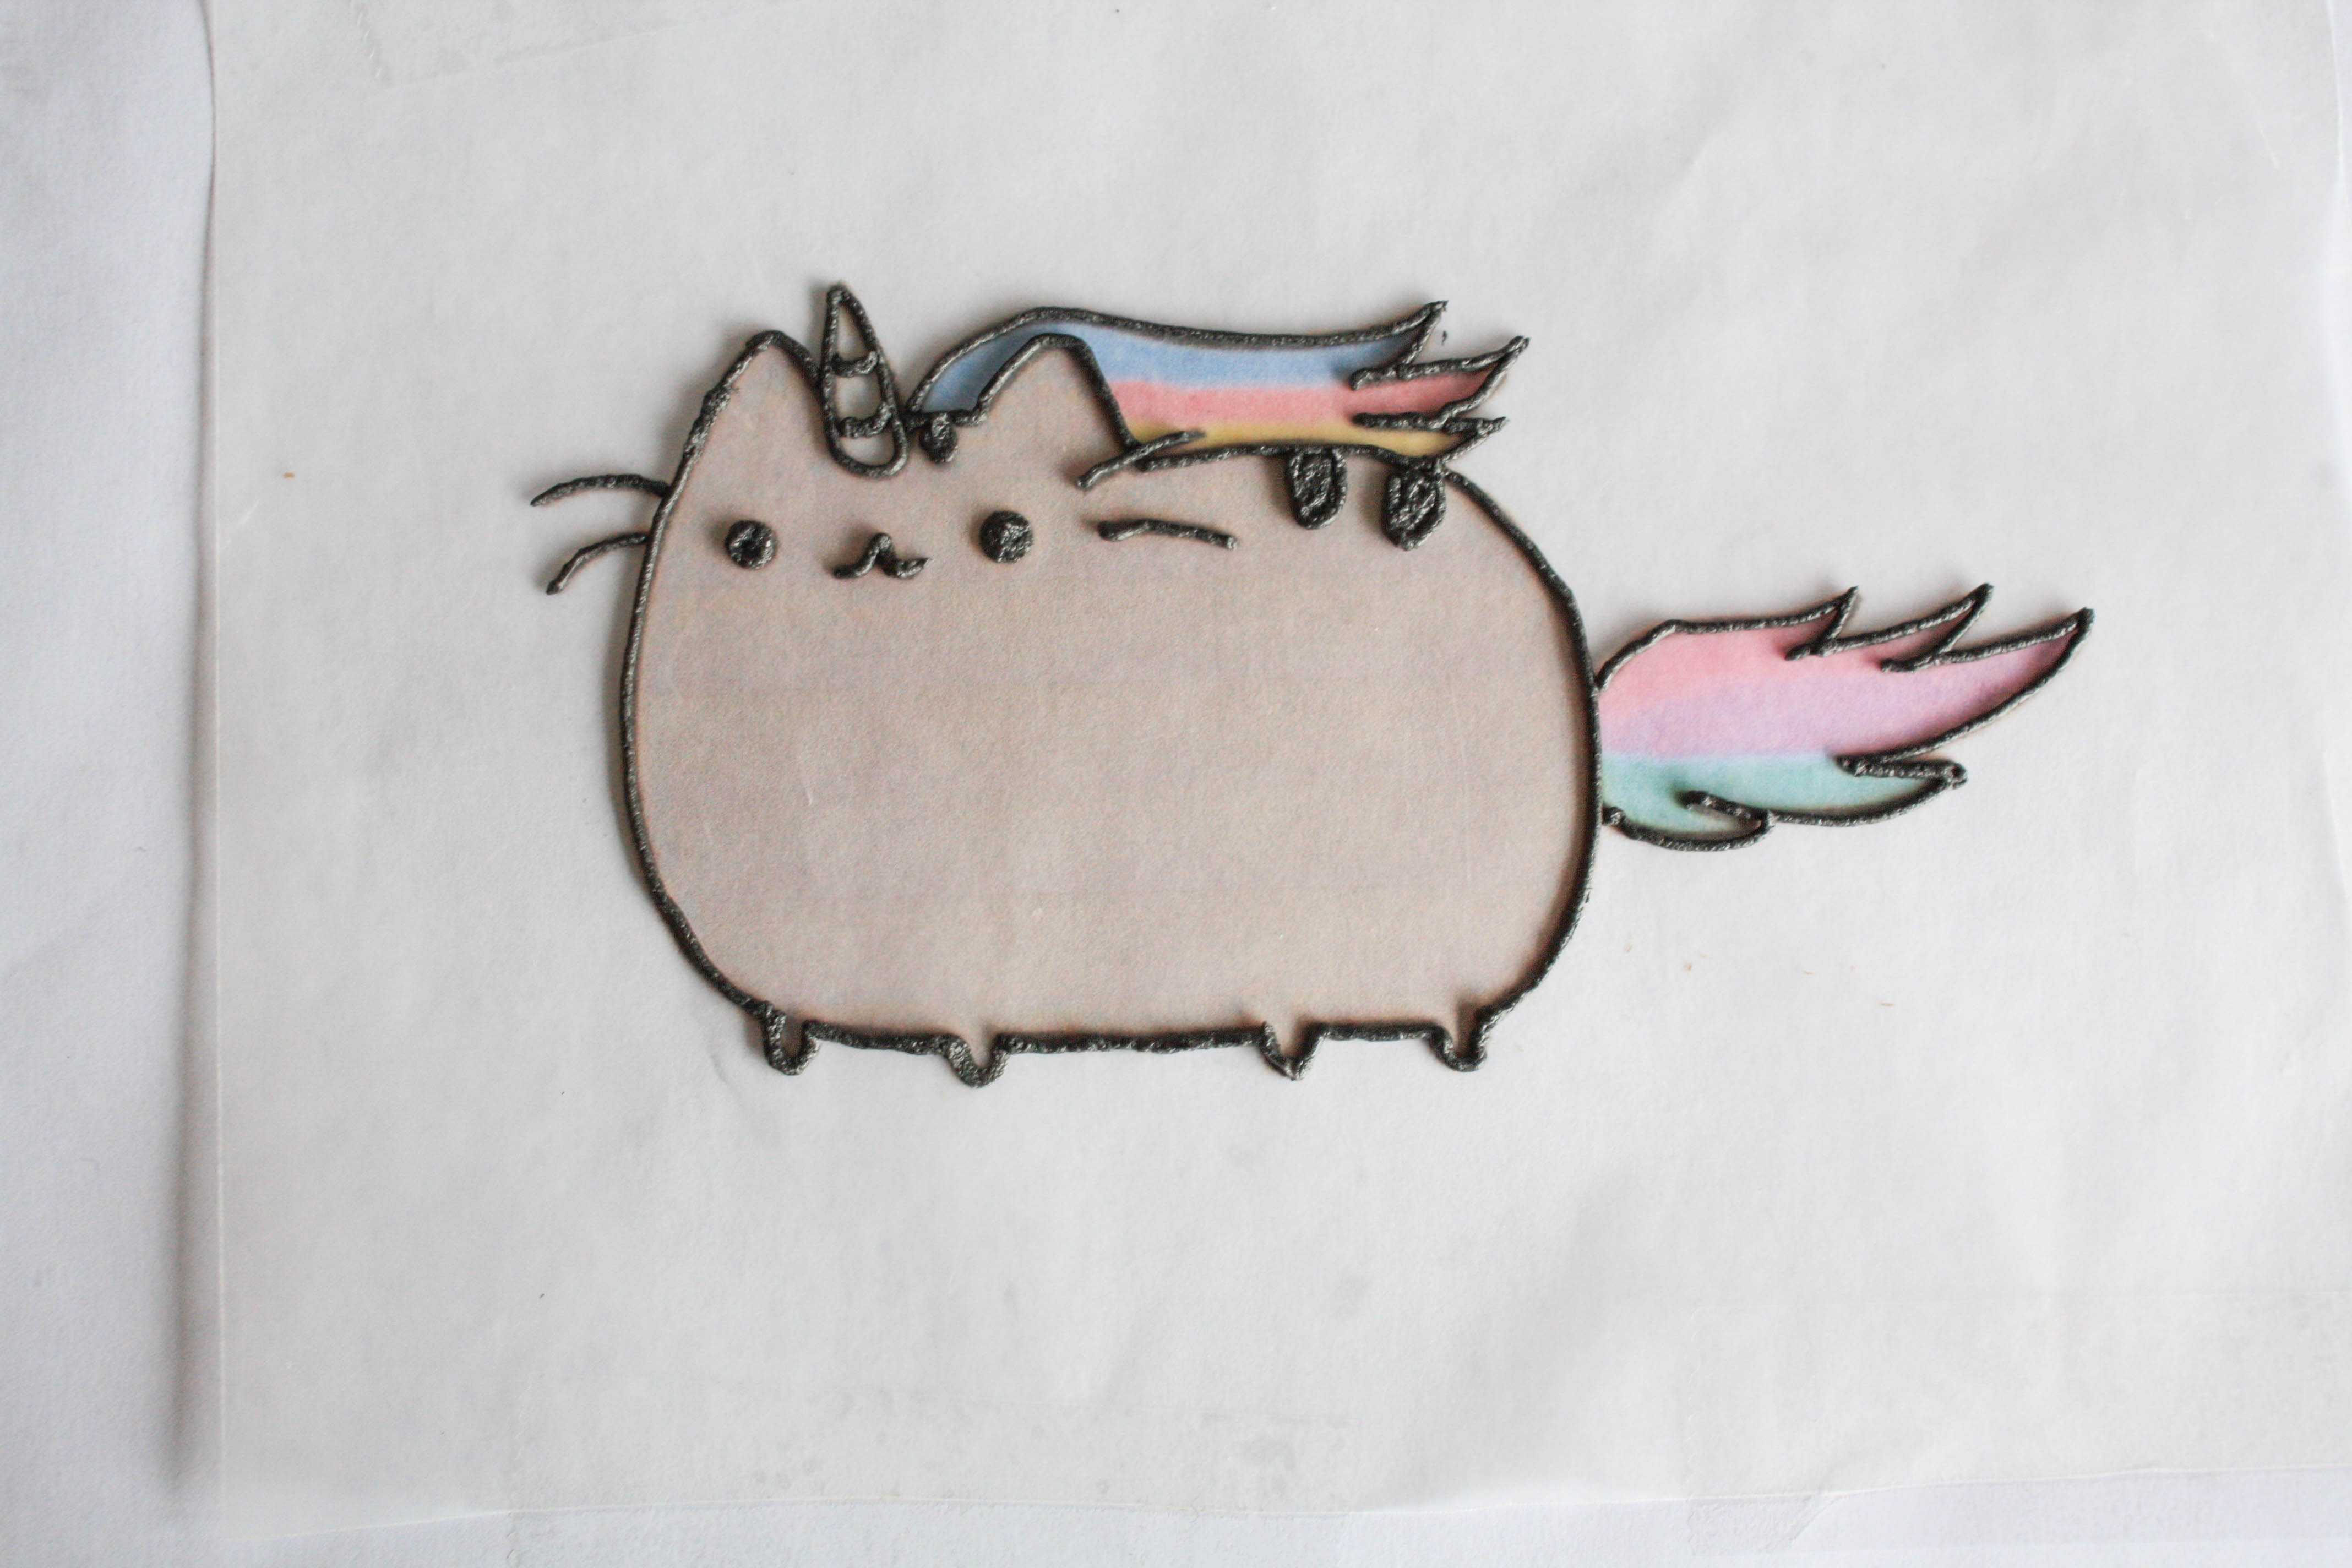
Start by piping the outline of your image. Make sure all of your lines make contact with the waxed paper. I used a #1 tip to pipe the outline of my image. Use whatever size tips work best for yours.
Start with the interior details. Then, layer in the color. Hold your image up to the light every now and then to check if there are any tiny holes in the piping. Use a toothpick or a small offset spatula to push the buttercream into the crevices that need to be filled in.
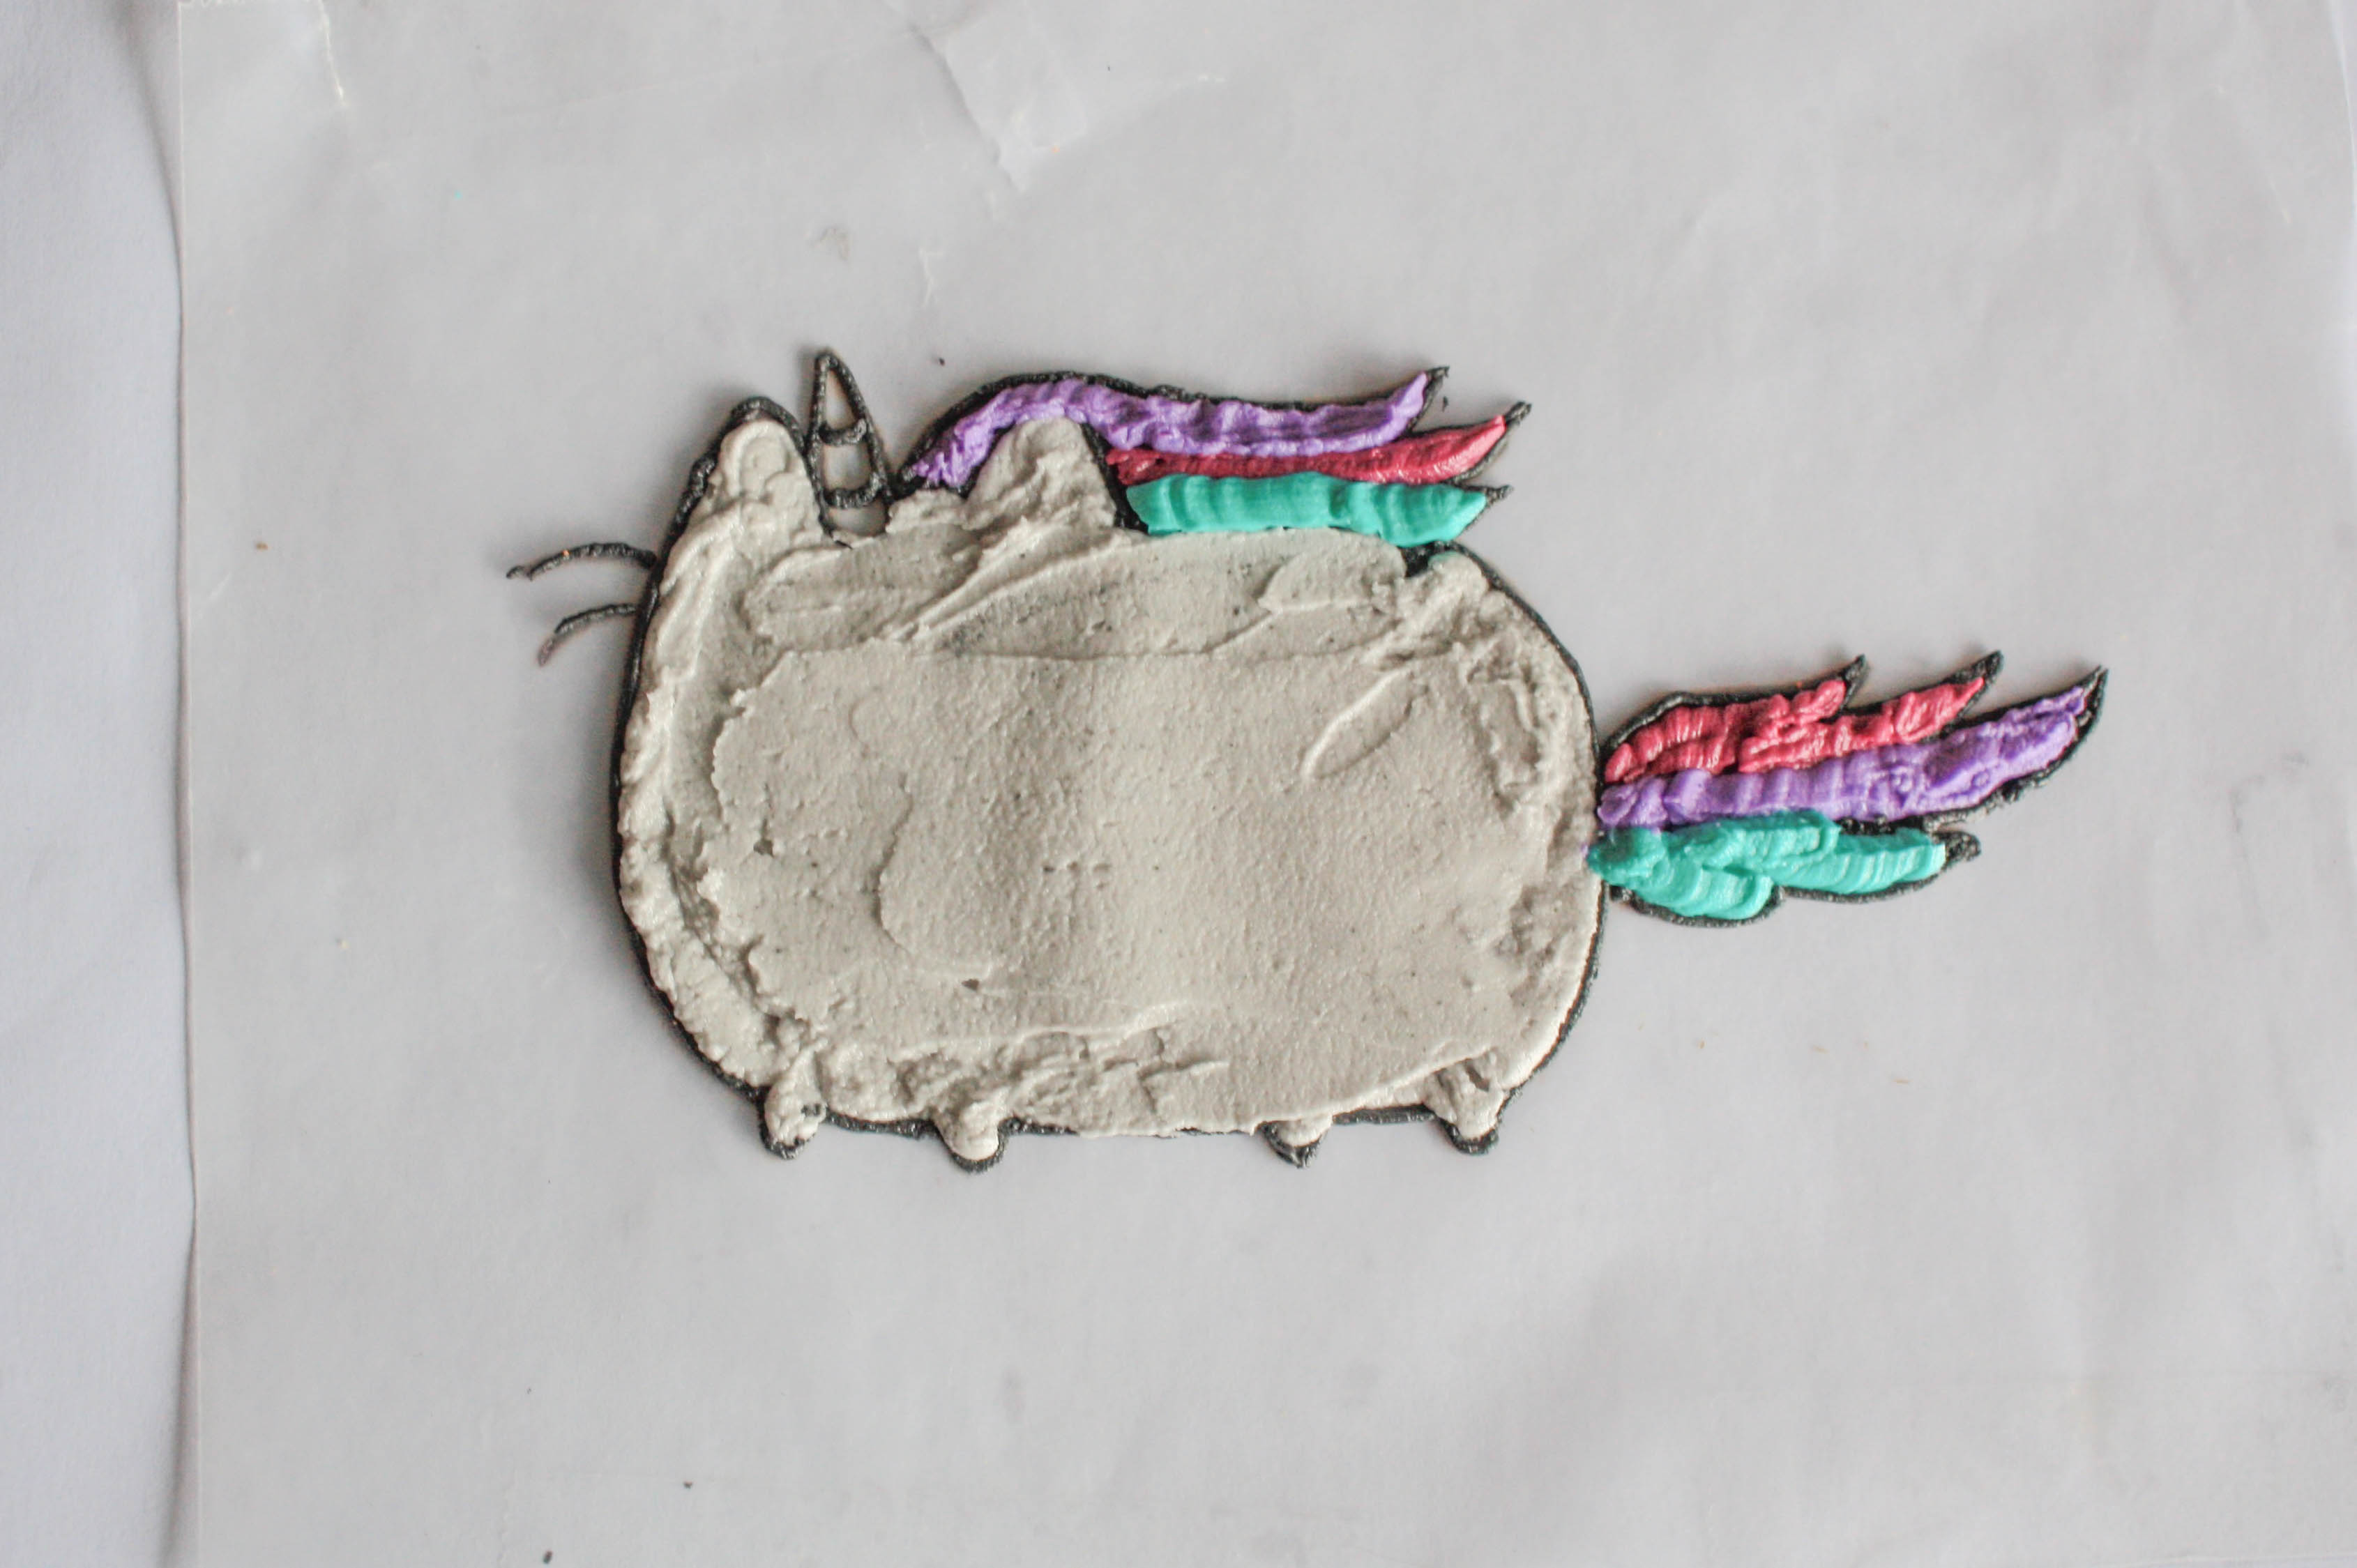
Step 3: Add another layer of buttercream for height
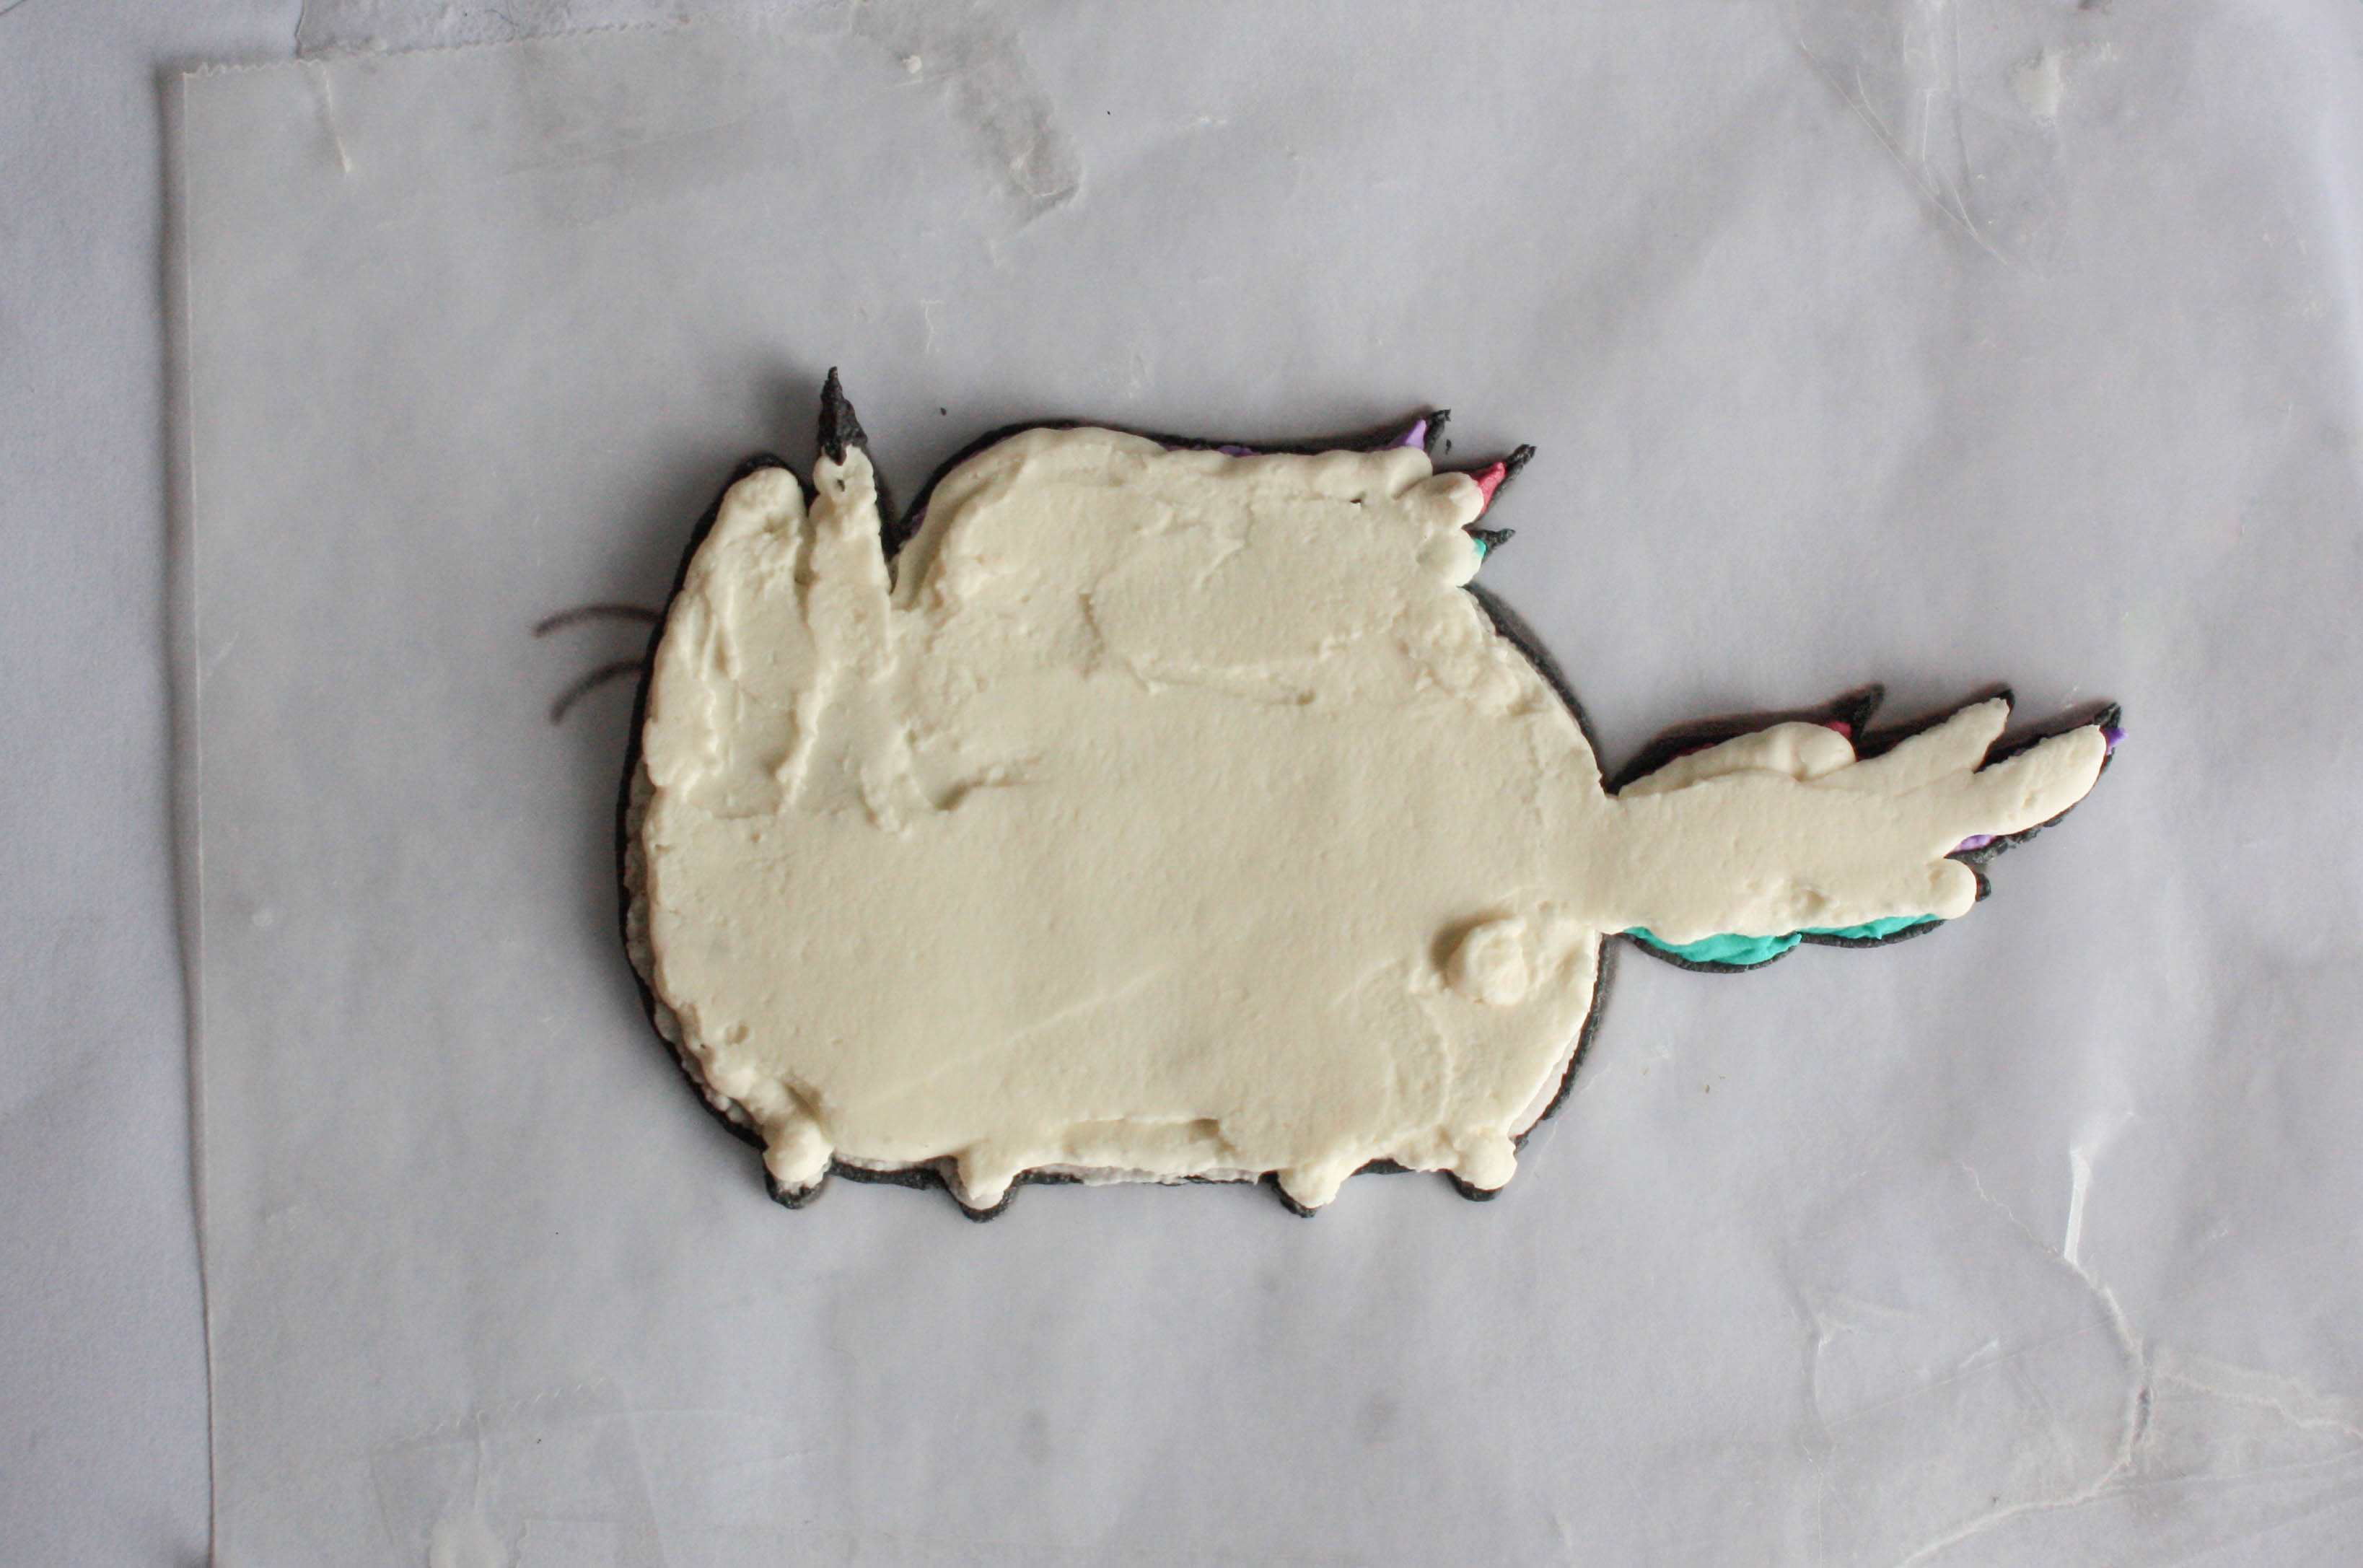
Once your image has been completely filled in, pipe on a second layer of buttercream. This will give your image a little more height when it’s added to the cake. Use any color that you have on hand — this layer will not be seen.
Use a small offset spatula to smooth over the back of your image.
Step 4: Freeze!
Pop the image into the freezer for 15-20 minutes, or until frozen solid.
Step 5: Transfer the image to your cake.
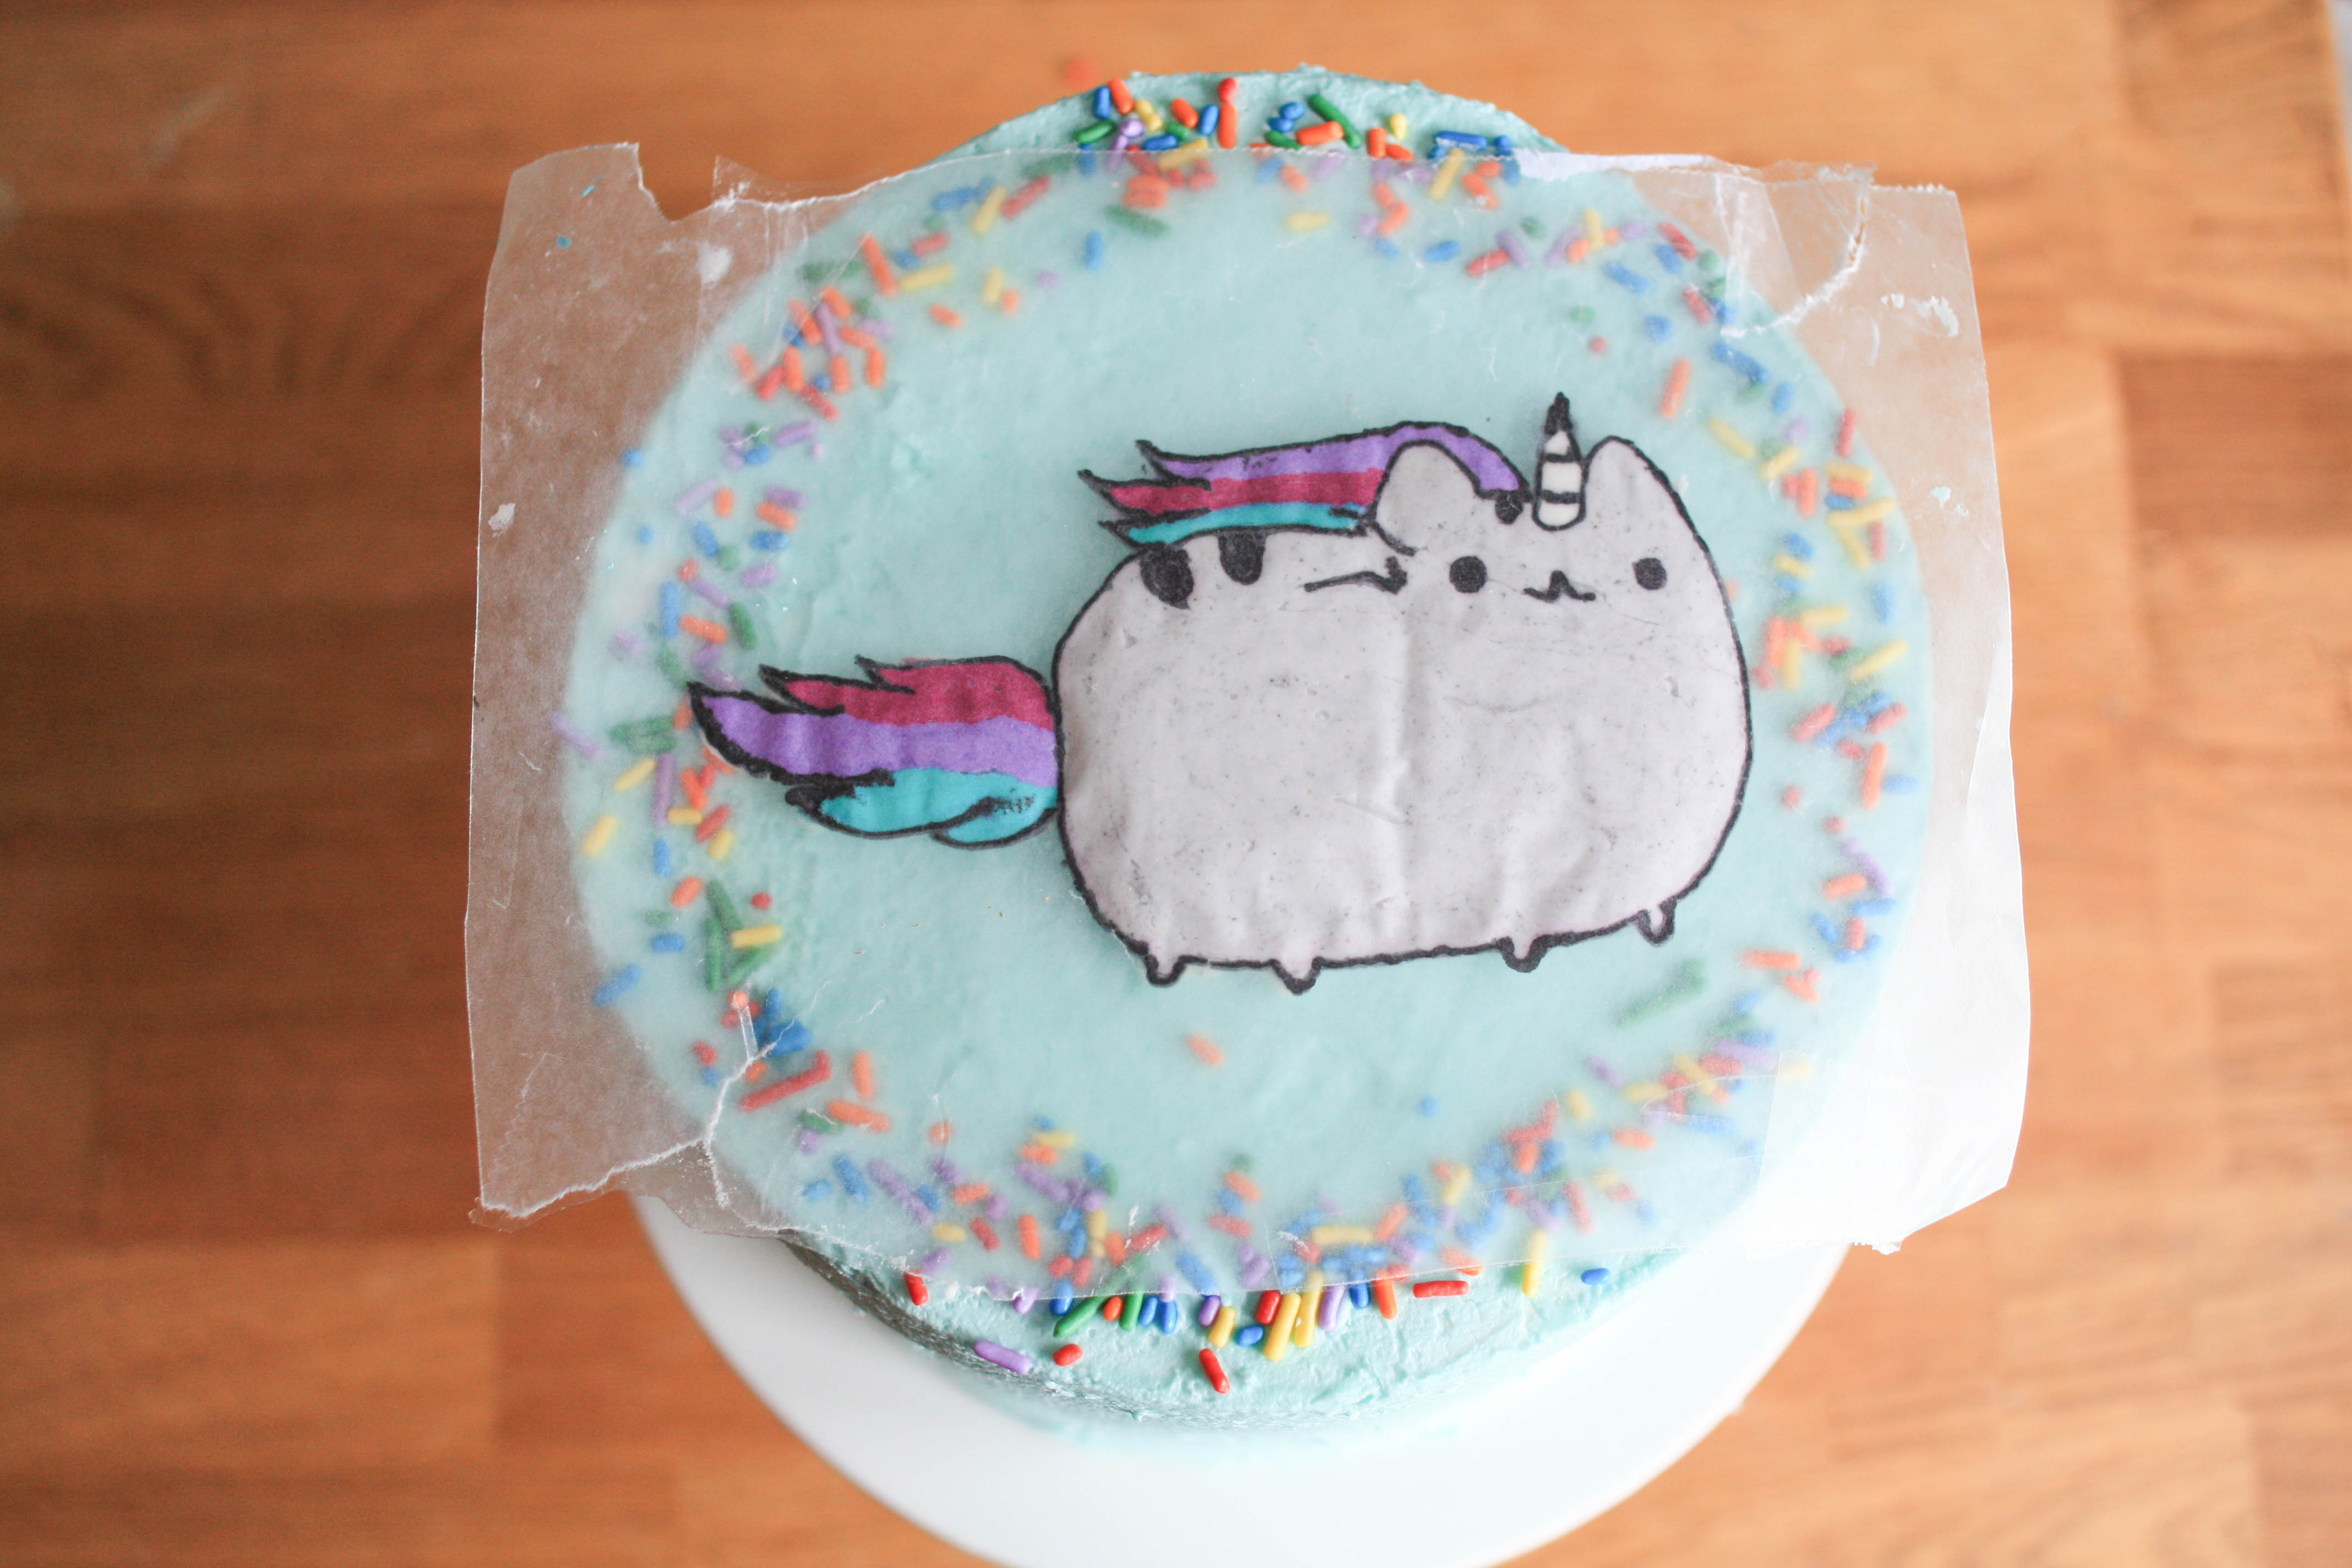
Remove your image from the freezer and use your finger or a piece of waxed paper to smooth over the back of the image one final time.
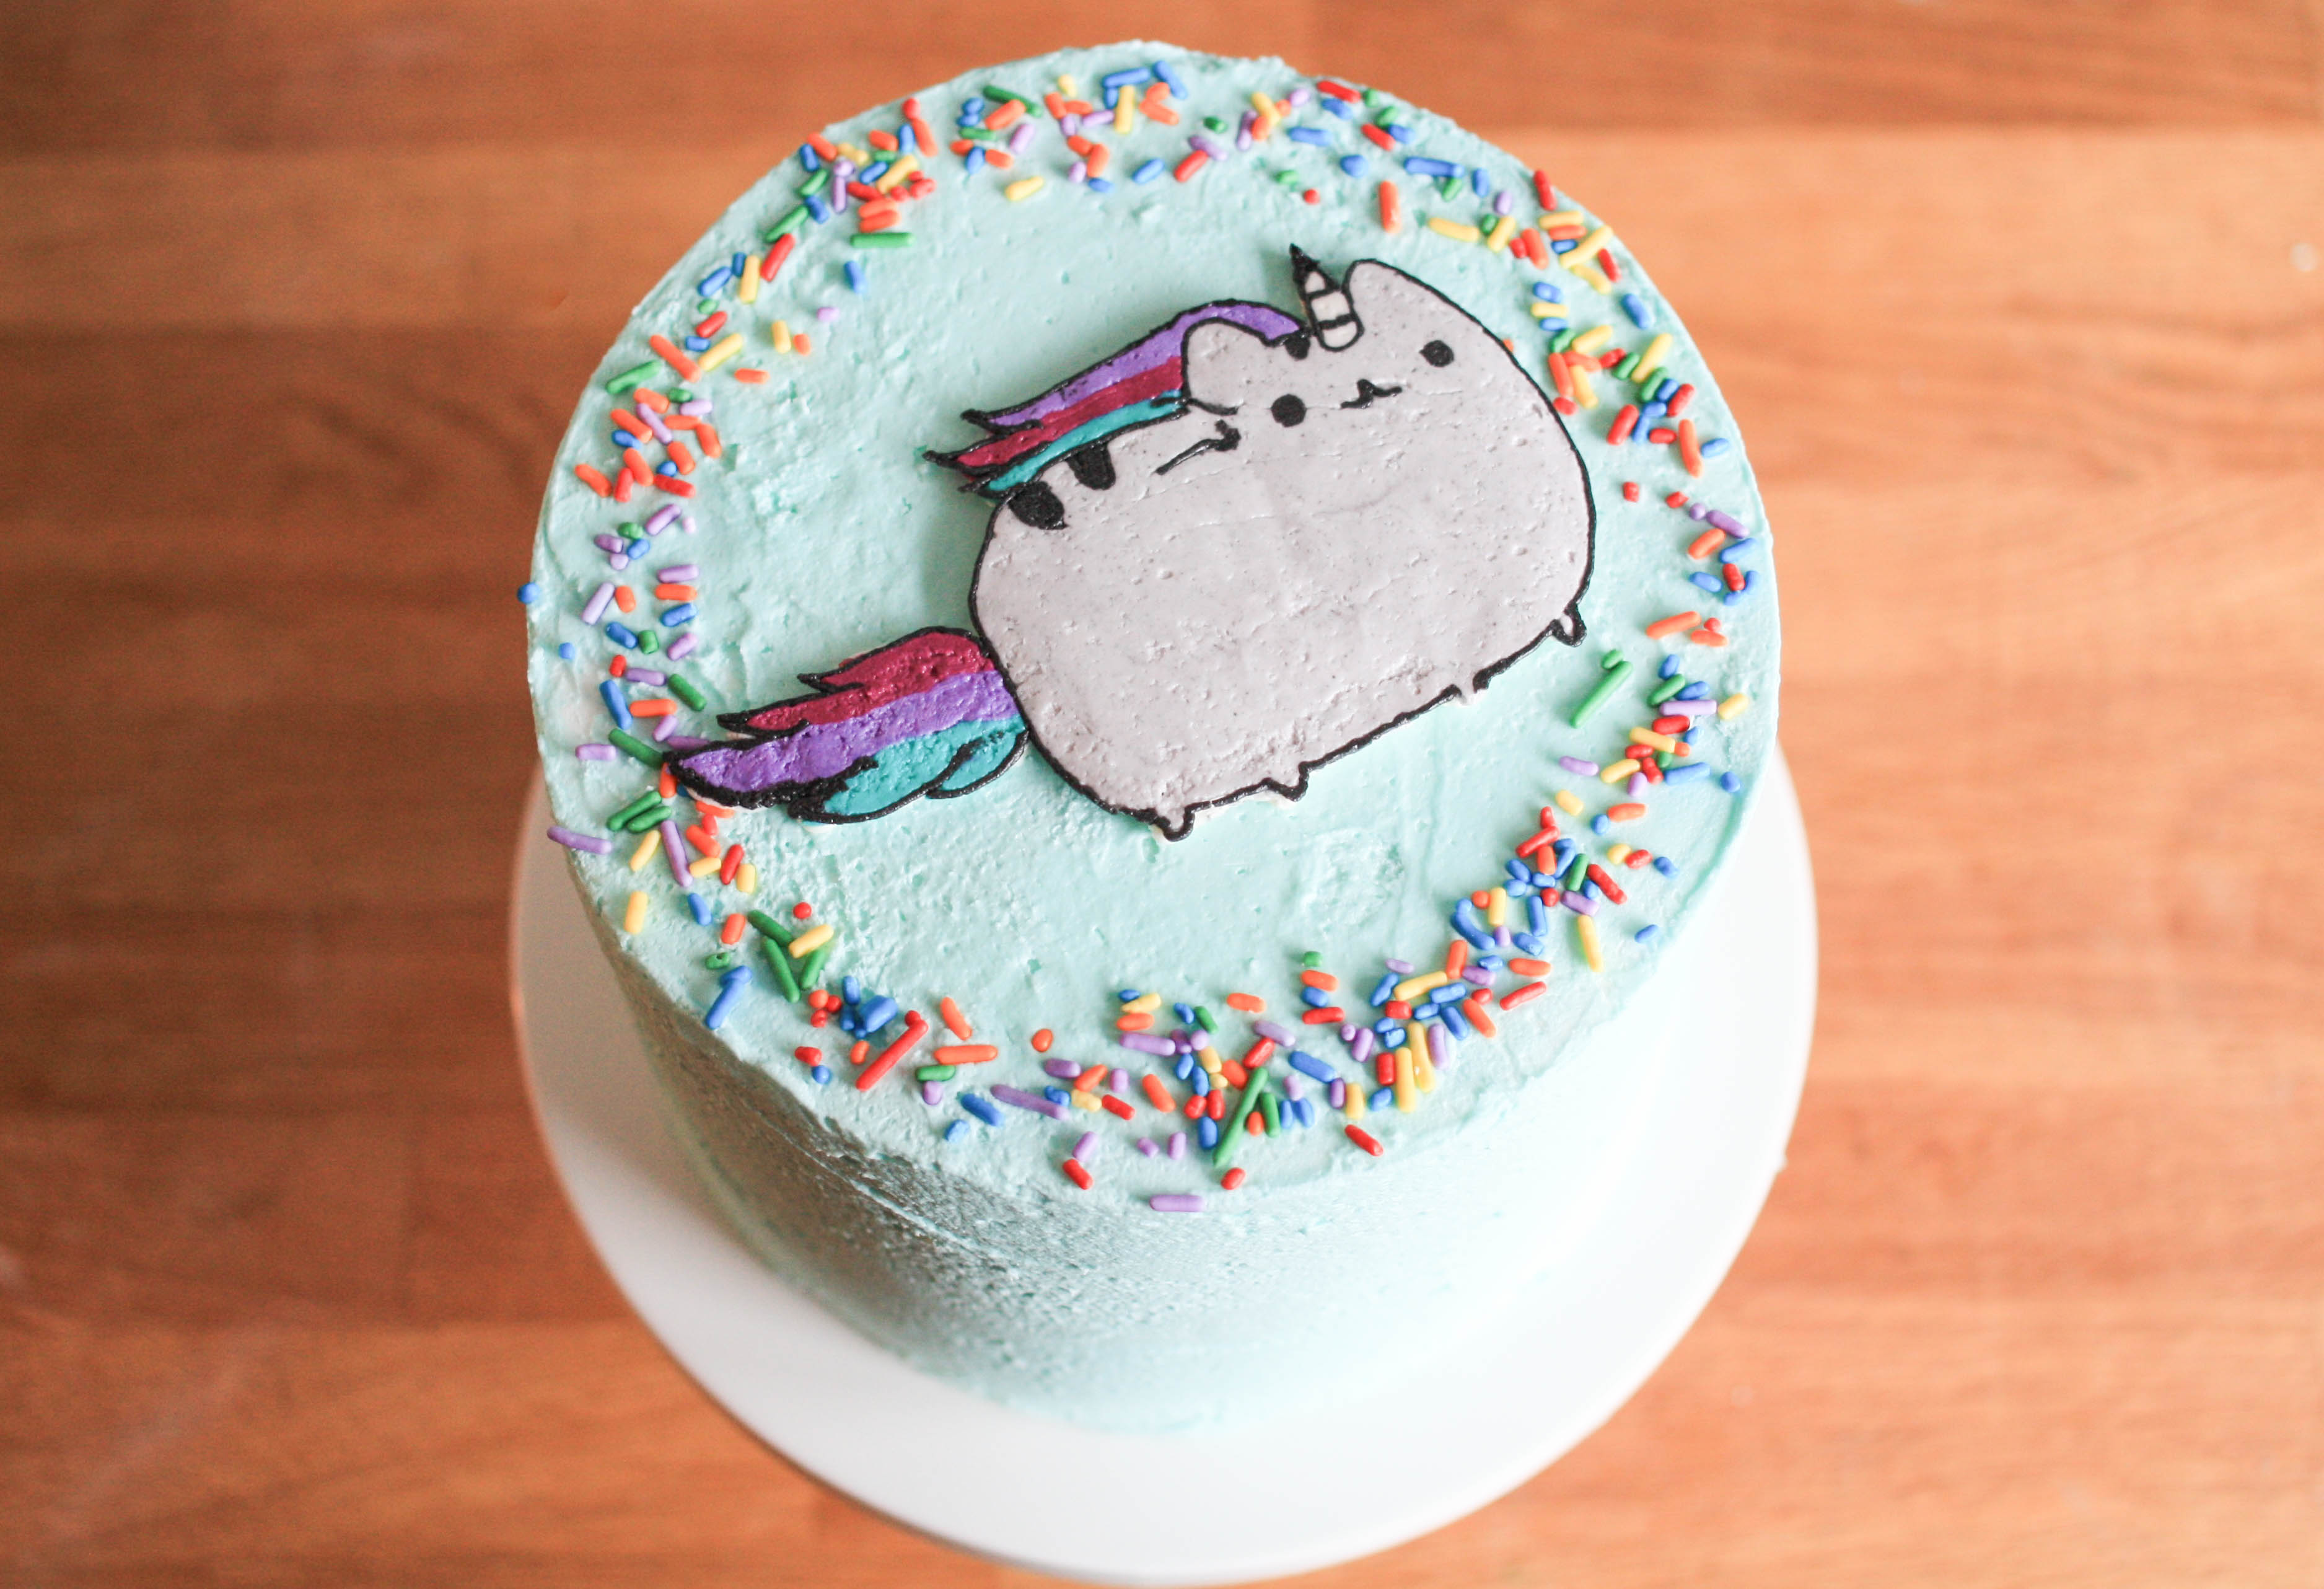
Flip the image over and place it onto your cake. Rub your fingers all over the image, smoothing the buttercream and adhering the buttercream transfer to the cake. Pop the cake into the fridge for 10-15 minutes before removing the waxed paper.
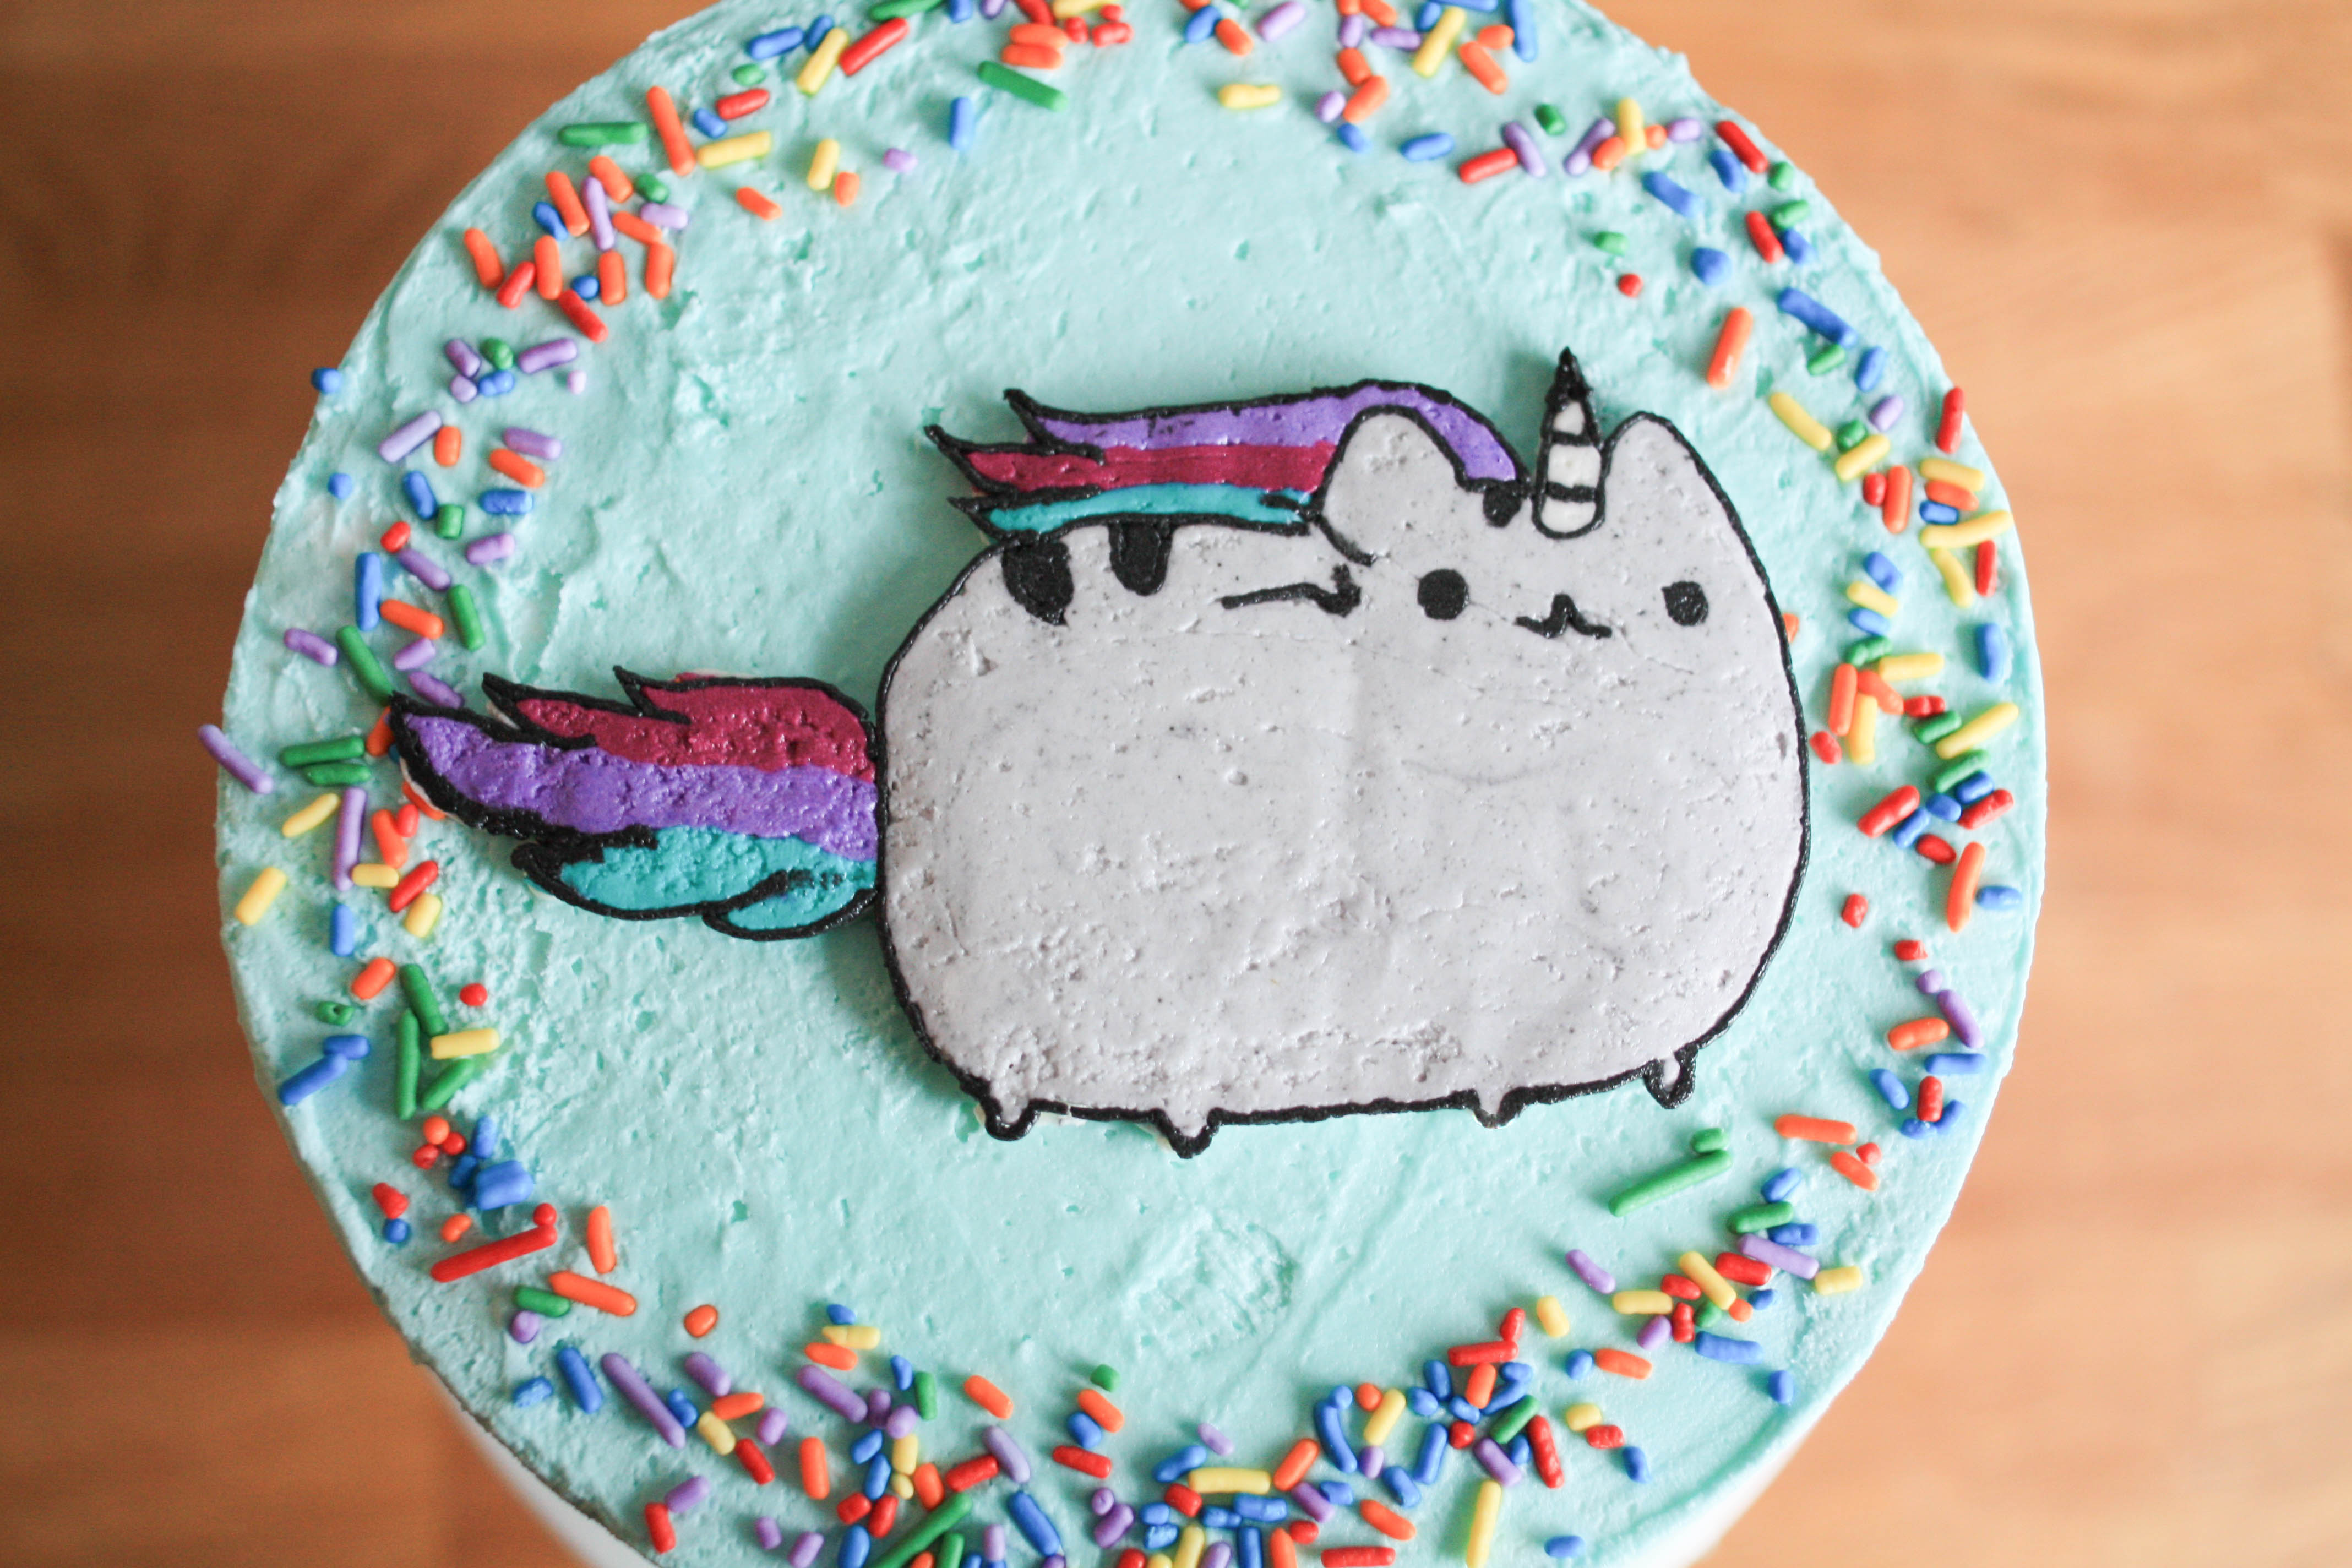
(Oops! I just realized that my character’s teeny little whiskers didn’t make it over to the cake. I’ll go back in and pipe them on before the cake is served.)
Short on decorating time? Make your buttercream transfer image well in advance. After it’s been frozen, wrap the image in plastic wrap and place it in a zip-top bag. Save it in the freezer for up to three months.
Share tips, start a discussion or ask one of our experts or other students a question.
No Responses to “How to Make a Frozen Buttercream Transfer”