
How to make watercolor calligraphy gift tags
Here’s what you need:
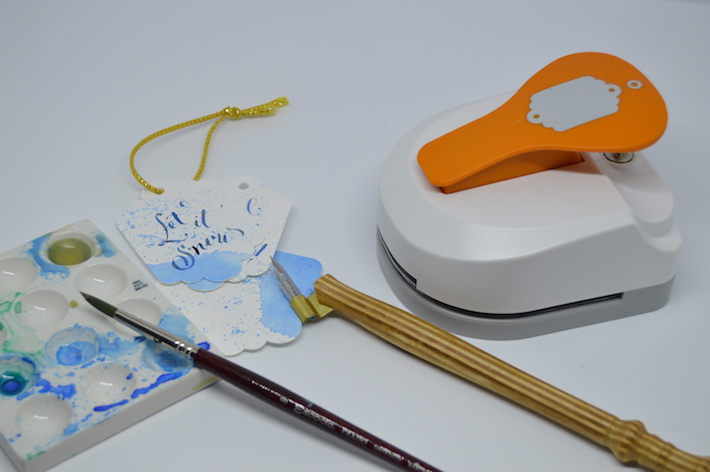
- Cobalt blue watercolor (or another color of your choice)
- A watercolor palette, to make the wash
- An old watercolor brush
- your favorite Pointed pen nib and holder
- 140-pound watercolor paper
- Paper tag cutter
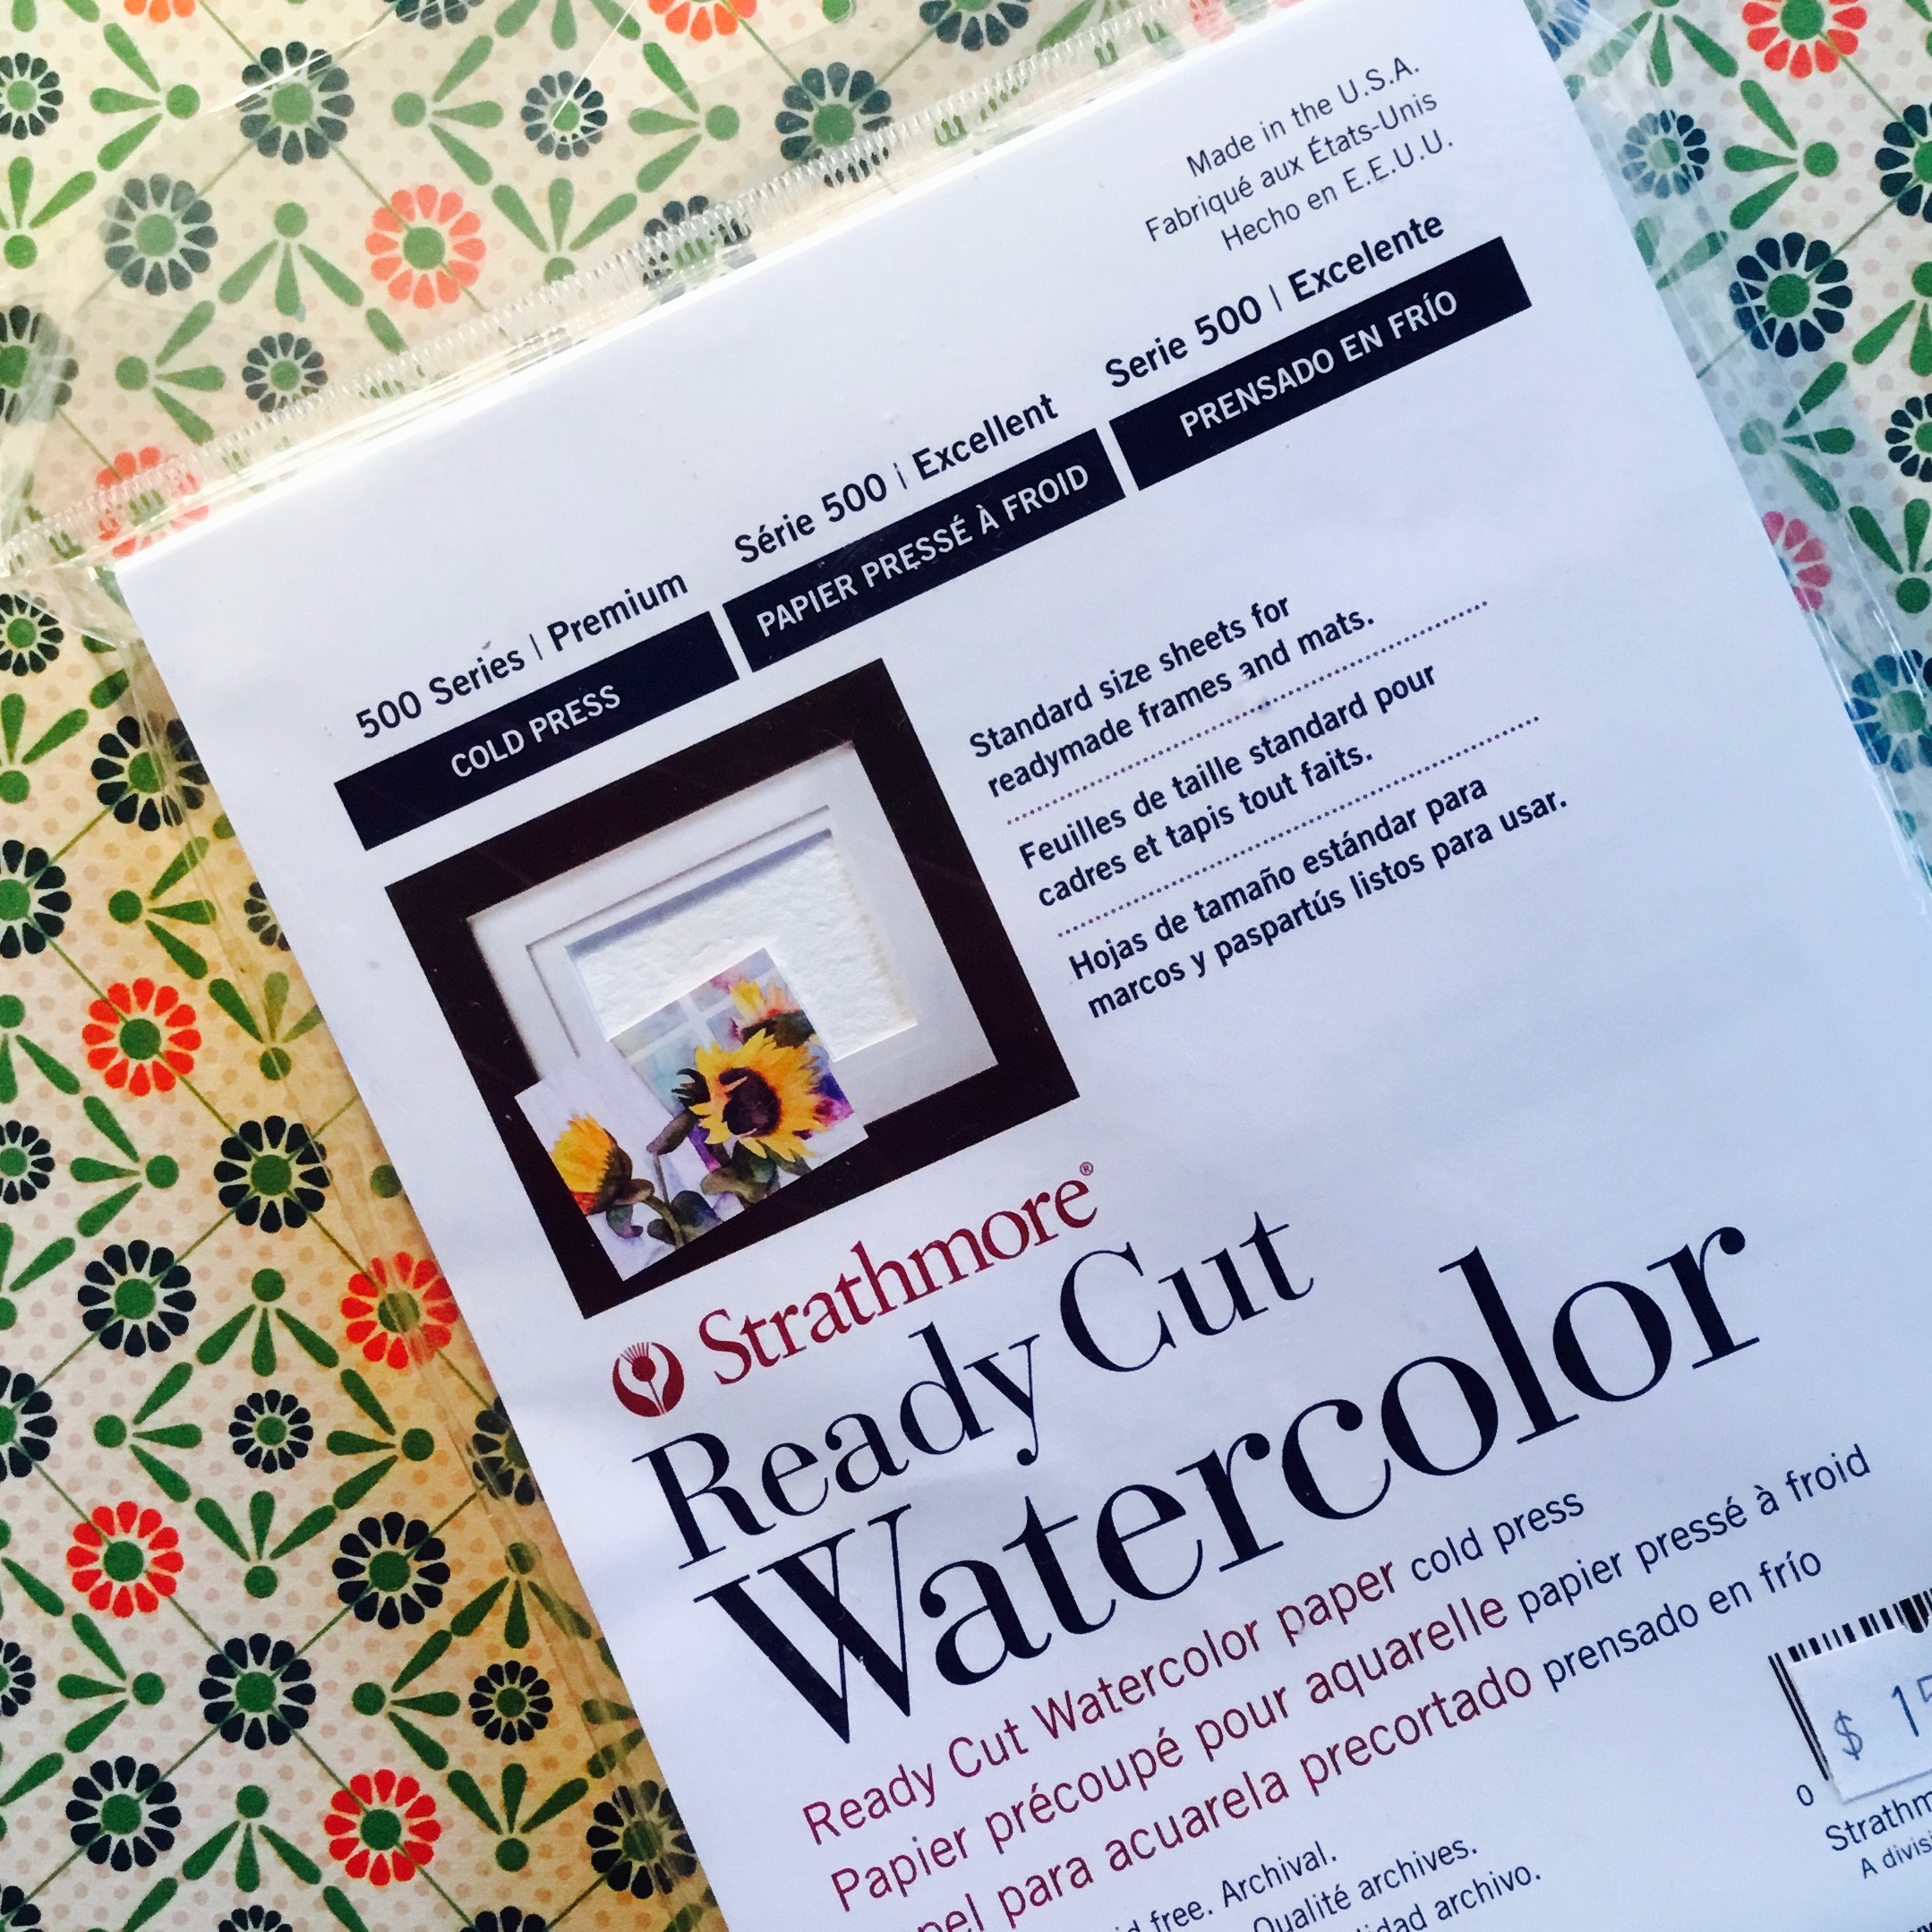 I really like these cut-to-size water color sheets by Strathmore. It’s definitely a pricier choice, but the paper is all ready to go. For a less expensive option, purchase large sheets of paper and cut down to size. If you are using a pointed pen, be sure to purchase smooth textured paper!
Step 1: Mix the watercolor wash
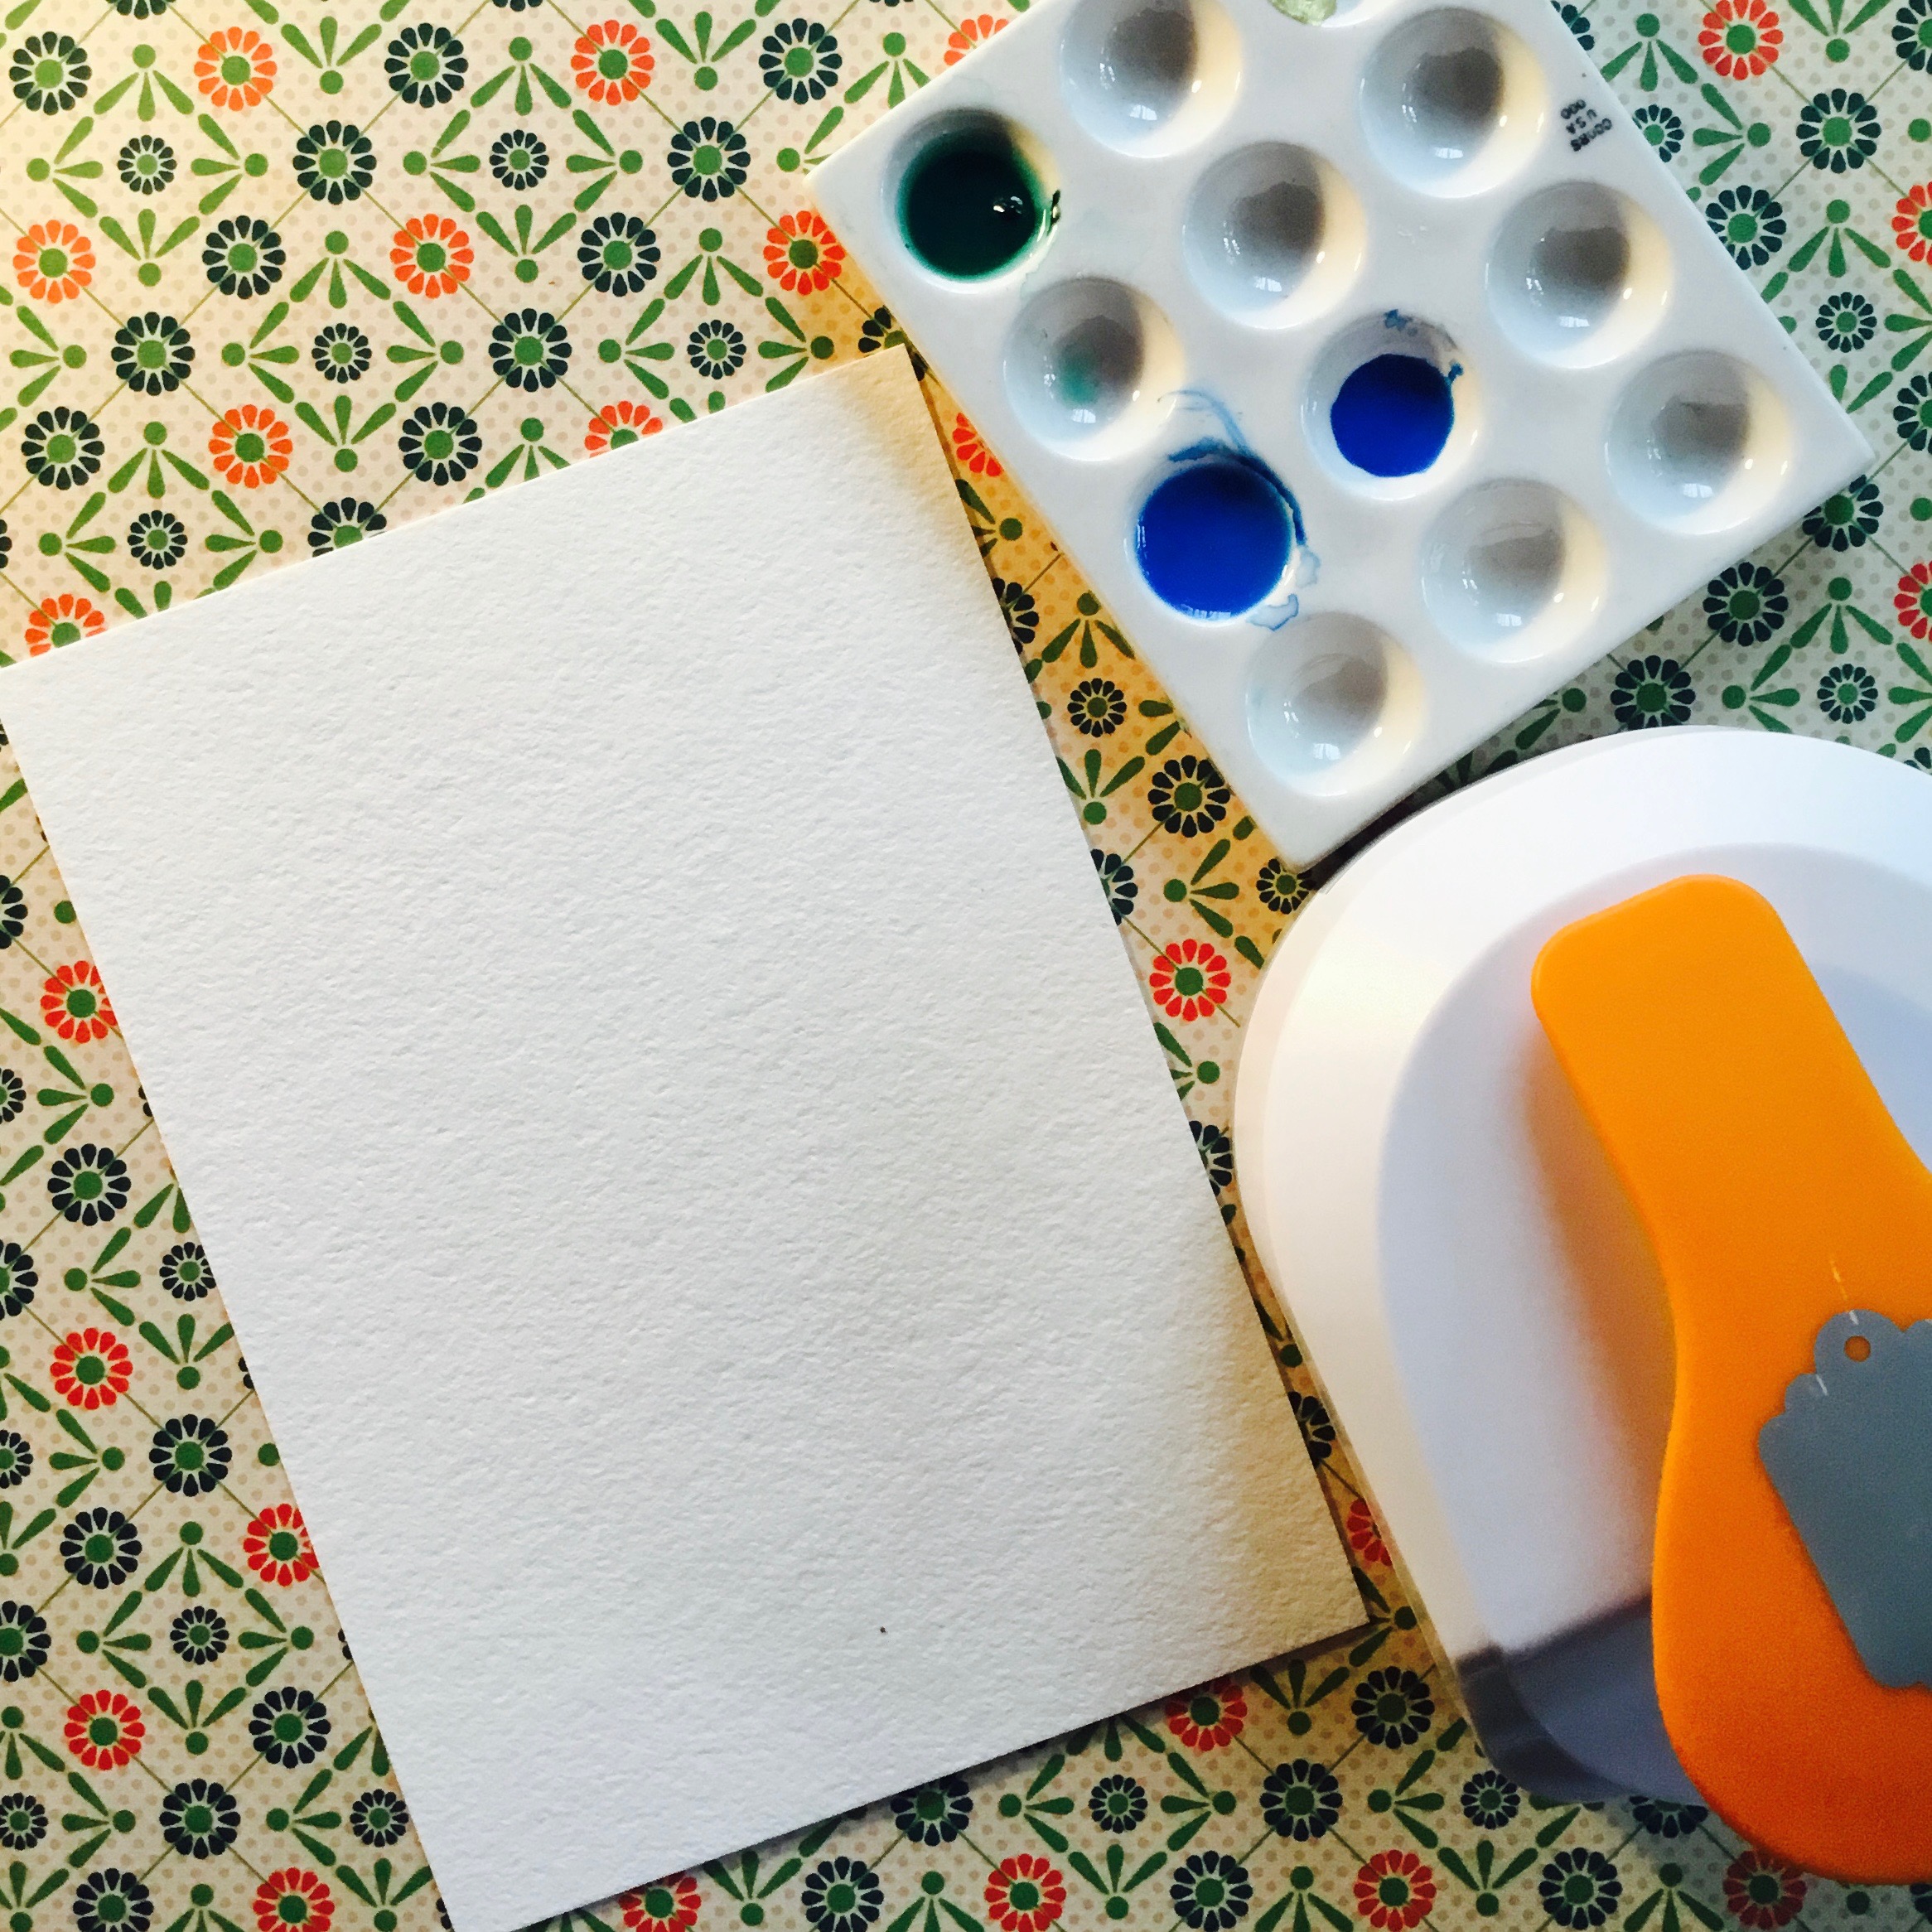 On your palette and using your old watercolor brush, mix up a cobalt blue watercolor wash, using enough water to create the consistency of coffee cream.
Step 2: Paint the wash on your paper
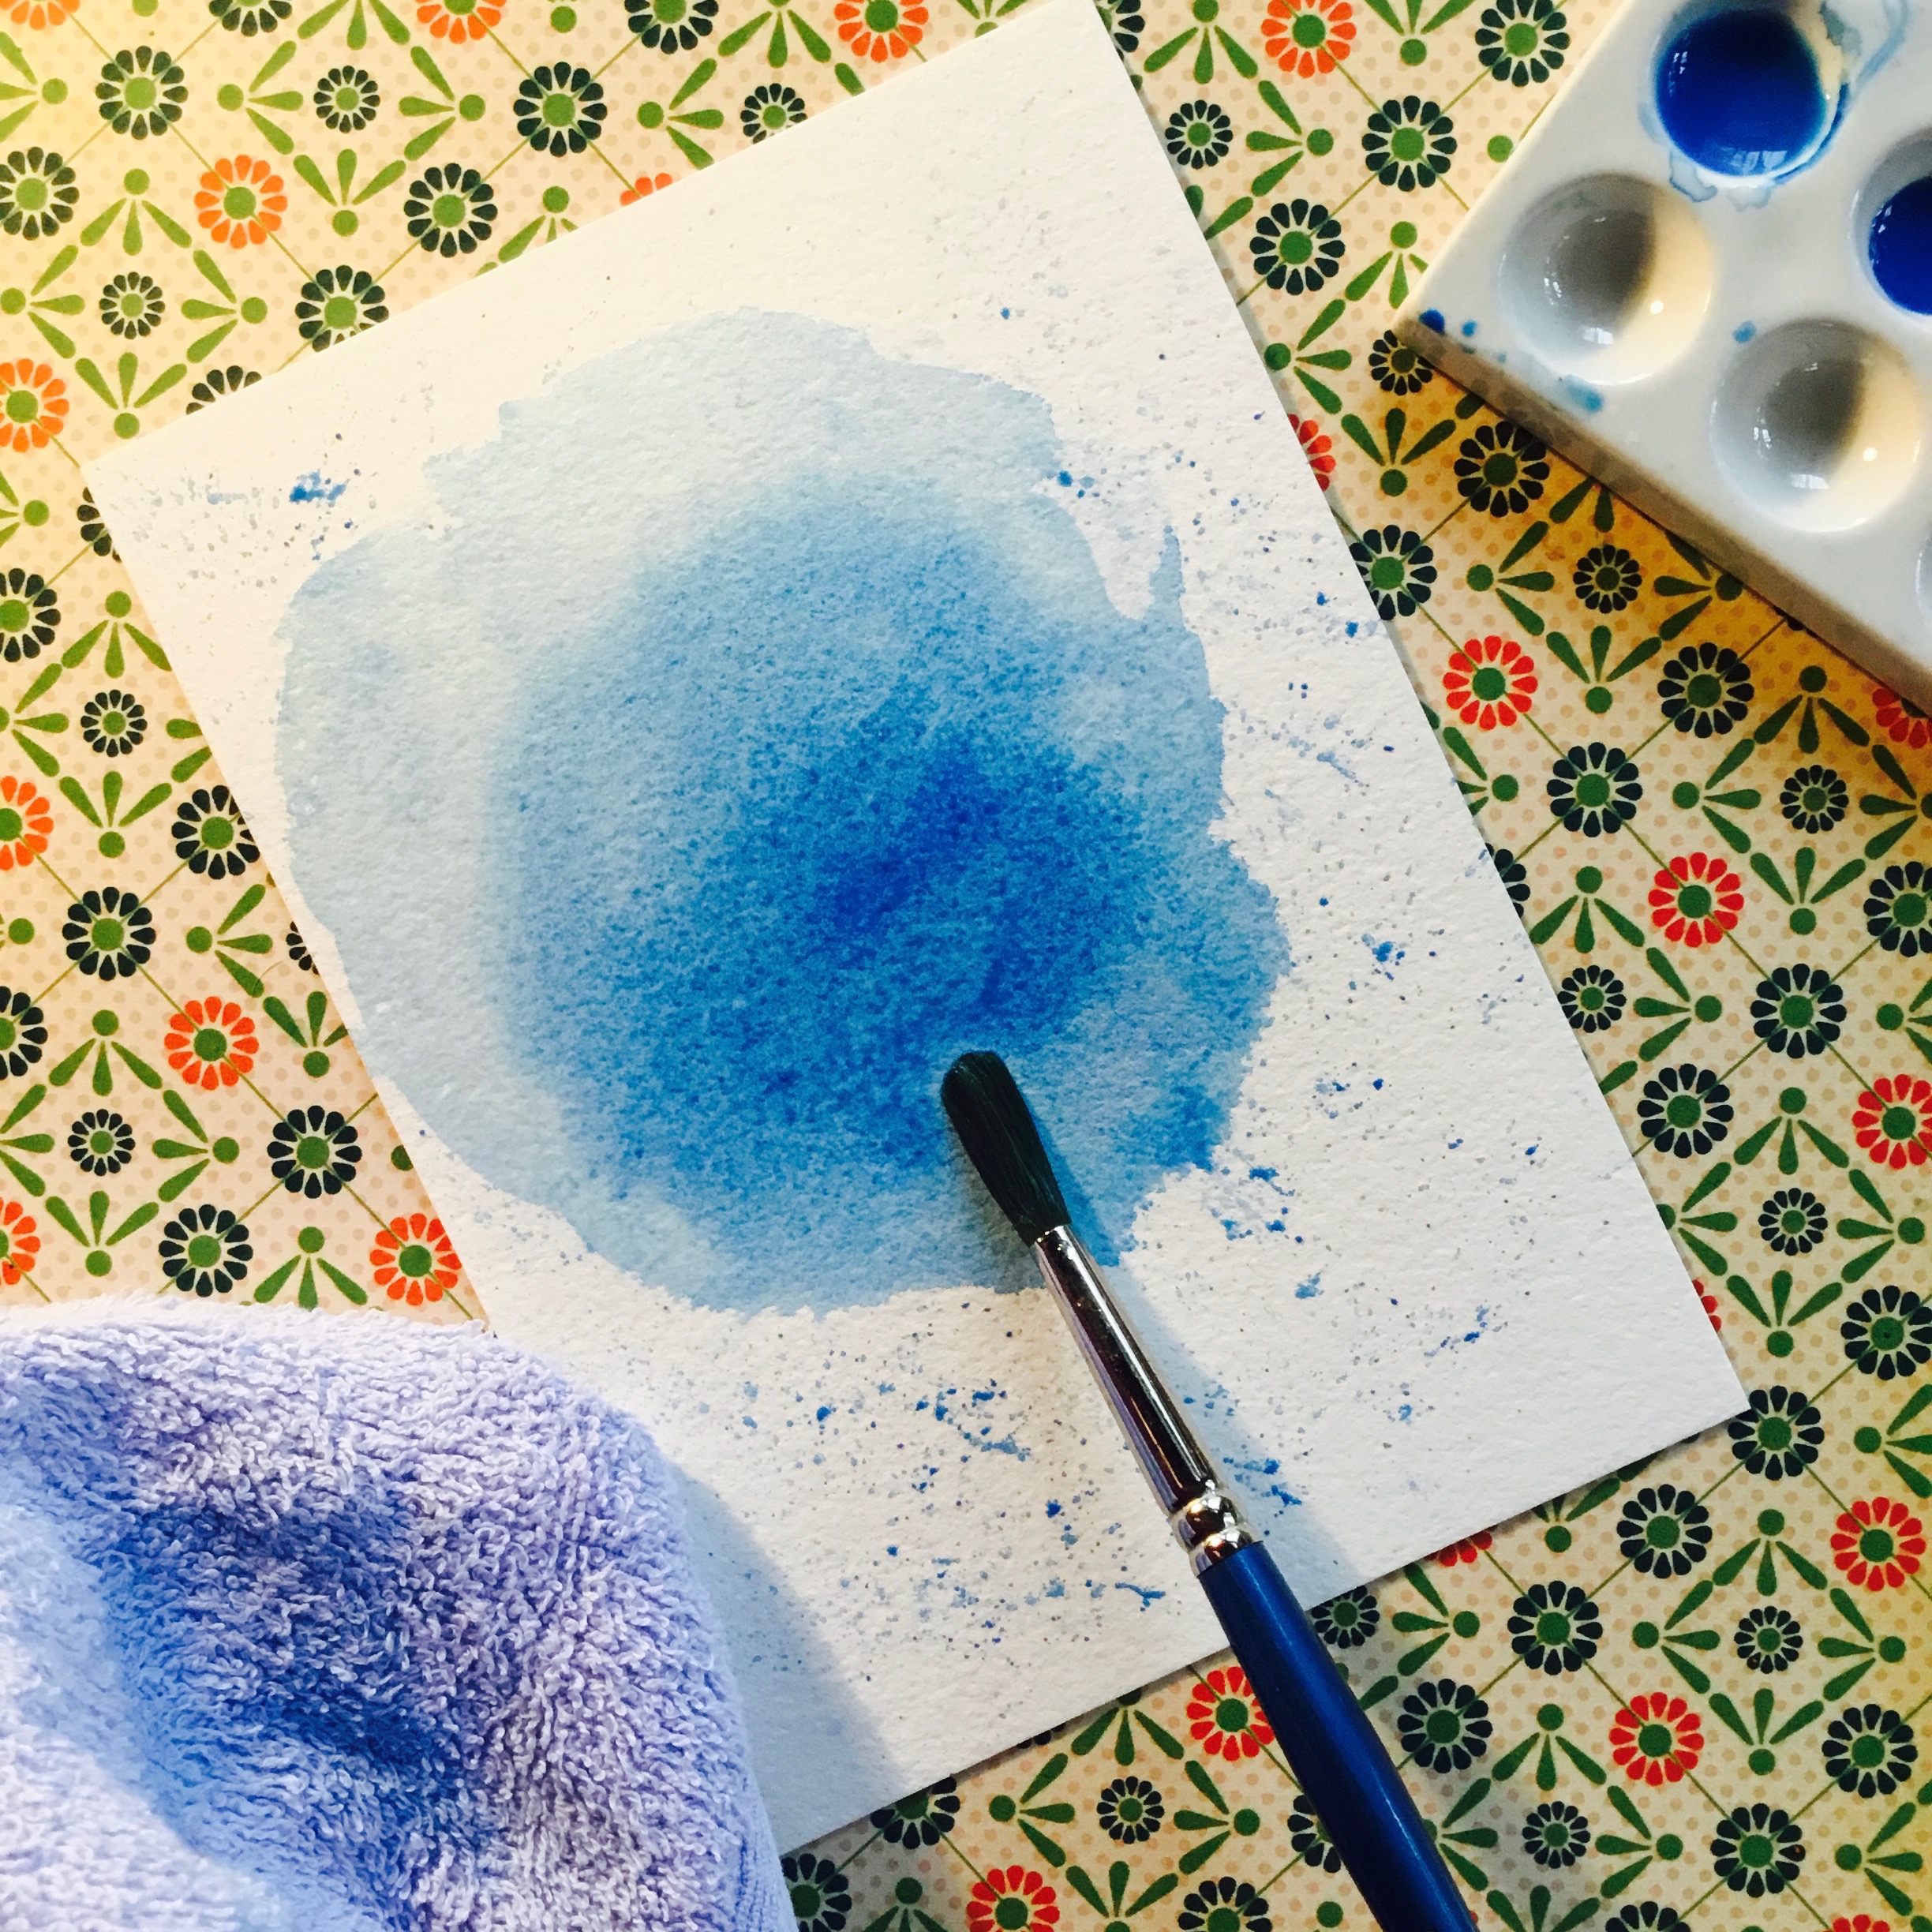 Use your old brush to create a cloud-like shape on your page. Add more water to create lighter areas to add interest. Use your brush to smooth out any patches where additional pigment has gathered to avoid harsh lines. This will create delicate shading.
For the splatter effect, load your brush with color and hold it over the paper. Then drag your thumb across the end of your brush.
Use your old brush to create a cloud-like shape on your page. Add more water to create lighter areas to add interest. Use your brush to smooth out any patches where additional pigment has gathered to avoid harsh lines. This will create delicate shading.
For the splatter effect, load your brush with color and hold it over the paper. Then drag your thumb across the end of your brush.
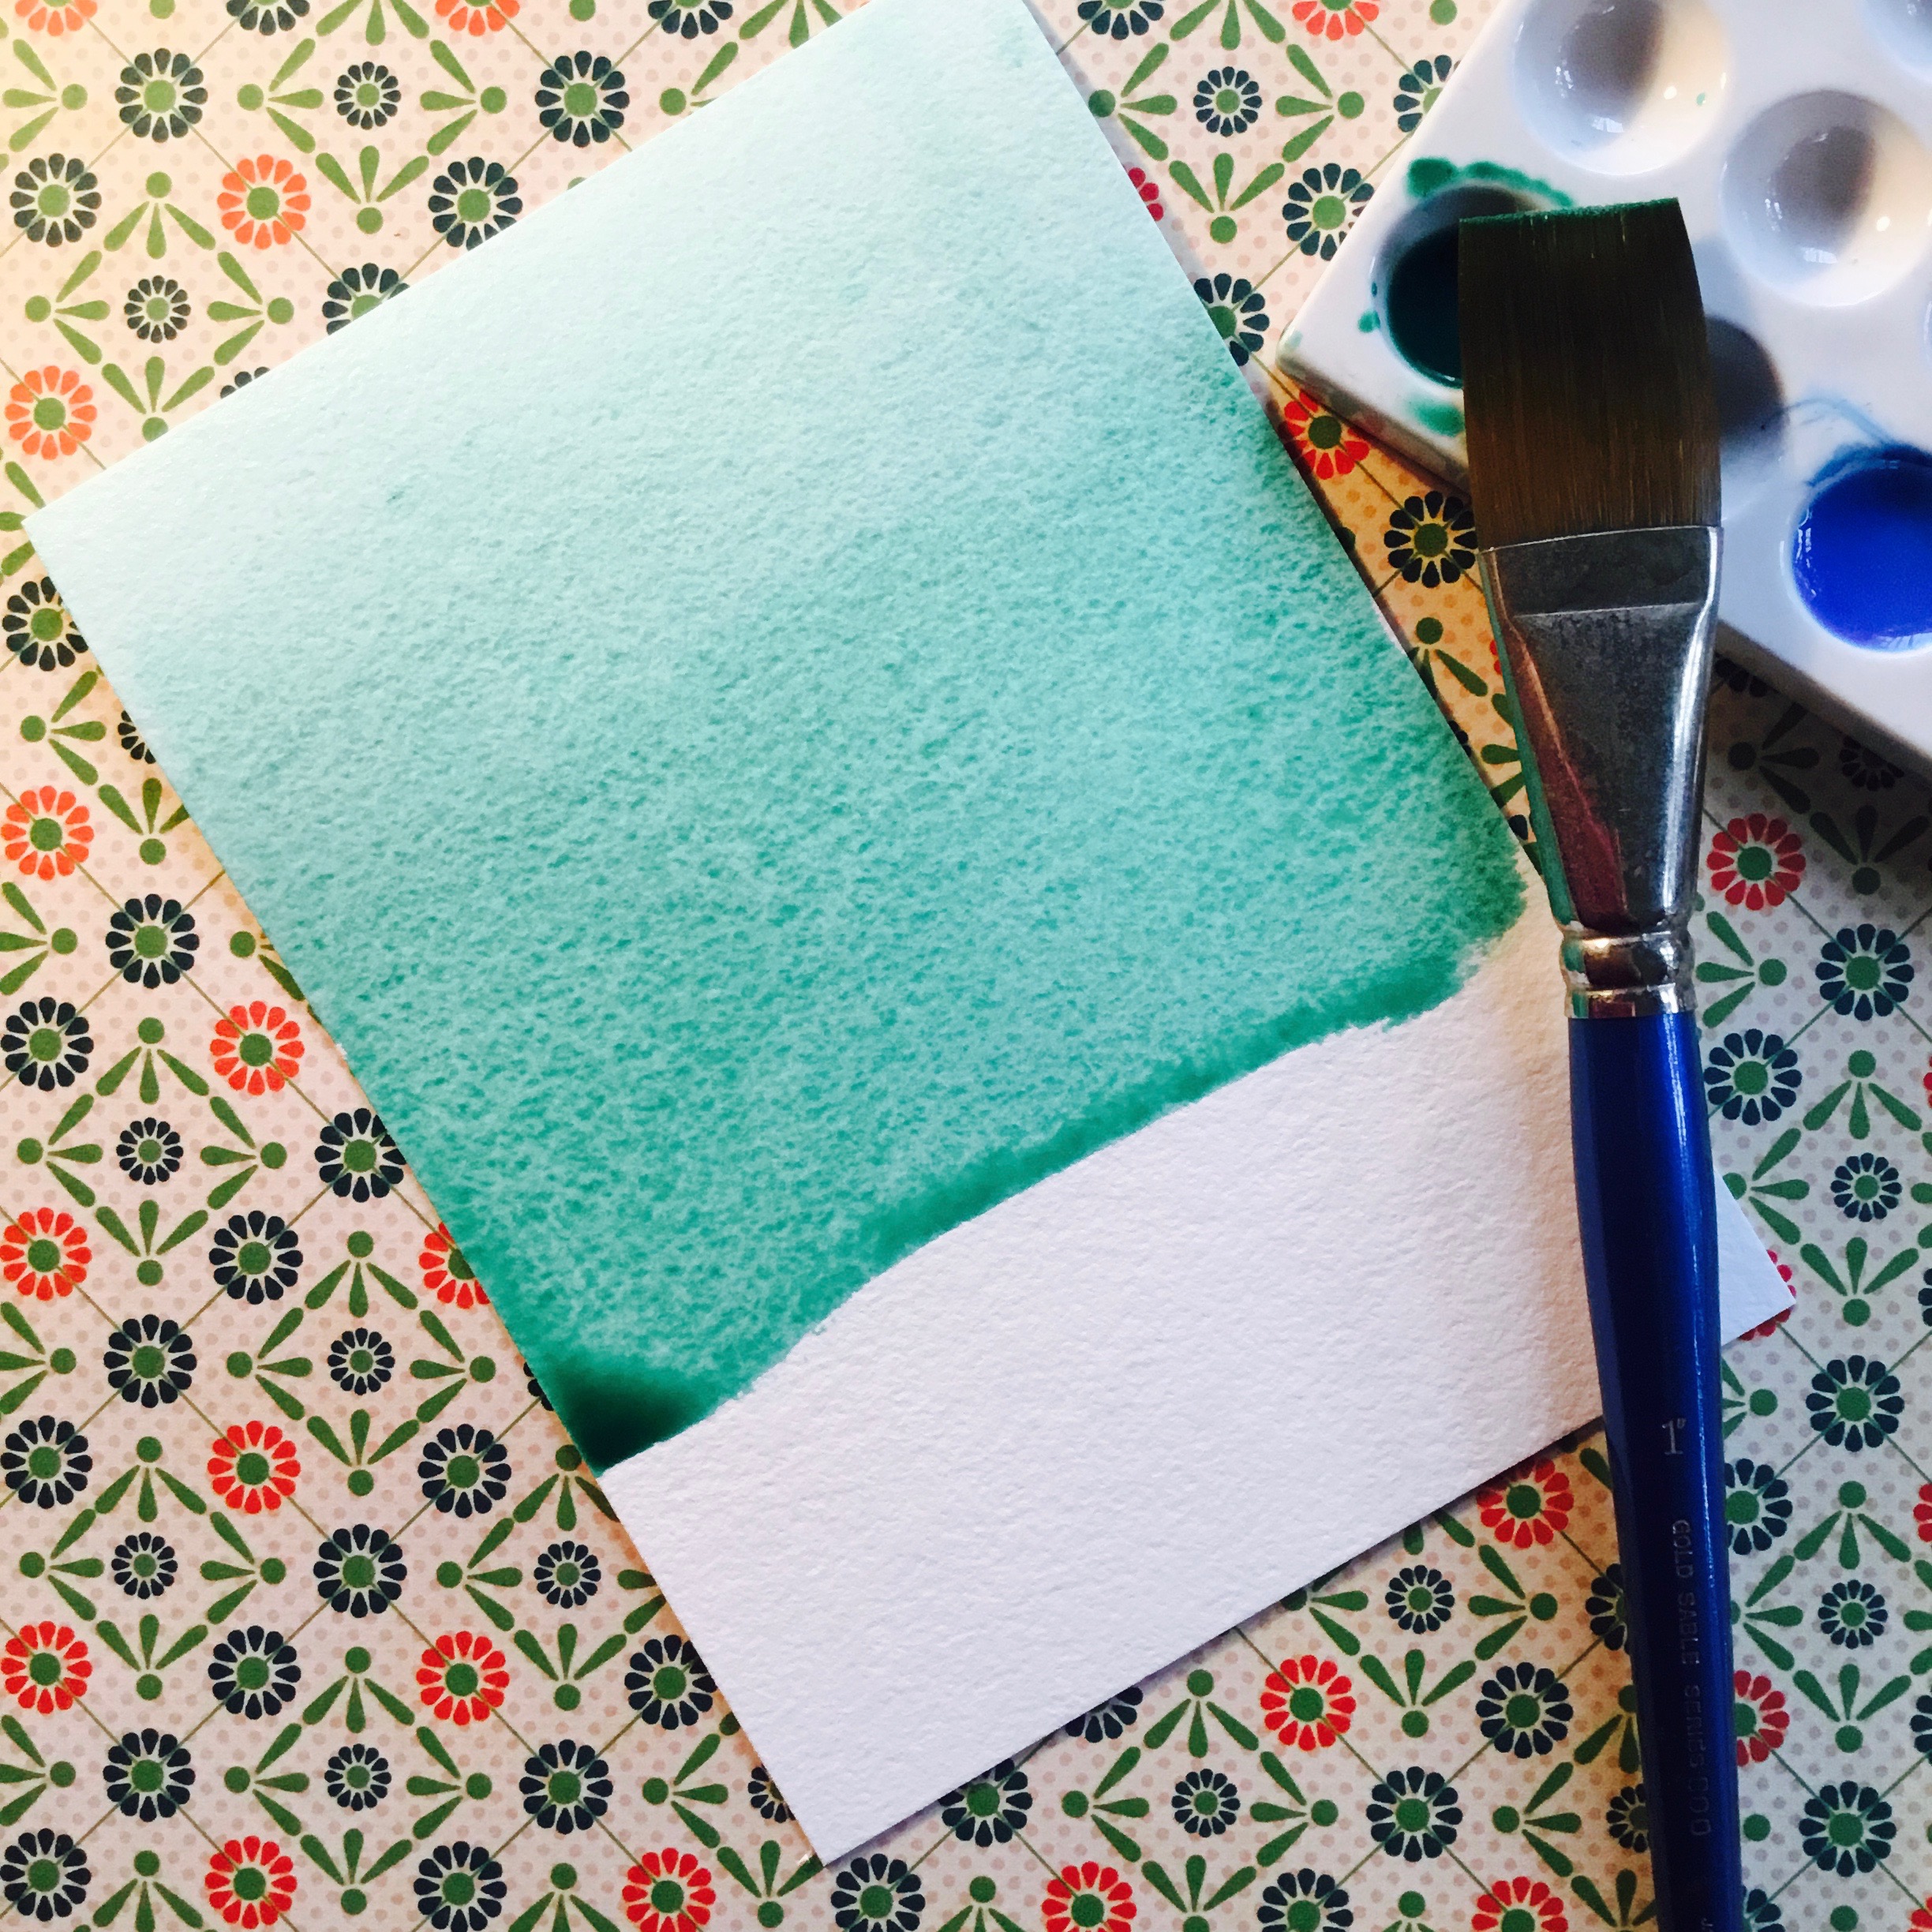 For a slightly different look, create a ombré-inspired watercolor wash for your tags. Use a larger 1″ flat brush to create a graident wash from the top of your page down. Allow the wash to dry, then add an additional wash to the bottom of the page to emphasize the ombre effect.
See that puddle forming in the bottom left hand corner of the wash above? Avoid letting your paint form puddles like that, as that can create harsh lines once dry. Simply move the color down the page, or use a slightly damp brush to pick up the extra pigment that has puddled.
For a slightly different look, create a ombré-inspired watercolor wash for your tags. Use a larger 1″ flat brush to create a graident wash from the top of your page down. Allow the wash to dry, then add an additional wash to the bottom of the page to emphasize the ombre effect.
See that puddle forming in the bottom left hand corner of the wash above? Avoid letting your paint form puddles like that, as that can create harsh lines once dry. Simply move the color down the page, or use a slightly damp brush to pick up the extra pigment that has puddled.
Step 3: Cut the tag shapes
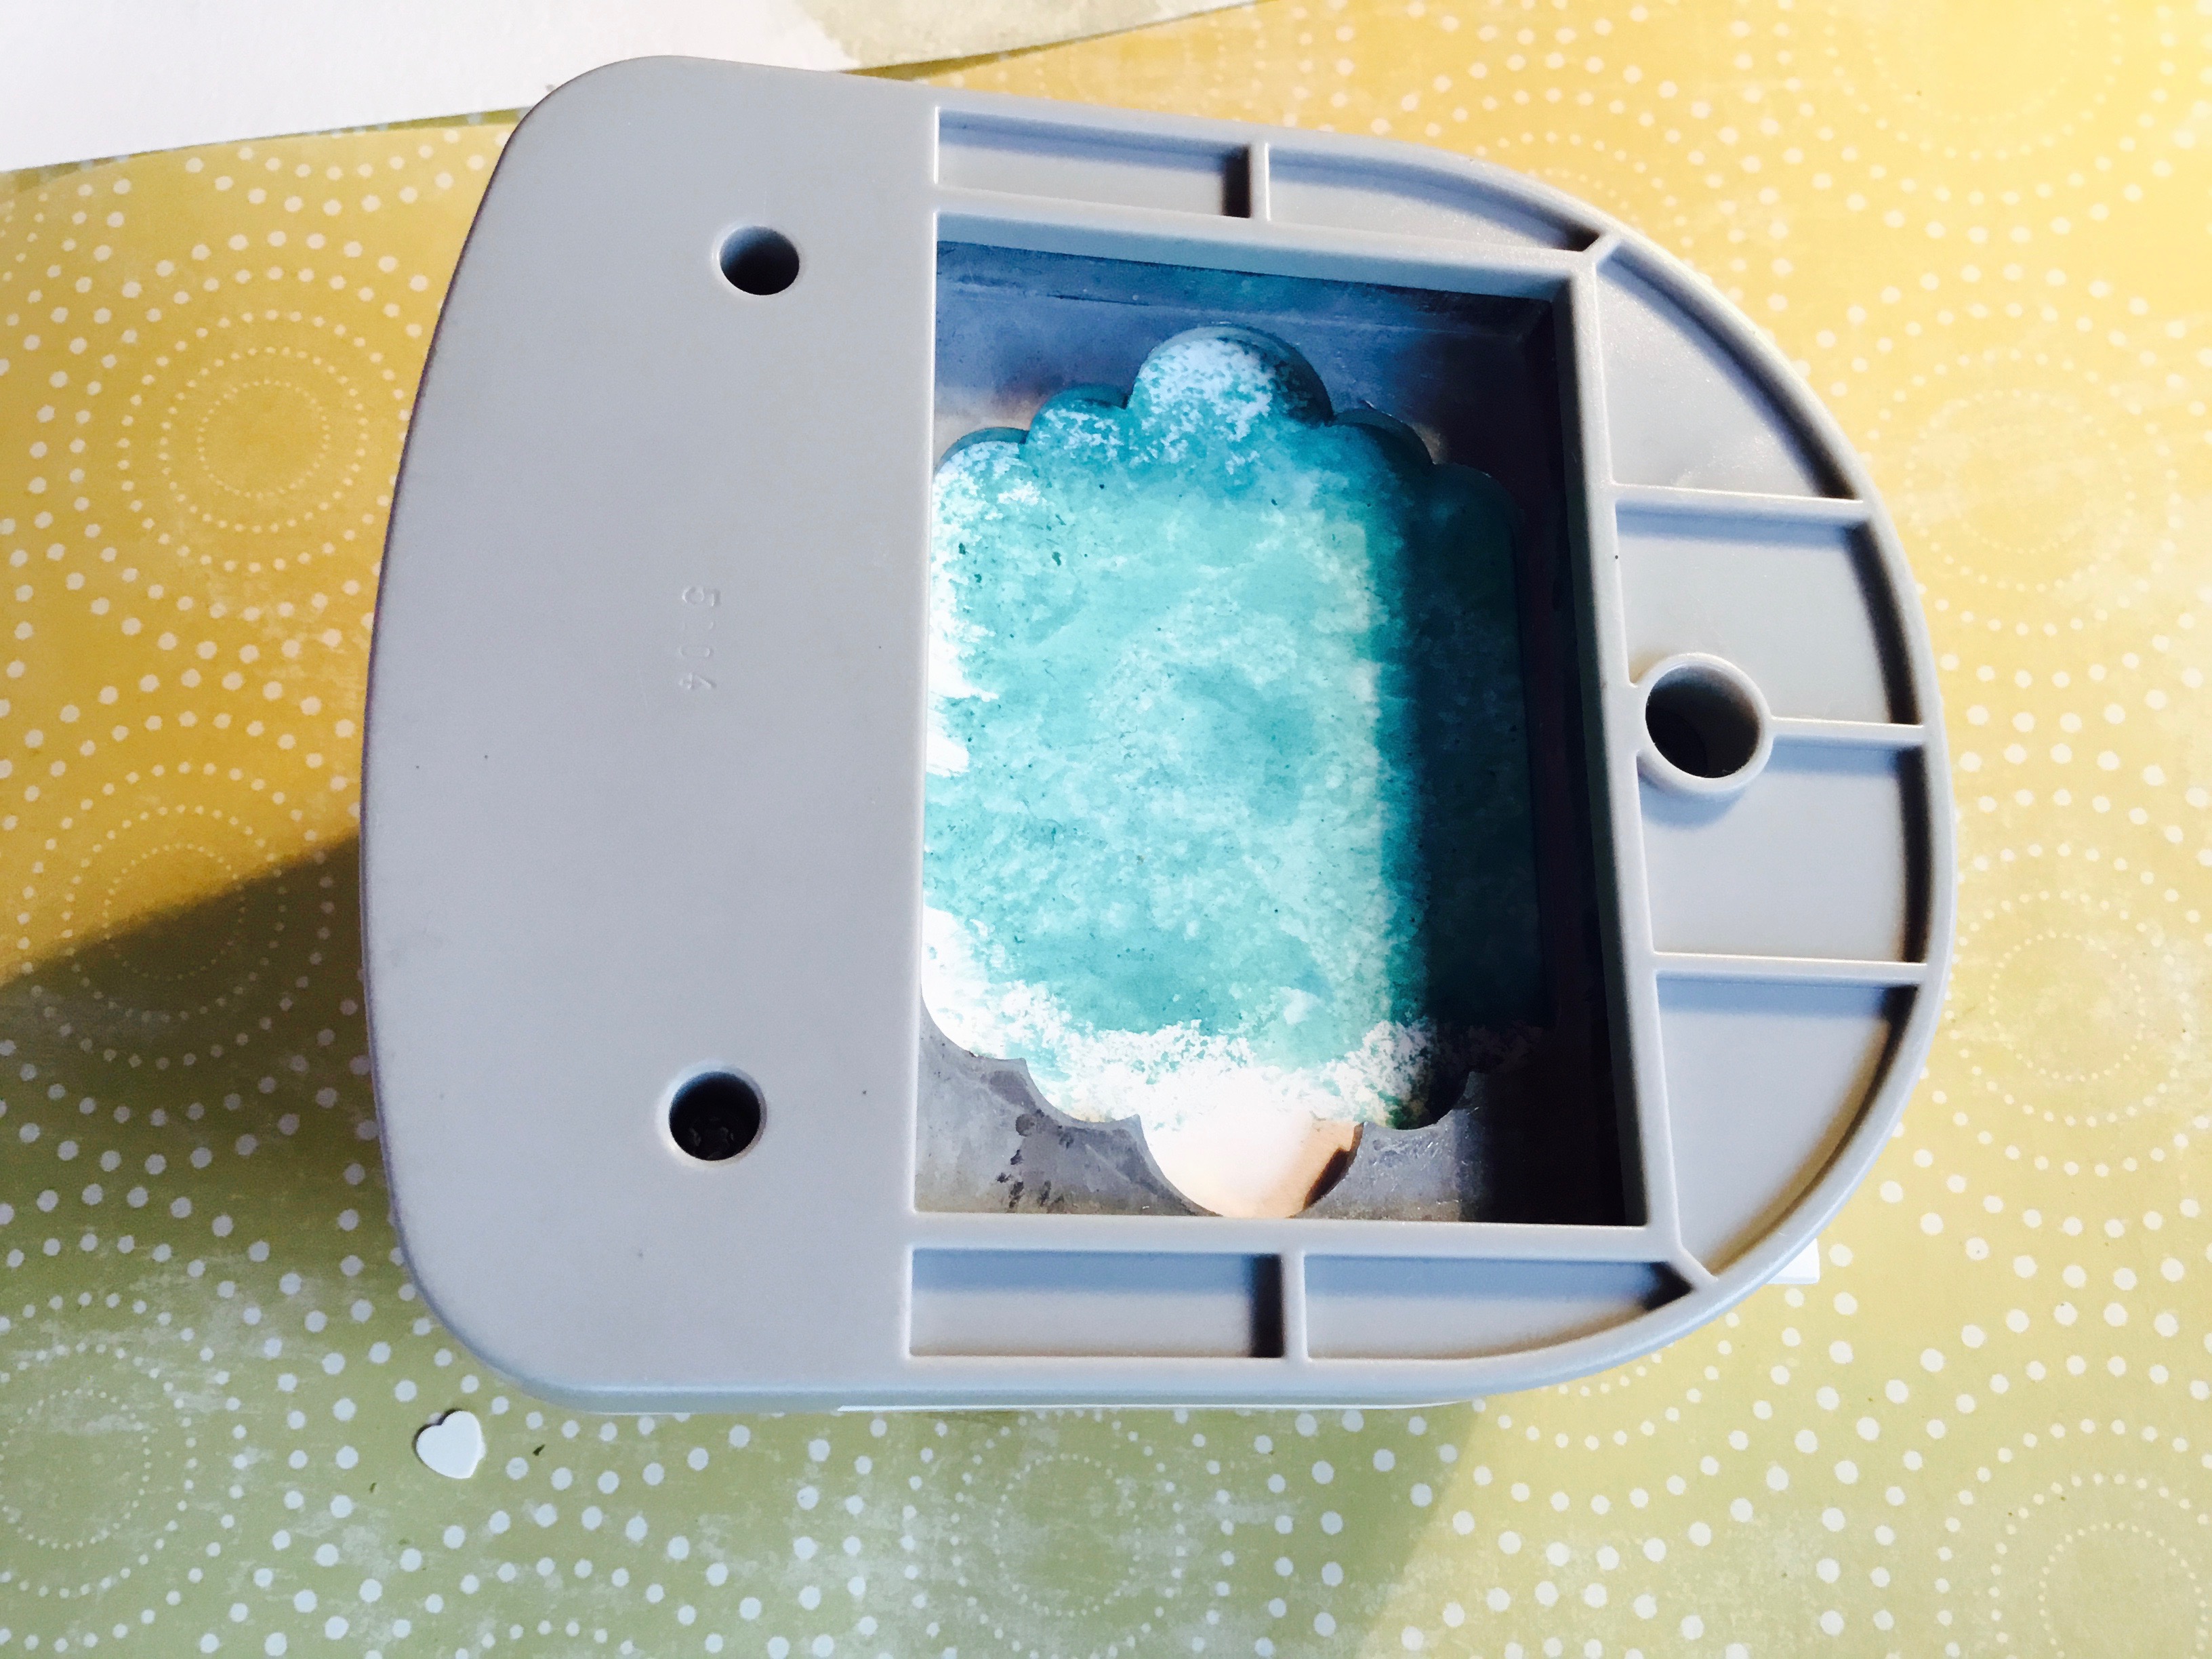 Once the water color wash is dry, the fun begins! Use your paper tag cutter to cut tags for your paper. I like to turn the painted paper paint-side up so that I can capture the most beautiful parts with my paper cutter!
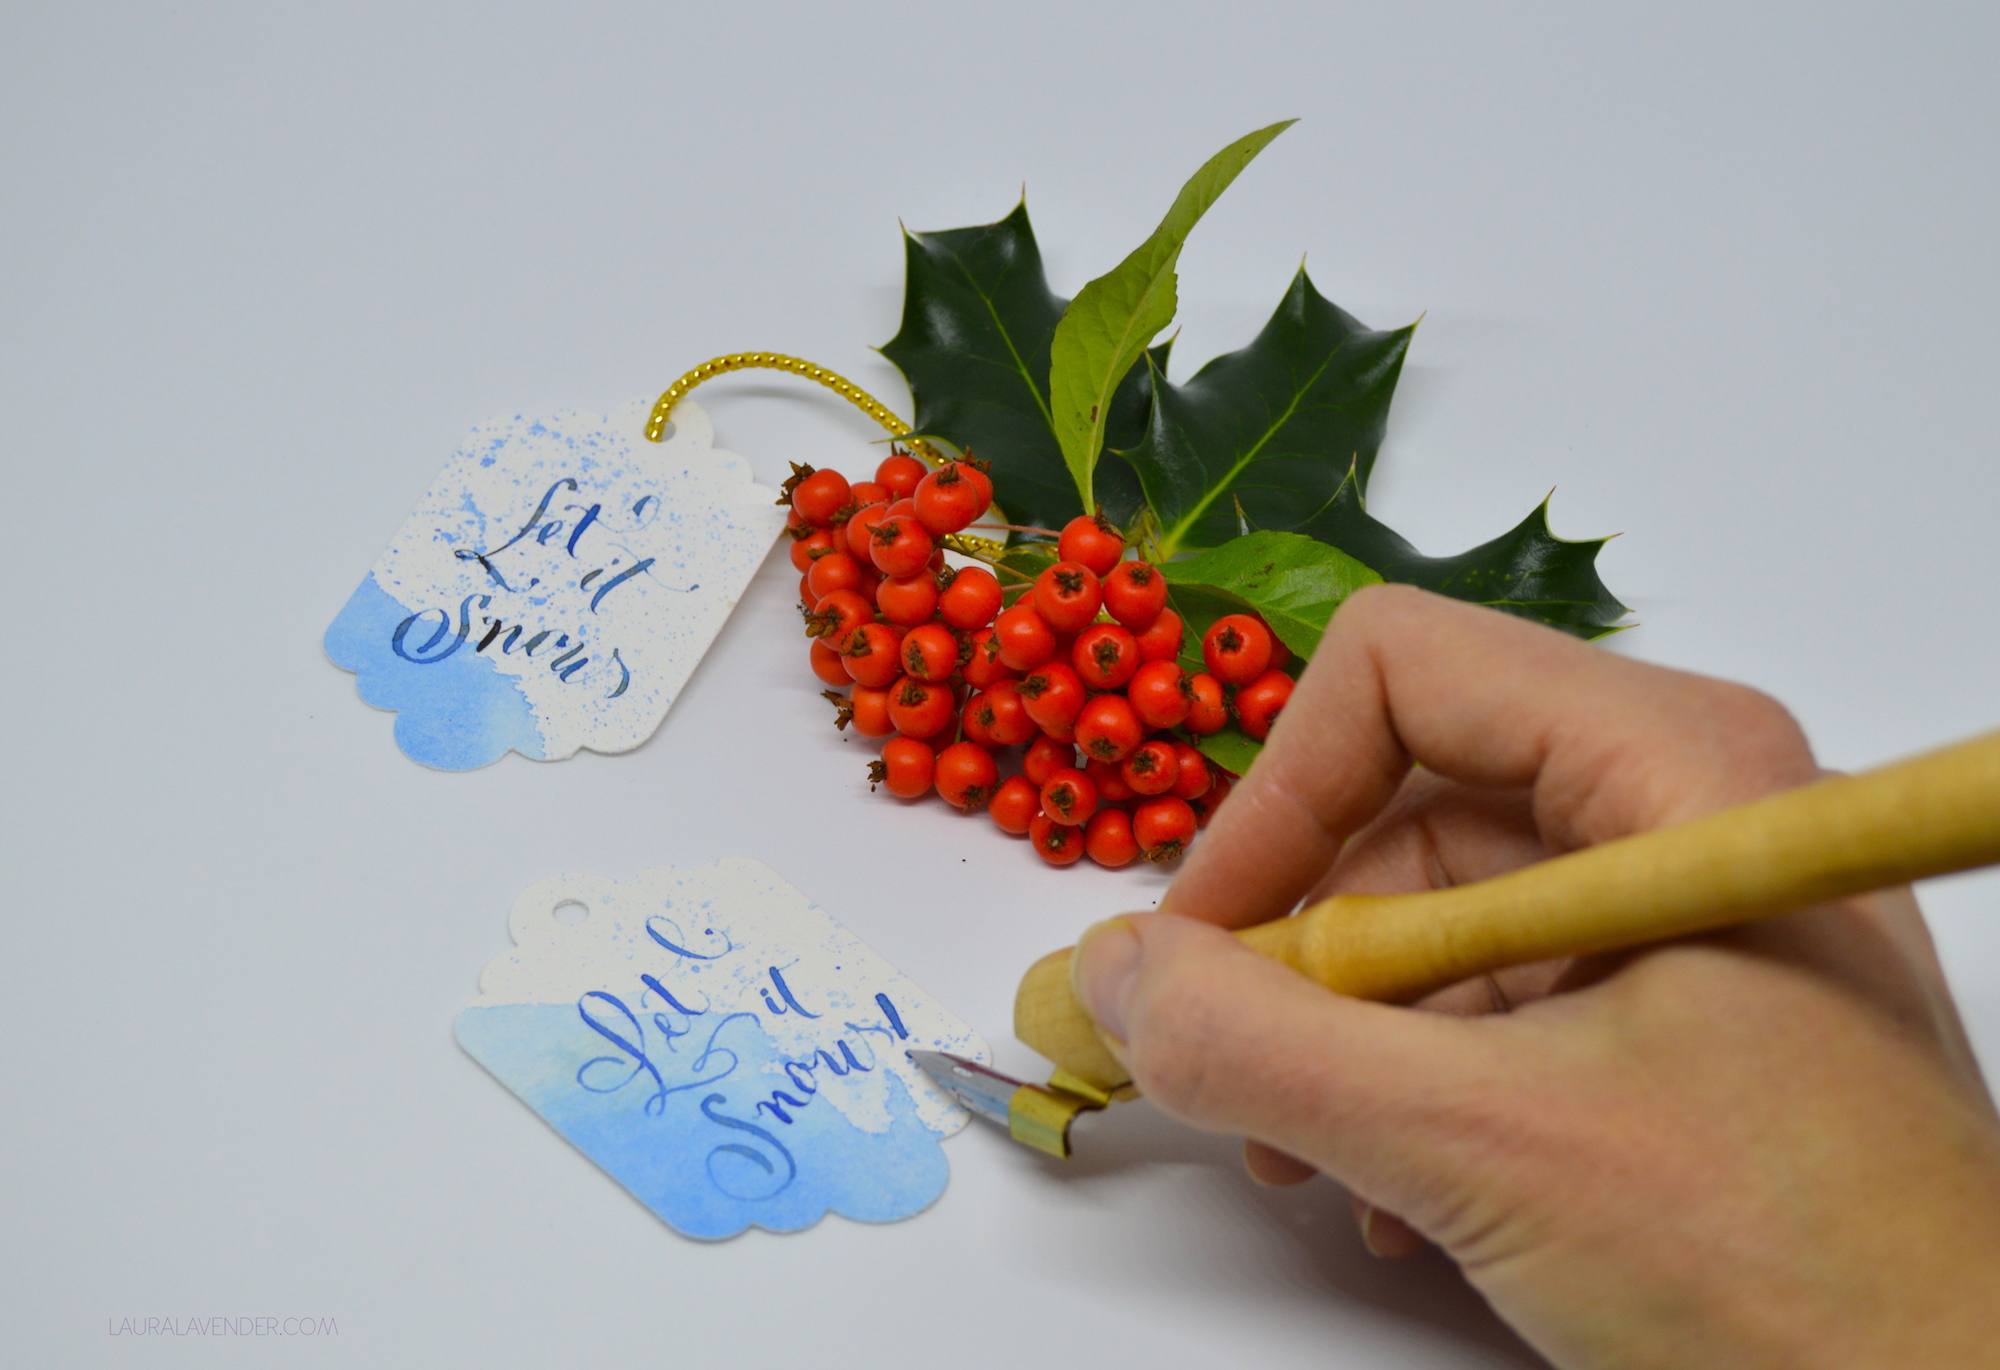
Step 4: Add your calligraphy
Once the tags are all cut out, you can move onto the calligraphy! I used watercolor paint to letter the tags. To use watercolor with your calligraphy dip pen, there is a few things to keep in mind:- Mix up a watercolor wash that is the texture of coffee cream
- Use an old watercolor brush to load paint onto the back of your calligraphy nib
- Wipe off any extra pigment on the side of your paint well
- Be sure to test your nib by doing a stroke on an old piece of paper before you jump into your project
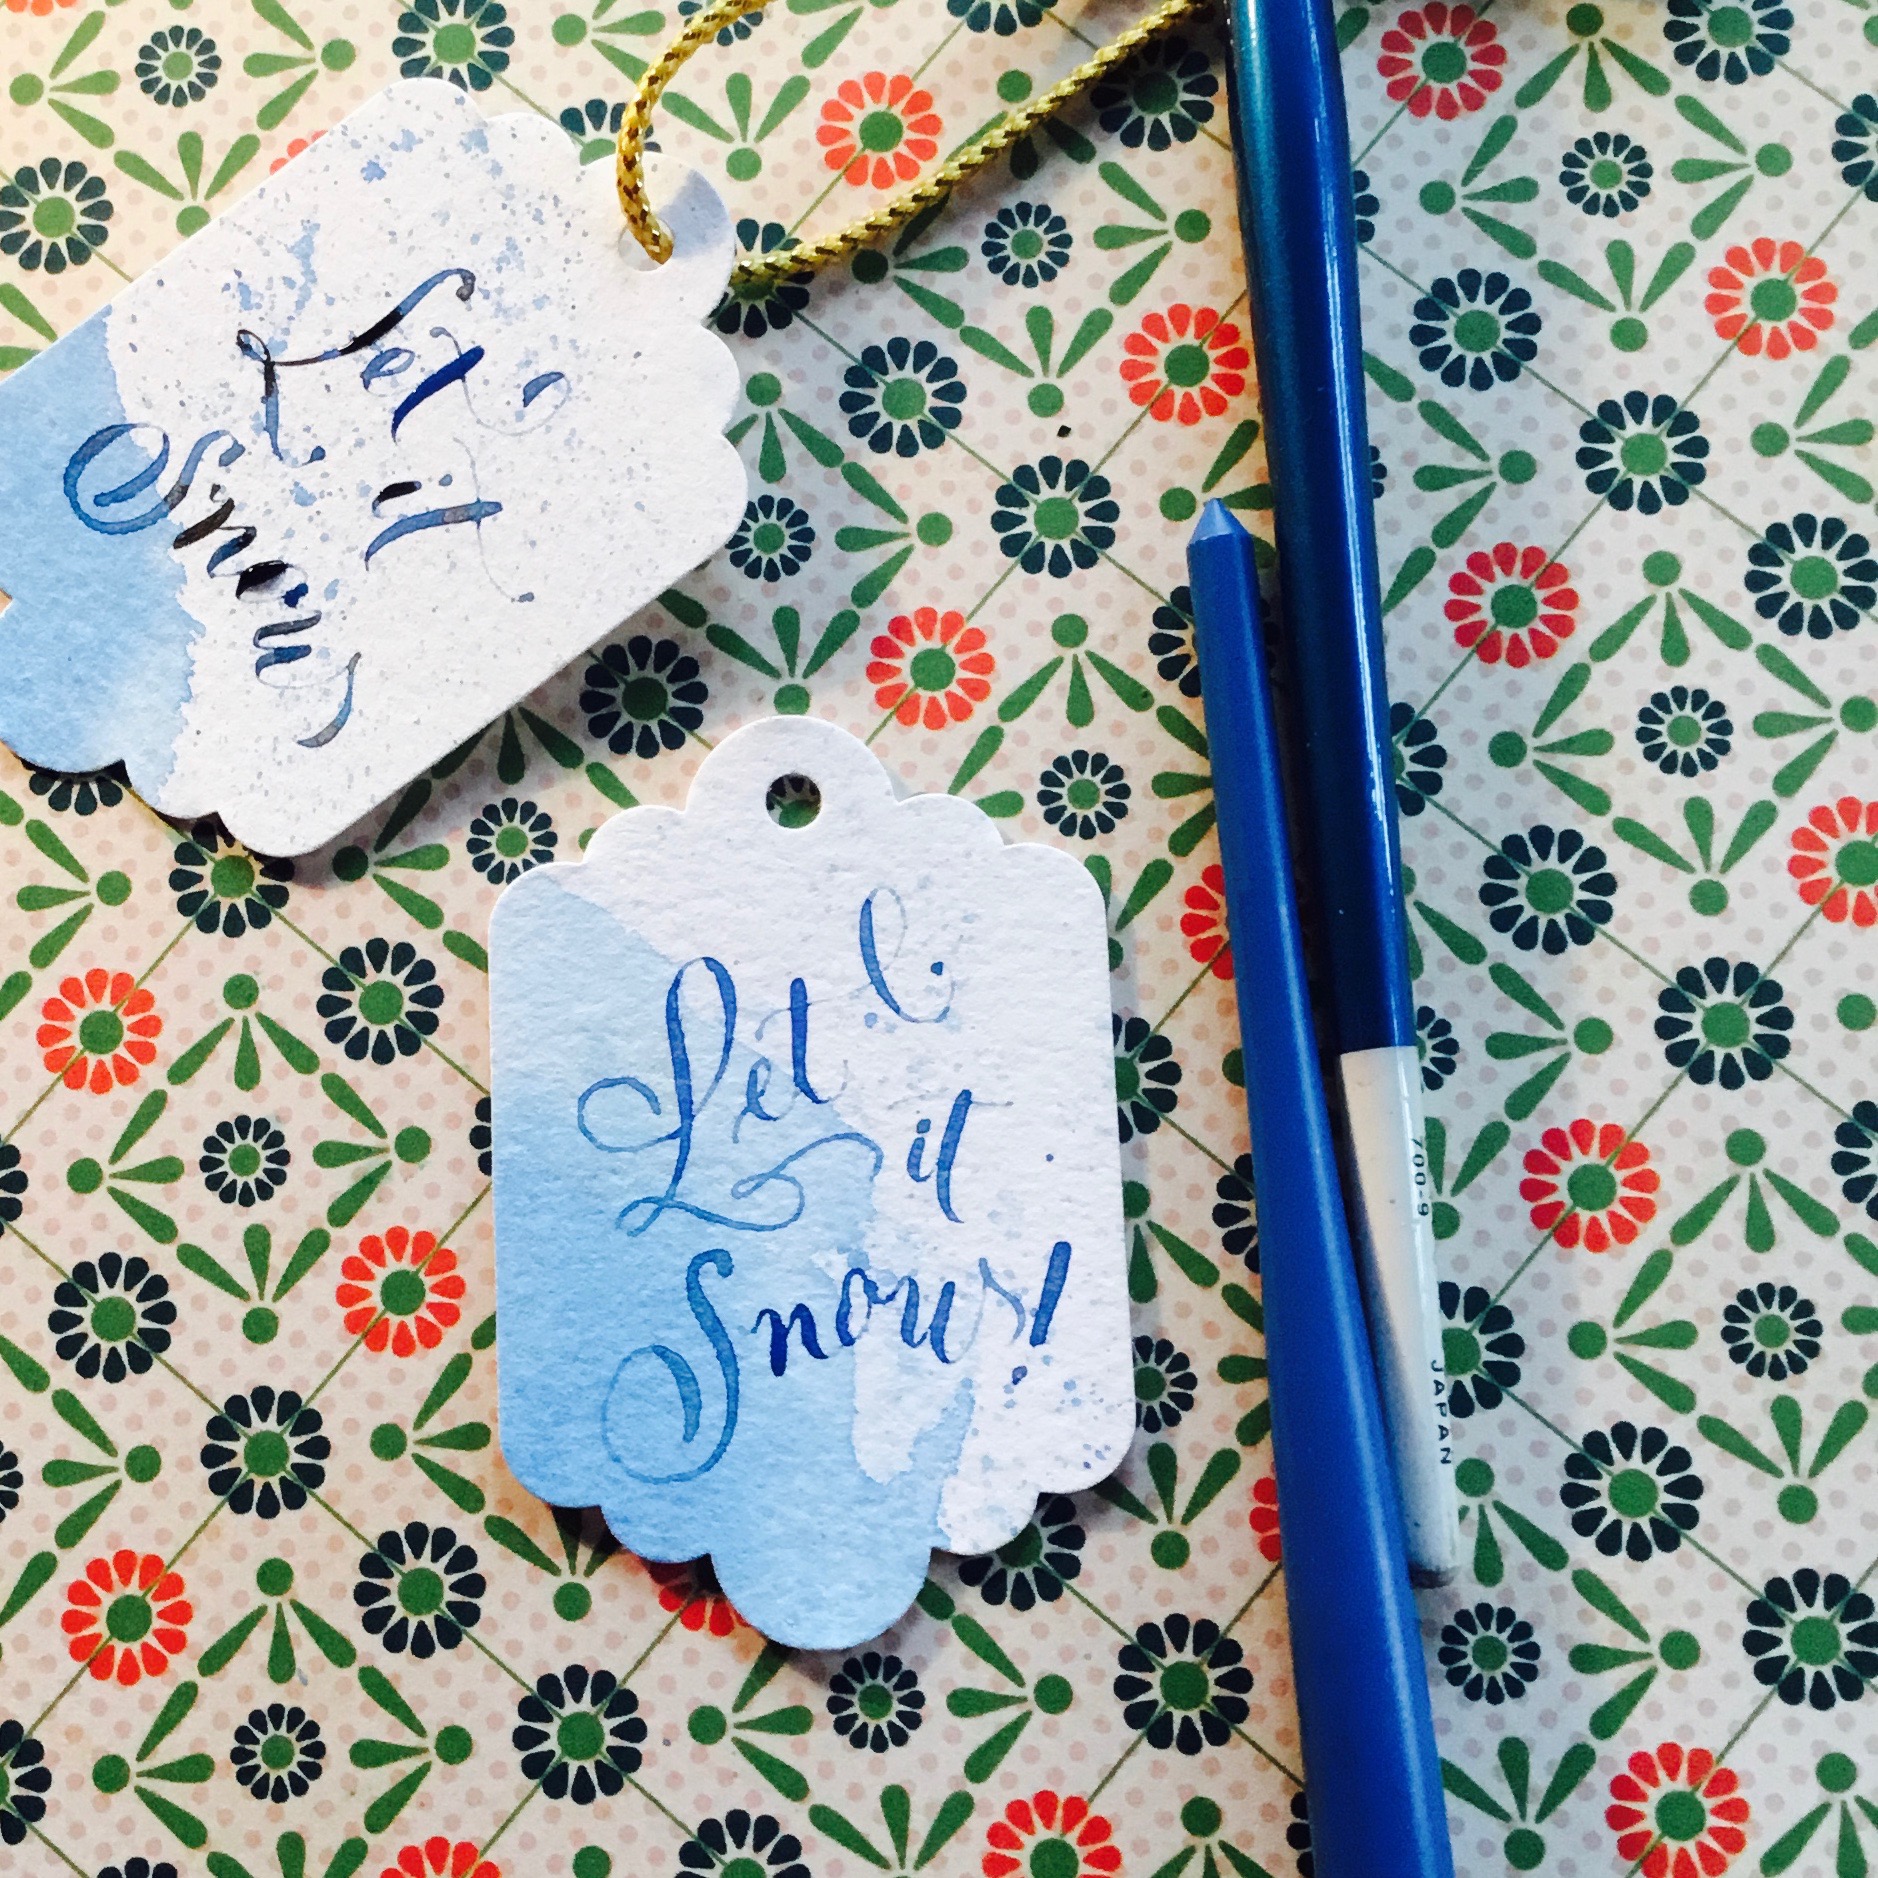 As you can see in the top tag, I added a few drops of black ink here and there into the lettering to add a little bit more oomph to the letters.
When you’re happy with the front of the tags, you can flip them over and add a “To” and “From.”
As you can see in the top tag, I added a few drops of black ink here and there into the lettering to add a little bit more oomph to the letters.
When you’re happy with the front of the tags, you can flip them over and add a “To” and “From.”
Share tips, start a discussion or ask one of our experts or other students a question.
No Responses to “Effortless Hand-Lettered Gift Tags”