
Even as a seasoned card maker, I enjoy finding out other paper crafters’ tips and tricks — there is just always something new to learn. Below I share my absolute favorite card making hacks that will save you both time AND money. Check them out, and be sure to share in the comments your favorite card making tips and tricks!
Our favorite card making tips and tricks
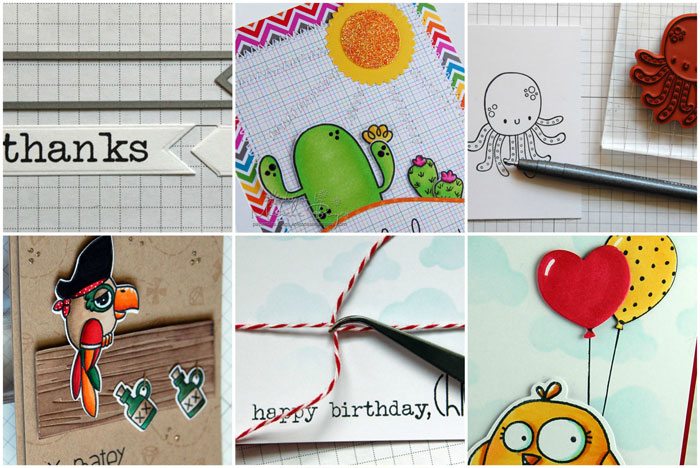
1. The invaluable white eraser
In card making, I often use light pencil marks as guides. In the top photo above, you will see that I drew light lines as guides for stitching the sun’s rays. To cleanly remove pencil marks, I use a hi-polymer white eraser. Where a common pink eraser will often leave a pink or dark smear, a white eraser cleanly removes the pencil marks with little to no residue left behind. White erasers are available in many forms and brands, and can often be found in the school supply section of most department stores.
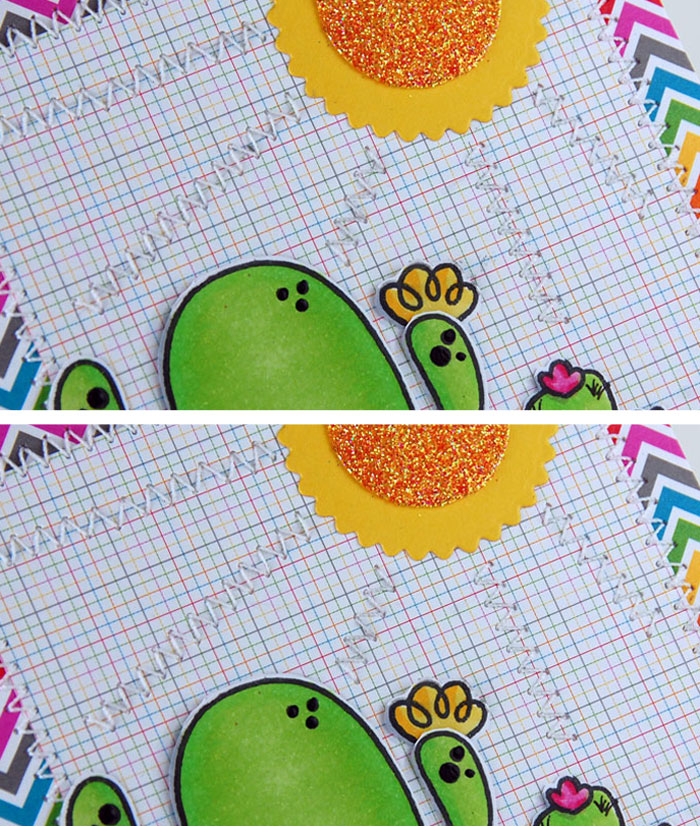
2. Die-cut to fit
Did you know you can shorten die-cuts to fit your needs? As shown above, I first die-cut the full length banner strip. I stamped the sentiment to one side, then placed the die-cut strip back into the die, positioning it at the point where I wanted the second cut. After die-cutting a second time, the strip is cut to the desired length.
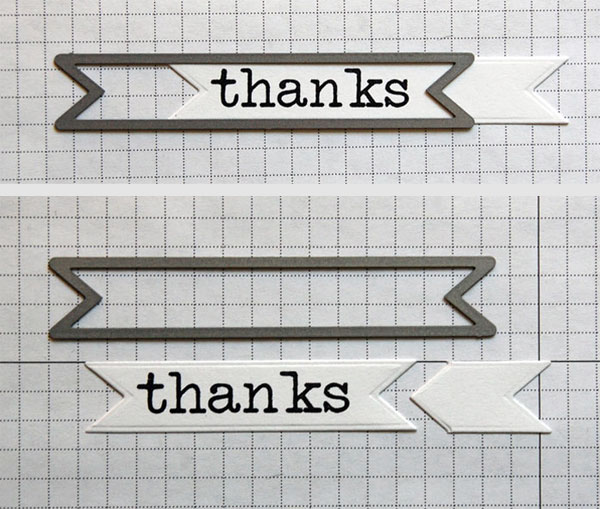
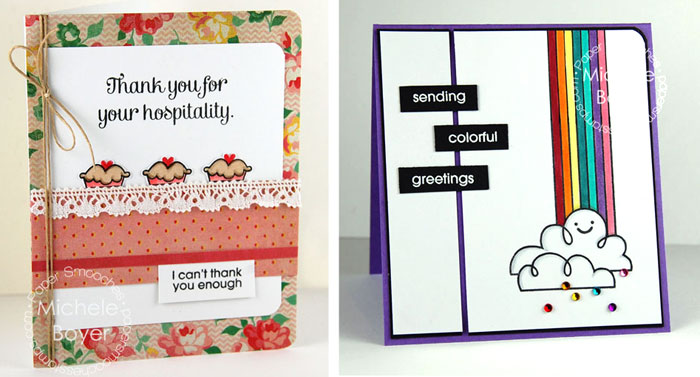
3. Emphasize with embossing
To create a darker appearance on patterned or colored card stock,clear emboss a sentiment after stamping. In doing so, the letters appear a bit darker and thicker. The difference in the two sentiments shown above may be slight but creates just enough of a difference to darken the sentiment. Results are more noticeable on a slightly “busier” pattern or darker card stock.
4. Fill in the blanks
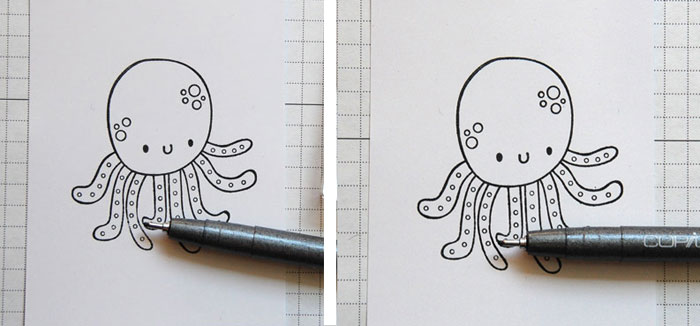
Sometimes when stamping an image, small areas are not inked as fully as the rest. Instead of re-stamping, use a black marker or pen to fill in the blank or lighter areas. Before doing so, take into consideration how/if you are going to color the image. For example, if you are going to use Copic markers, use a Copic-compatible pen to fill the stamped lines. Or fill the lines once coloring is complete.
Another consideration is the thickness of lines on the stamped image. Some are much thinner than others. If the lines are very thin, you will want to use a pen with a smaller tip, such as 0.25 mm. For thicker line images as shown above, I use a 0.5 mm tip.
5. Round the corner
Invest in one or more corner rounder punches or tools. Rounding one corner (or more) adds to your card’s uniqueness. There are many choices of punches or tools, some of which have two sizes of rounded cuts.
6. Outline die-cuts
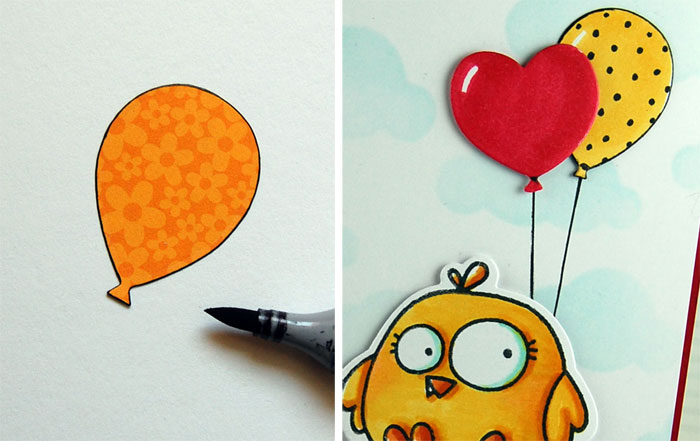
Use a black marker to add a thin border around die-cut pieces. Doing so helps light colored pieces to stand out against light backgrounds. Holding a black marker with the tip pointing up, run the side of the marker around the back side edges of your die-cut piece. By edging from the back, you can better control the thickness of the outline.
7. The grand grid
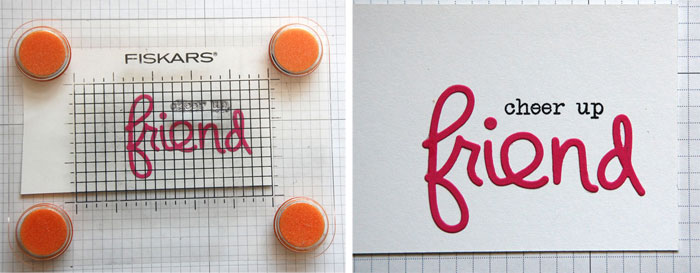
Use grid paper as well as the grid on paper crafting tools to align sentiments and objects. In the sample above, I first positioned the clear stamp (“cheer up”) above the die-cut word “friend.” I used the lines on the stamp press to align with the right and bottom edges of the card stock block, then picked up the stamp by pressing the stamp press over the stamp. After inking, I realigned the right and bottom lines on the stamp press with the card stock edges and stamped. The results are perfectly straight.
8. Pop it up
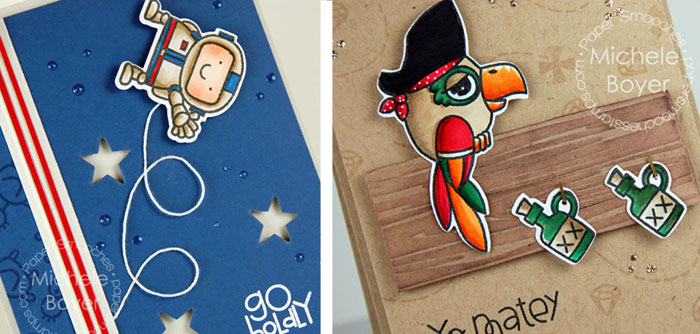
Use foam tape and squares to add dimension to cards. In the sample on the left, I used foam tape beneath the blue panel to create depth beneath the die-cut stars. The astronaut is raised on foam tape which also holds the string in place. On the right, I used foam tape to raise the platform for the parrot. Foam squares were placed beneath the top of the parrot to balance the layers. For additional dimension, the entire front panel was raised on foam tape.
9. Hold that line
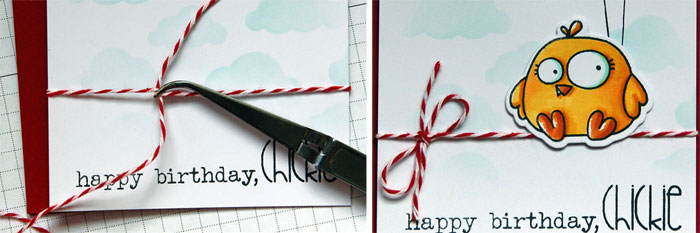
Use self-closing tweezers to help hold ribbon or string when tying. It’s like having an extra set of hands.
I love these hacks. One you missed with the 3D gloss you used on the astronaut background for drops, you can draw a line with the gloss and stick the string in place or just dot a line onto the card wait a few mins and then once the gloss has gone tacky instead of runny it will grab the string and stay put and not squidgy out and show at the sides. I love 3D gloss to put onto animals eyes and noses to make them have shine and look more lifelike. I also use 3D gloss as raindrops or go over a printed thin font/lettering on a card with the gloss to make it look stamped and embossed or you can add glitter then pop more gloss ontop once the bottom layer is dry, which is usually 15 mins. Once there is gloss ontop it looks like an expensive glossy glittery topper.