
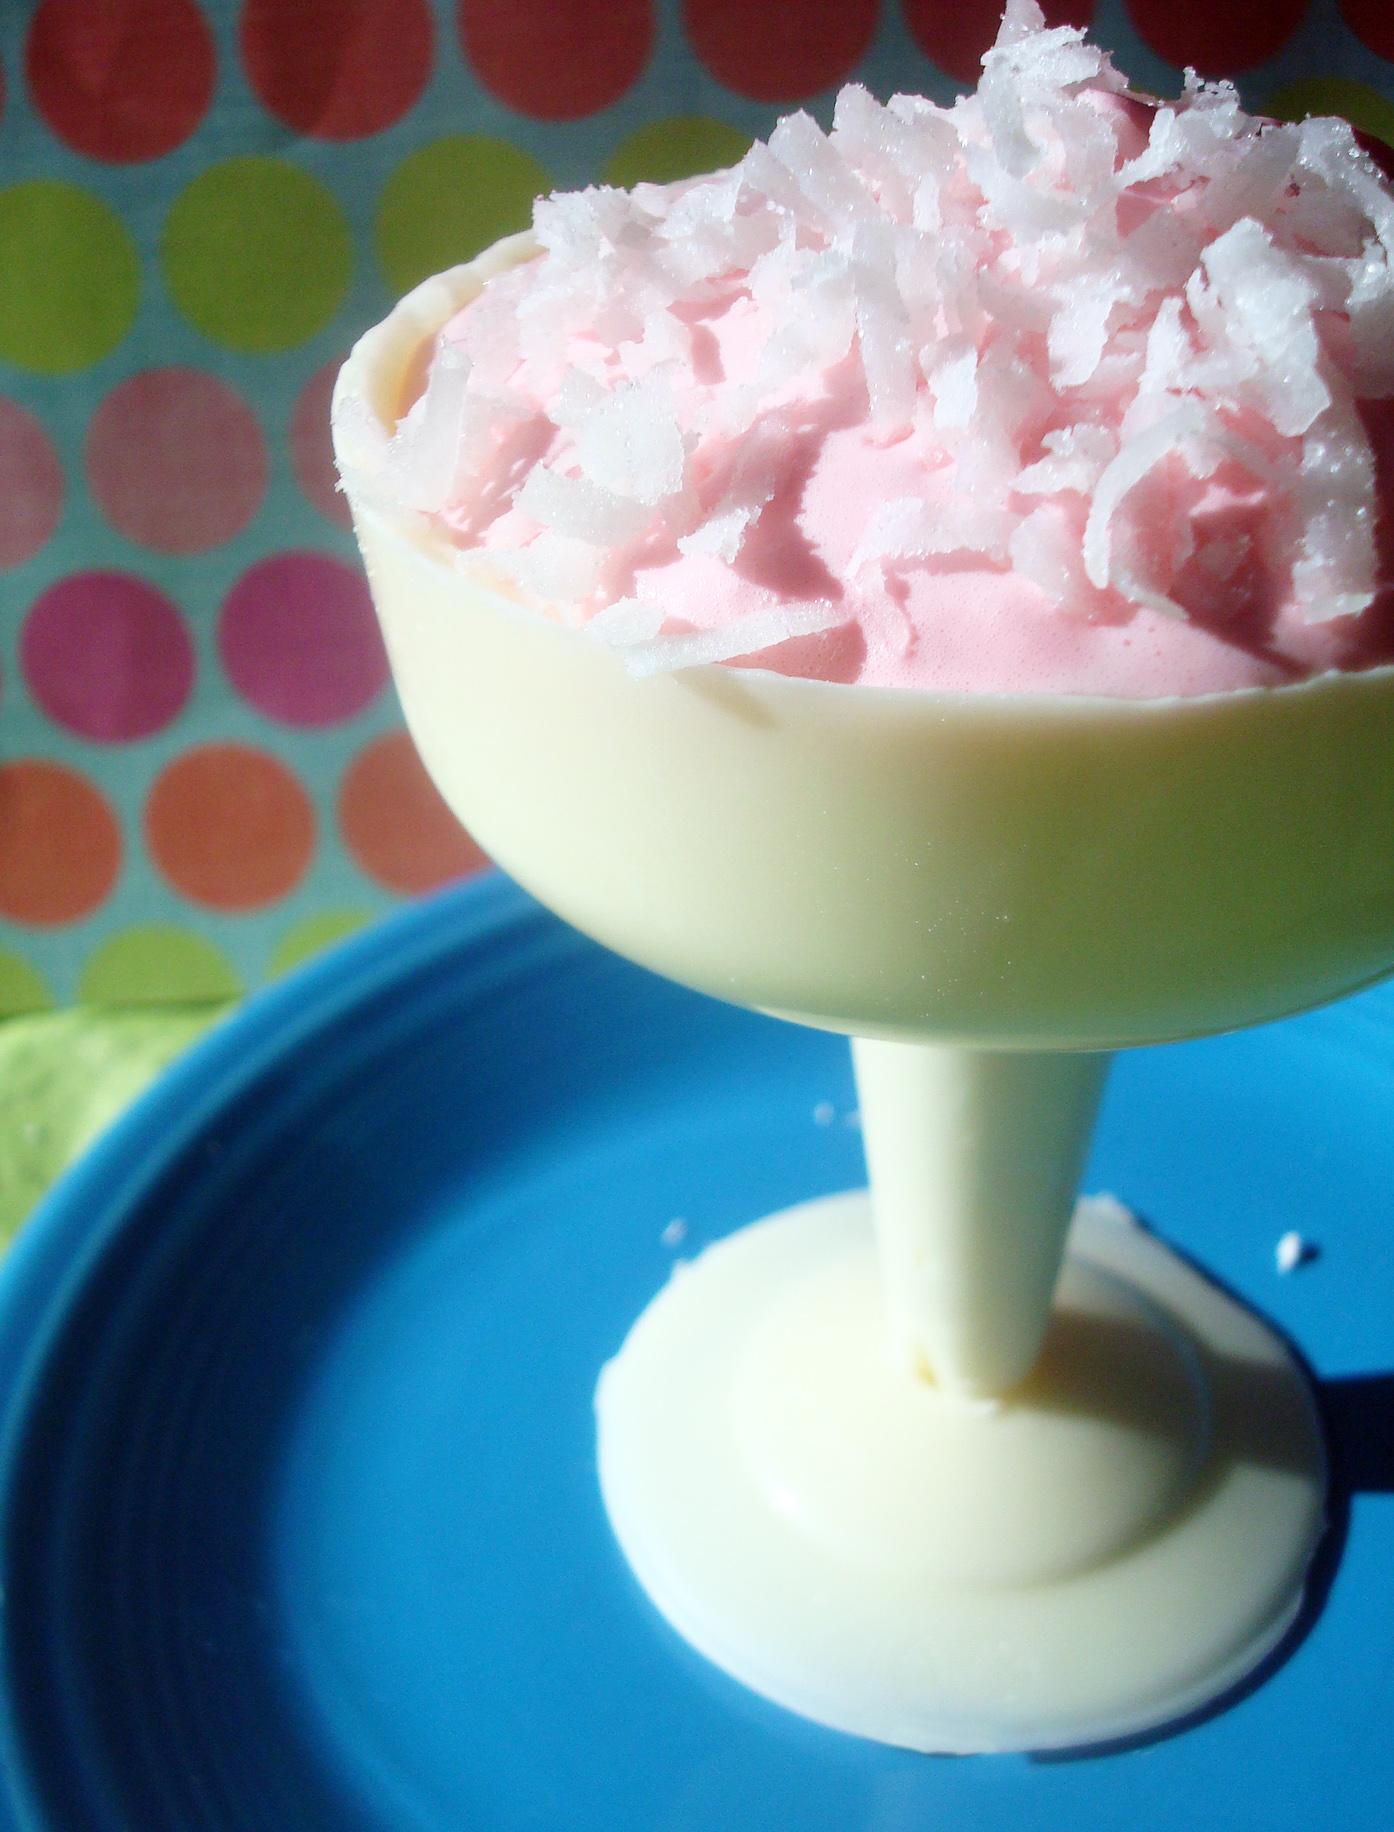
This pretty dessert has sweet secret: It’s edible from head to foot of the glass. That’s right — that cup is chocolate, not glass. We’ve got a recipe and tutorial for edible white chocolate dessert cups, and we feel like sharing.
Photos via CakeSpy
These edible vessels are surprisingly simple to make, and employ plastic champagne coupes as an inexpensive mold. They can be the base of any number of desserts, from mousse to ice cream to whipped cream and fruit. They can also be used as a cake decorating element; or, simply fill them with candy for clever centerpieces.
How to make a chocolate cup
Makes 4-6 dessert cups; adapted from Taste of Home
Ingredients
- 12 ounces (1 bag) white chocolate morsels
- flavorings or food colorings of your choice (optional)
Equipment
- Dollar store champagne coupes with removable bases
Step 1:
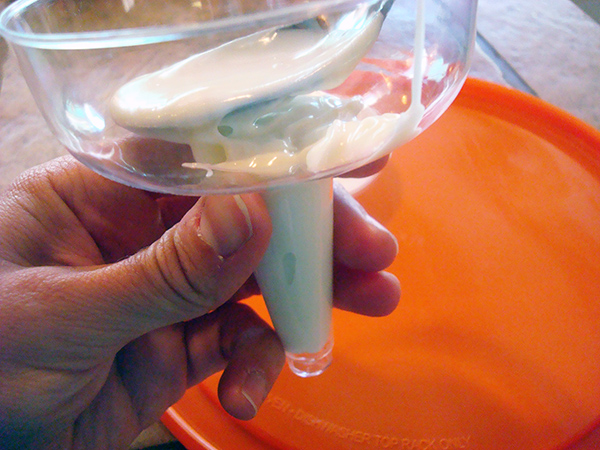
Start by making the cups. Melt the white chocolate morsels in the top of a double boiler.
Step 2:
Separate the removable bases from the cups of your champagne coupes. Start with four of them, and if you still have a good amount of the mixture when you’ve filled all of them, you can use the other two coupes (this will depend on how thickly you apply the candy).
Step 3:
Fill each hollow stem with your melted white chocolate mixture. Now, use a pastry brush or spoon to brush the sides and “bowls” of the cups (author’s note: I started with a spoon for filling the stem, and then graduated to a pastry brush to apply chocolate to the sides of the cup). Set the tops back on the bases, and place in the refrigerator for about 15 minutes, or until set.
Step 4:
Once your 10 minutes are up, remove from the refrigerator and give them a generous second coat, putting emphasis on the sides of the cup. Place back in the refrigerator on the bases until set.
Step 5:
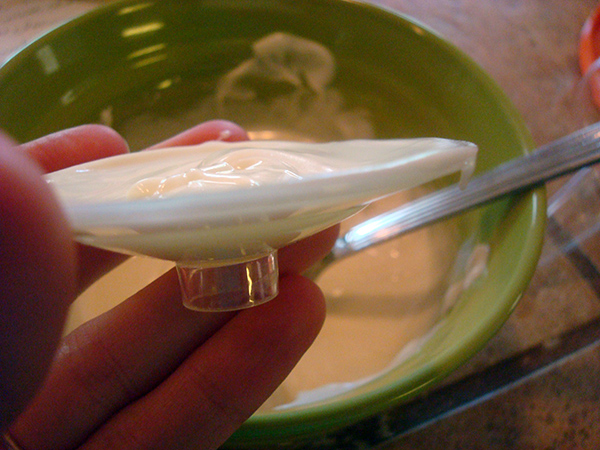
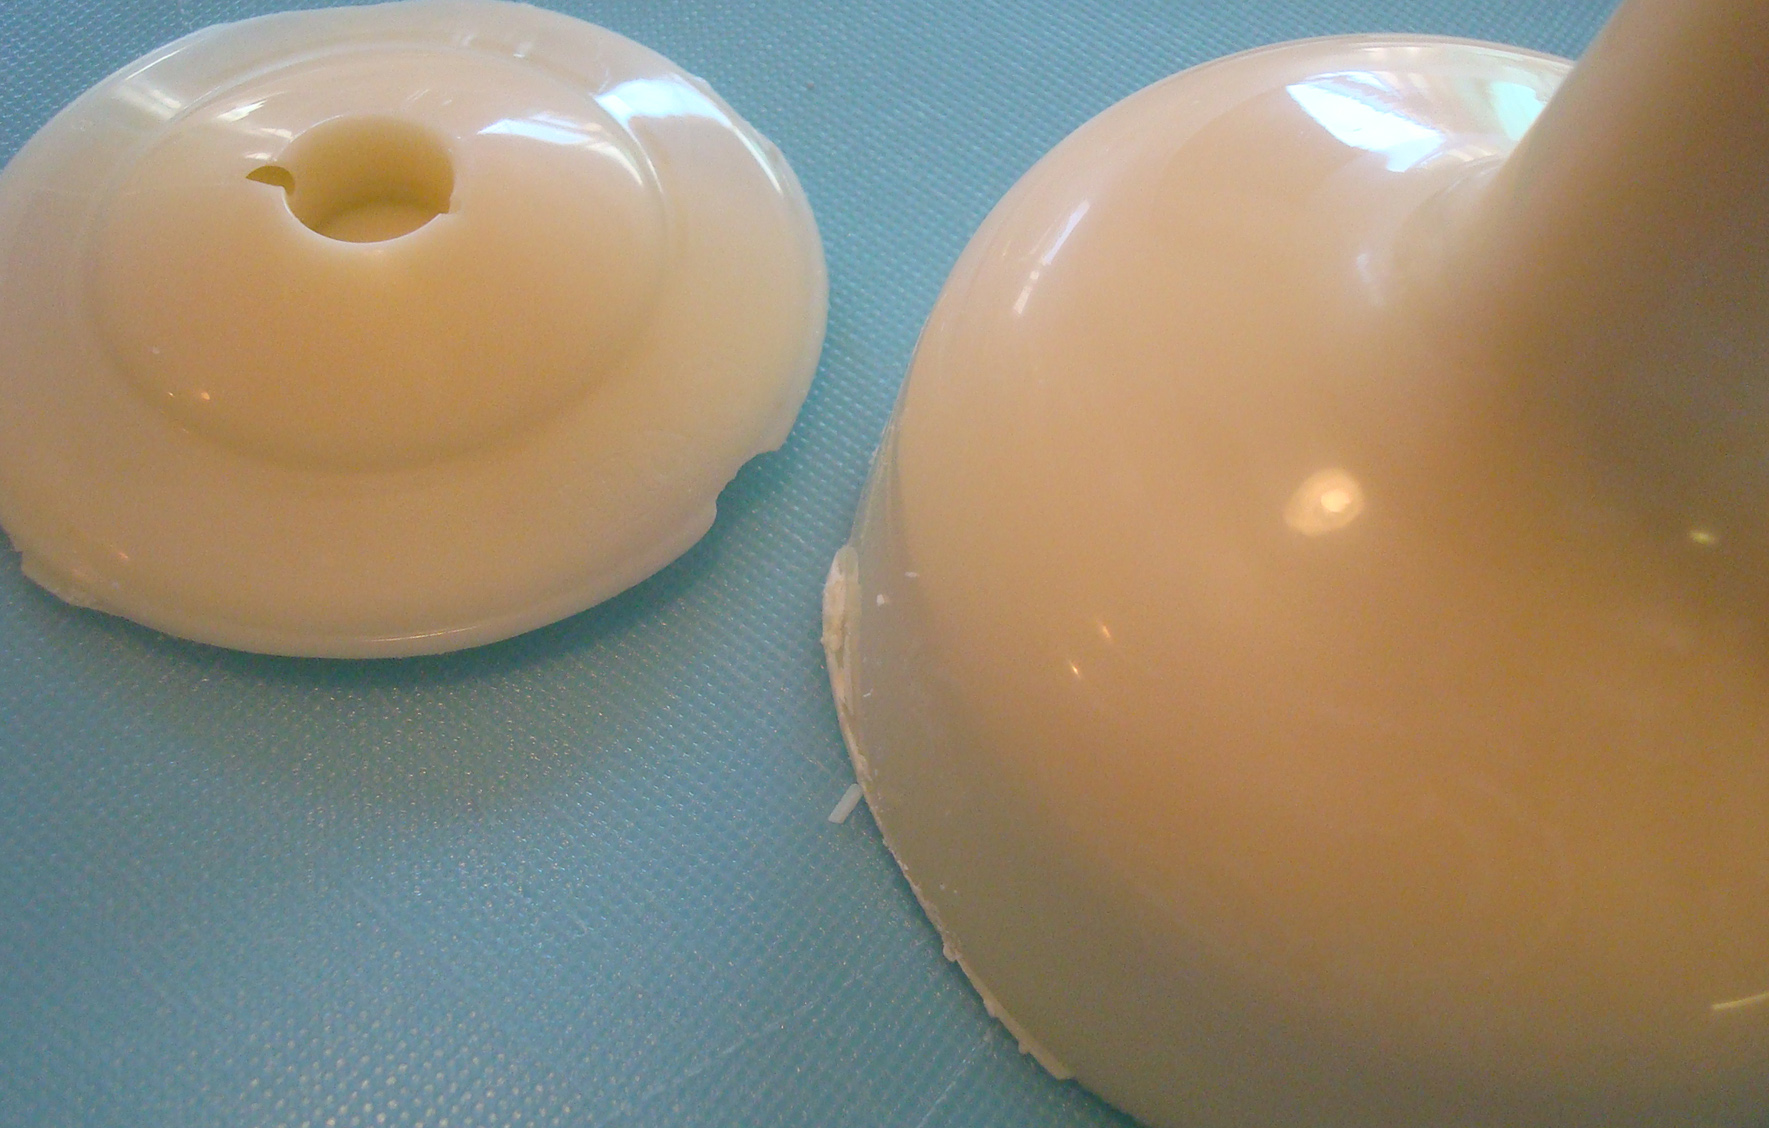
Remove the tops from the bases; the chocolate should be set to the point where you can set the coupes on their sides while you proceed. Grab those bases, and invert them.
Fill each of the bases with most of the remaining melted mixture, leveling the top. Place them with the coupes in the refrigerator. You should have a little white chocolate left — keep it on hand.
Step 6:
Once everything is set (that is to say, the chocolate is completely hard and firm), remove from the refrigerator (to keep things cool, remove the coupes and bases one at a time). Gently, using a sharp knife, ease the edges of the plastic from the chocolate. The pieces should come out without too much trouble.
If the plastic cracks or breaks, that’s ok — you only spent a dollar on these! If there is some breakage on your candy cups, don’t panic. You can place the cracked bit in place, and press it together using the remaining white chocolate mixture as “glue.”
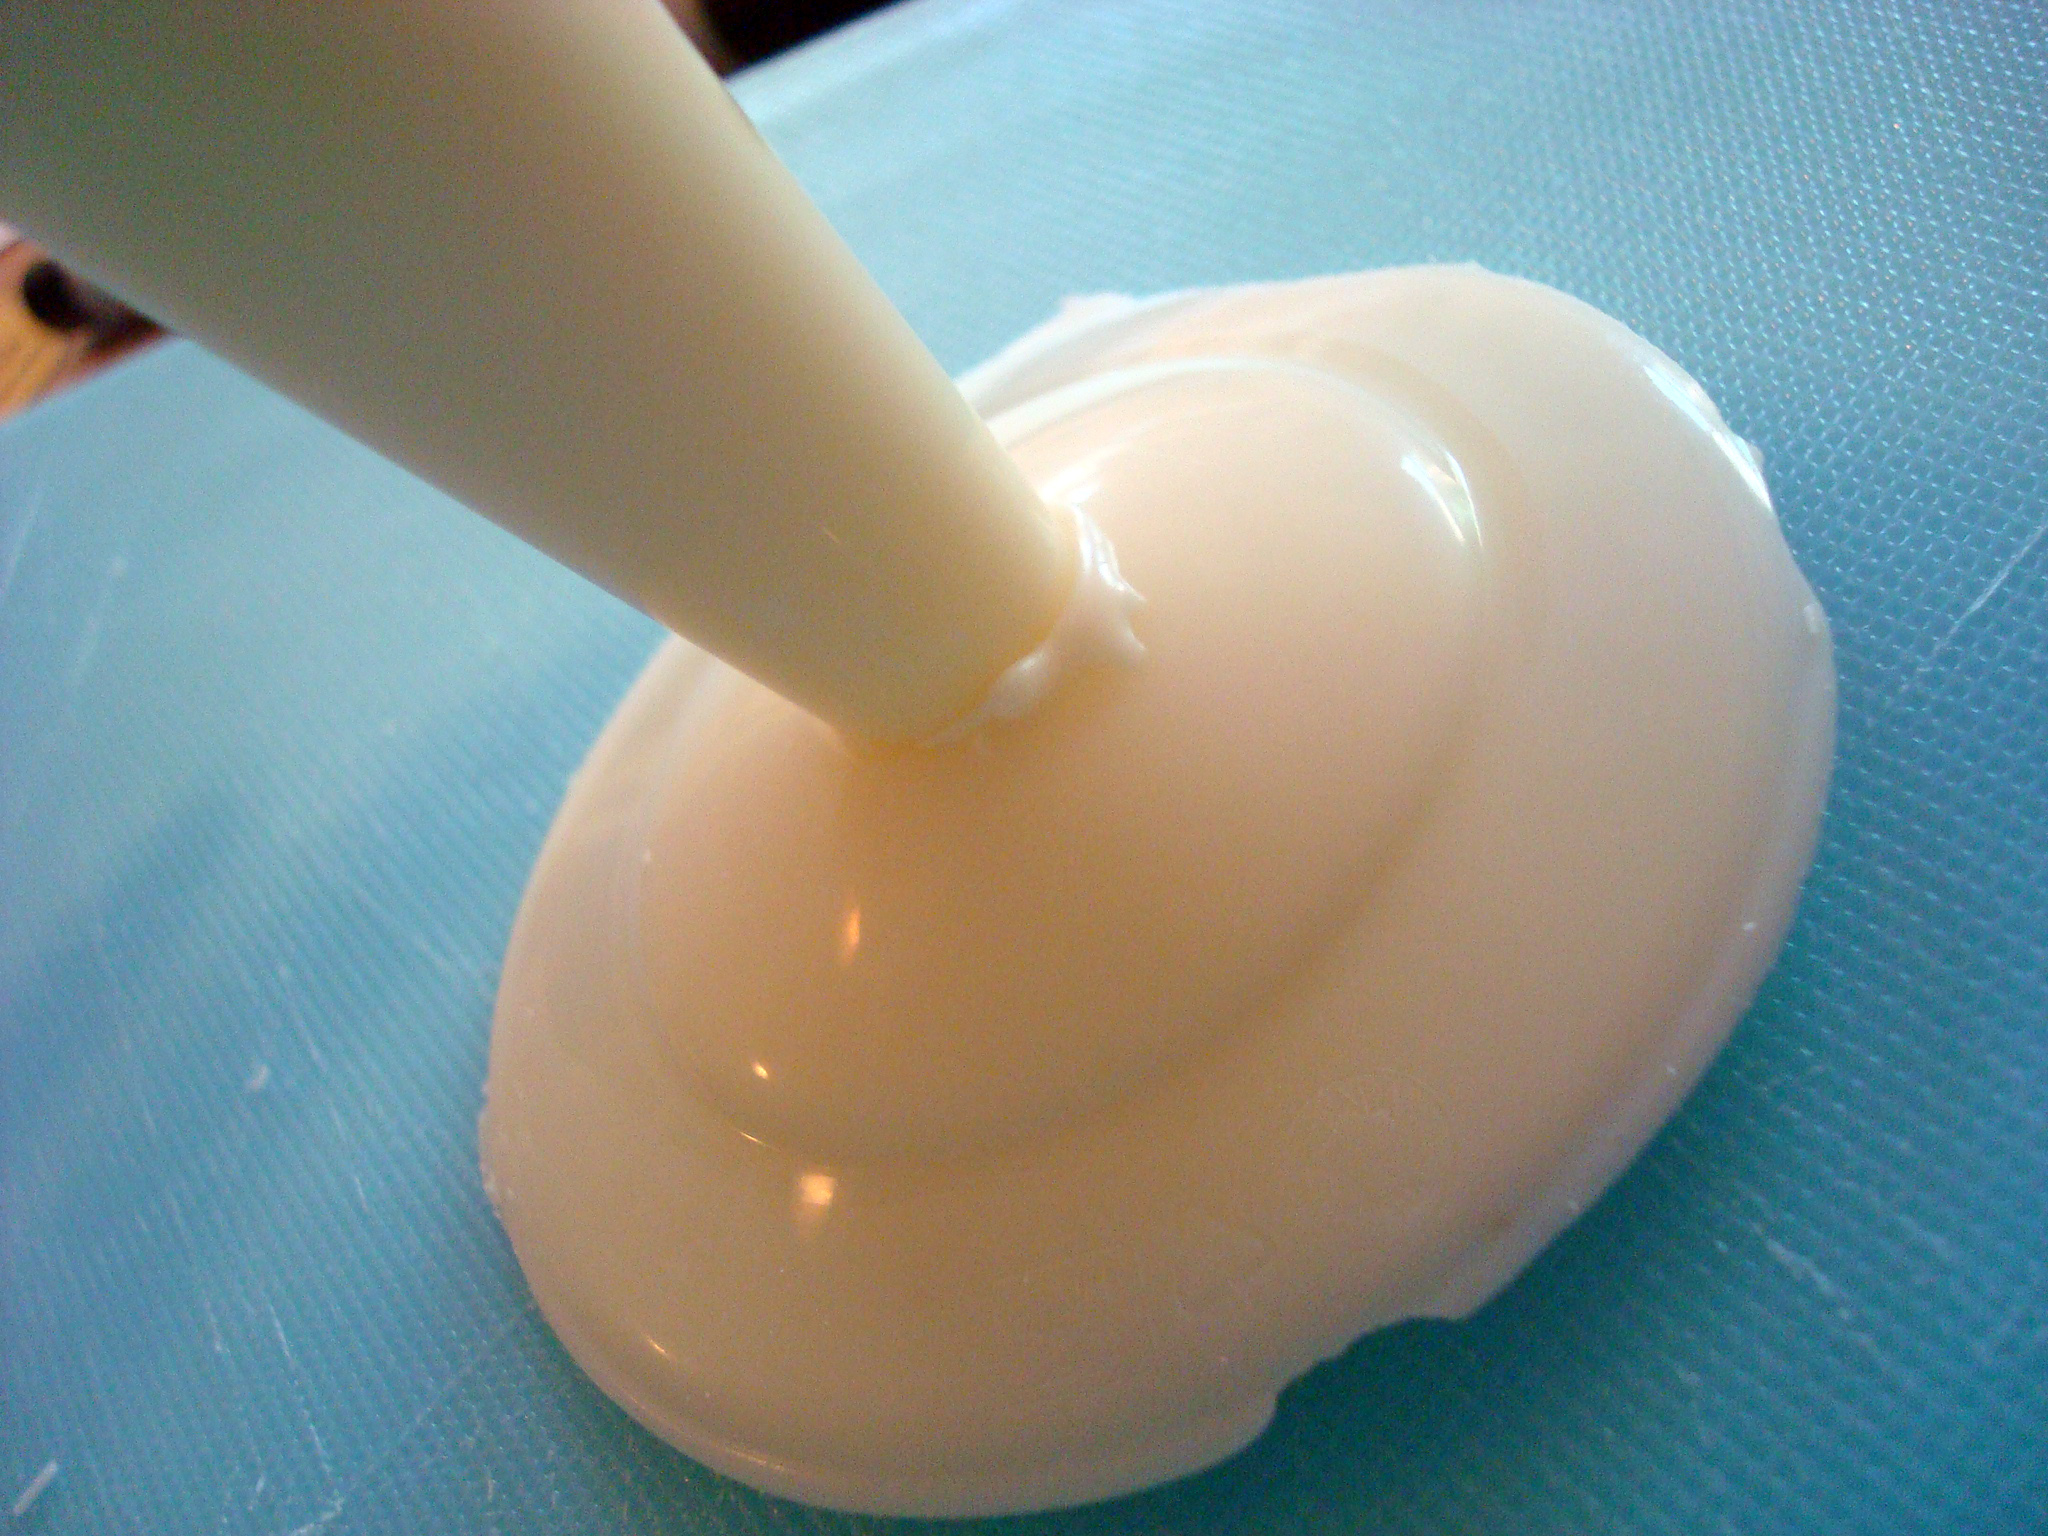
Step 7:
Adhere the bases and cups using the remaining white chocolate as glue. Let them set again in the refrigerator for about 20 minutes before filling with the dessert of your choice. If not using immediately, let them rest in the refrigerator until ready to serve your dessert so that any ambient heat doesn’t make the base and top separate.
Recipe notes:
- These cups can be made in several days in advance. Store in the refrigerator until you’re ready to use.
- This recipe can be made with semi-sweet chocolate morsels or candy melts, as well.
- Fill the cups with your dessert of choice only directly before serving, especially if the item you’re serving is at all moist: this can make the cups melty after a while.
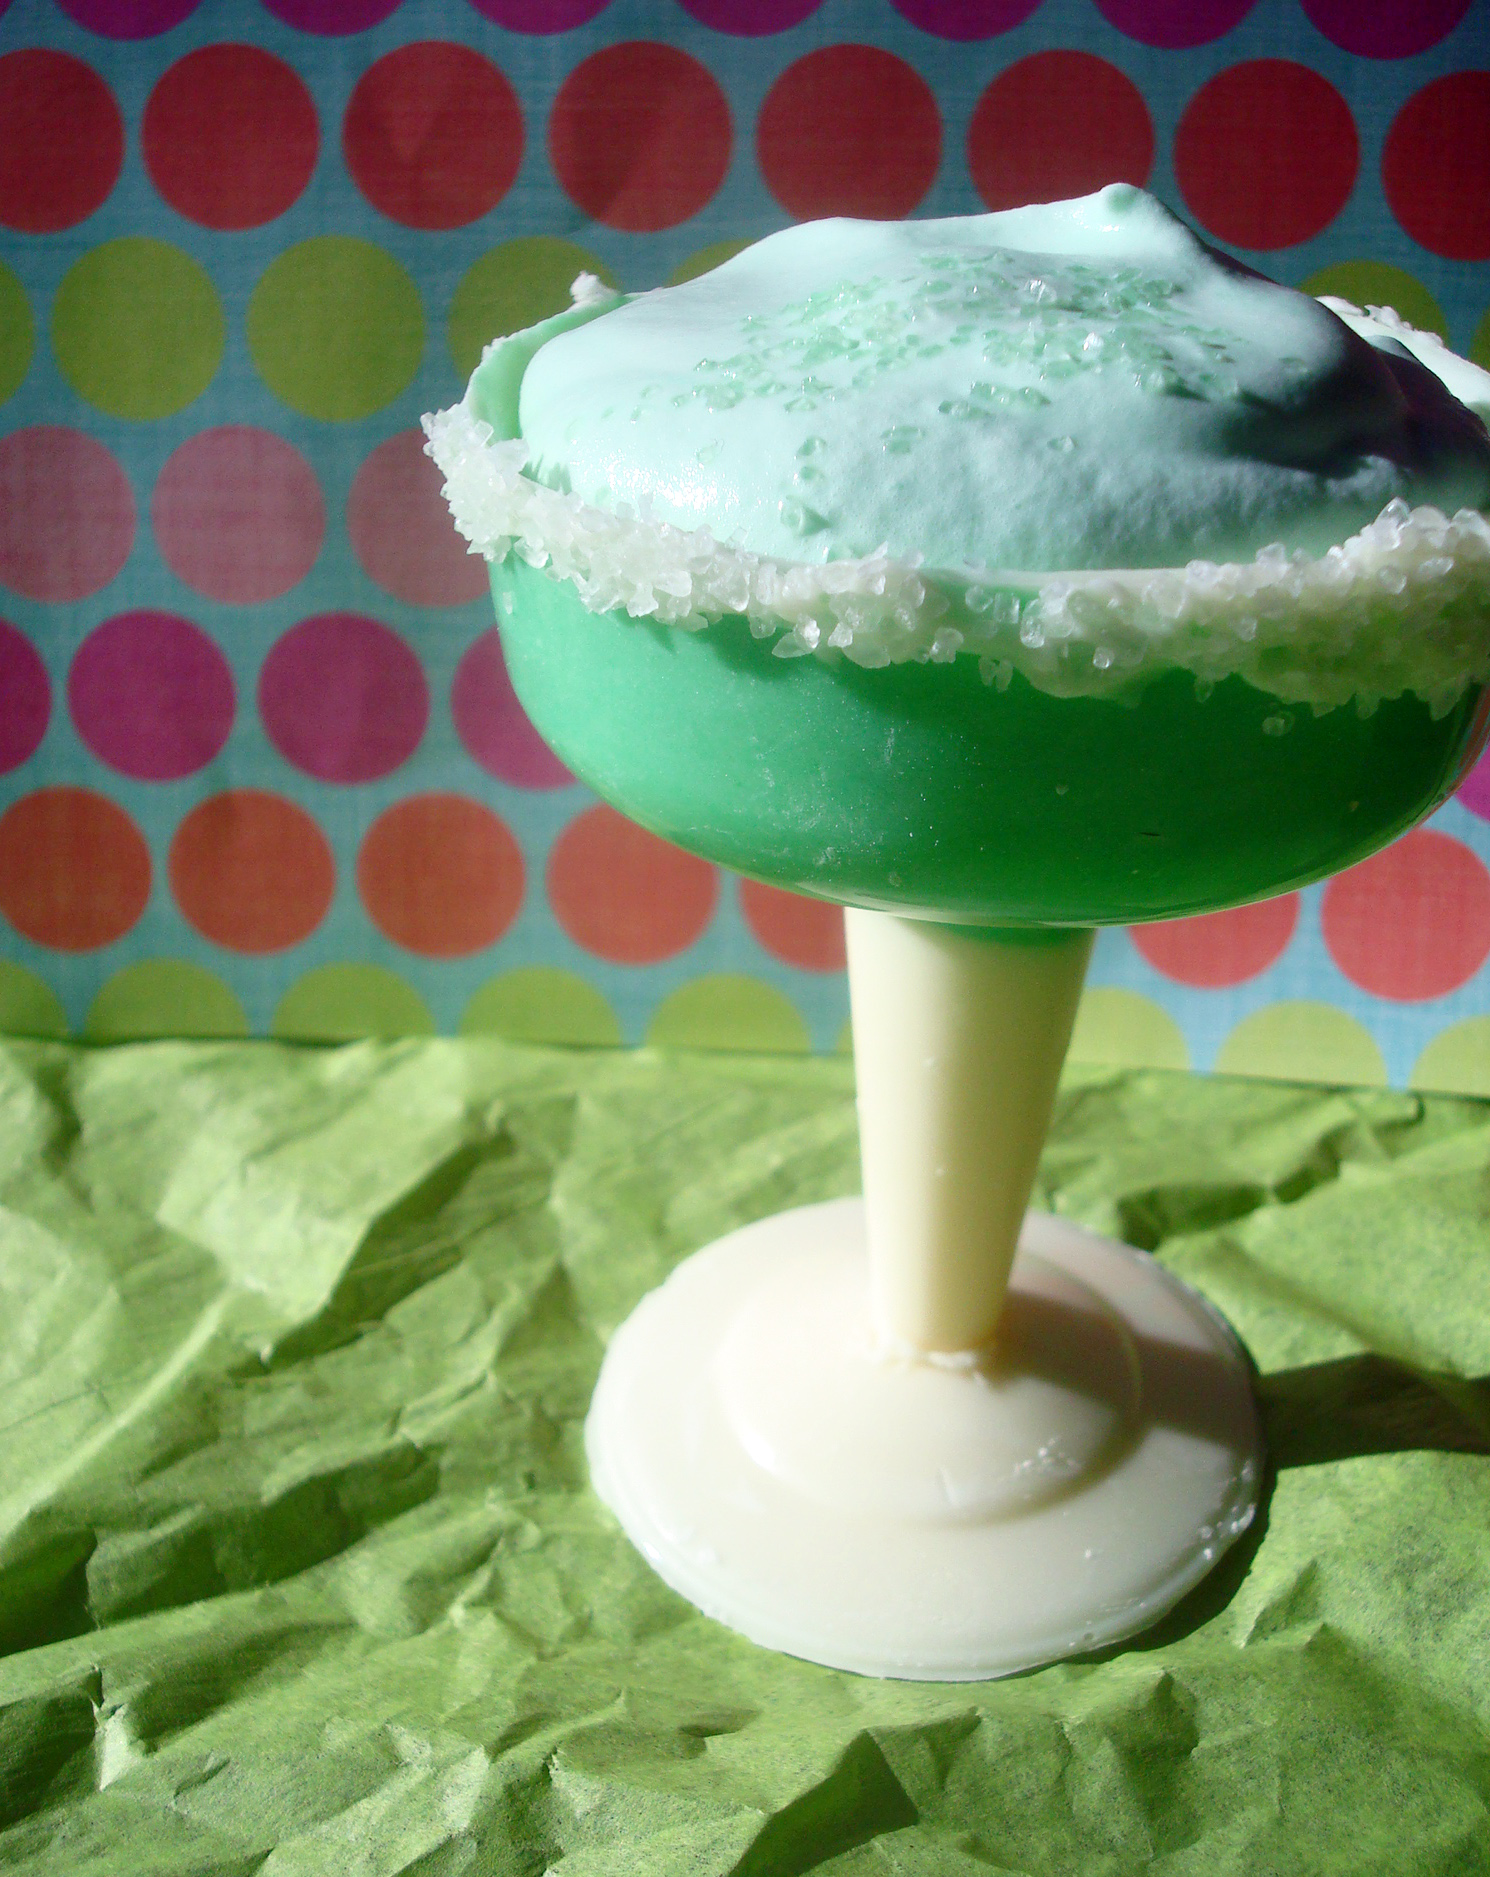
- You can add a color to all or part of the white chocolate mixture for colored dessert cups, which opens up a world of decorating ideas, such as these “margarita” dessert cups:
Have you ever eaten dessert out of an edible bowl or cup?
Make decadent chocolate candy at home!
Master key techniques, including melting, tempering, dipping, enrobing & molding to make your favorite sweets. Sign Me Up! »
Share tips, start a discussion or ask one of our experts or other students a question.
No Responses to “Our Cups Runneth Over: How to Make Chocolate Dessert Cups”