
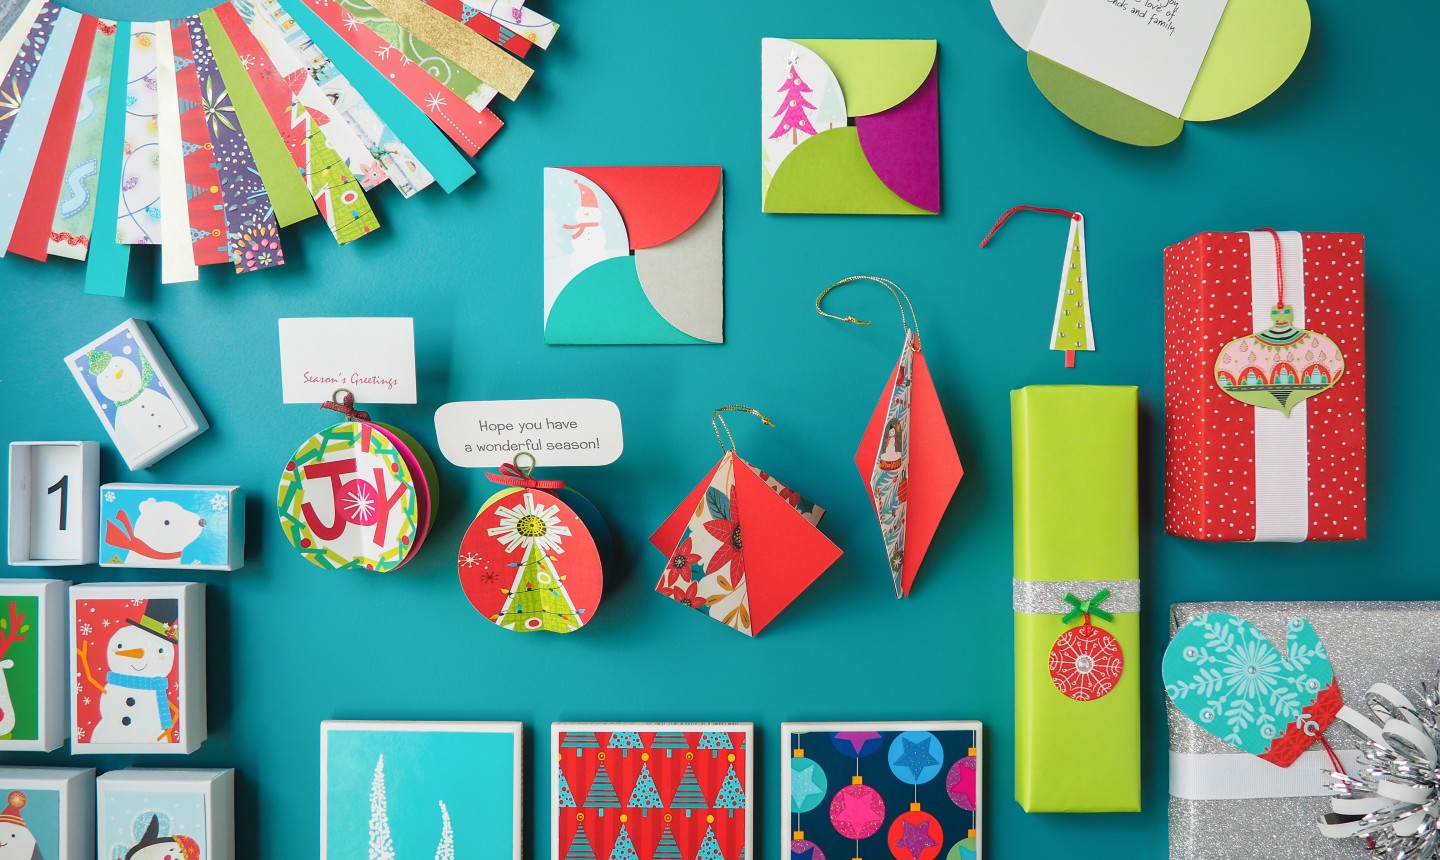
Receiving holiday cards is one of the best parts of the season. But let’s be real: you can only hang a certain amount on your refrigerator before you run out of magnets. Instead of tucking them away in storage (where they’ll never be seen) or throwing them away (even worse!), why not upcycle them instead? Here are a few fun ways to breathe new life into those beloved holiday cards that arrive in your mailbox.
1. Ornaments

Grab the cards with pretty printed patterns and show them off on the tree. Pair them with matching card stock to really make ’em pop.
What You Need
Use a template (this can be as simple as a diamond you draw on a scrap piece of paper) to cut out the front of two Christmas cards, a piece of matching card stock and a piece of plain card stock. Tape the Christmas card cut-outs on either side of the white card stock. Cut two very slender slits halfway down the center of the Christmas cards and the colored card stock. Use the slits to slot the two pieces together. Add a hole and string, then hang it on your tree! (You can also whip up a bunch and string them together for a DIY garland.)
Good to Know: You want to tape white card stock between your card cut-out so the ornament is more sturdy. Without that extra support, it might be a bit flimsy.
2. Place Cards

Welcome your guests to Christmas dinner with festive place cards that truly can’t get any cuter.
What You Need
Cut around the greeting inside your Christmas card and set it aside. Then, use a circle punch to cut out a combination of Christmas cards and card stock (5 total) and fold them in half. Wrap floral wire around a pencil twice and twist the ends together to make a little looped holder. Use double sided tape to stick two halves of two circles together. Keep taping the halves together to make a 3D, accordion-like circle. Before you add the last piece, insert the stem of your wire loop to the inside center. Cut ⅛” off the bottom of the place card so it sits flat on the table, and insert the cut-out greeting into the wire holder.
3. Coffee Coasters

These little coasters are an easy way to add holiday cheer around the house. Bonus: they make great gifts for the caffeine addict (or Christmas lover!) in your life.
What You Need
Remove any blemishes on the ceramic tiles with sand paper or nail polish remover. Once they’re clean and dry, cut out your card fronts — they should fit inside the tiles with a ¼” border. Brush Mod Podge on the tiles, then press the card into place. Brush more Mod Podge on top to create a waterproof seal. Add self-adhesive felt pads to the bottom and you’re ready for a warm cup of cocoa.
4. Gift Tags
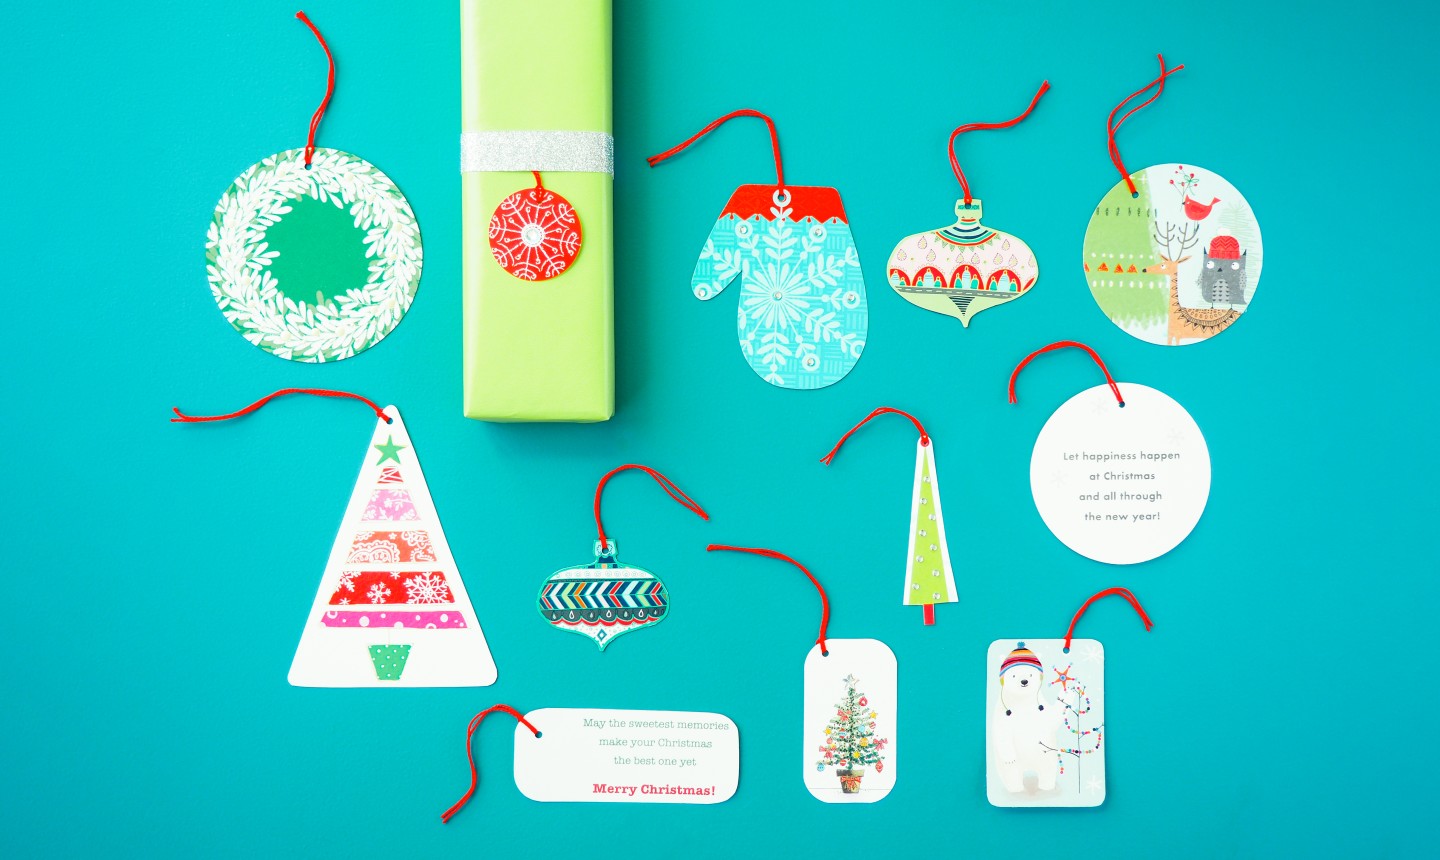
Here’s the thing: a particularly cute card shouldn’t just be gifted once. So why not cut around the image — or punch out a piece of the pattern — and use it as a gift tag?
What You Need
You have total freedom with this simple upcycle. Cut around a focal image in your card, use a fun-shaped punch (like a mitten or a star) or feature the interior message of the card with a circle punch. Once you’ve got your shape, add a hole punch and thread it with ribbon to tie it to your present.
5. Advent Calendar

Instead of buying an advent calendar, make your own and stash fun surprises that’ll keep the whole fam on their toes.
What You Need
Cut your cards to fit the top of each box and glue or tape them in place. Label the inside of each box with a number and arrange them into a pattern. (We made a tree design, but a simple square works too.) Add double sided removable foam tape squares to the back of each box and secure them to a wall. Fill each box with any little treats you can think of — small gifts, candies or even holiday-centric jokes!
6. Gift Card Holders
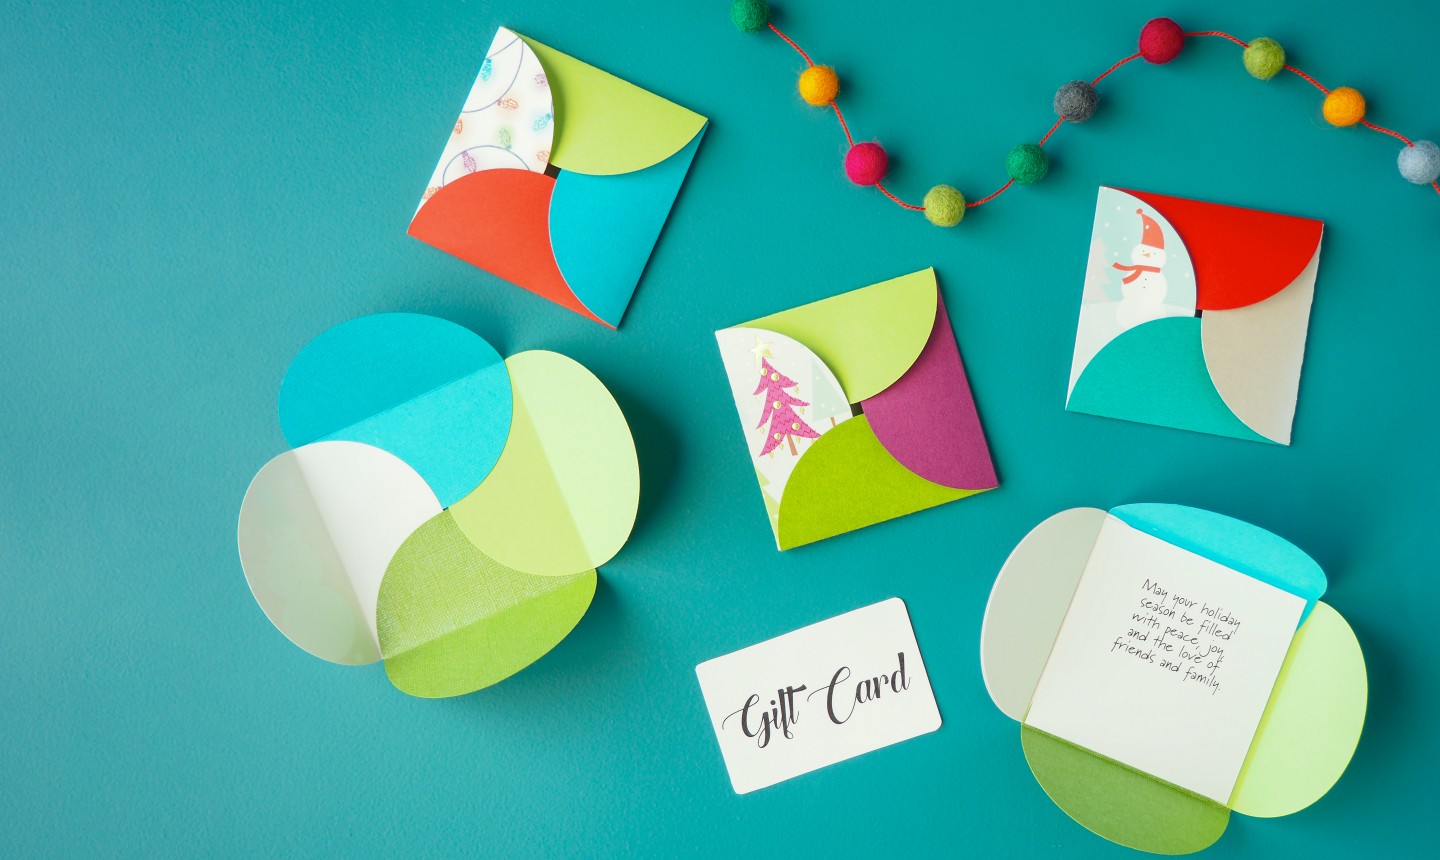
There’s nothing wrong with a good ole’ gift card, and sliding it into a handmade holder shows the recipient you really care.
What You Need
Cut four circles from any combination of cards and card stock. Fold each in half and crease. Just like when you’re sealing a cardboard box, place your folded circles so they overlap and the creases form a square (as shown above). Glue or tape each edge to secure the paper in place. Cut a greeting from the inside of a card and glue or tape it to the inside square. Add a gift card, then fold the flaps in on themselves to close.
7. Strippy Wreath

It’s not a holiday without a festive wreath! Think beyond store-bought versions and make a colorful sunburst-y design to hang on your wall.
What You Need
Cut your Christmas cards and card stock into ¾”-wide strips of various lengths. Remove the outer hoop of both embroider hoops and set them aside. Place the 8″ ring inside the 12″ one. Add a dab of hot glue on either end of a Popsicle stick and press it on the edge of both rings, securing them to each other. Do this a few times around the hoops until they’re held together.
Now add small dabs of glue only to the outer ring and start piecing your strips of paper, slightly overlapping them so there are no gaps. (Use the inner ring as a guide so your pieces are evenly placed.) Let the wreath dry, then gently pop the Popsicle sticks off the back and remove the inner hoop.
Photos by Kimberly Stoney
What great ideas!
Great ideas!
These look like so much fun
I can’t wait to try these