
Color blocking is a great trend with staying power, one that is perfect for creating flattering shapes and adding a touch of brightness to any garment. It’s easy to adapt an existing pattern to use multiple fabrics. If you have a tried and true pattern, you can use that as a basis to create a color-blocked garment that you can practically sew in your sleep. Okay, so maybe it’s not quite that easy, but…
Here are a few helpful tips for successfully creating your own color-blocking pattern pieces.
These are the steps to adapt your existing pattern and create a completely different look. You can use these same techniques on dresses, knit tops, skirts, the options are endless.
Step 1: Time to design!
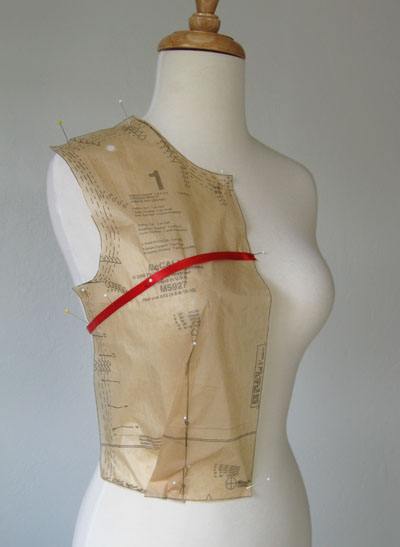
For sewing dresses, I like to work with a very simple pattern that has a basic bodice/skirt combination or princess seams. In this example, I am using a pattern that has a bodice with a waist bust dart only. If you have a dress form you can pin the pattern piece on the form and use ribbon to play around with the visual lines of your design.
Alternatively, you can put scraps of fabric over the form or even on yourself. It helps to see how the colors work together, how much of each color you want and how the proportions are looking with your design.
Sometimes I used colored pencils and play around with sketches to see how the colors look together and where to put the various shades. It is surprising how helpful that is for figuring out which color to put in which part of the design.
Step 2: Trace your pattern pieces.

At this point, you are just tracing the pattern pieces, including all markings and the grain lines. Be sure to note any pieces that are placed on the fold, and label your pattern pieces.
Step 3: Add your design lines to your traced pattern pieces.
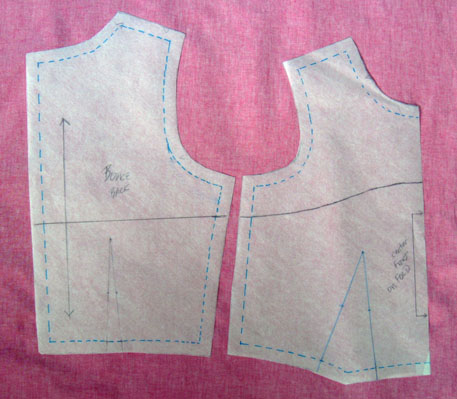
If you are going to create a color-block effect that continues from the front to the back of the garment, be sure to have your line continue unbroken at the side seam. In the above example, the upper portion of both front and back bodice will be in the same color, so the design line crosses the side seam at the exact same spot on the front and back bodice.
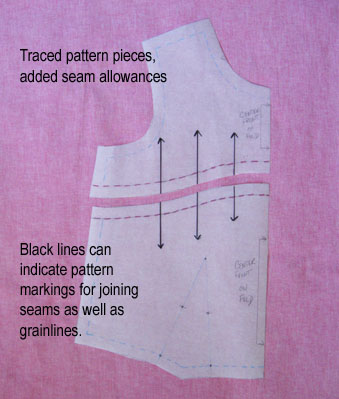
Step 4: Draw in your grain lines.
This example shows the center front bodice that will be cut on the fold — this should be on the straight of grain. But, the process would apply to the back piece. I draw lines parallel to the straight of grain line going through my design line. That way, when we trace the separate pieces, we will have both the grain lines and markings indicating where to join the pieces.
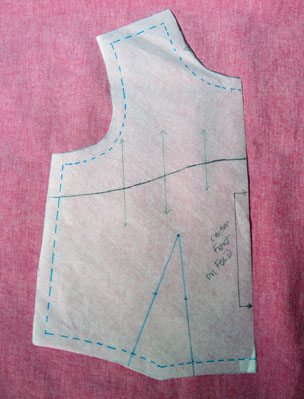
Step 5: Trace your new pattern pieces.
Trace your newly designed pattern pieces and add the seam allowance to the design line. The rest of the pattern will already have the seam allowance if your original pattern had them. If you are working from a sloper without seam allowances this whole process is actually a bit different, as you would create your pattern pieces with the grain lines, and then add the seam allowance after you have made all the pattern pieces.
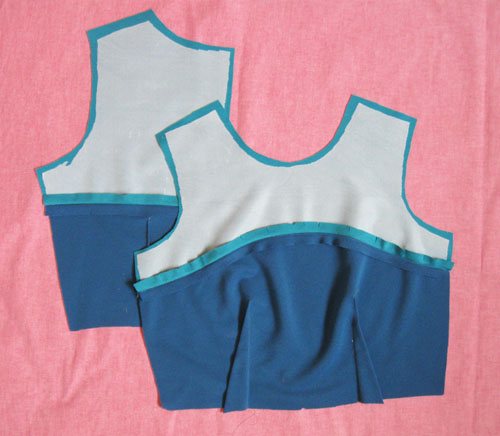
Step 6: Cut out and mark your fabric.

The spots where the grain lines cross the design line now becomes markings or notches where you can match your pattern pieces. I don’t necessarily use all of the grain lines I have marked although if the pieces are very curved it helps to have them. I generally interface the top portions of any color-blocked garment, it helps that seam to look smooth and not collapse or ripple.
Step 7: Sew your color-blocked pieces together.
As with any curved seam, sometimes a few snips are needed to get the seams to join smoothly. Once you have your newly color-blocked portions sewn together, then you can proceed with sewing up the garment as instructed.
A few other things to consider:
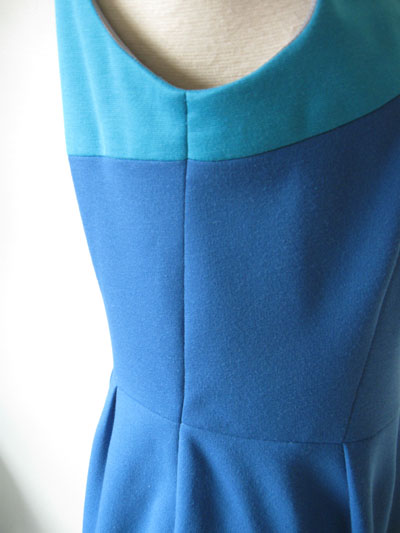
Watch your intersections! If you have created a color-block effect that crosses a seam be sure to use care when sewing so that the four pieces join perfectly. A little machine basting is always in order just to secure the seam and check before final stitching.
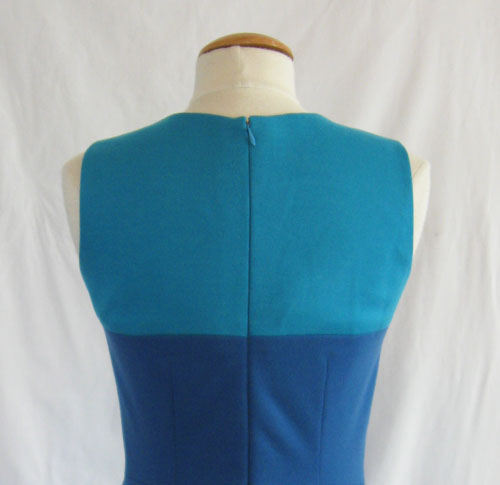
Choose a zipper that complements your design. In this case, the colors were in the same family and the zipper color is the same as the top section so the tab blends in. If any large part of the dress is a dark color like black or navy I tend to use that even if the top section is lighter. You can use strips of light fusible interfacing along the seams to prevent the zipper tape from showing through.
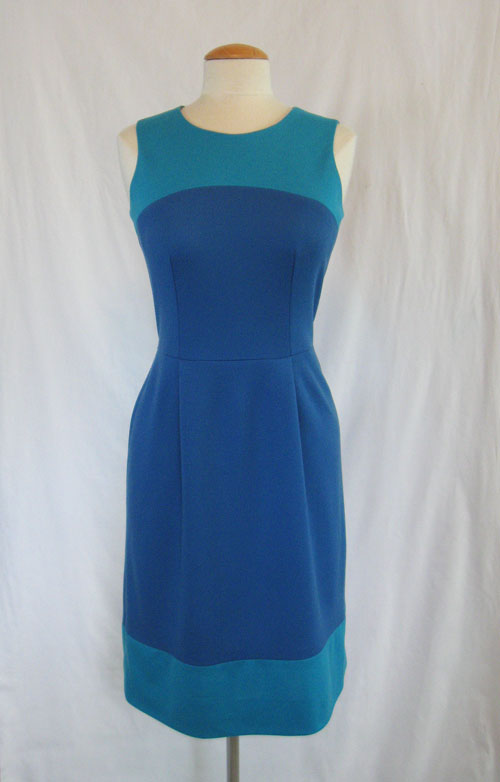
Creating a color-blocked garment is a great way to use up small pieces of fabrics. Is there some hue that brings out the color of your eyes? Try making a little black dress with a twist! And don’t forget about prints. You combine prints, solids or any combinations by using these steps to change up your pattern.
However, some patterns are perfect for color blocking, and the work is already done by the pattern company. Many patterns even provide the yardage requirements for the various fabrics.

Craftsy member team.mcgo662974 made her color-blocked dress in the Craftsy class The Couture Dress
Share tips, start a discussion or ask one of our experts or other students a question.
No Responses to “Design Your Own: How to Make Color-Blocking Patterns”