
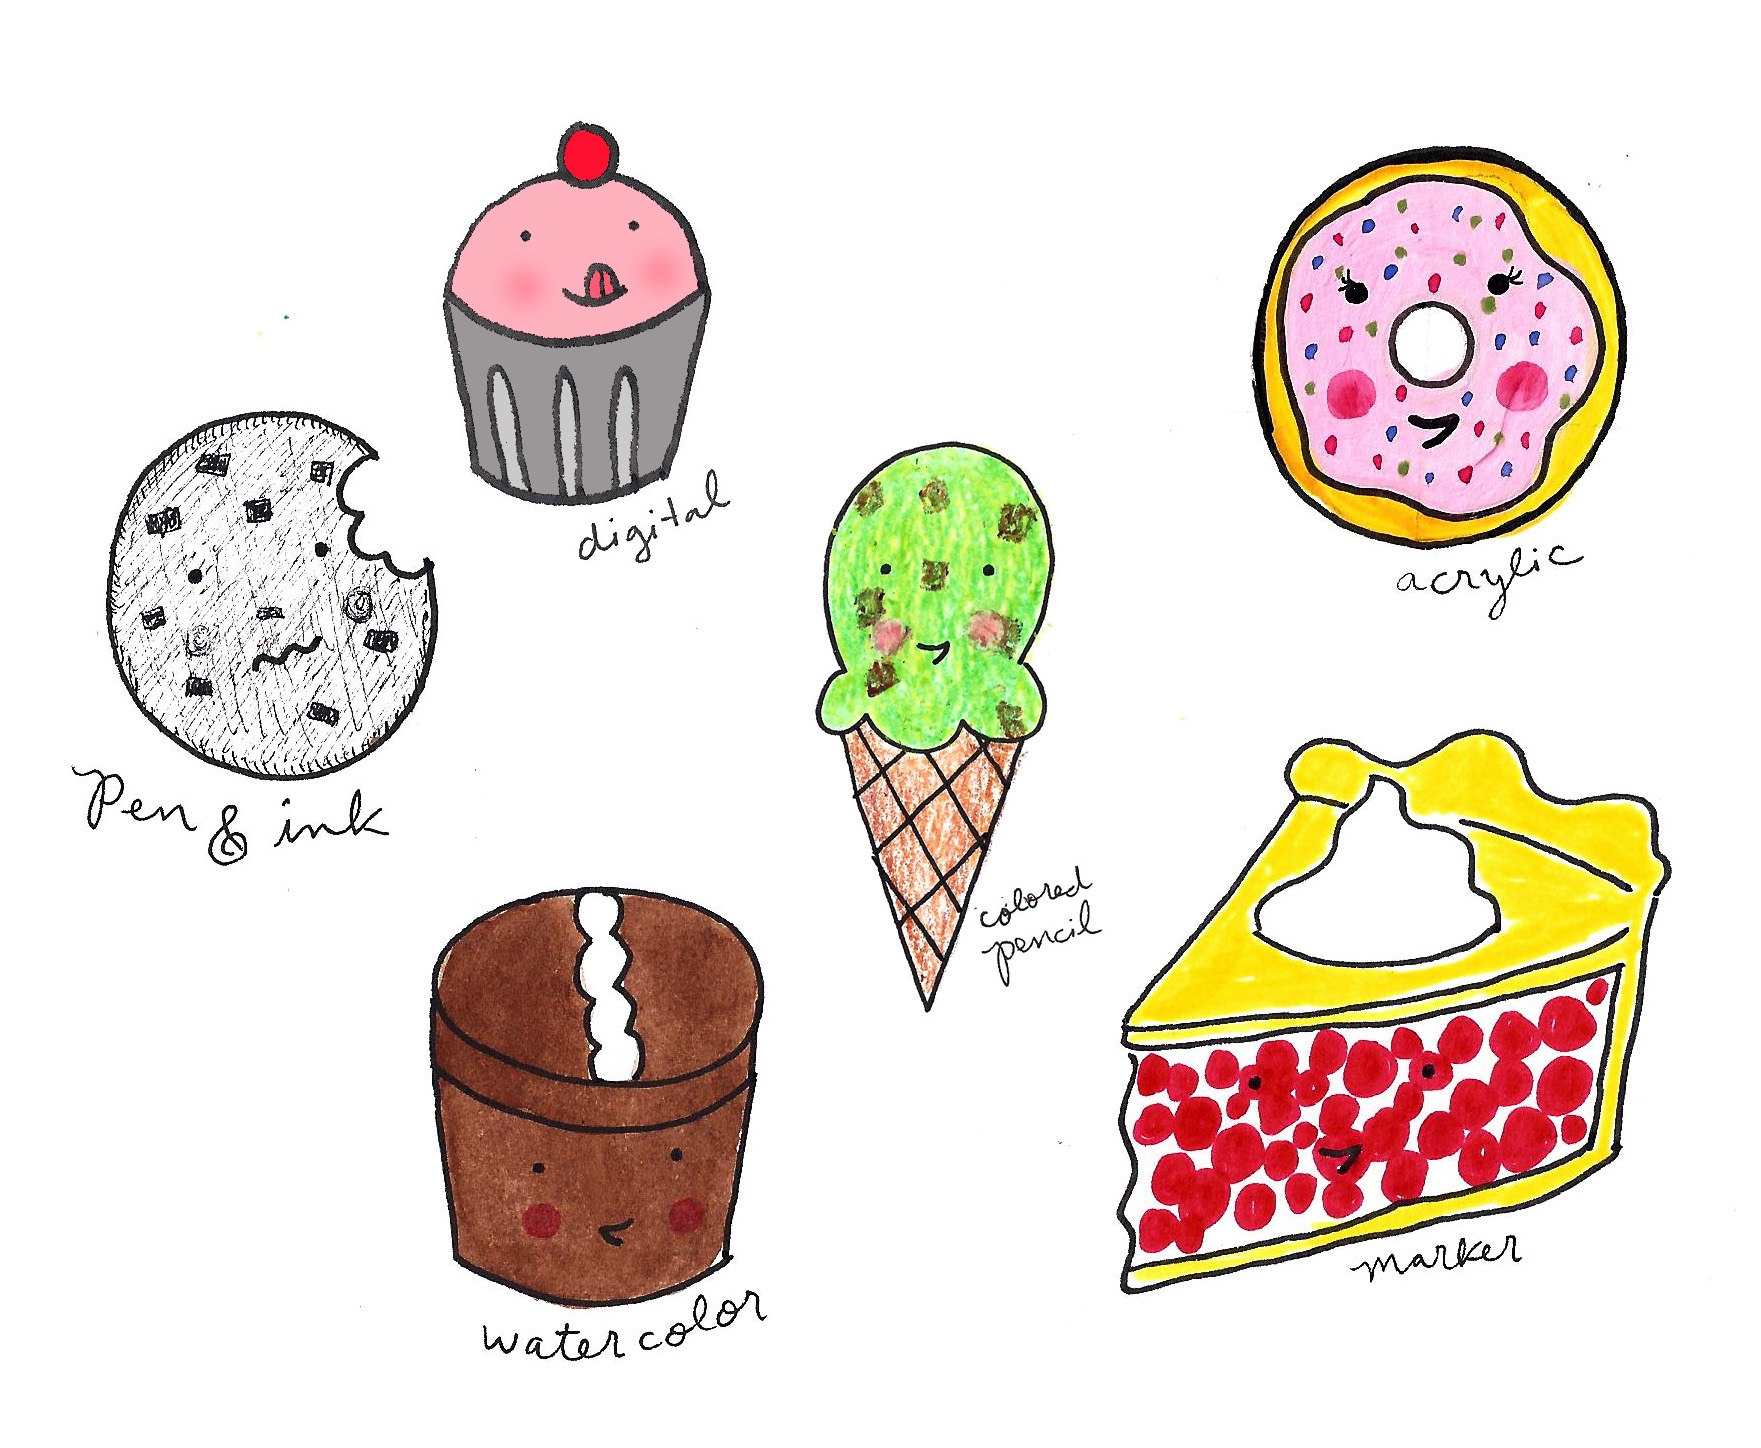
Adding color can be an easy and effective way of making your pen and ink illustrations sparkle and pop. But what medium should you use to take them from black and white to technicolor? After all, the mode in which you color your pen and ink work can have a profound effect on the tone of the finished piece.
Explore different ways to color your pen and ink illustrations.
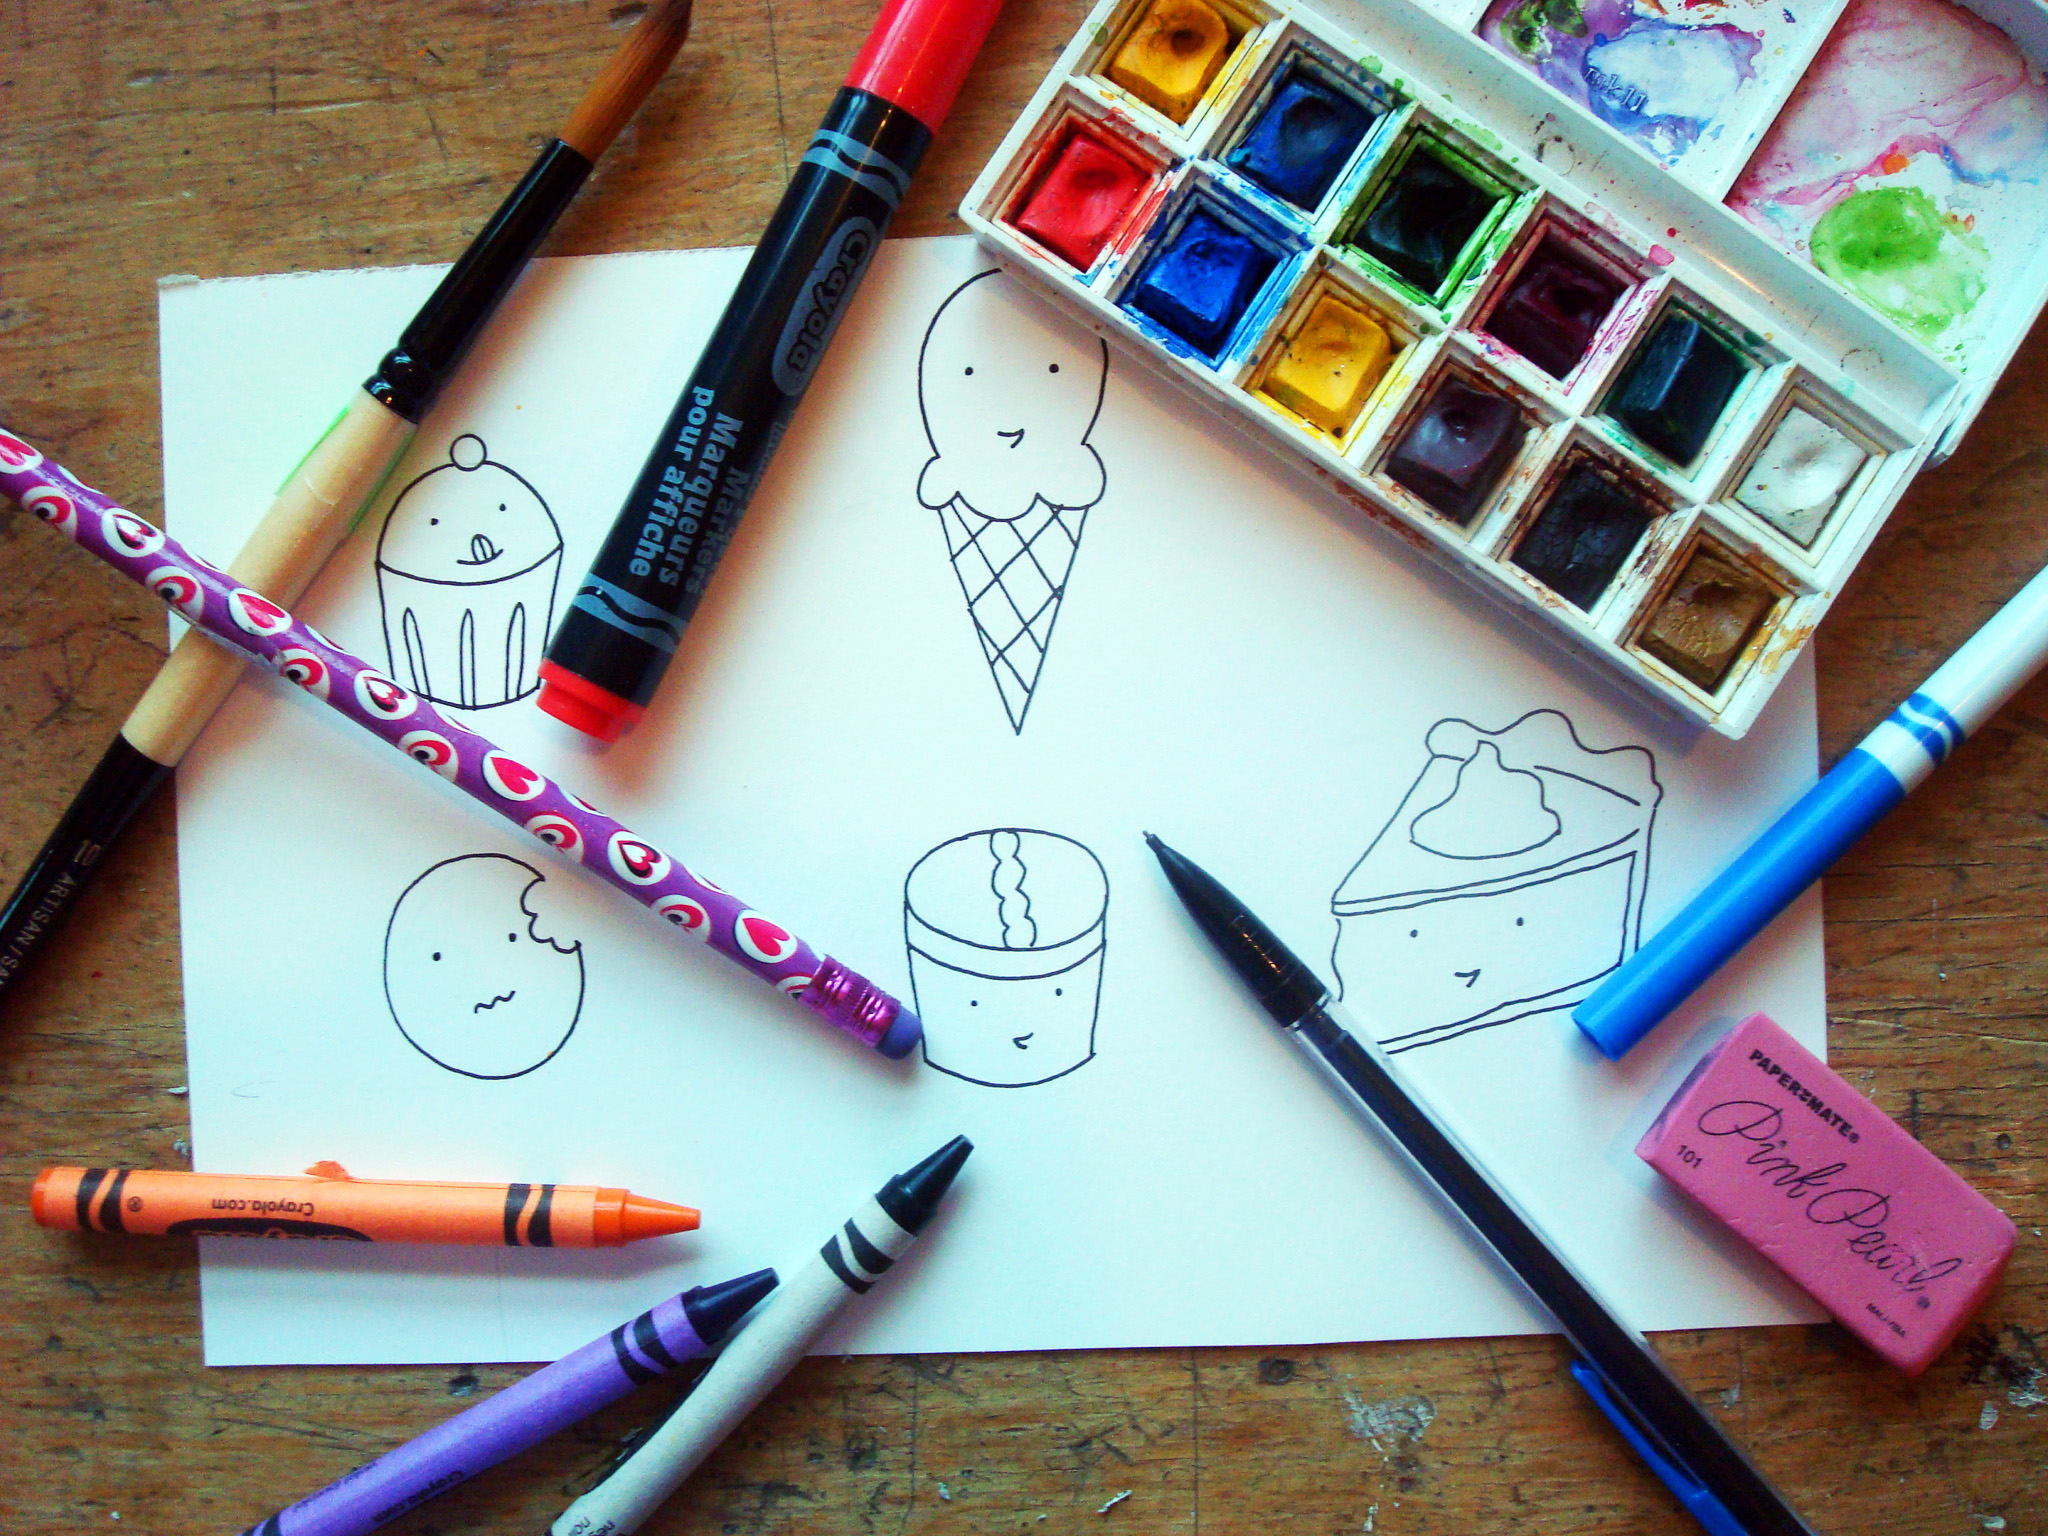
Photos and illustrations via CakeSpy
Here, we’ll explore several of the many different ways to tint your drawings. We’ll begin with a group of pen and ink illustrations that start out quite similar, then taking the drawings on different paths based on different modes of coloring, including a discussion of the pros and cons of each method.
Method #1: Digital
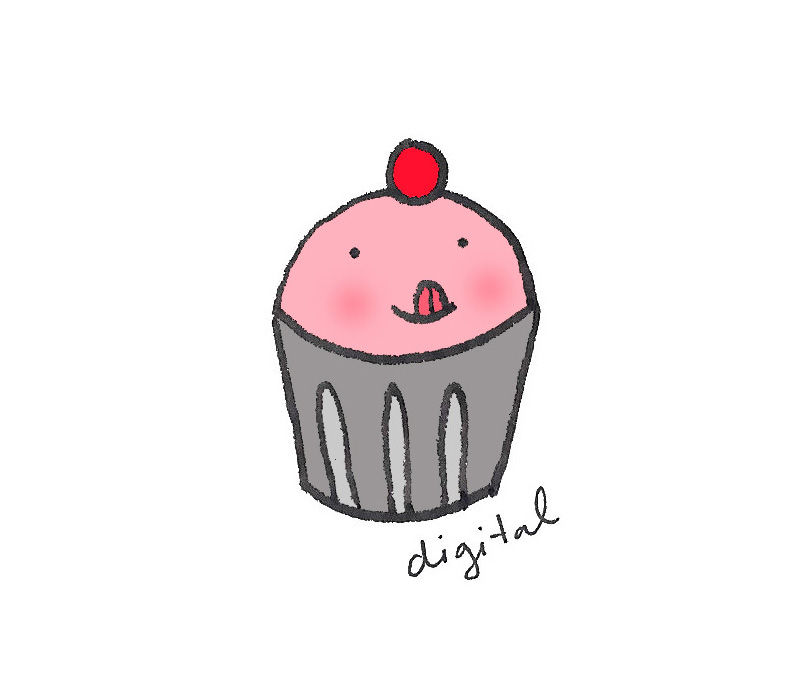
How it’s done:
Scan your pen and ink illustration, and color it digitally in an image editing program. If you want to get fancy, you can remove the white background and adjust the contrast on the drawing for strong, crisp lines. This method is most straightforward with illustrations featuring “closed” lines.
Advantages:
- Easily contained, and you can edit the color easily if you change your mind or just want to experiment.
- As long as you have your computer, you’ll always have the right supplies.
Disadvantages:
- The color can be “flat” when done in this way.
- If you prefer a tactile approach, this might not satisfy your desire to get your hands dirty.
Method #2: Pencil / Colored pencil
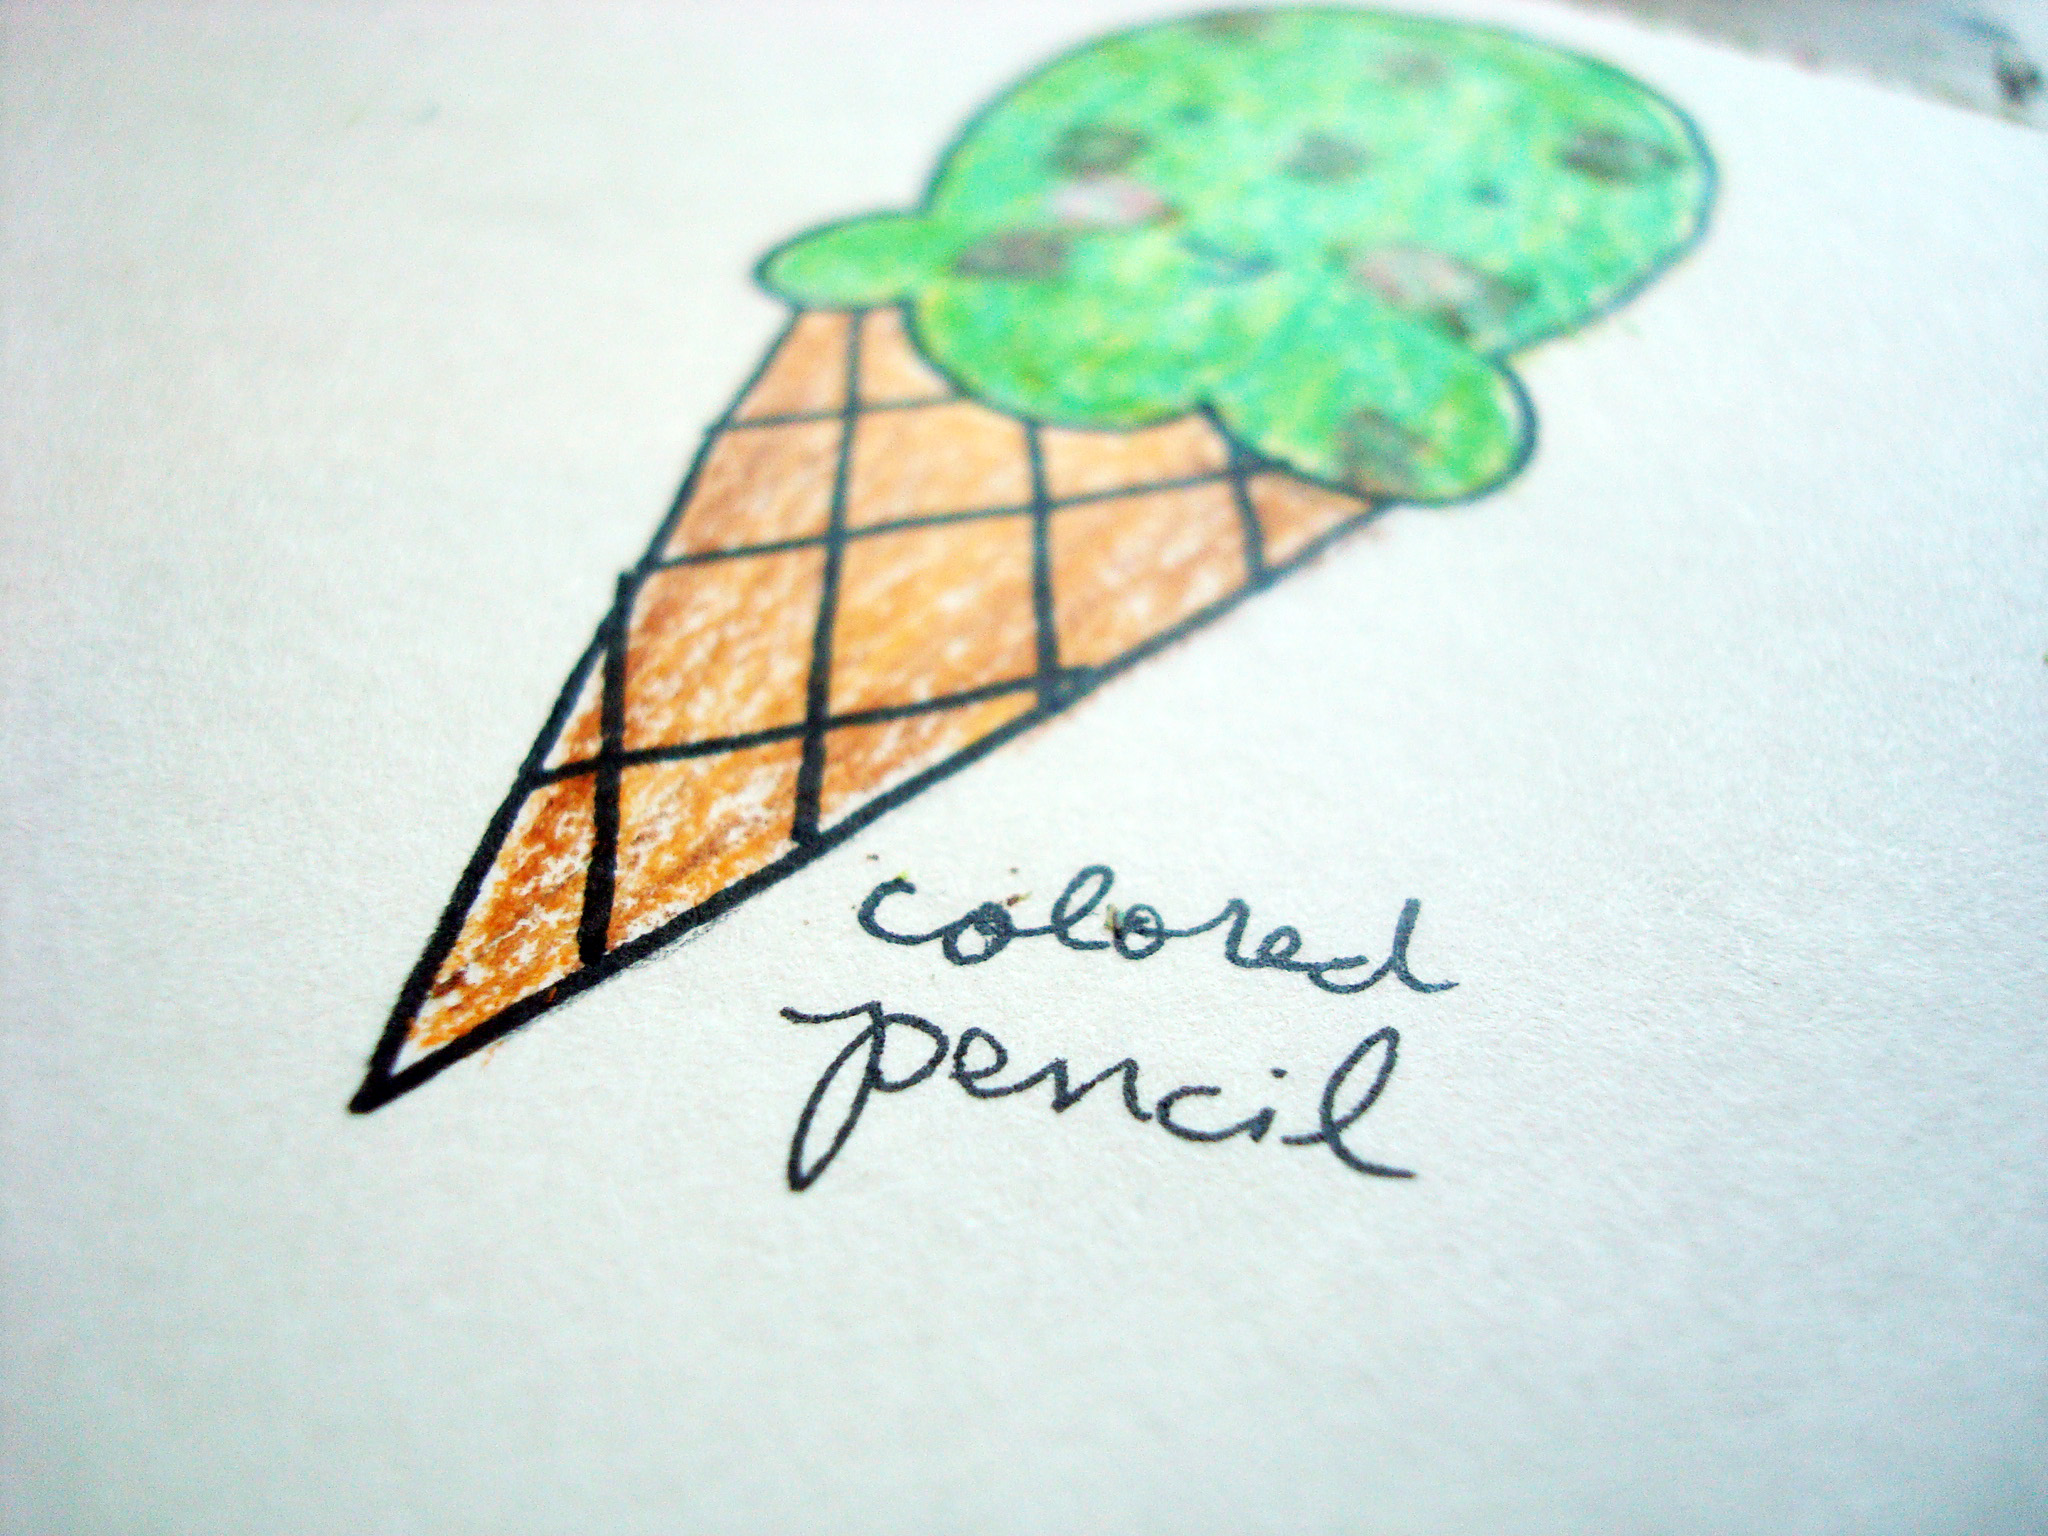
How it’s done:
Drawing with colored pencils is like coloring in a coloring book, but with a bit more care and refinement. Cross hatching, stippling or the layering of multiple colors can be used to make dimensional tones. Smooth or lightly textured papers work best for this medium.
Advantages:
- This is a wonderful way to add soft, dimensional color to your illustration.
- It’s easy to combine colors gently, making a lush, subtle color scheme.
Disadvantages:
- Some pencils are more opaque than others and can diminish the lines.
- You’ll need to avoid heavily textured papers, so that the pencil will coat the surface evenly. As you can see on the example, even a lightly textured paper can yield undesirable white spots on the drawing.
Method #3: Watercolor or liquid inks
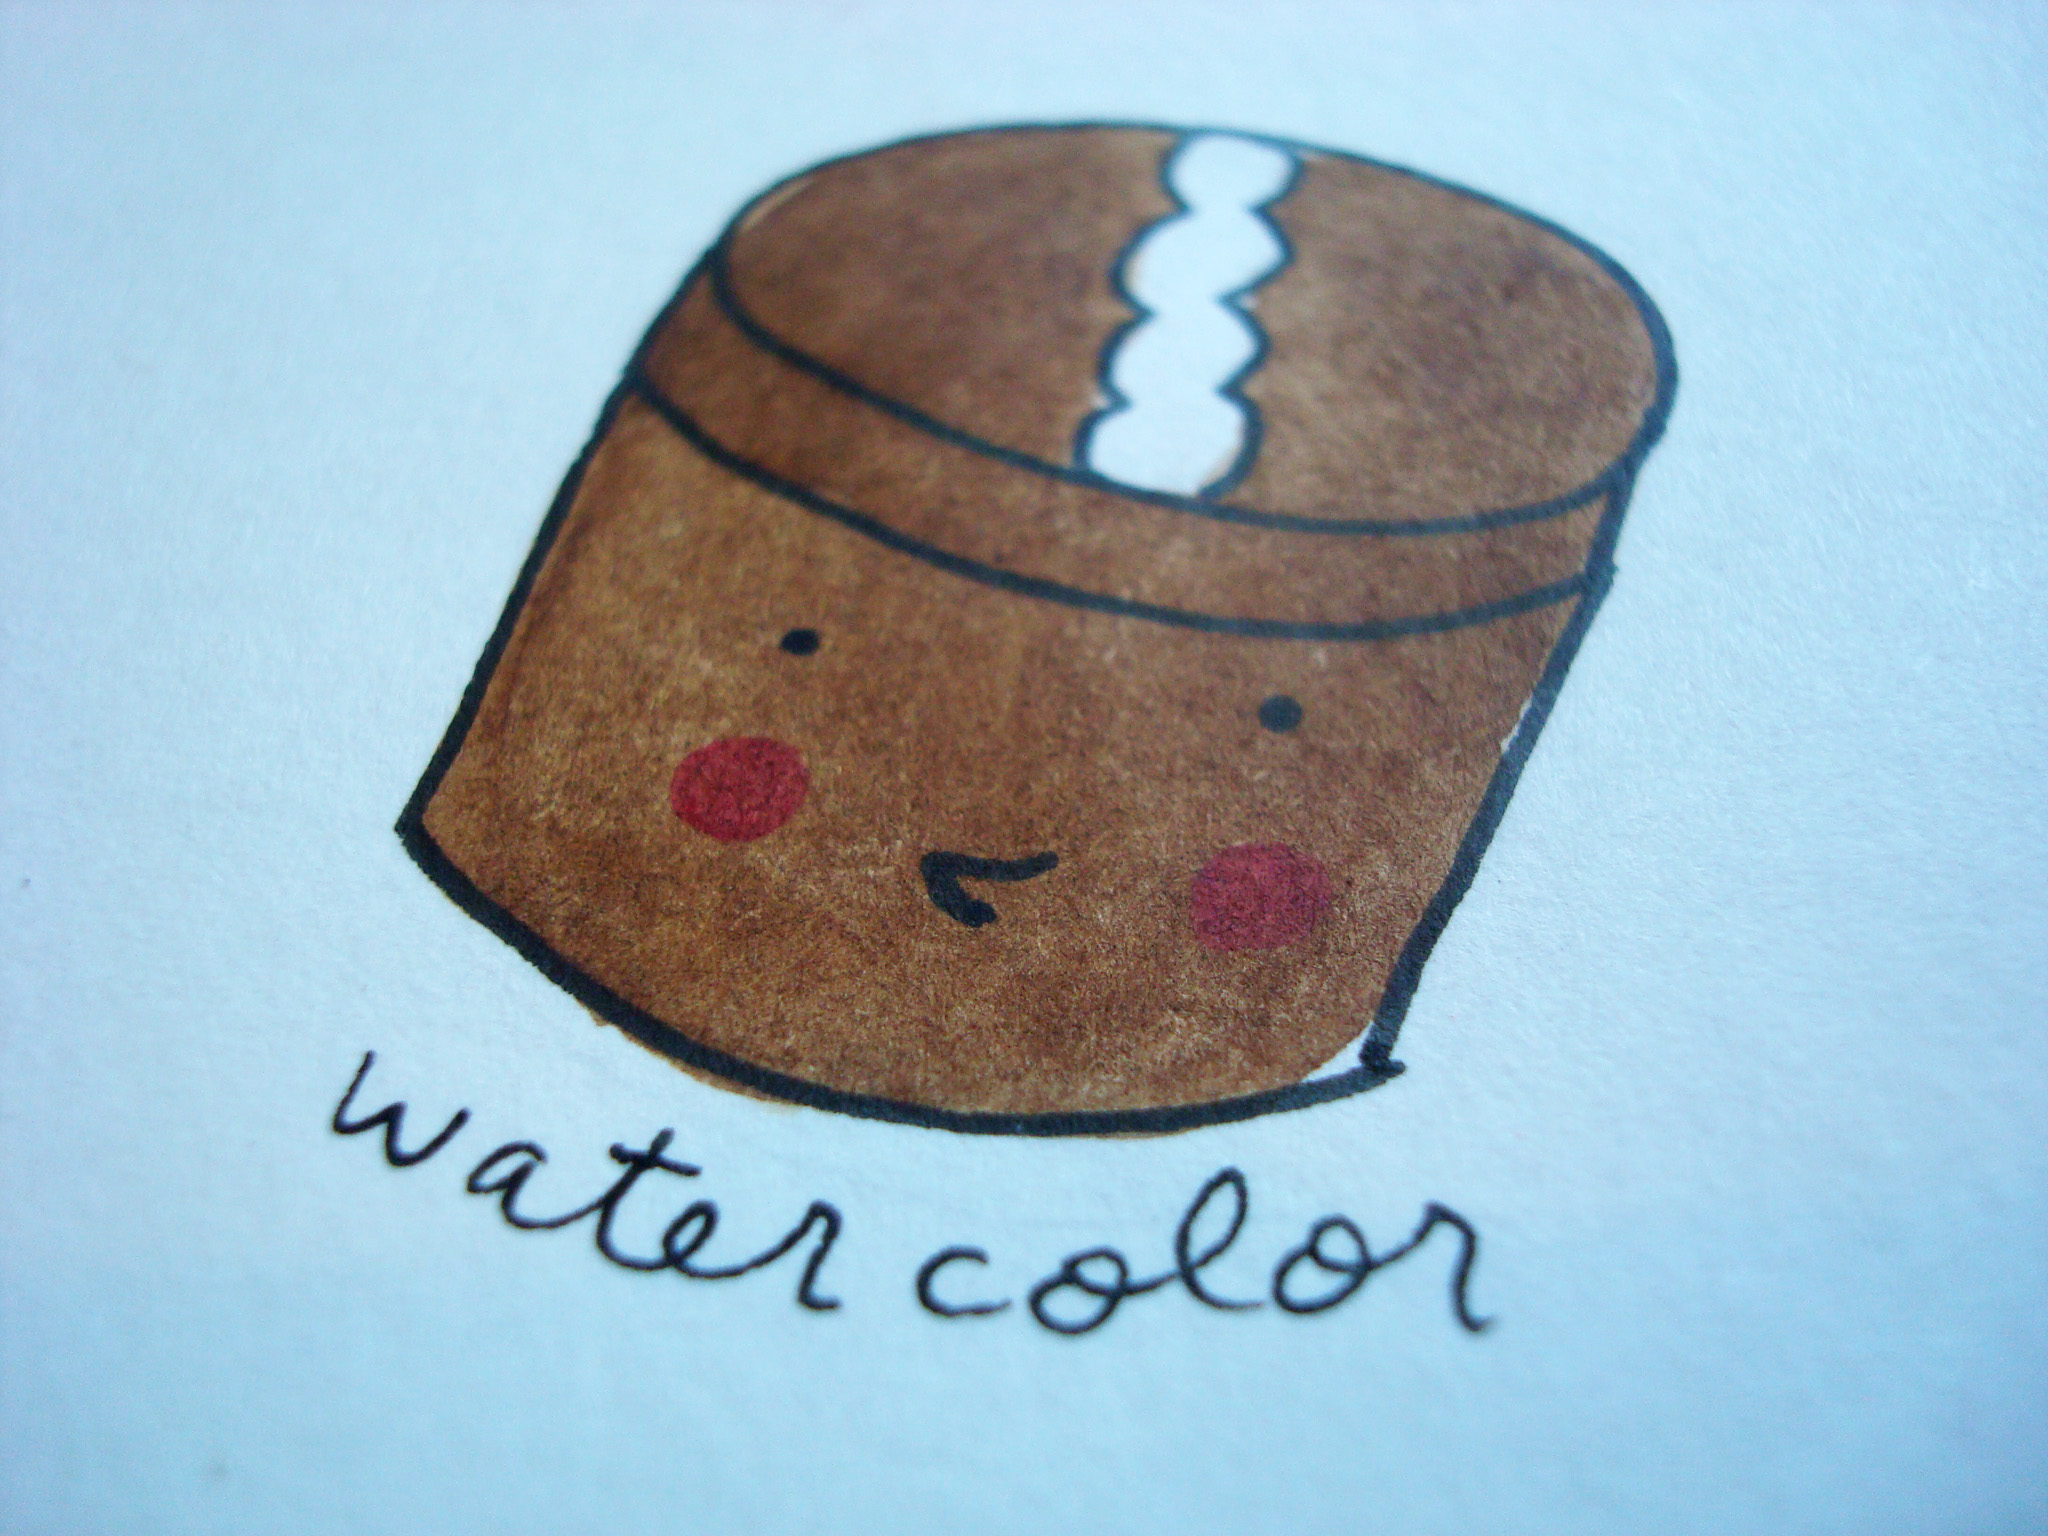
How it’s done:
Once your pen and ink is dry, simply wet and paint, applying the paint in washes or smaller, more delicate strokes. If you are scanning your watercolored work, make sure that it is dry first. If you plan on reproducing the work, make the colors slightly more vivid than you’d like because scanners may not pick up the most subtle of watercolor tones.
Advantages:
- This adds a fluid, vivid color and painterly quality to pieces.
- It’s easy to mix colors and add subtle shadows and highlights.
Disadvantages:
- Translucent watercolor is tough to correct if you make a mistake.
- Waiting for watercolor to dry takes awhile, so it can be time consuming.
- Some scanners may not pick up subtleties in color.
Method #4: Marker
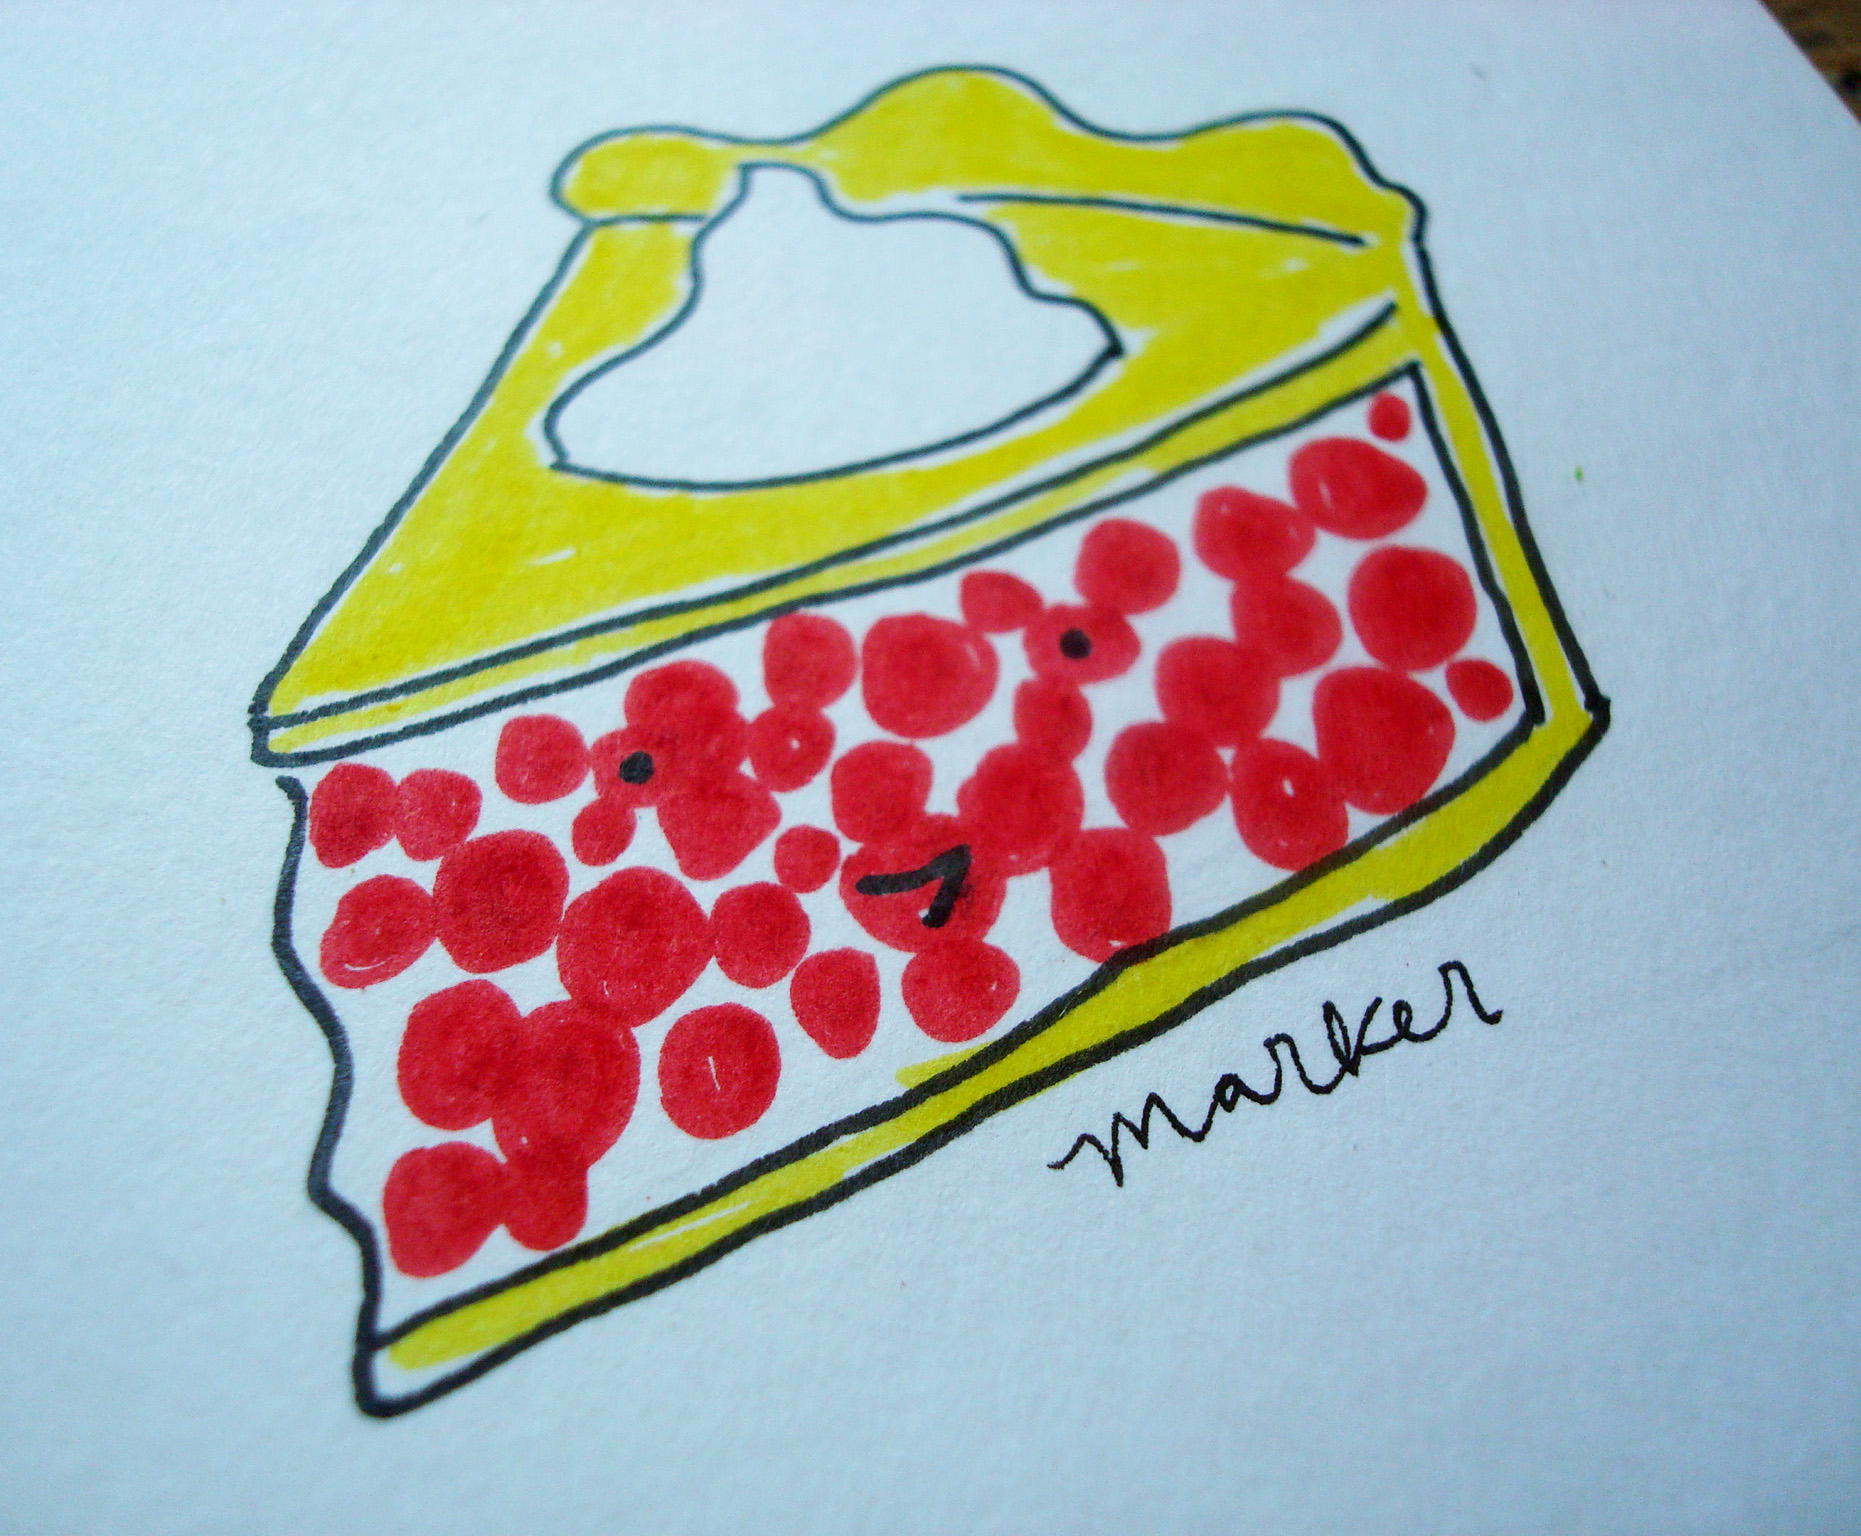
How it’s done:
Simply color between the lines. Using marker blenders and different pressures to apply the ink can add variety and dimension in color. Use a relatively smooth paper, but one that is thick enough so that it will not bleed. Test your markers on the paper first because sometimes the ink will bleed slightly beyond your markings.
Advantages:
- Bold, bright, popping colors.
- Marker reproduces easily and well.
Disadvantages:
- It takes some prowess with markers to get used to adding more subtle color, such as shading or blending.
- Markers can bleed, so make sure to test the paper you are using to make sure the color won’t bleed outside the lines.
Method #5: Pen and ink
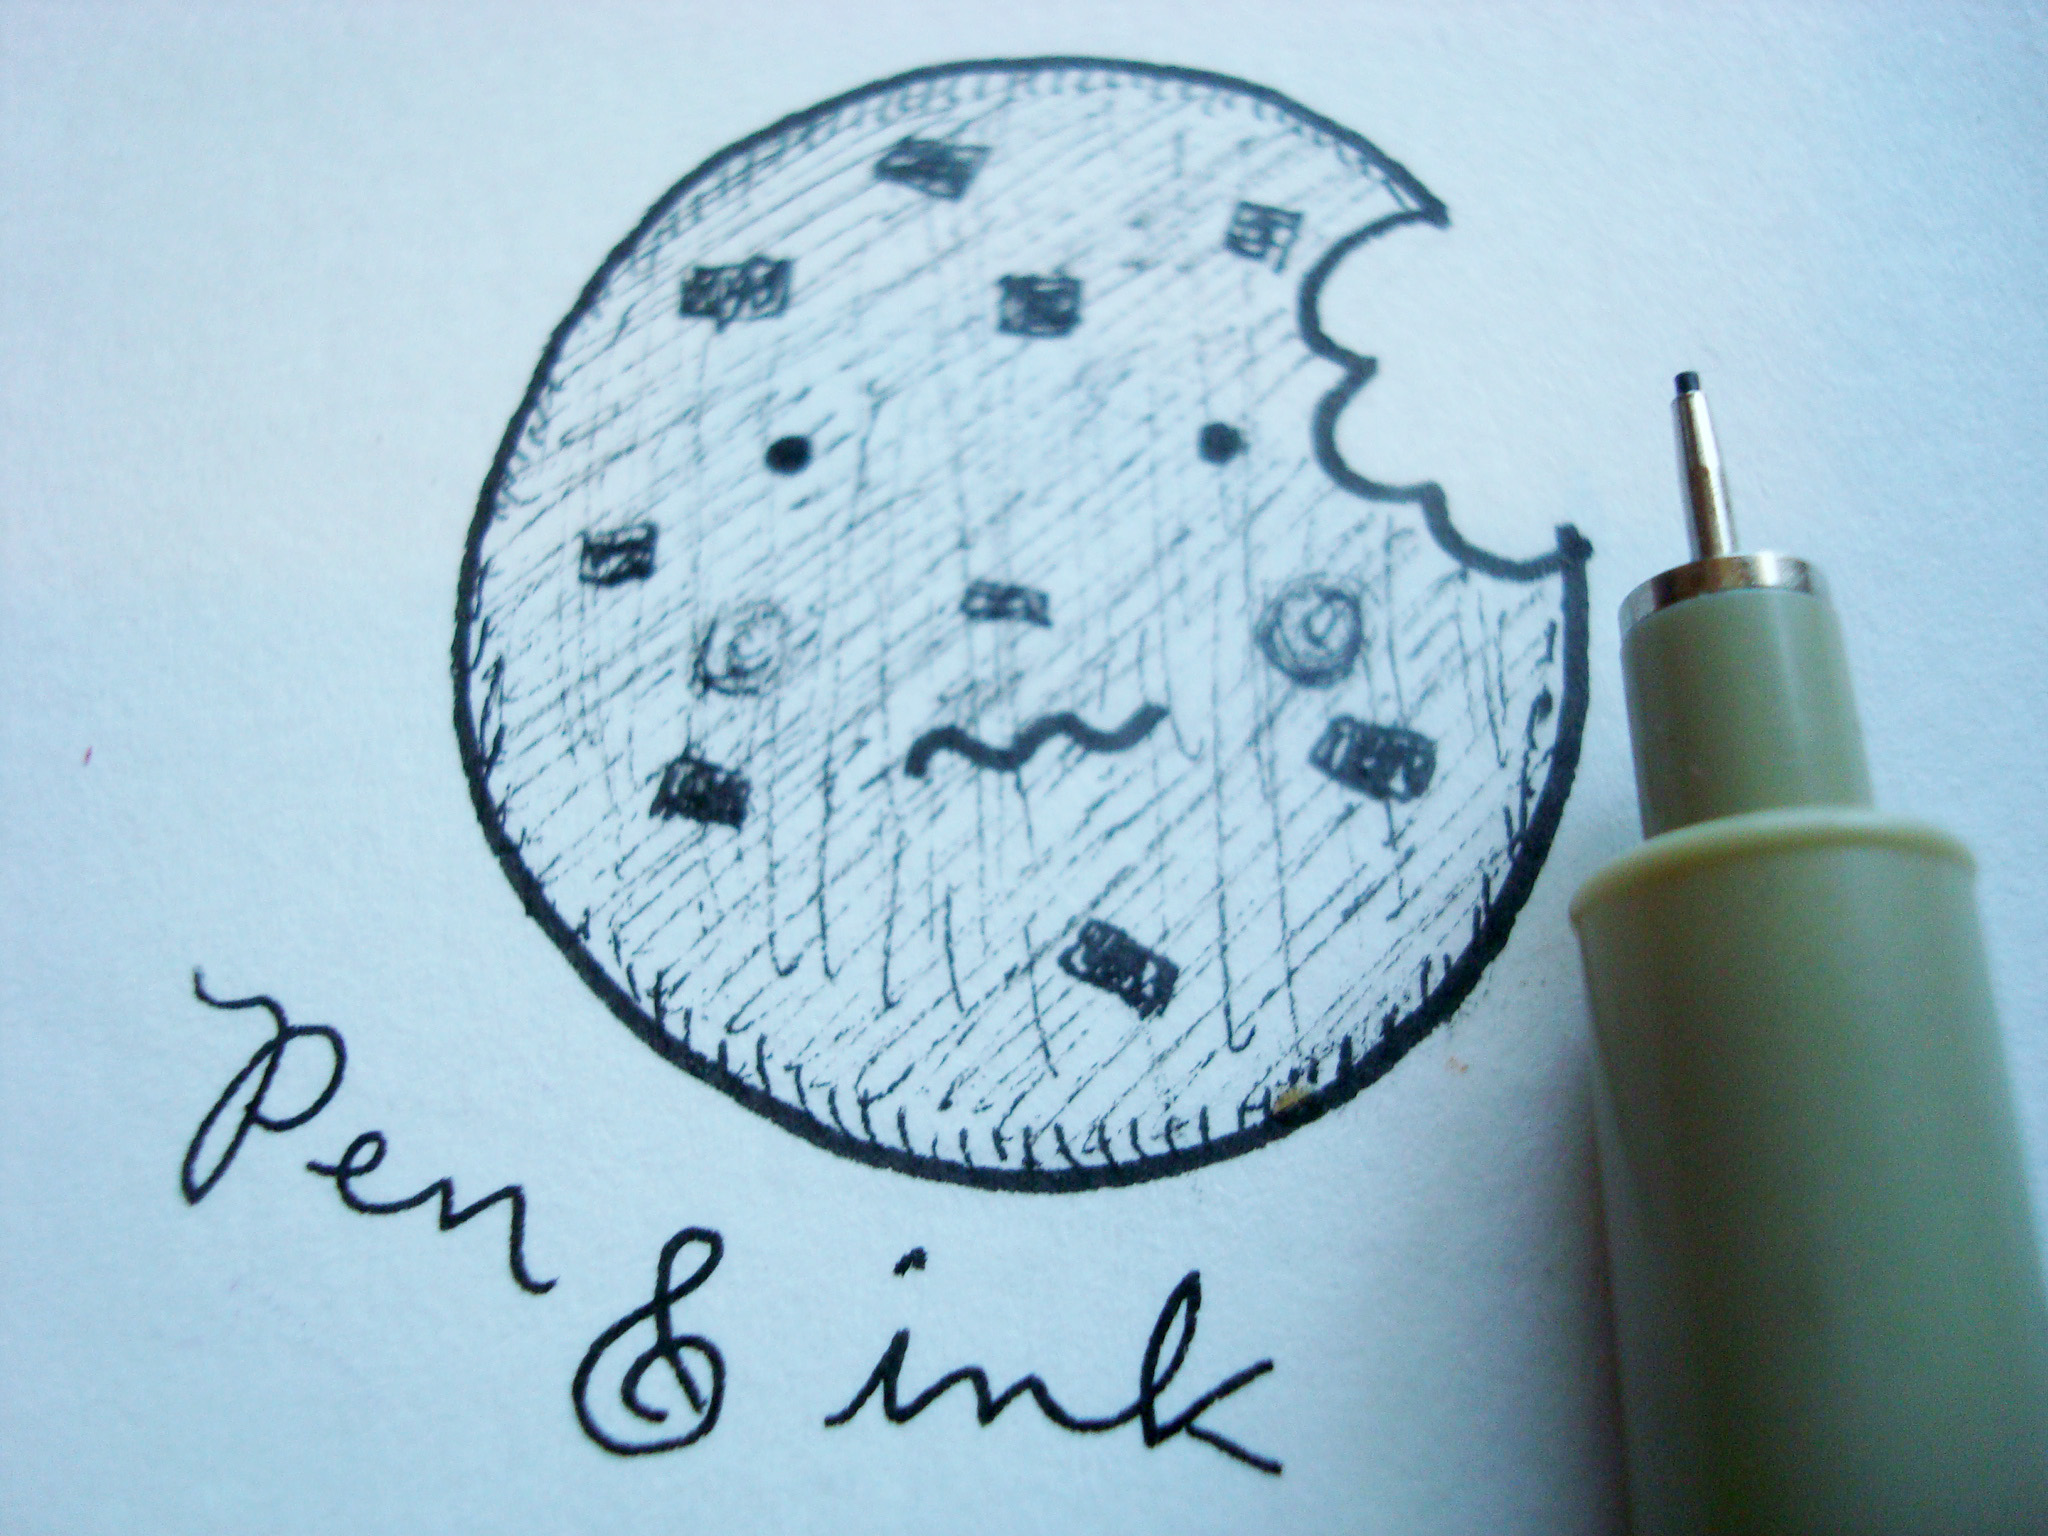
How it’s done:
Create a variety of different pen strokes to “color” your illustration with varying tones. You can use black and white or colored pens for this method.
Advantages:
- Minimal supplies needed.
- The finished work looks intricate and cool.
Disadvantages:
- This highly detail oriented method can be very time consuming.
- It can be hard to keep detailed pen and ink pieces like this from becoming “static,” so the drawings sometimes lack movement.
Method #6: Acrylic paint
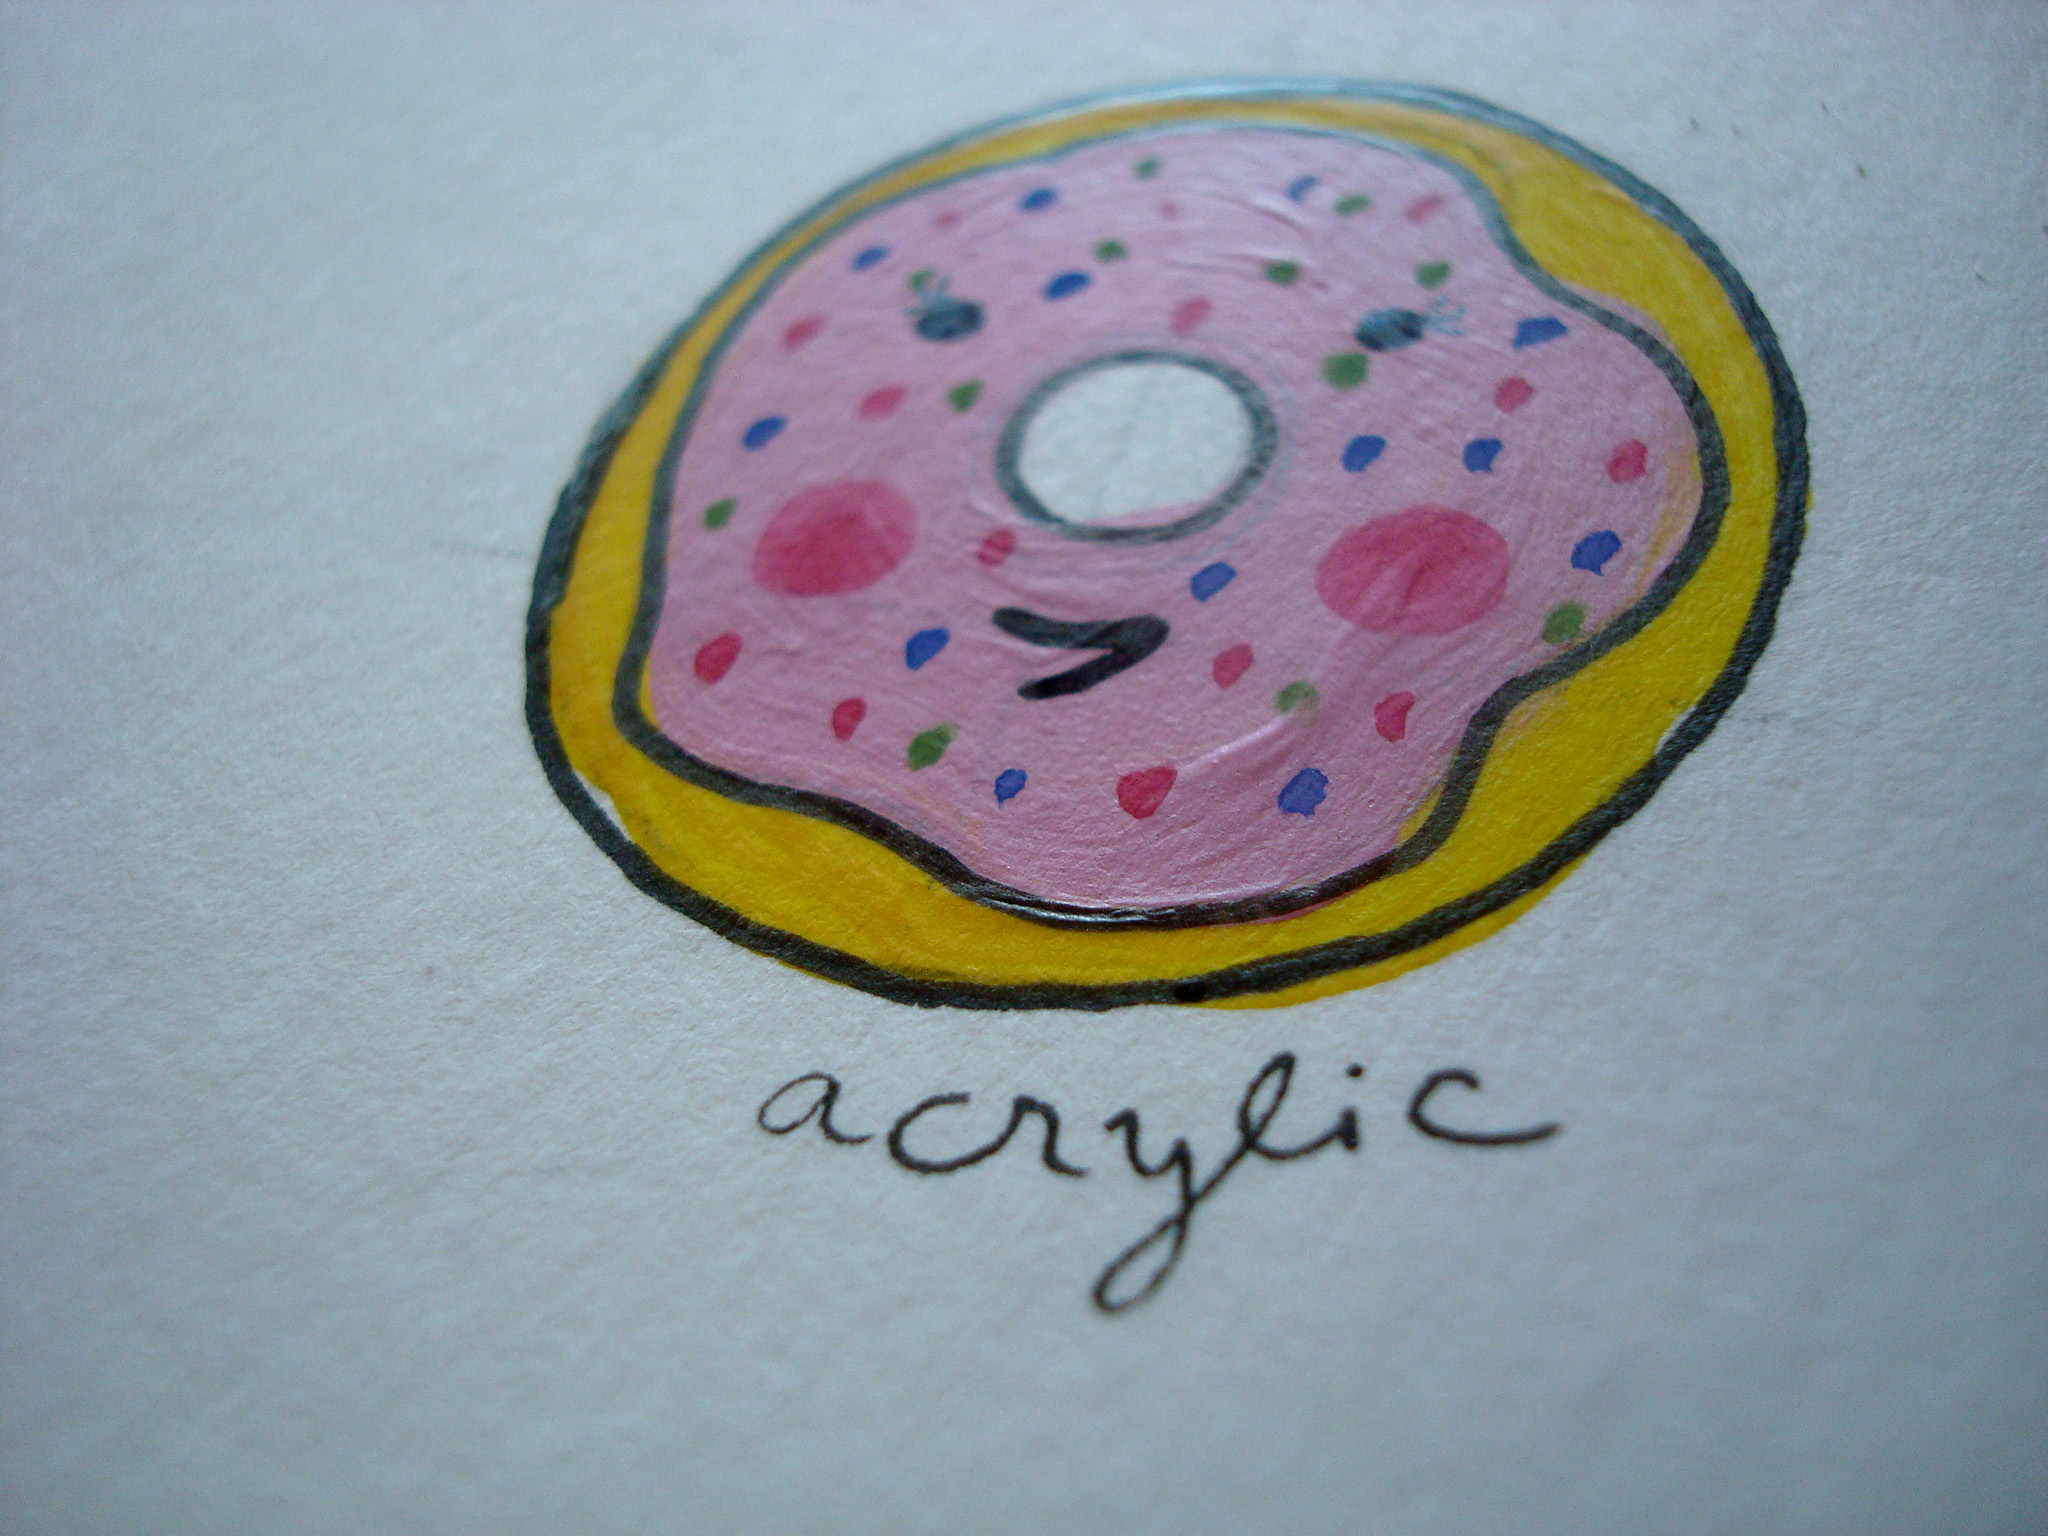
How it’s done:
You can simply paint between the lines, or color in blocks of paint before using pen and ink on top of the dried paint. The paint will leave a pleasant, light texture from brush strokes.
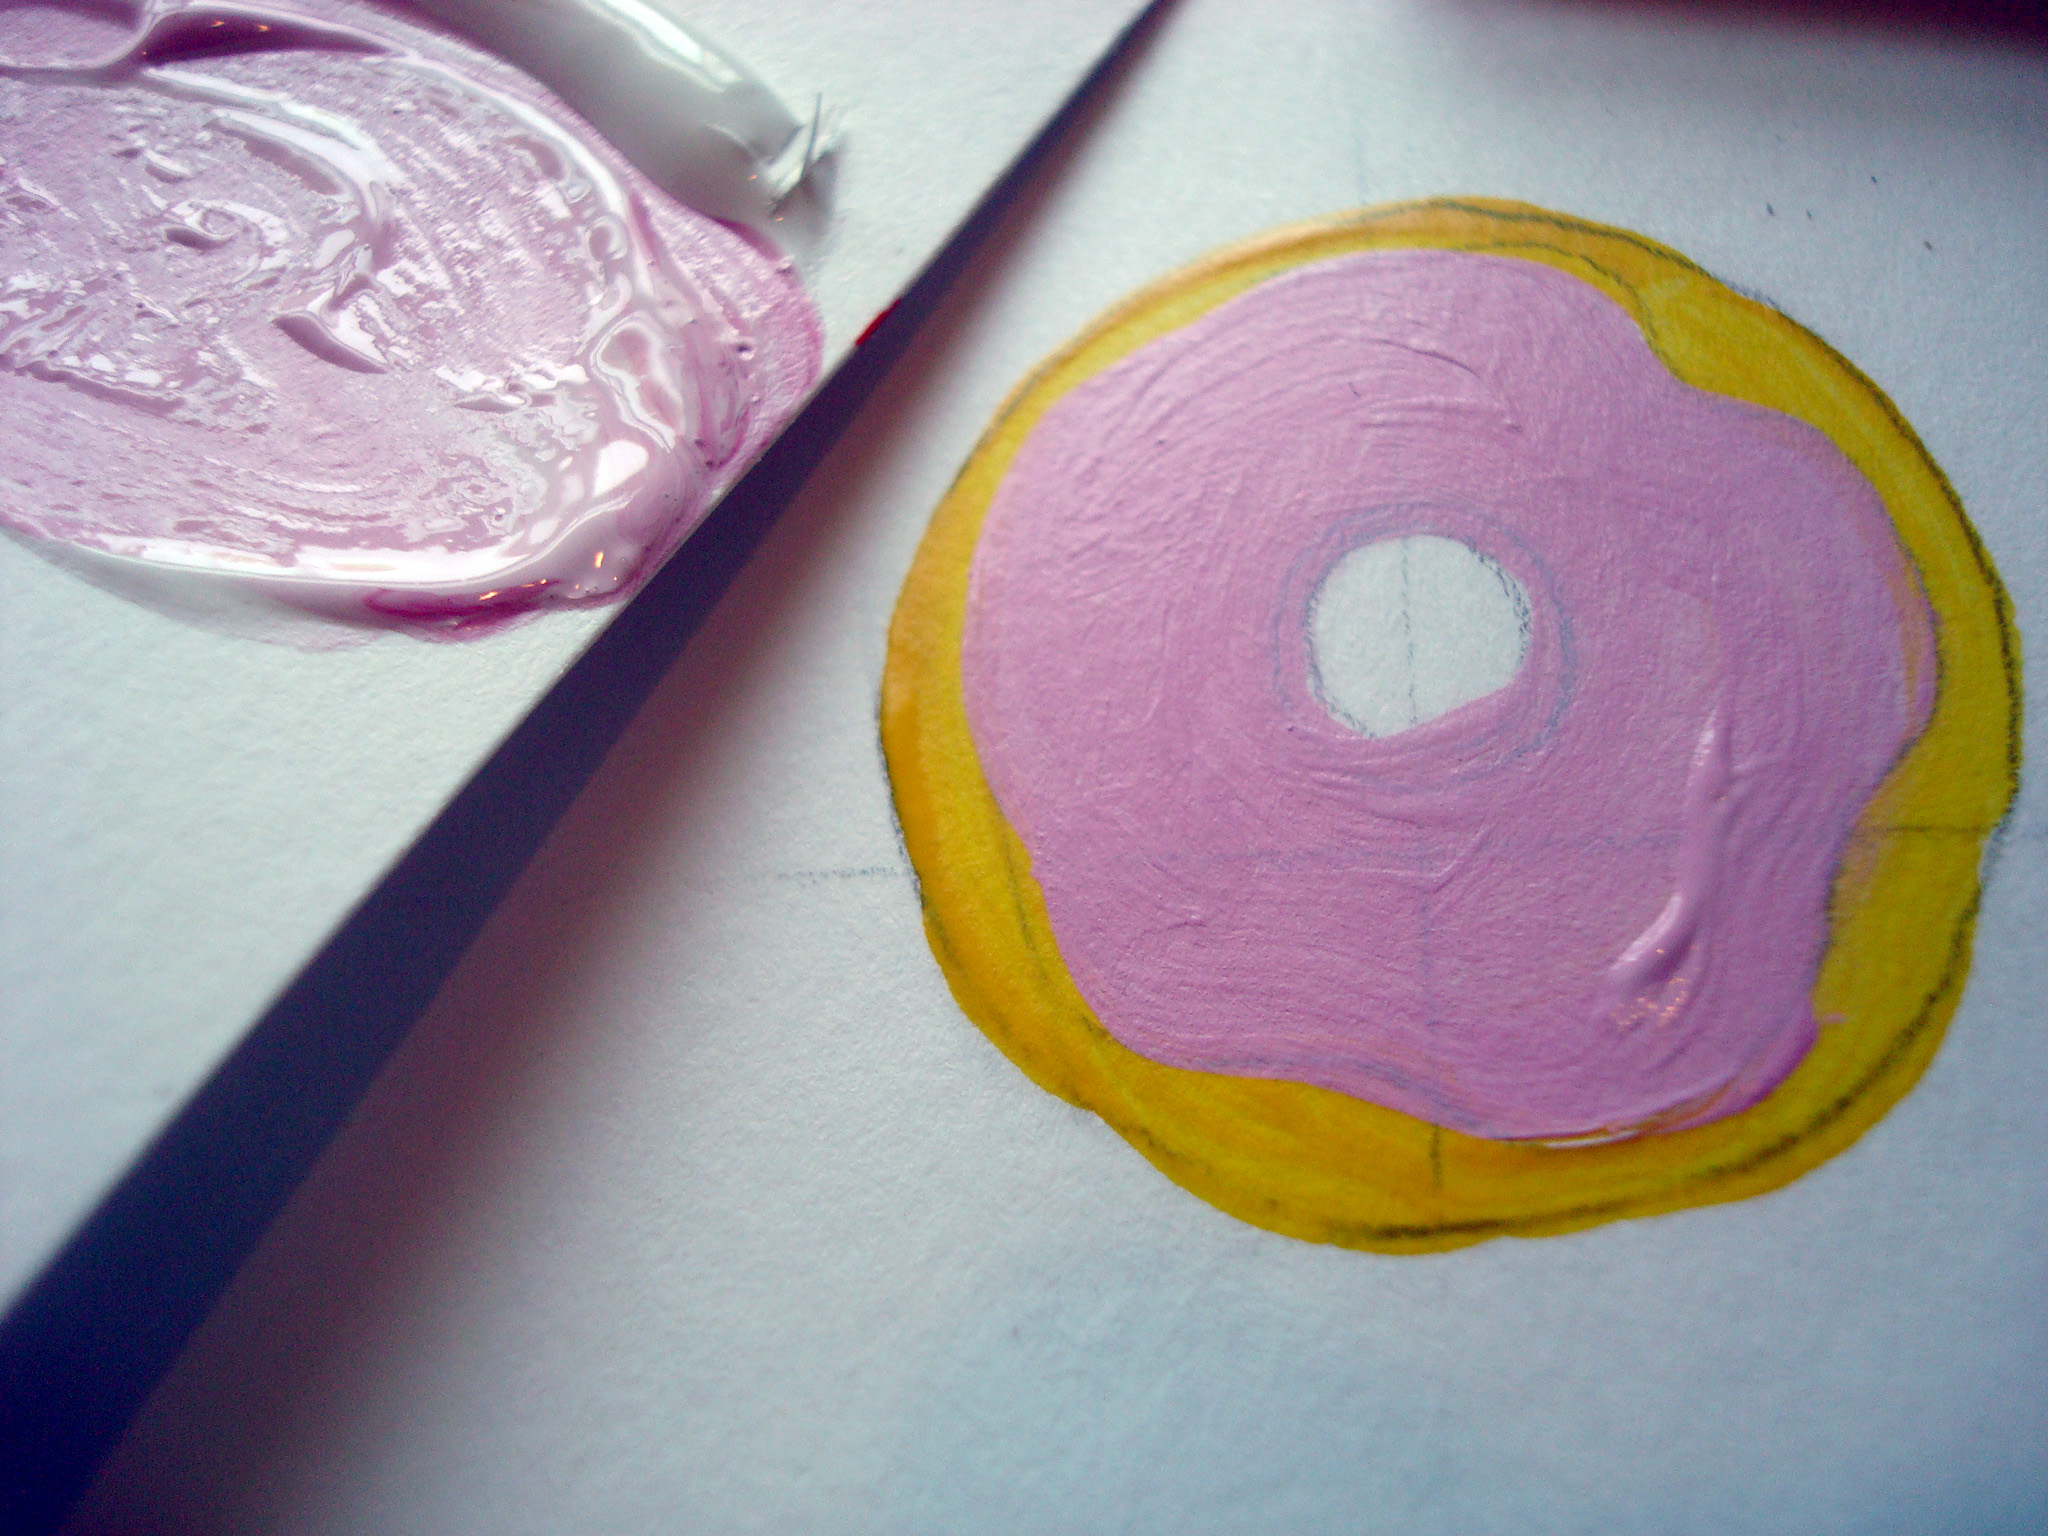
Advantages:
- It produces bright, vibrant color.
- The paint is opaque, so you can paint over pencil lines.
Disadvantages:
- Opaque paints can be “flat.”
- Mastery of adding shadows and subtle color variations can be more difficult to master with opaque paints.
Method #7: Mixed media
How it’s done:
Technically, combining pen and ink and any of the media listed above classifies as “mixed media.” But we’re referring to mixing the media with which you add color to your illustrations here. For instance, watercolor with colored pencil details; acrylic or gouache with accents added digitally.
Advantages:
- You can combine different aspects of different media to attain unique look that reflects your style.
Disadvantages:
- You have to work in two different types of media, which may mean more money spent on supplies or more time spent.
Share tips, start a discussion or ask one of our experts or other students a question.
No Responses to “In Living Color: 7 Different Methods for Coloring Illustrations”