
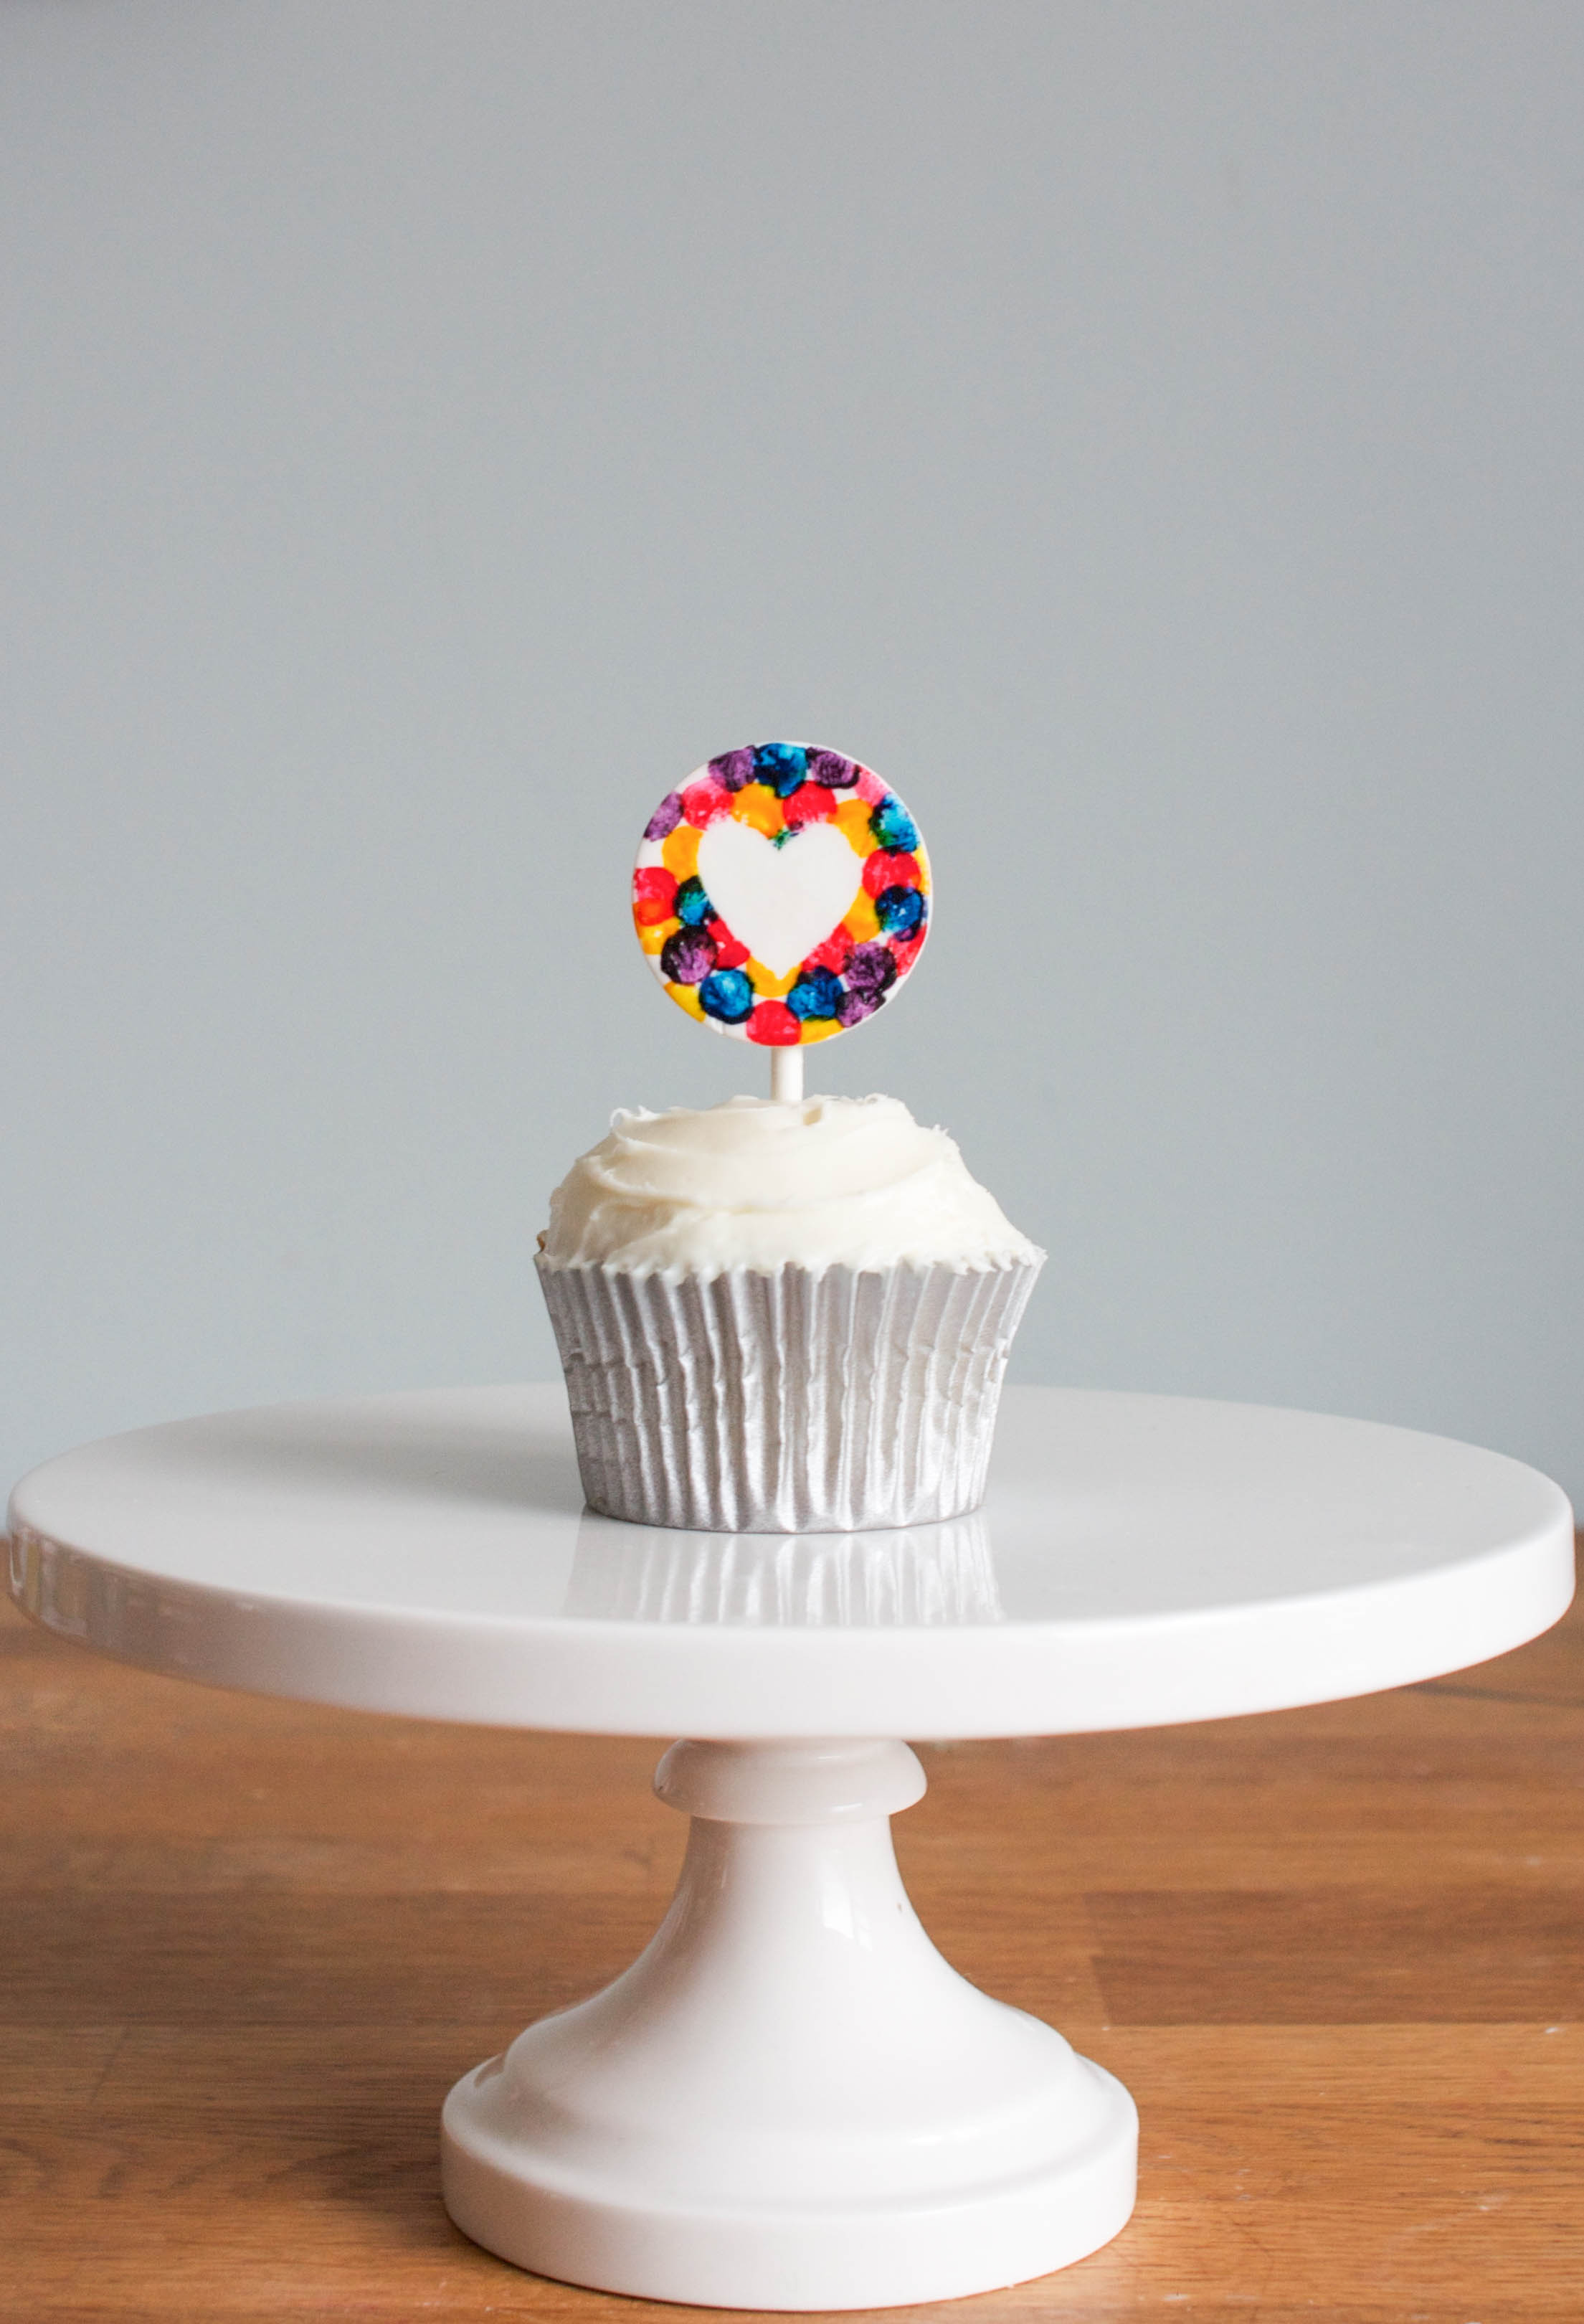
I’ve got a few reoccurring themes in my cake designs. Even my 4-year-old has picked up on my favs. He recently told me, “Mommy, I’m going to draw you a picture. You like hearts and rainbows!” What can I say, he knows me!
I’m not the only one into colorful creations these days. Confetti coated design themes are popping up in paper goods, decor, invites, and more. It’s no surprise that cakes have quickly followed!
Cake designers have used everything from wafer paper, fondant, candy melts, and sprinkles to create edible confetti. Today I’ll share with you another technique for adding a confetti pattern to your cake designs. It’s a great way to achieve a fun and festive look without adding extra bulk.
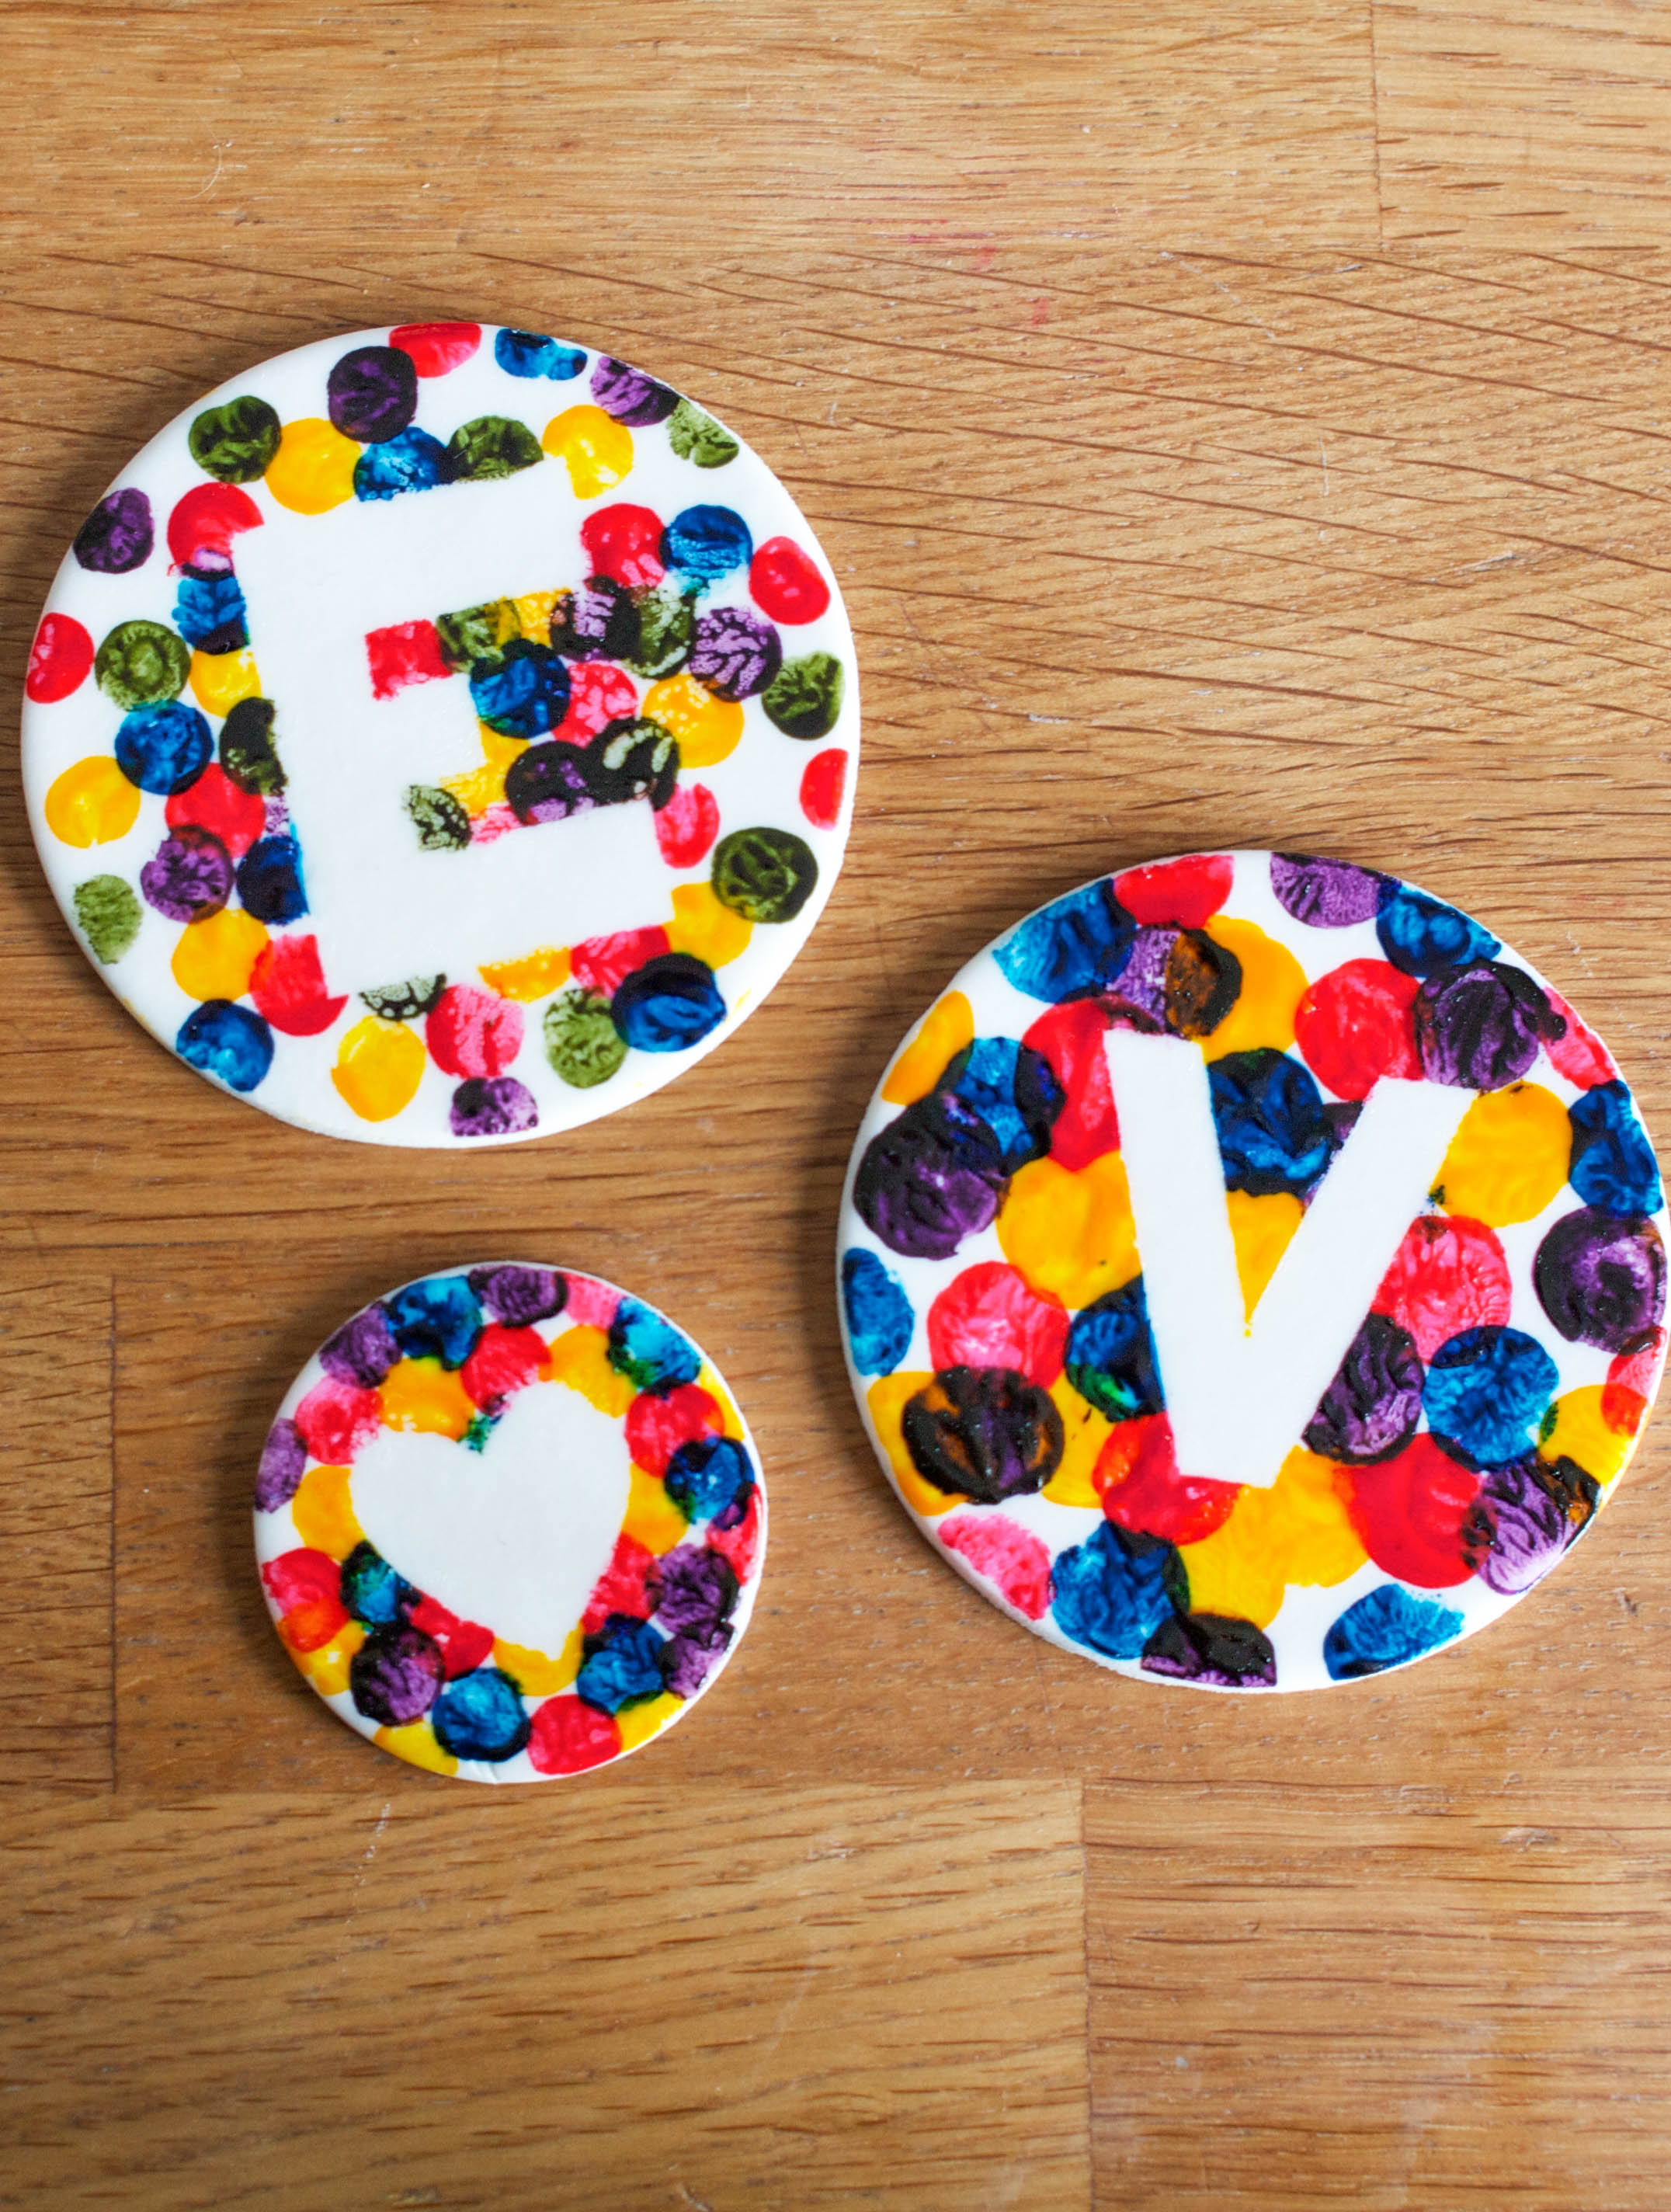
How to make colorful confetti cupcake & cake toppers
All images via Erin Bakes
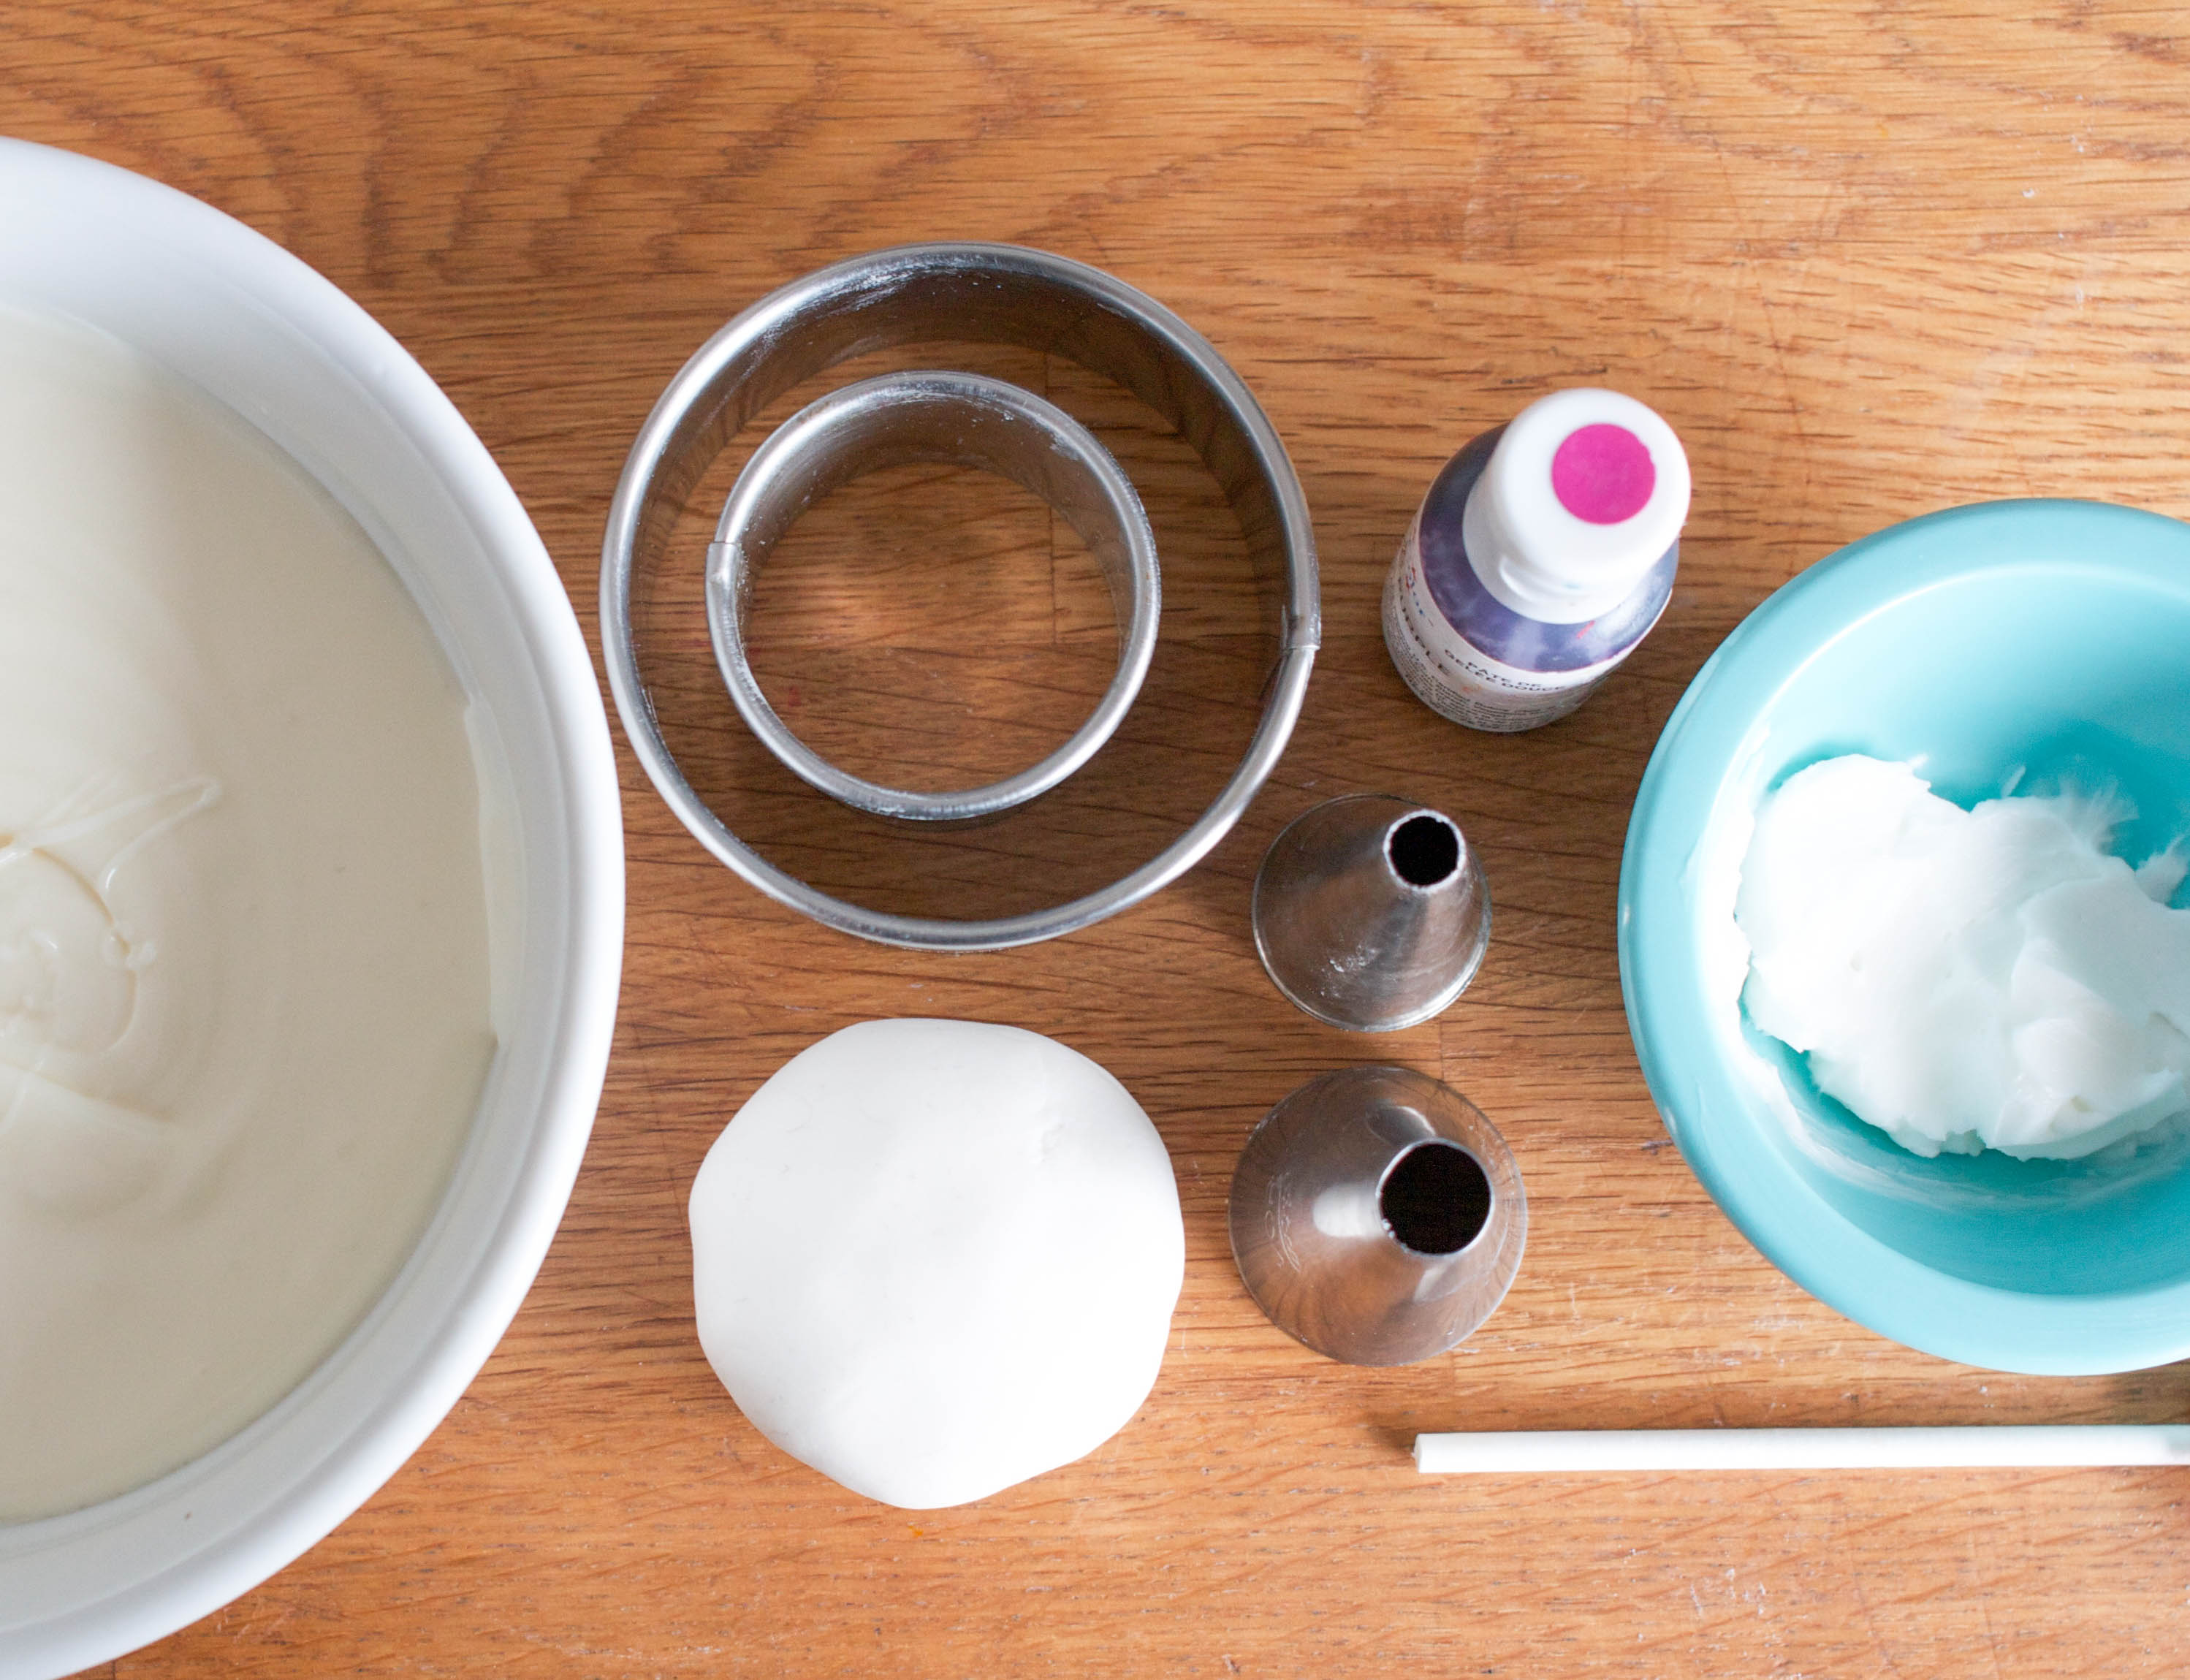
Supplies:
- Gum paste
- Rolling pin
- Circle cutters
- Piping tips or tiny circle cutters
- Gel food colors
- Lollipop sticks
- Shortening
- Parchment paper
- Sharpie
- Pencil
- Scissors
- Candy melts or white chocolate
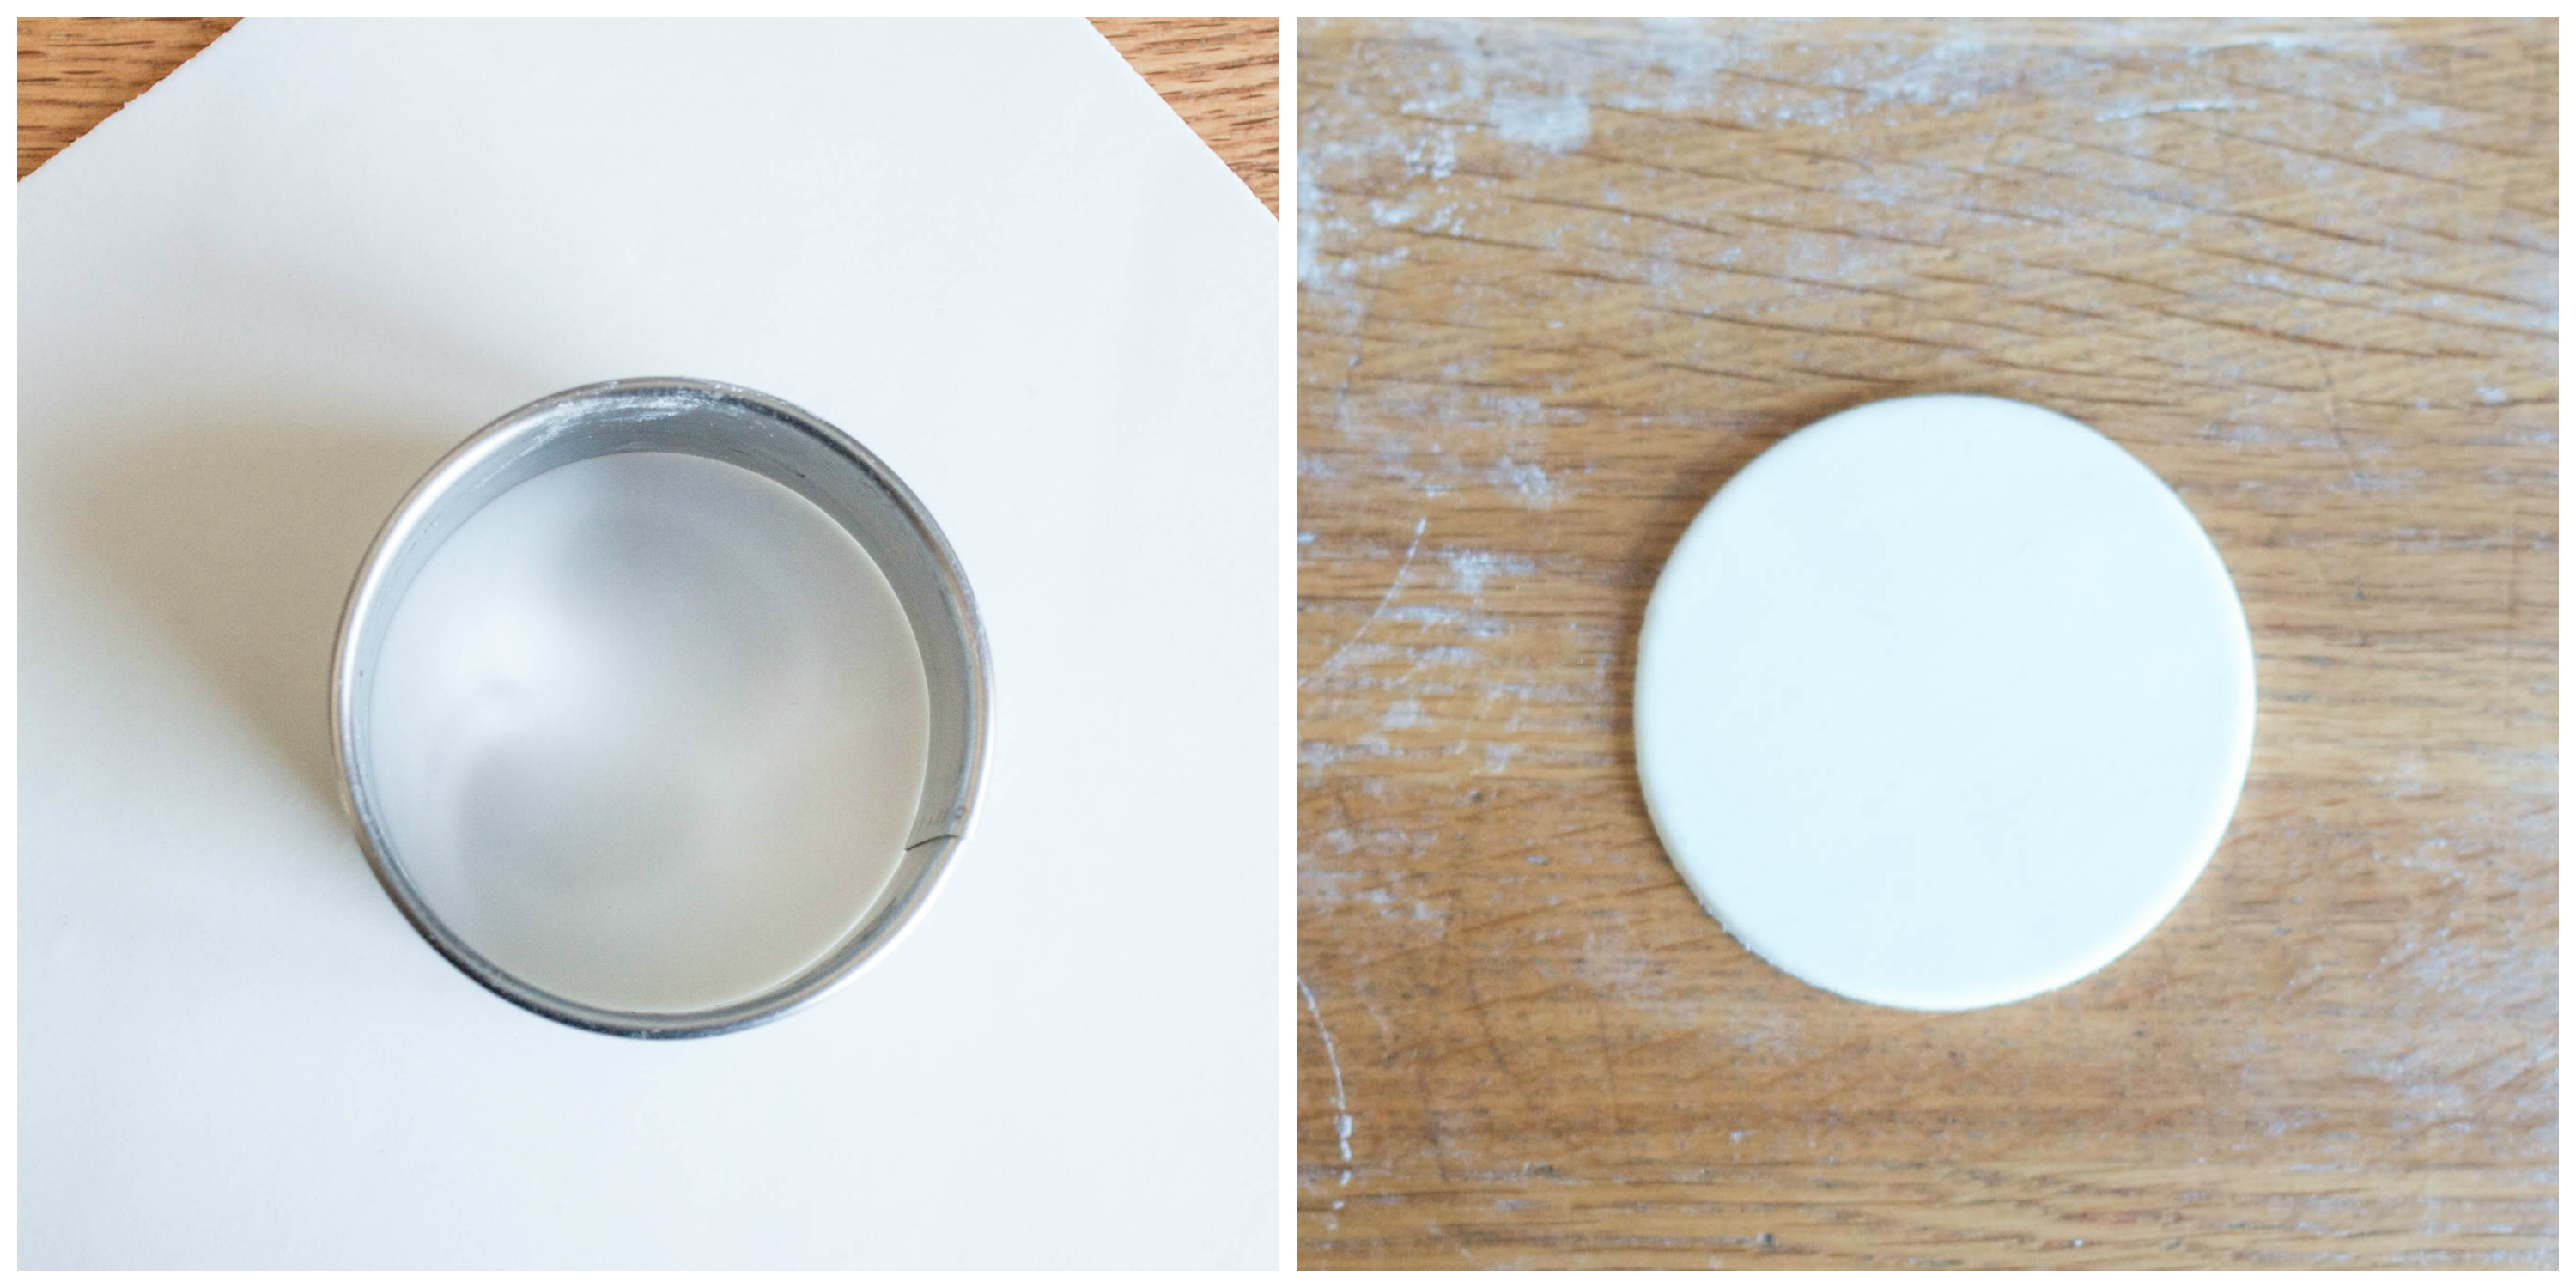
Step 1:
Roll gum paste to about an 1/8-inch thick. Cut out large circles and set aside. Allow the circles to dry completely before painting.
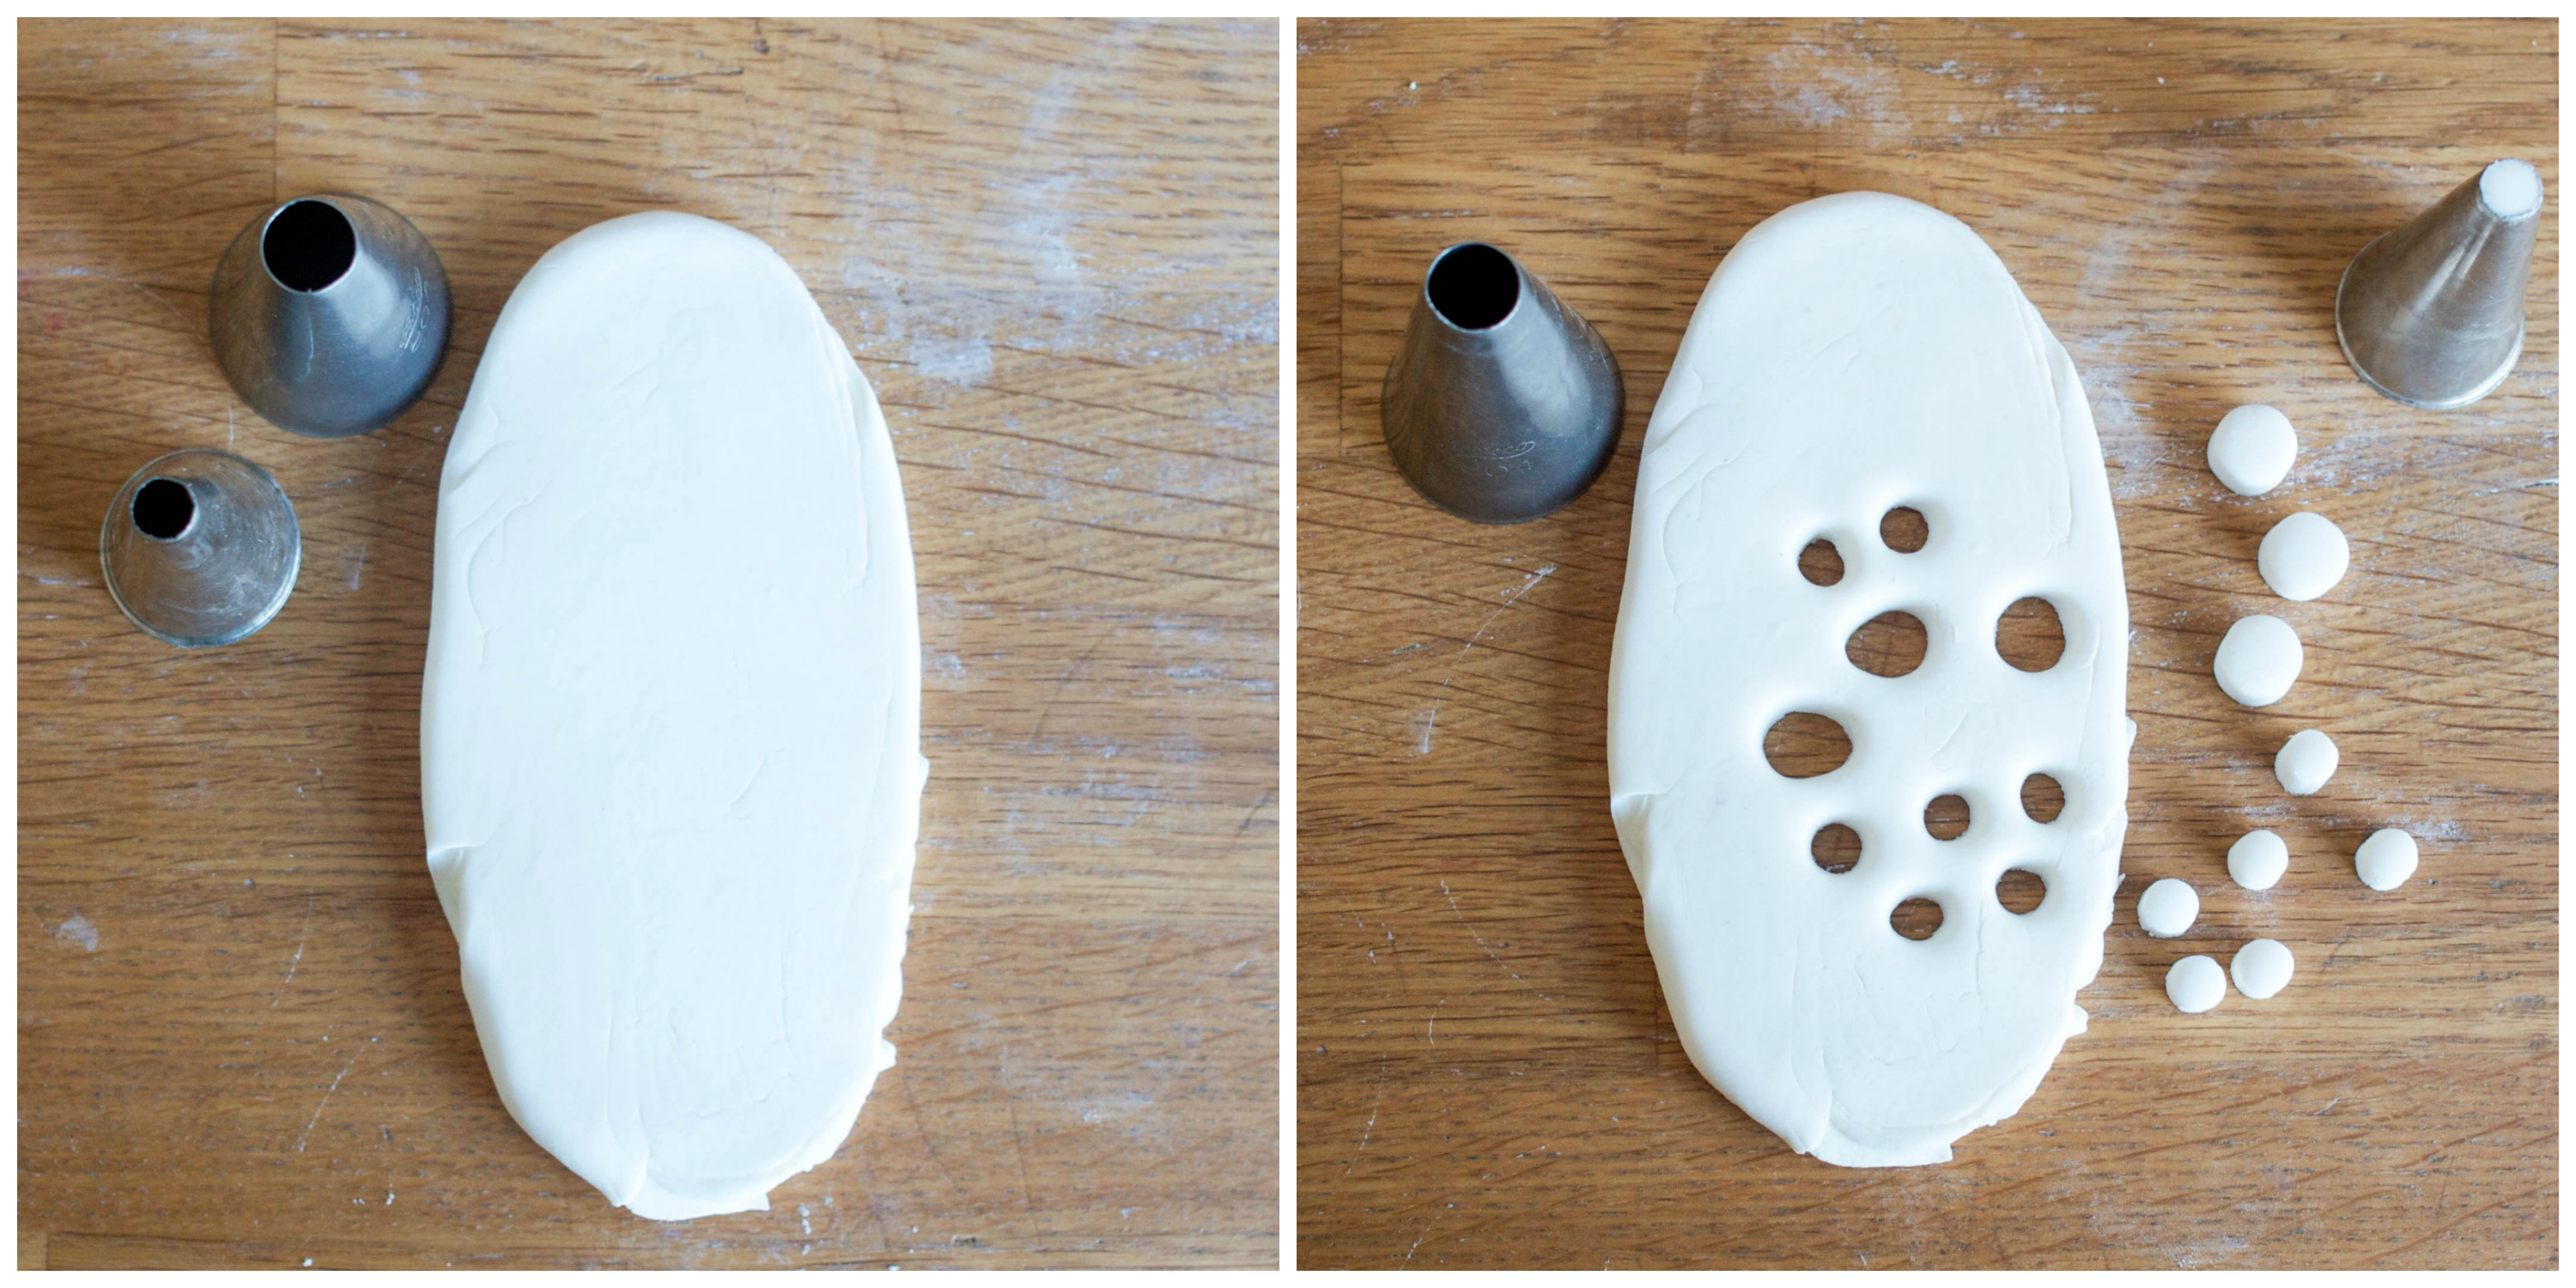
Roll gum paste to about a 1/4-inch thick. Cut out many small circles using tiny circle cutters or piping tips. These small, thick circles will become your stamps for making the confetti pattern, so you’ll want one of the side to be completely flat. Set them aside to dry before using.
These should take a little longer than your larger circles since they’re twice as thick, a few hours up to overnight.
Step 2:
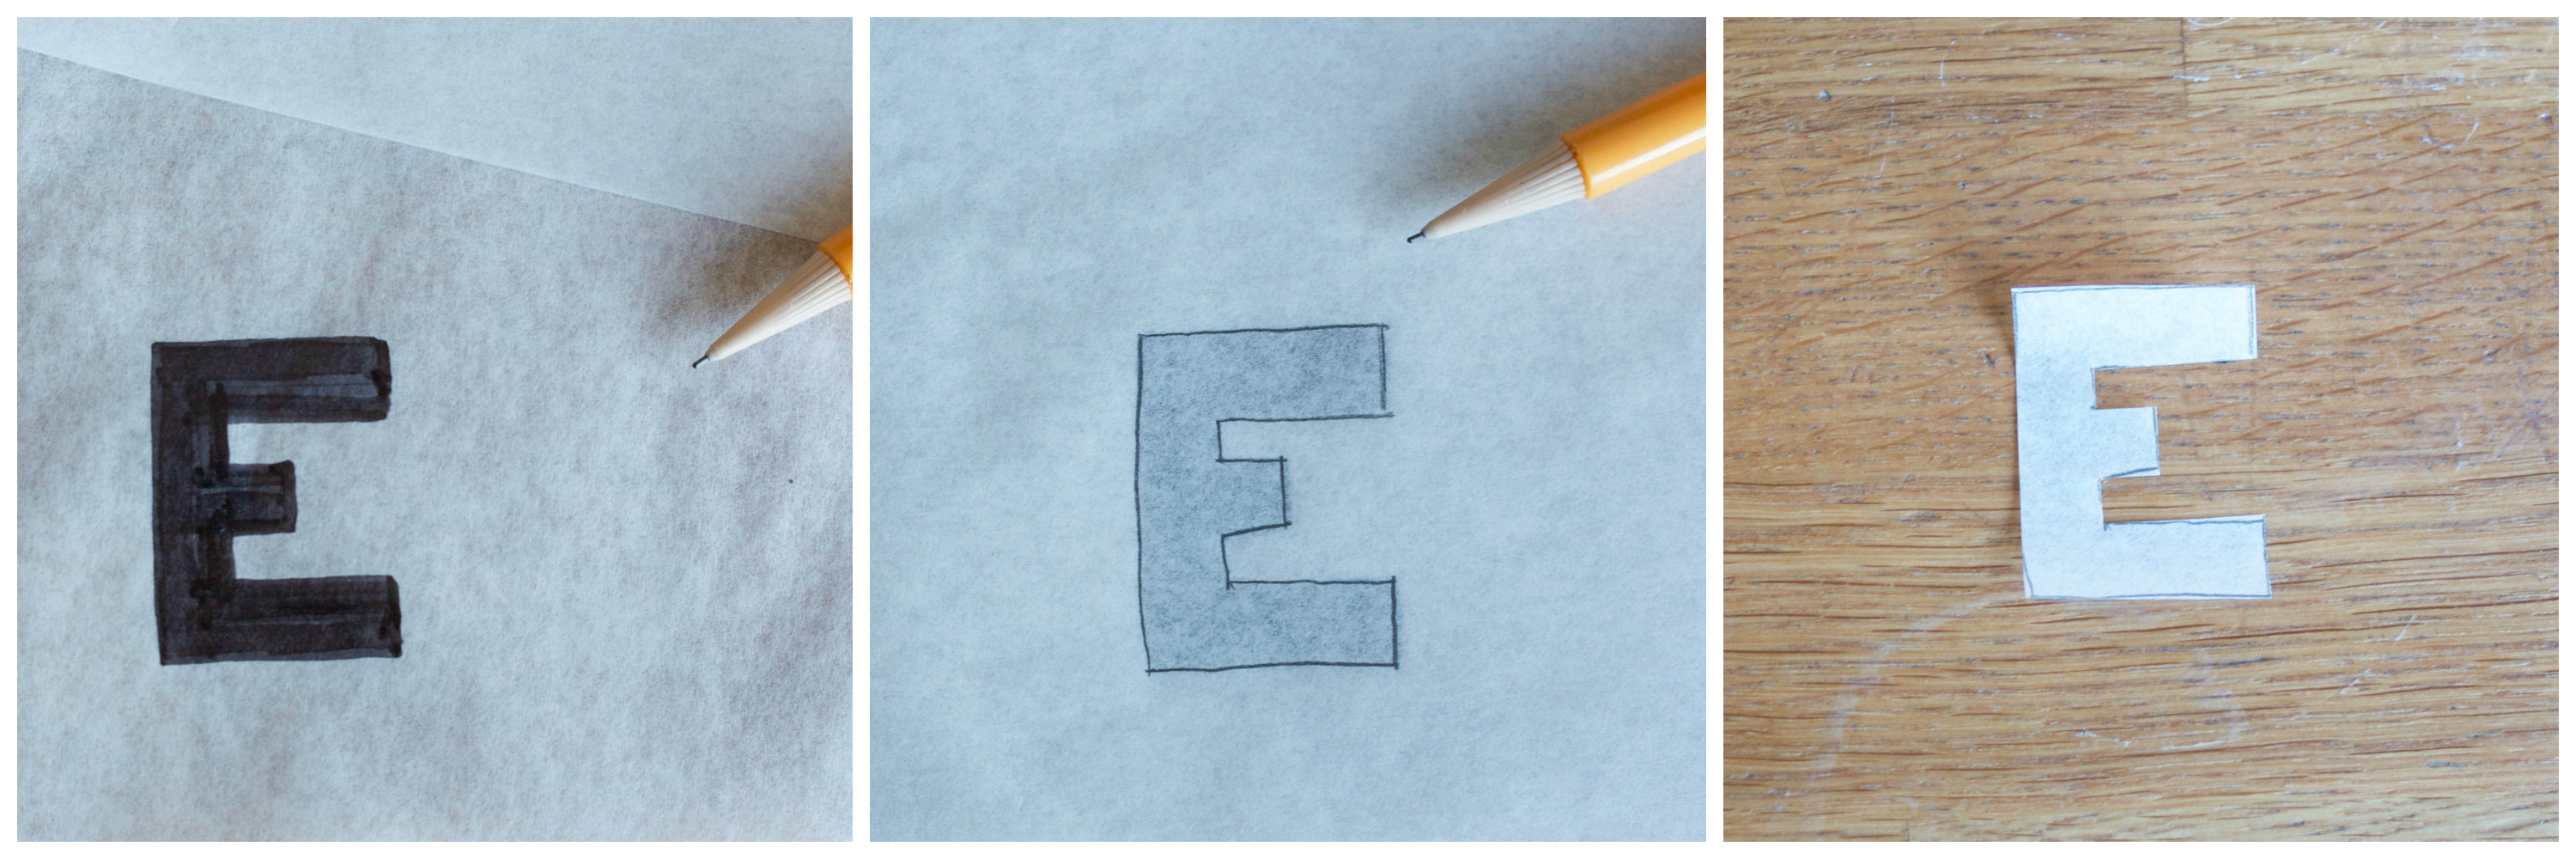
Draw your shape or letter onto a piece of paper using the Sharpie to create a template. You can also just print out letters or shapes if you’re looking to exactly match other paper goods. Place a piece of parchment paper over your template and trace with a pencil. Cut out the letter and flip it over, pencil side down.
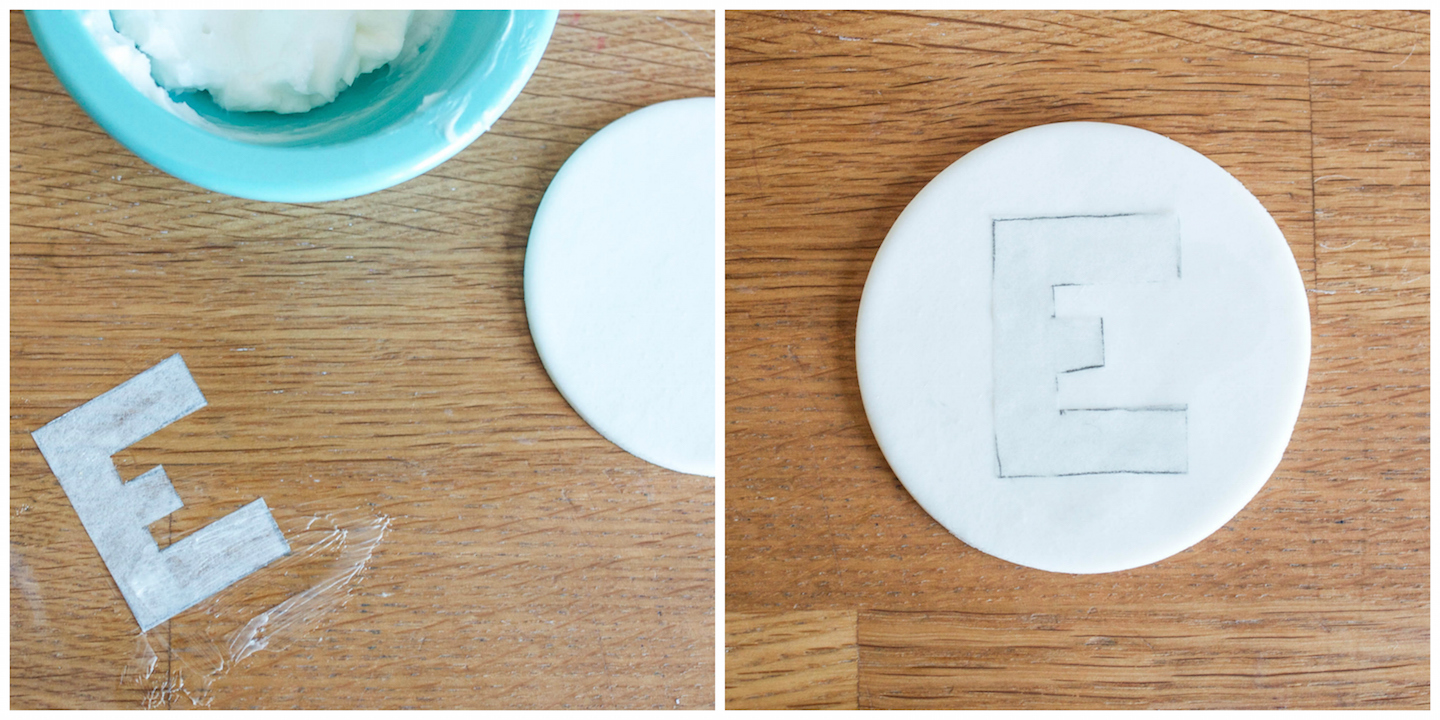
Spread a thin layer of shortening onto the back of the letter and stick the letter, shortening side down, onto one of your gum paste circles.
Step 3:
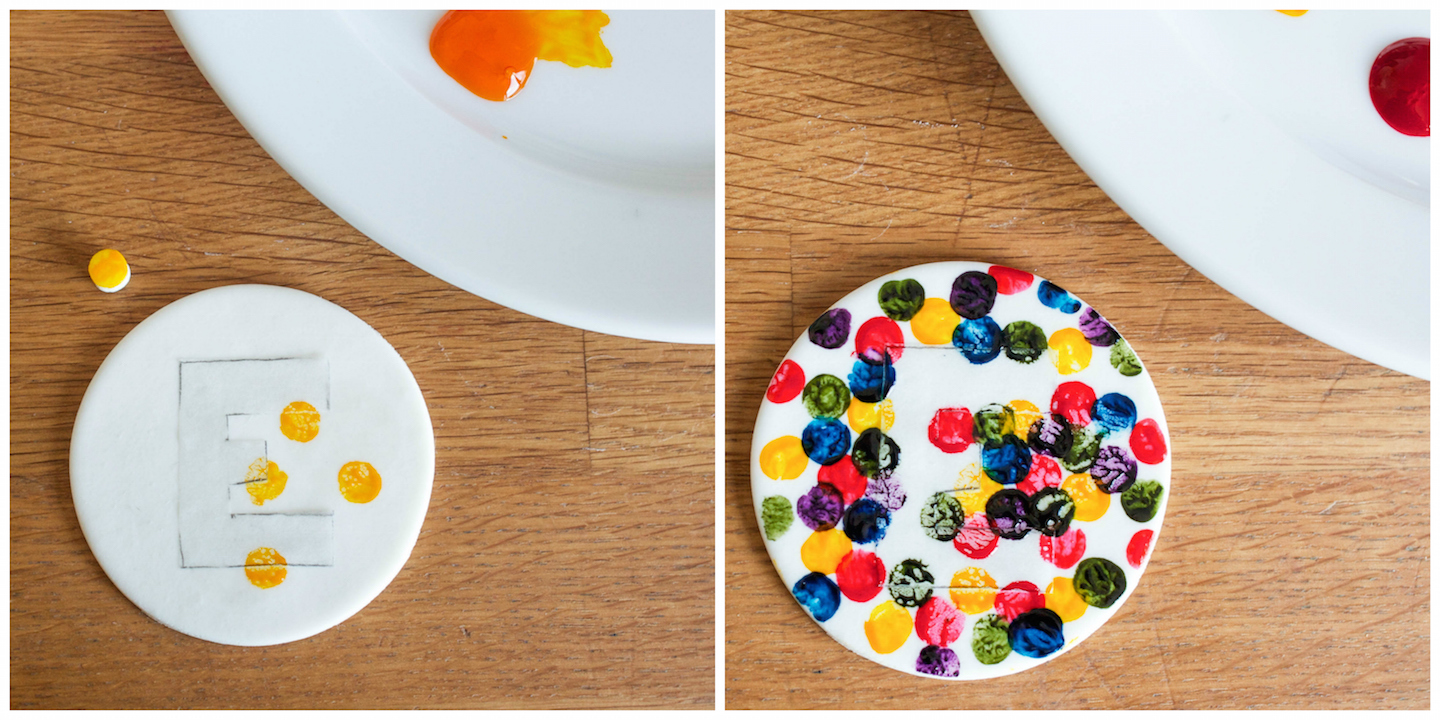
Dip one of the small circle stamps into the lightest gel color that you’re using. Stamp the color onto the topper making sure to overlap the template. Repeat with the other colors, working from lightest to darkest. Use a fresh stamp for each color.
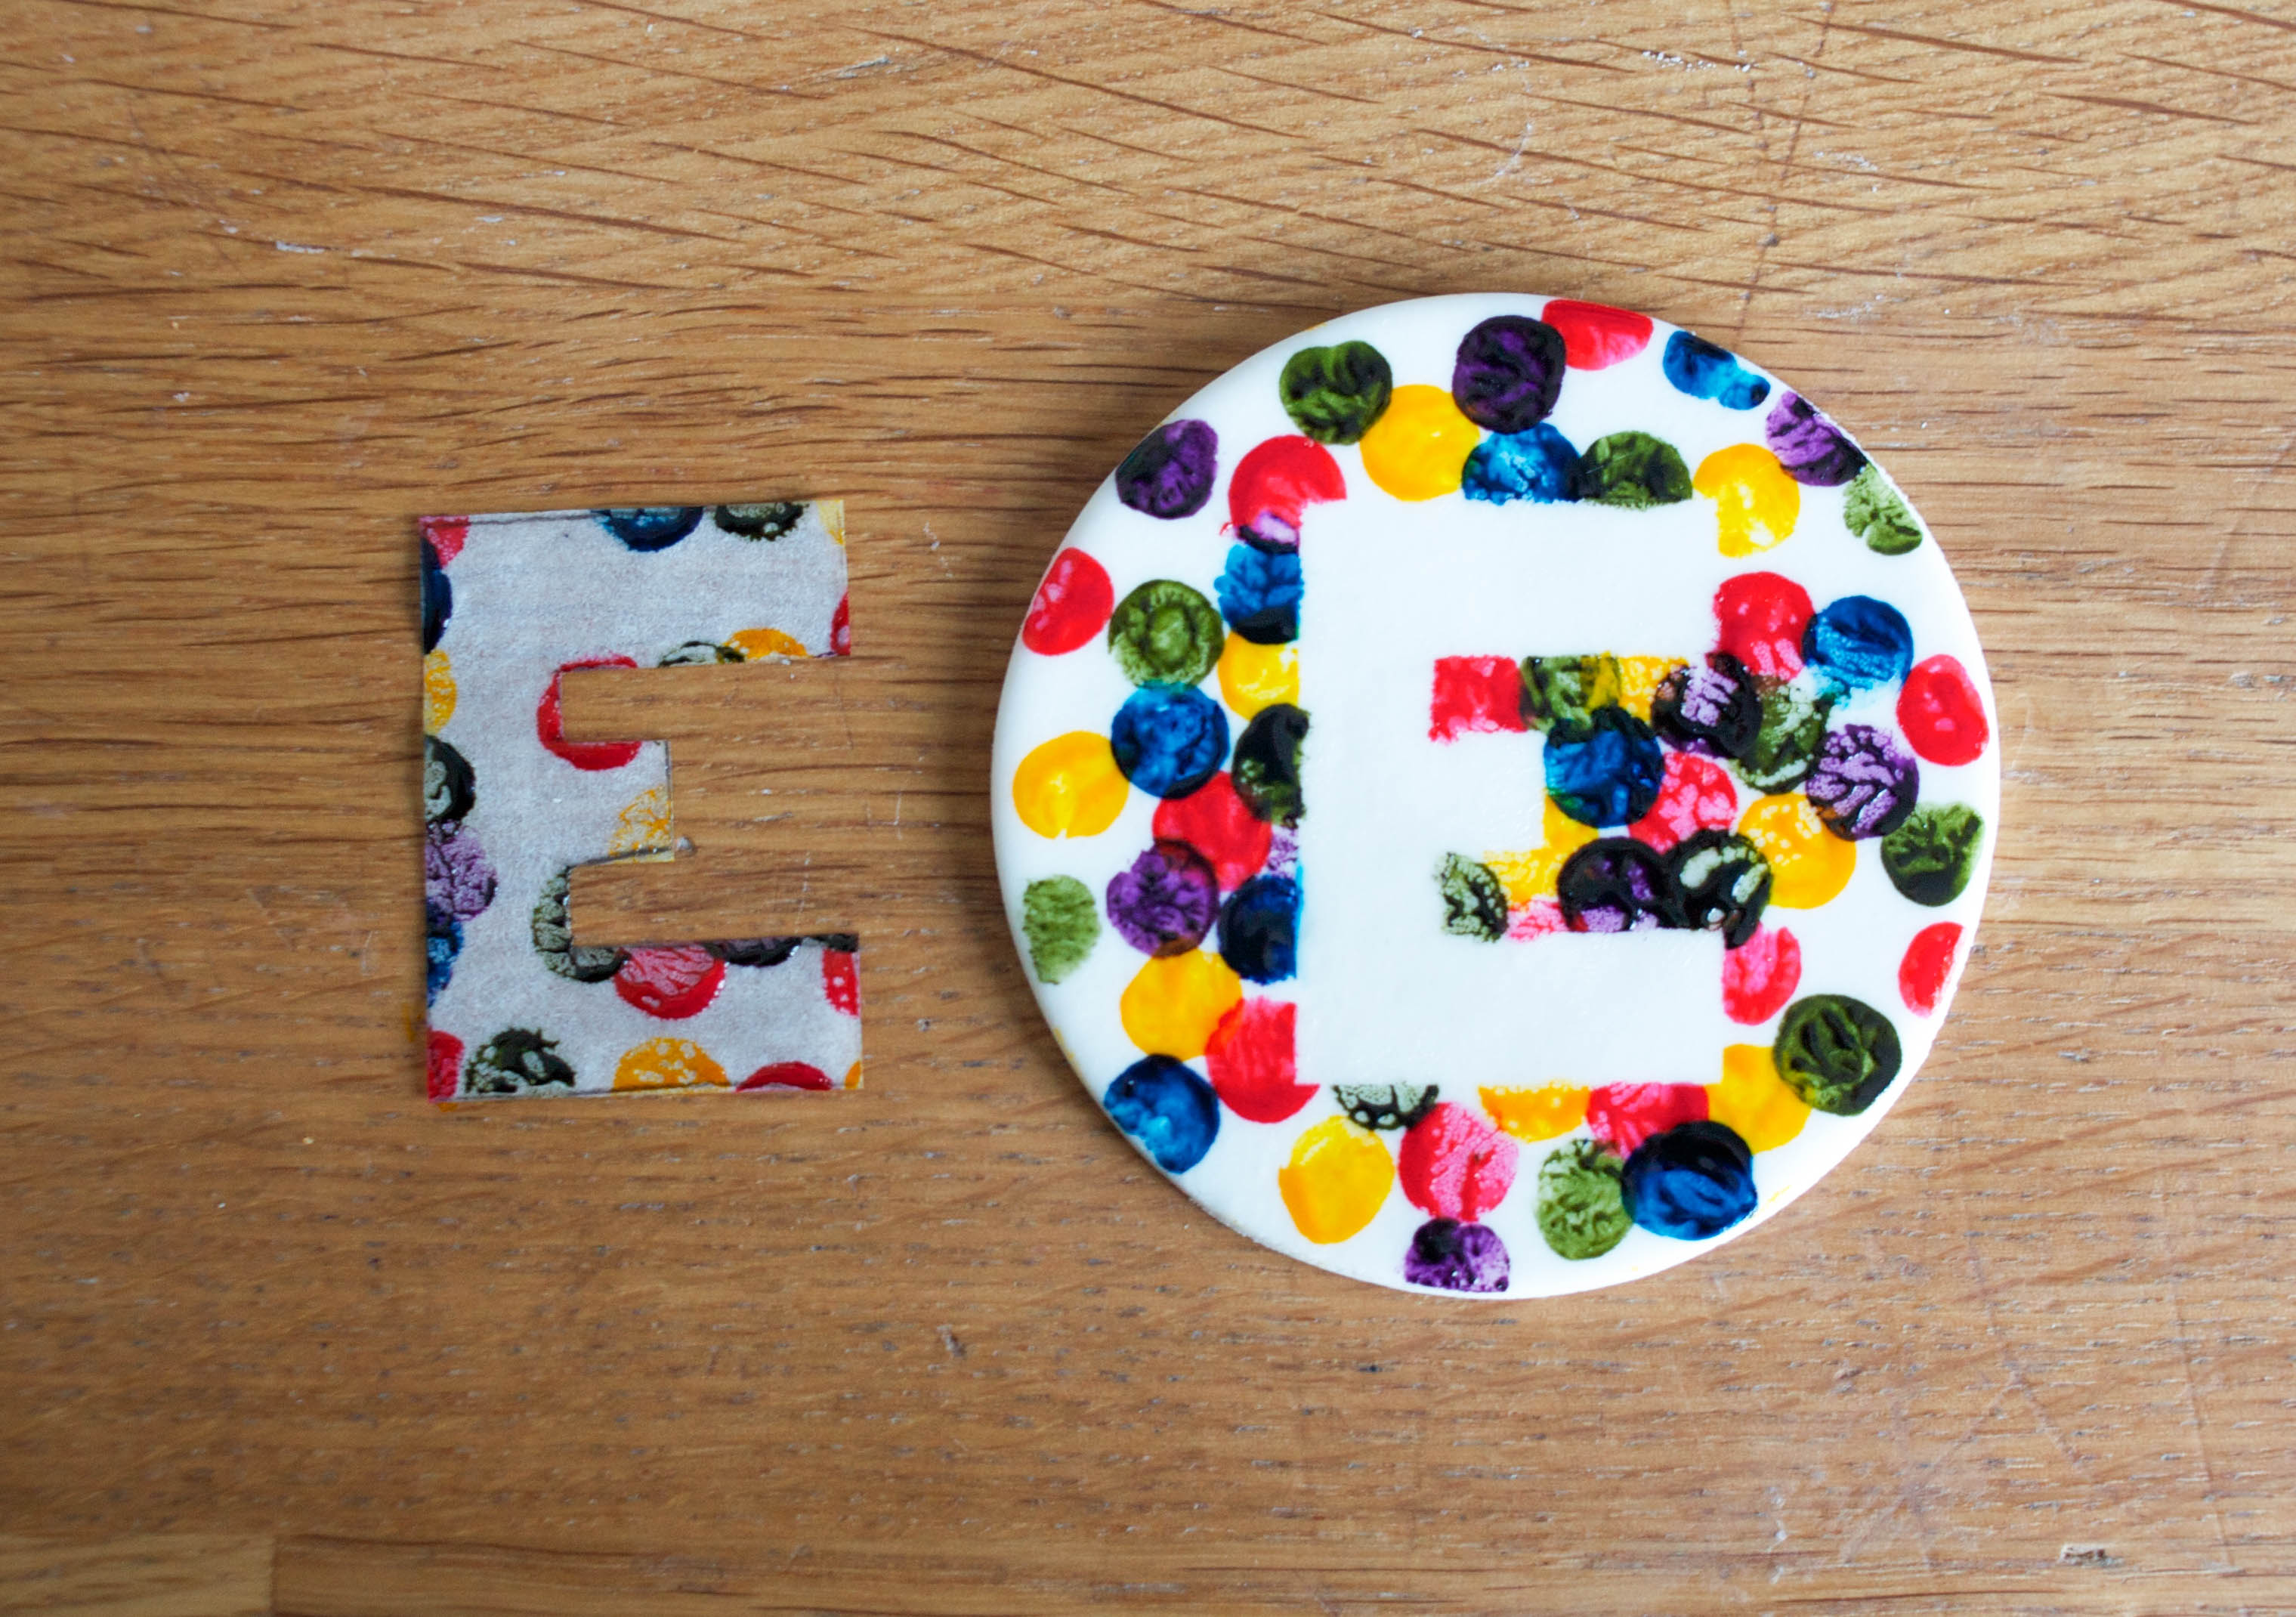
Let the gel colors dry before removing the template. Use the tip of a small knife to help lift the paper up off of the gum paste. Wipe away any excess shortening with a paper towel.
Quick Fix: If any of your food coloring sneaks under the template, use a fine-tipped paint brush dipped in vodka to wipe away the excess color.
Step 4:
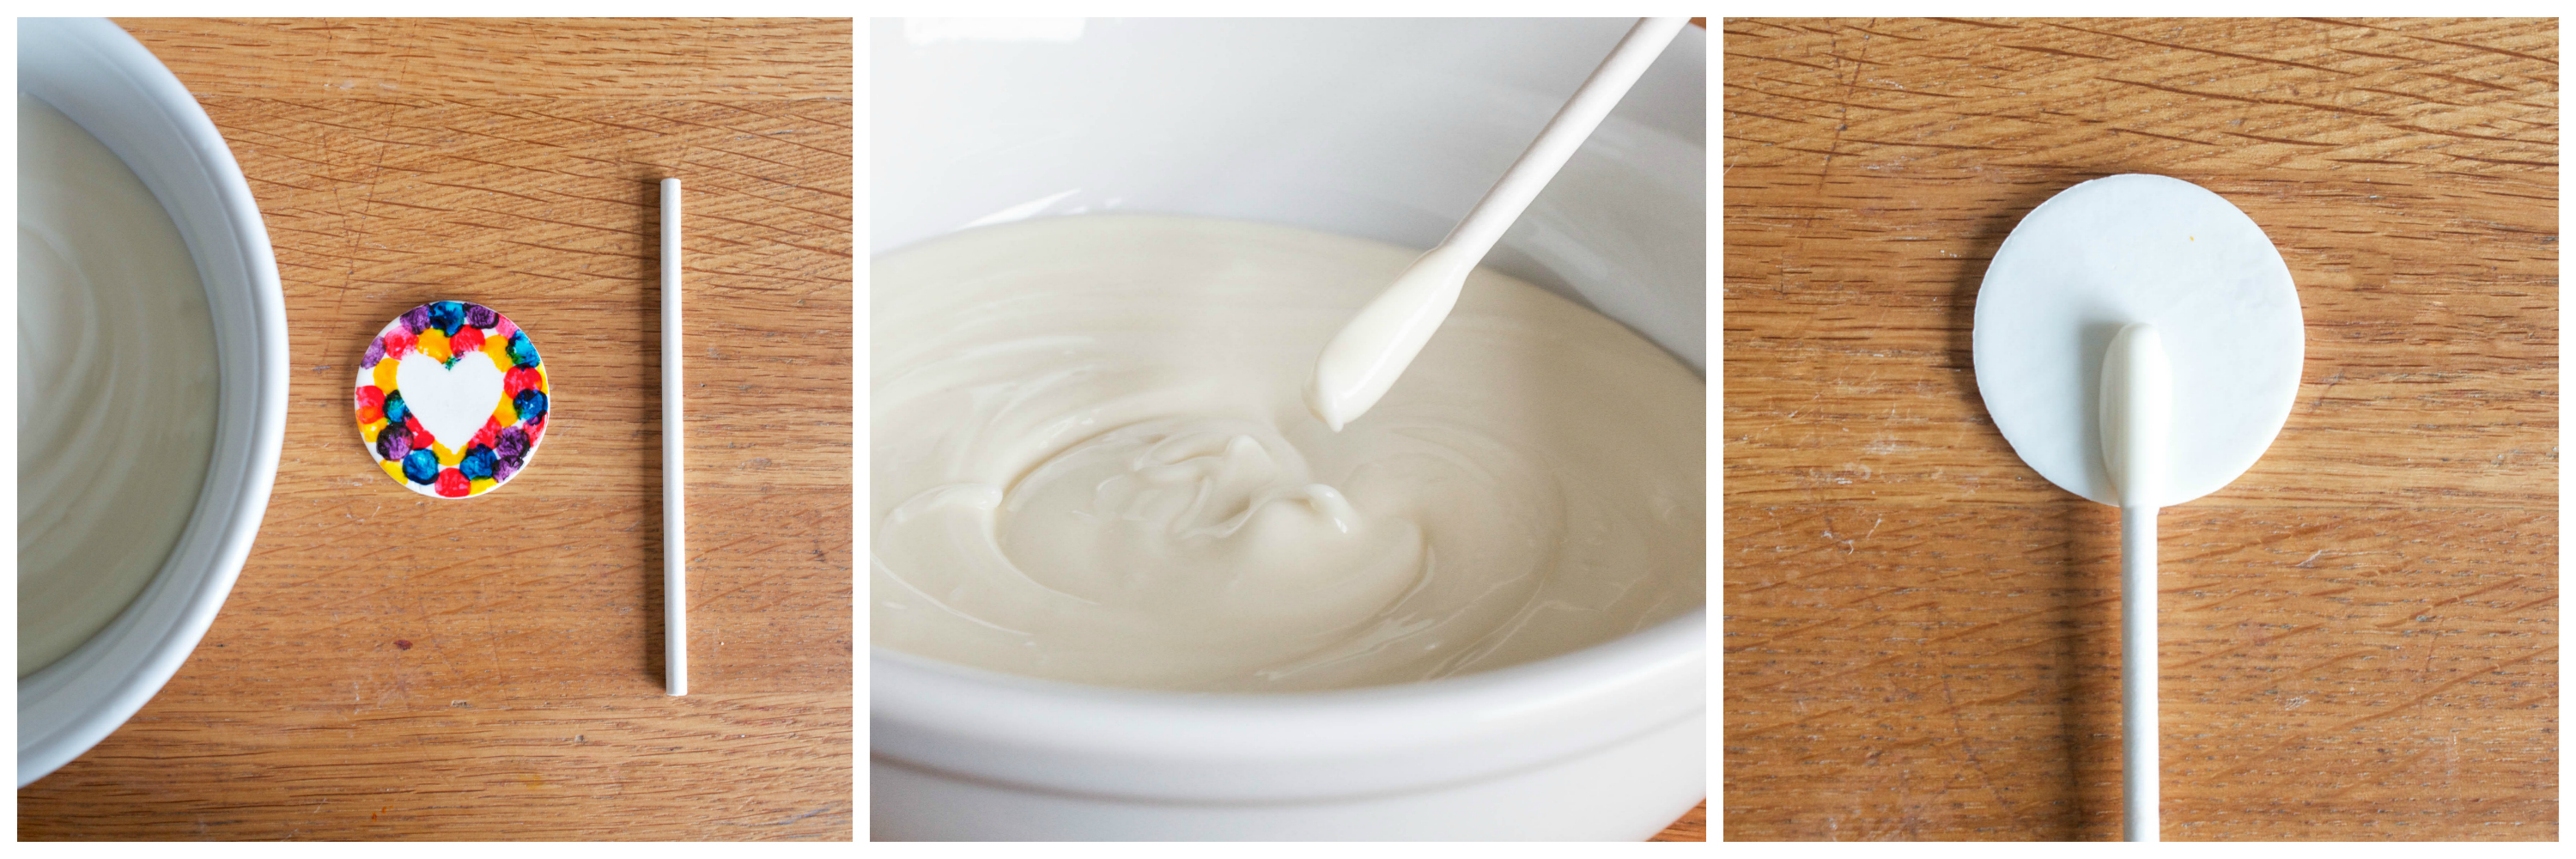
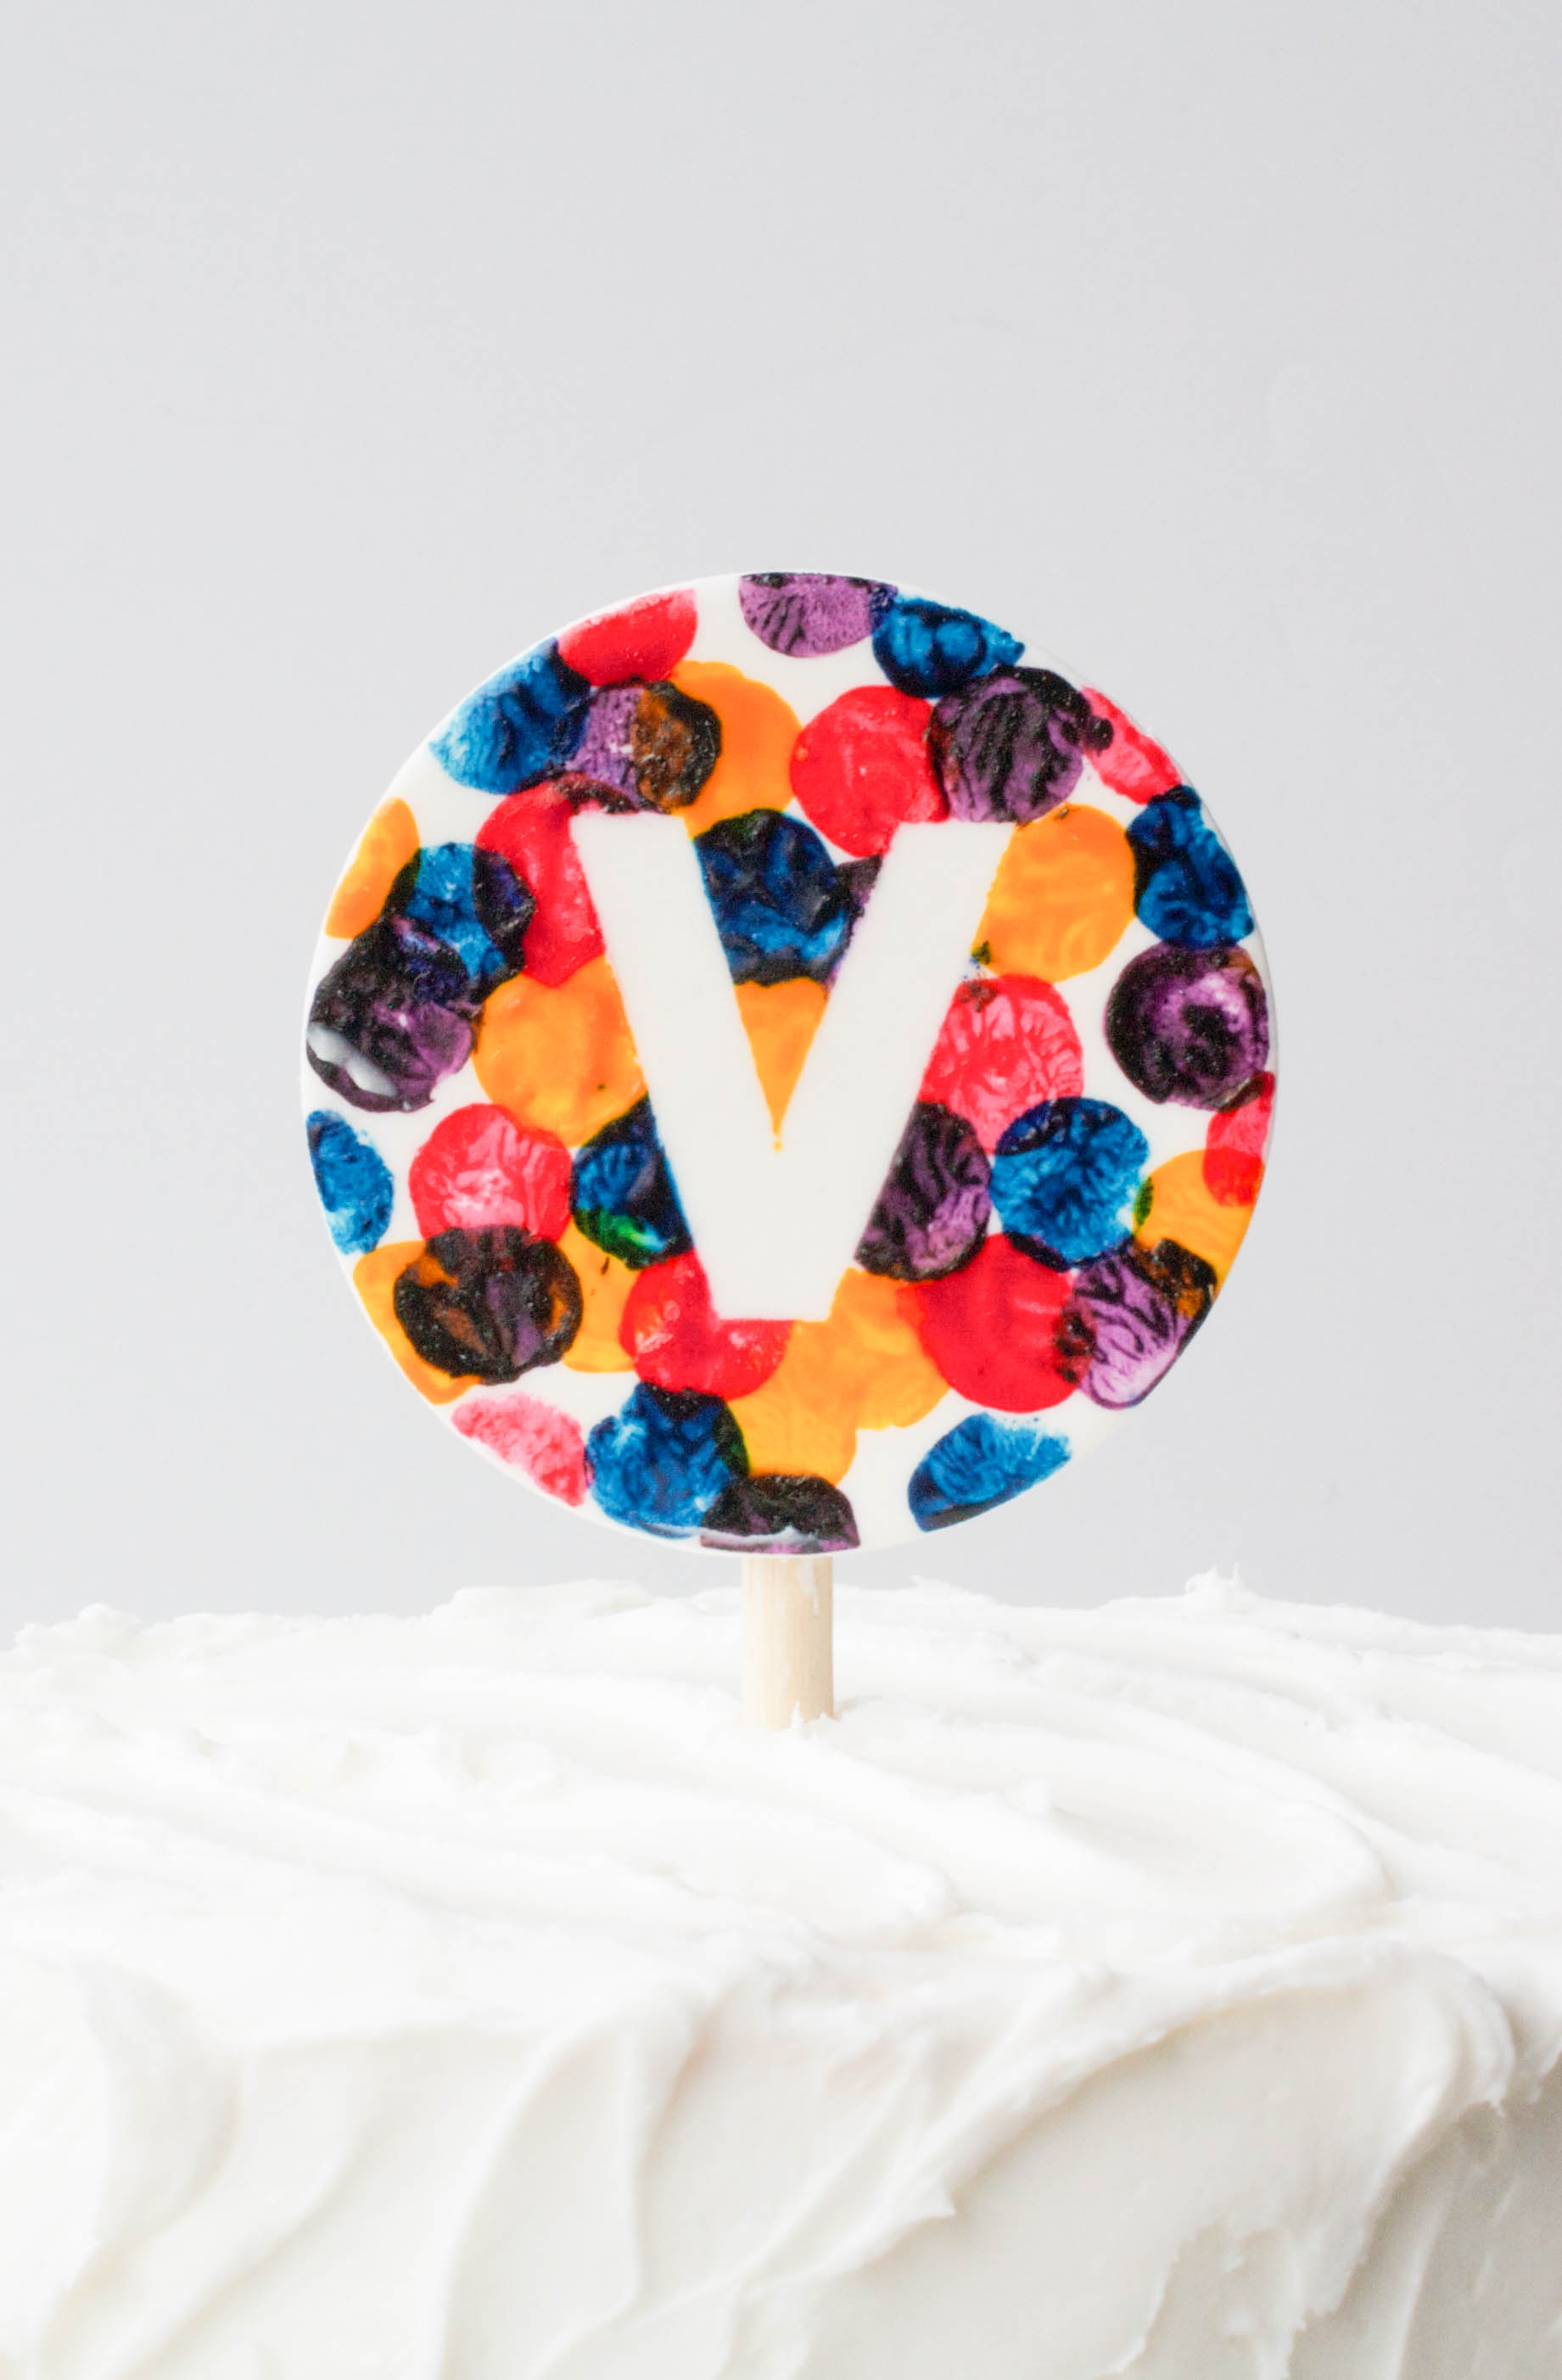
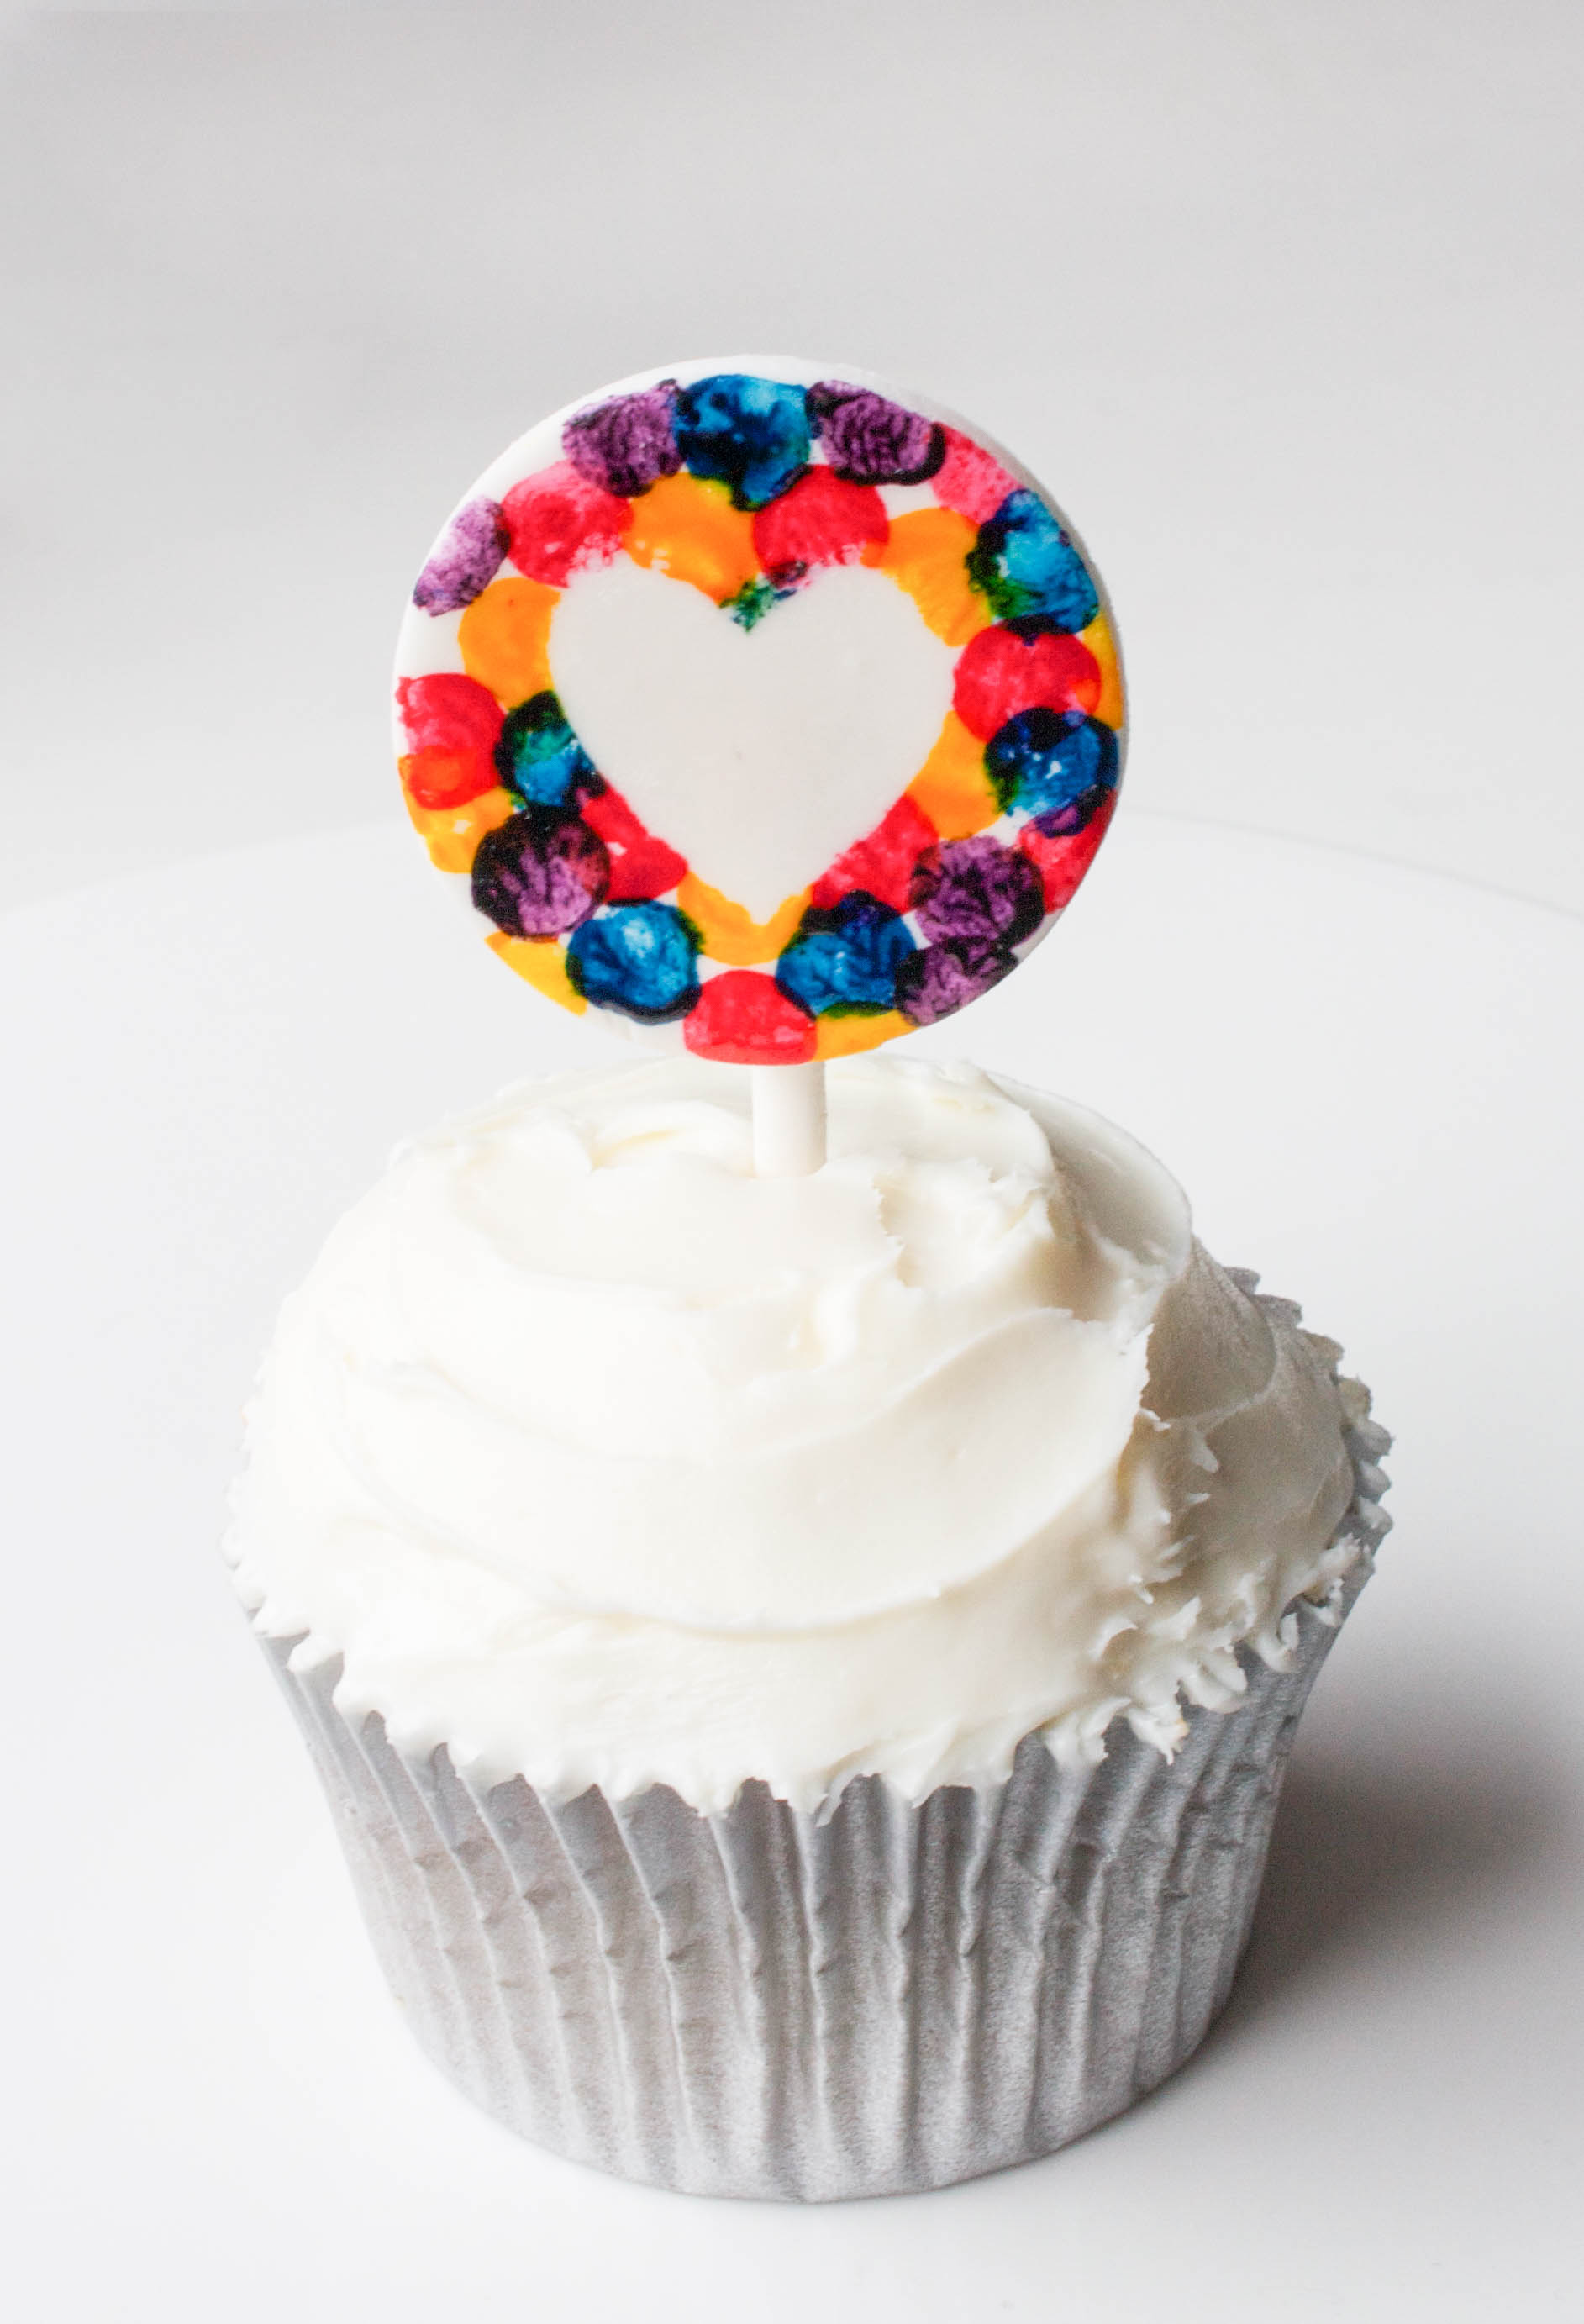
You can use your topper as-is and set it flat on top of a cake or cupcake, or add a stick to prop it up.
Dip the lollipop stick into melted white chocolate or candy melts and place the dipped end onto the back of one of your gum paste discs. Let the candy dry before using your topper.
I stuck to simple circles with this project, but you could use any shape to make your stamps. Hearts, diamonds, or triangles would all be super cute and very on-trend. Mix up the colors and use pastels for a baby shower cake, or sea glass shades for a nautical inspired design.
Working on a fondant covered cake? Go ahead and use this same technique to create confetti revealed designs on the sides or top of your cake.
Share tips, start a discussion or ask one of our experts or other students a question.
No Responses to “Party Perfect: Colorful Confetti Cake & Cupcake Toppers!”