
If you have been around cake for quite some time, you have likely heard the phrase, “I love the look of fondant, but I just don’t like the taste” uttered at least a million times! Luckily, there is a great alternative to fondant: modeling chocolate. For those whom have never used modeling chocolate, it works very differently than fondant and yet it can look the same; better yet, it also tastes like chocolate!
So what is modeling chocolate? It is made of chocolate (i.e. chocolate chips, chocolate chunks, or candy melts, though for our purposes today, we will refer to them all as chocolate). Basically, corn syrup is added to the chocolate. The little bit of water in the corn syrup seizes the chocolate and turns it into a soft clay which can be worked and molded into shapes or draped over cakes. Interestingly, you can use modeling chocolate to replace most fondant work. When created correctly it holds its shape and does not need to dry. As a result, modeling chocolate is great for sculpting figures or making flowers. But today, we are discussing how to cover a cake in modeling chocolate.
So, the first thing to remember about modeling chocolate is that it does not dry out the way fondant or gum paste do. As Lauren Kitchens says in her incredibly informative class Cityscapes, Intro to Modeling Chocolate, “the enemy of modeling chocolate is heat not air.”
Modeling chocolate is made of chocolate and as such, can melt, even in your hands, so when you are working with it, make sure to keep both your hands and chocolate cool. Again, Lauren does a great job of demonstrating this in her tutorial.
If you find your chocolate getting too warm and your fingers are getting oily, STOP and put the modeling chocolate down! You have warmed it up too much, so you need to let it cool for a while. You might even need to place it in the fridge and let it firm up. Luckily, all is not lost- it will work just fine once it is cool.
The other thing to remember when working with modeling chocolate is that it is not stretchy the way fondant is. It will actually tear, so if you are covering a cake and one side is too short, don’t try to pull it to cover that side. Basically it is best to measure first and make sure your modeling chocolate is large enough to cover your cake.
So let’s begin.
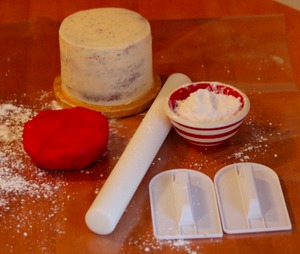
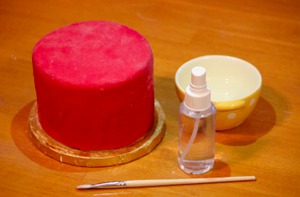
Here are the ingredients and tools you will need to cover your cake in modeling chocolate:
- A cake, of course. It needs to be crumb coated and chilled.
- A rolling pin
- Powdered sugar or corn starch, which ever you feel more comfortable with. In this tutorial, I used powdered sugar and went a little crazy with it.
- A fondant smoother or 2, depending on the size of your cake.
- A paring knife (not shown)
- A mat, or you can use your counter, just add a little extra powdered sugar.
- Modeling chocolate. You can use about the same amount you would as if you were coving your cake in fondant.
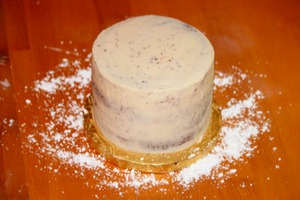
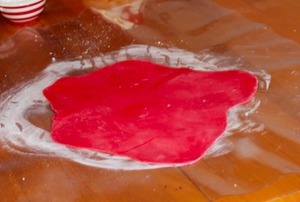
I like to start by putting just a little bit of powdered sugar around the base of my cake, to help prevent the modeling chocolate from sticking to the table after I lay it down over the cake. In the past I have started all over many times because the fondant or modeling chocolate stuck to the counter and then it tears everything up top.
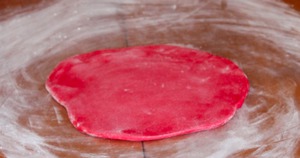
Now we are ready to start rolling out. Work your modeling chocolate to where it is soft but still firm. Be careful not to let it get oily, but bear in mind that you do want it workable.
I am working on a clear mat but using only the bottom side. Roll it out until it is thin, about 1/8 – 1/4 inch thick (4-6 mm). It is best to roll it out from the center and push out.
Be sure to continue picking up and turning your modeling chocolate every few strokes. This is very important because modeling chocolate will stick even to non-stick surfaces. No surface is safe from modeling chocolate!
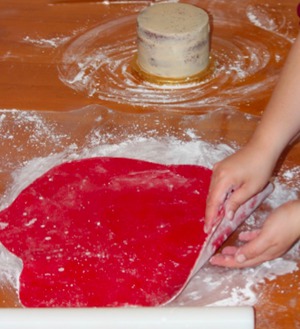
Once your modeling chocolate is rolled out and is not sticking to your mat, you are ready to cover your cake.
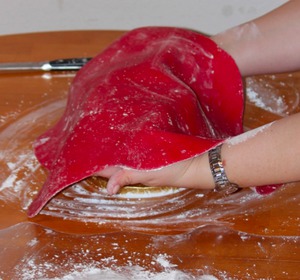
Pick your modeling chocolate up gently. I am covering a small cake, so I just picked it up with my hands and placed it on, but if you are more comfortable rolling it onto a rolling pin, you can do that as well. Remember there are no modeling chocolate police. If it works for you, then do it your way!
Now comes the tricky part. Start by securing the top of the cake and rubbing it to top of the cake to attach it. Then just like with fondant, you want to gently “Fluff the skirt.”

Fluffing the skirt is a bit different with modeling chocolate because as we discussed earlier, modeling chocolate does not stretch. So as you fluff, you also want to move it up and toward the cake rather than fluffing and pressing down on the cake as you do when you are working with fondant.
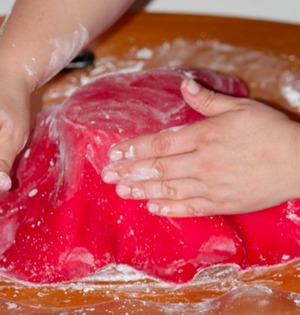
The top edge of your cake tears easily, but remember heat can be our friend. If you find that yours starts to tear, you can sometimes press the edges back together and rub them softly. The warmth of your fingers can help the seam disappear. This doesn’t always work, but it is worth a try.
Remember to continue pressing up and in. And if you spot any blemishes, sometimes rubbing with your fingers can fix them. Also, keep in mind that if your hands are really warm and you are taking a while trying to get your cake covered you might start to melt your modeling chocolate. So, if you know this could be a problem, have a bag of ice nearby to cool your hands down, making sure to keep them dry.
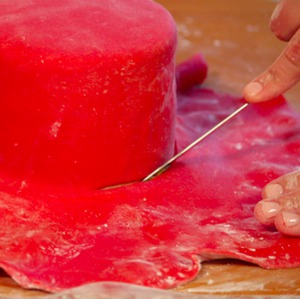
Once you have your cake covered, cut the excess off. If it does not have icing on it, so you can reuse it. Modeling chocolate can be stored at room temperature for 2-3 months wrapped securely in plastic wrap put in a Ziploc bag or it can be frozen for up to a year.
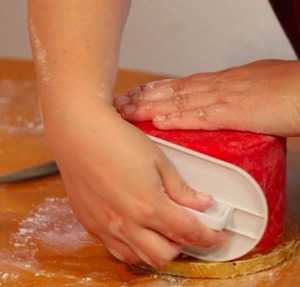
Use your smoother to secure the modeling chocolate to your buttercream underneath and to help get out wrinkles. You can also go back and warm areas with your fingers to help smooth them out further.
If you find that you have a lot of extra powdered sugar on your modeling chocolate you can first use a firm dry paint brush to “dust” off your cake. Then I like to use a small spray bottle filled with vodka to mist over the entire cake. I then wet the paint brush with vodka and go over it again to remove the rest of the powdered sugar. Water tends to bead on the surface and does not remove the powdered sugar as well.
With a few more details we are ready to present a beautiful and delicious cake!

Be sure to explore Lauren Kitchen’s Craftsy class Cityscapes: Intro to Modeling Chocolate to learn tons of great information to help bring your modeling chocolate techniques to the next level.
Making a goblet, will the chocolate detach from the sides once turned up?
How hong will a cake with chocolate clay last?
Can you freeze the cake after it's been covered? If yes. How would I bring it to room temp? Thank you!
I really like your tutorials of covering a cake with modelling chocolate..l thought I would have to spray water on the cake before I cover with the MC. Thanks a heap. Would be looking forward for more tutorials from you.