
We’ve already covered the three major factors of controlling exposure: shutter speed, aperture and ISO. In this post, the last in our four-part series, I’ll cover how to work with shutter speed, aperture and ISO to create the proper exposure for the types of photographs you want to take.
Shutter speed, aperture and ISO all work together in a photograph.
It’s a three-way balance of light, and most of the time, you have some options in how you choose to balance them. In the previous posts, we talked about how to take shutter speed, aperture and ISO up a stop (letting in twice as much light) and down a stop (letting in half as much light) and the numbers associated with each.
Once you find the proper exposure for your photo (using your camera’s light meter), you can adjust it based on whichever of the three variables is most important to your photograph.
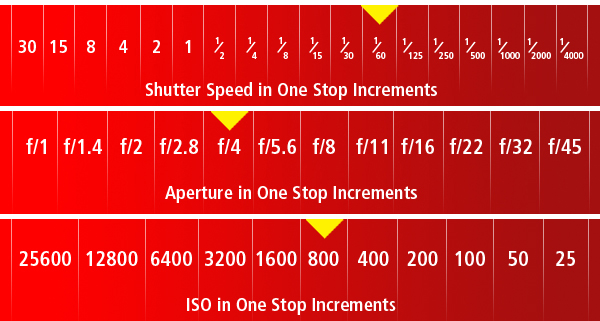
Let’s say that I know my shutter speed needs to be at least 1/60 second. I’m doing a portrait and it’s the slowest I can hand-hold the camera.
If my meter says that an even exposure (not overexposed or underexposed) can happen at f/4 and 800 ISO, then I have a few options:
- If I can take my aperture up a stop to f2.8, then I can take my shutter speed down a stop to 1/125. If you go up one stop in one area you must go down one stop in another.
- Using this rule, another option would be to take the ISO up two stops to ISO 3200 and then to take the shutter speed down two stops to 1/250 second.
- Or I could take the ISO up two stops and take the shutter speed down one stop and the aperture down one stop. The point is, once you have a proper exposure, the balance must remain.
Here are some examples of the variables when choosing your settings:

ISO 1600 was fast enough to shoot at 1/2000 sec. I could have gone to ISO 3200, but the decrease in quality wasn’t worth the speed since I was already getting a sharp image.
If you are shooting sports in a stadium at night, you will most likely have low light.
My first decision would be to take the ISO as high as it will go while still being of an acceptable quality — probably ISO 3200 on my camera. Then, I would take the aperture as open as it will go — let’s say f/2.8. This leaves me with the fastest shutter speed possible, great for capturing action. If it’s bright enough in the stadium and my shutter speed is maxing out at 1/8000 second, I can consider changing the other variables.
For sports, I care least about the depth of field, so I would bring my ISO down to improve the quality of the shot.
If I’m shooting a landscape on a bright sunny day without a tripod, I will most likely set my ISO first.
With plenty of light, I know I can keep the ISO at 100, which will give me the highest quality (least digital noise) for my photo. Next, I would make sure my shutter speed was fast enough to hand-hold the camera — at least 1/60 second for my wide angle lens and no tripod. The aperture is of little consequence since I won’t be all that concerned with depth of field for a landscape. It could be f/4 or f/22. It won’t make much of a difference.
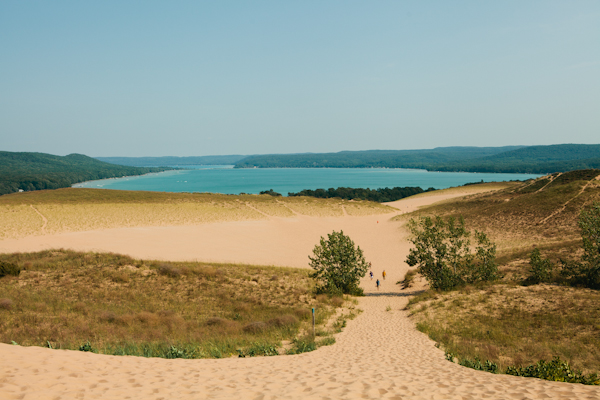
1/640 second at f/6.3 and 100 ISO. Having a low ISO was most important in this shot.
For a window-lit portrait on a cloudy day, my most important variable is aperture.
I want a shallow depth of field and to focus on eyes. I know that my shutter speed needs to be at least 1/125 to hand-hold the lens I’m using, so I’ll start there. If it’s still not enough light to get a proper exposure, I will bump up the ISO until I have enough light.
If you take enough photos, you will find yourself using the entire range of shutter speeds, apertures and ISO speeds. And you will quickly learn how to balance all three.
Share tips, start a discussion or ask one of our experts or other students a question.
No Responses to “Building Blocks of the Photographic Process: Proper Exposure”