
Puff stitch crochet is easy to learn but adds a sophisticated texture to crochet fabrics and motifs
Double crochet puff stitch tutorial
Before I talk a bit more about my own experiments with this stitch, let’s run through how to complete the stitch using the double crochet stitch as a starting point.Selecting materials
All you need is yarn, a hook and some scissors. I chose a 100% acrylic DK yarn that’s nice and plump and gives good stitch definition.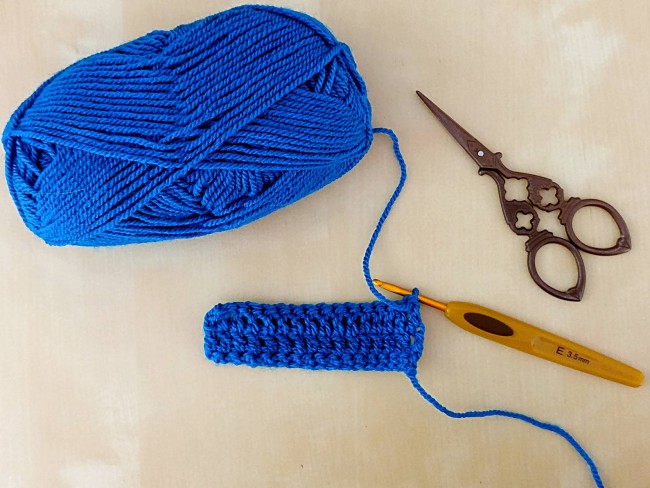 Puff stitch crochet also works well in wool/acrylic blends, silks, cottons and smooth wool yarns. When you first try the stitch, its probably best to steer clear of “fuzzy” yarns and fingering or sock weight yarns, just because its more difficult to see what you are doing and the effect you are creating.
Make a foundation for a puff stitch swatch
When I’m playing with a stitch that’s new to me, I make a swatch by starting with 18 chains, then working one row of single crochet stitches and then a row of double crochet stitches. Here’s a quick tutorial:- Ch 18
- Work the first sc into the second chain from the hook, then work 16 more sc stitches to the end.
- Turn, make 3 chains (these count as your first dc).
- Make 16 more dc stitches, one in each of the sc stitches in the first row.
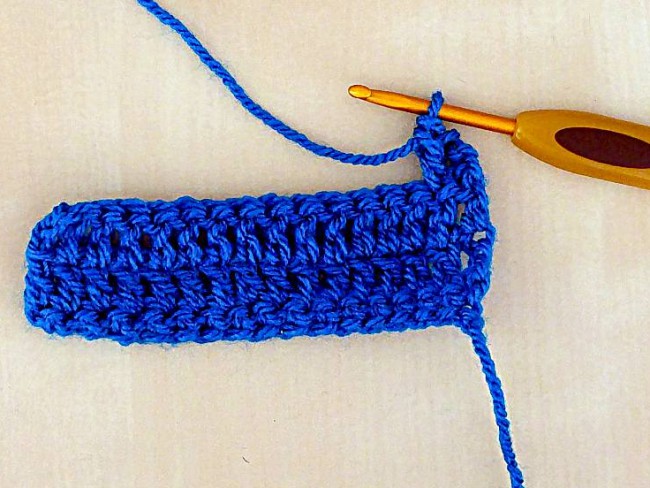
- Turn, make 3 chains and 1dc; your work should look like this:
Puff stitch placement
Once you have your swatch, you’ll work a row of 3-DC puff stitches by working the puffs into every other stitch. So, you skip the next stitch and work into the one after to create your first puff.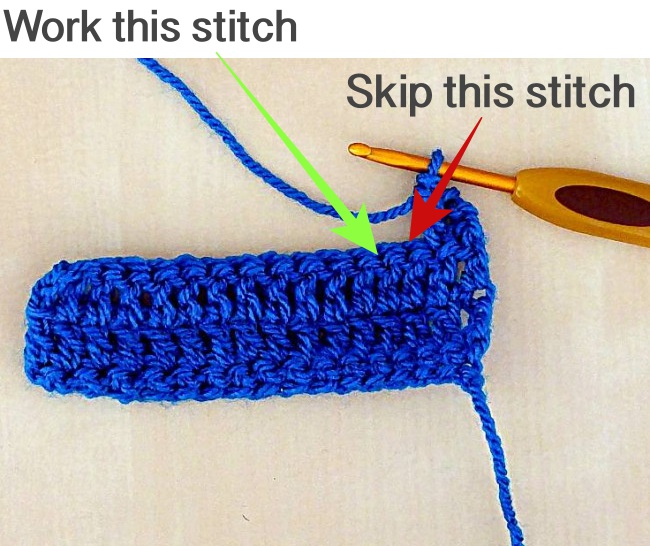
Here’s how to crochet the puff stitch, step by step:
Step 1:
Yarn over and insert your hook it into the stitch (just as you would for an ordinary DC). Yarn over and pull up a loop. Use the shaft of your hook to elongate this loop so that it reaches the height of the DC stitch you’ve already made.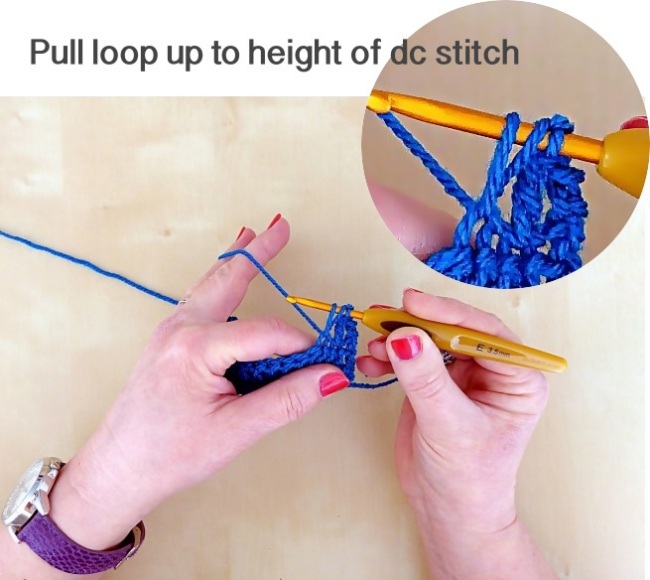
Step 2:
Yarn over and insert your hook into the same stitch. Yarn over and pull up a loop. Pull that loop up to the height of a DC. Step 3: Repeat Step 2 — yarn over and insert your hook into the same stitch. Yarn over and pull through a loop. Pull that loop up to the height of a DC. You will now have 7 loops on your hook.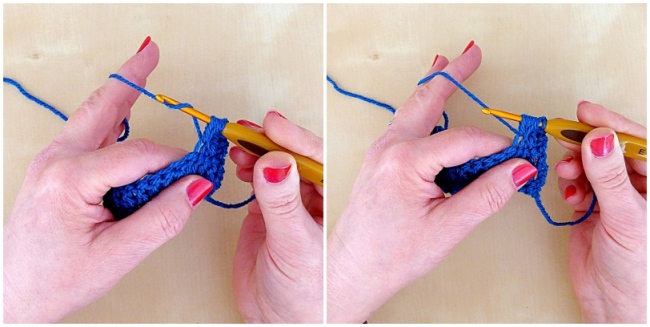
Step 4:
Gently rotate your hook so it’s pointing down, yarn over and pull through all 7 loops. It helps to use the shaft of the crochet hook to keep lifting up those extended loops to keep them taut.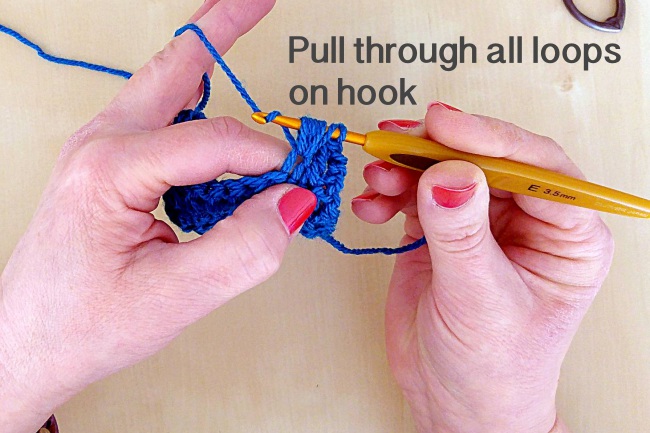
Step 5:
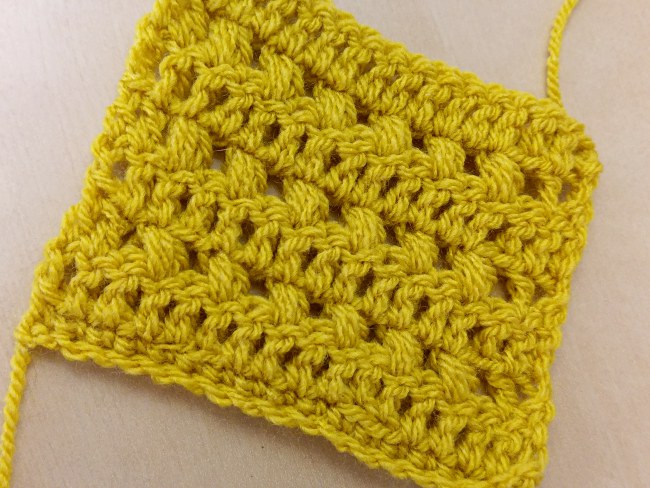
Your stitch will now look like the one below left. To finish crocheting the puff stitch, keep your working yarn taut and make one chain (see the photo below right). This prevents the puff stitch from becoming loose.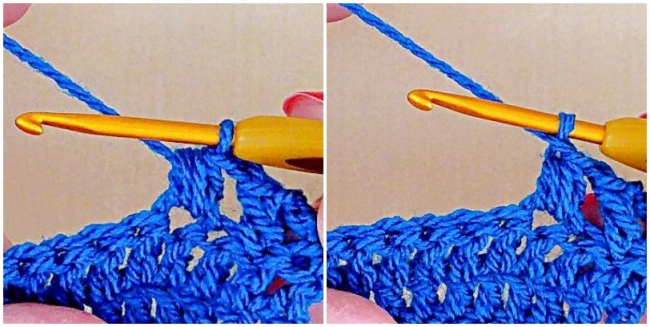 That’s all there is to it! Repeat the steps above until you reach two stitches from the end of your swatch. Make an ordinary DC into the last stitch and the top of the turning chains and you will have a row of puff stitches.
Experimenting with the puff stitch
In the swatch below, I worked the next row in ordinary DC stitches and went on to complete a second row of puffs. You can carry on as many times as you like. In the swatch below I tried a different color and made three puff stitch rows, all separated by a row of DC stitches.
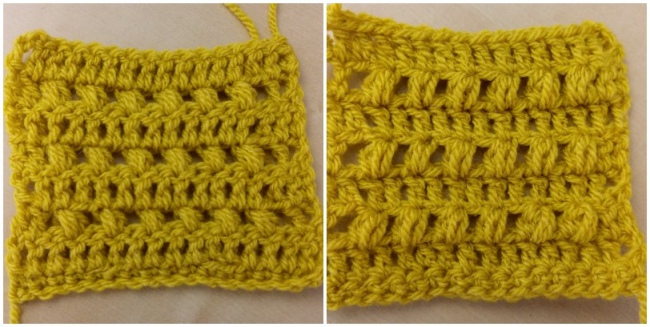
 I found that the reverse of the fabric (photo below right) was slightly different in its texture compared to the right side (below left), as the loops of the puff stitches were more prominent.
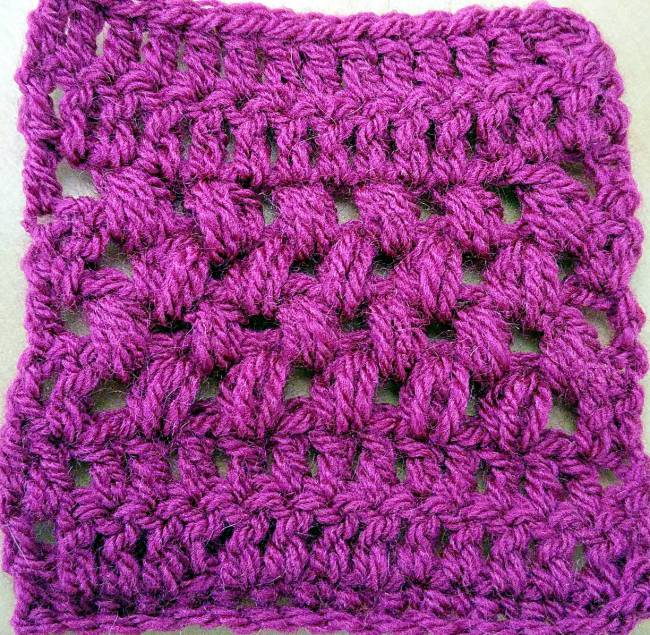
 I then made swatch with four rows of puff stitches, one after the other. This creates a crochet fabric that is the same on both sides. The more prominent, reverse side puff stitches alternate with the slightly tighter right side stitches. This looks very effective when bordered with a couple of rows of plain dc stitches top and bottom:
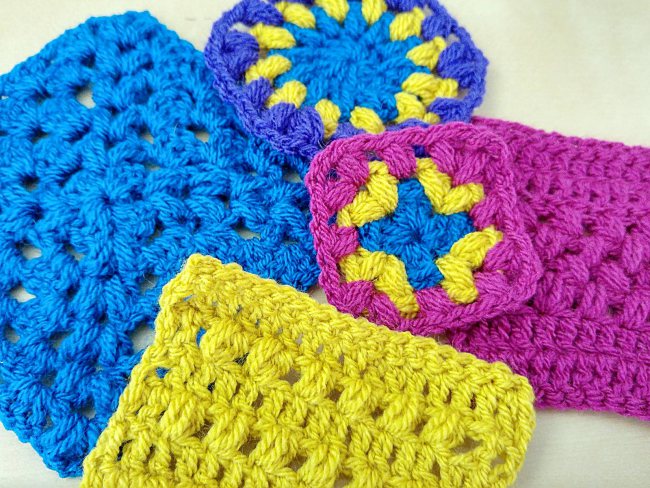
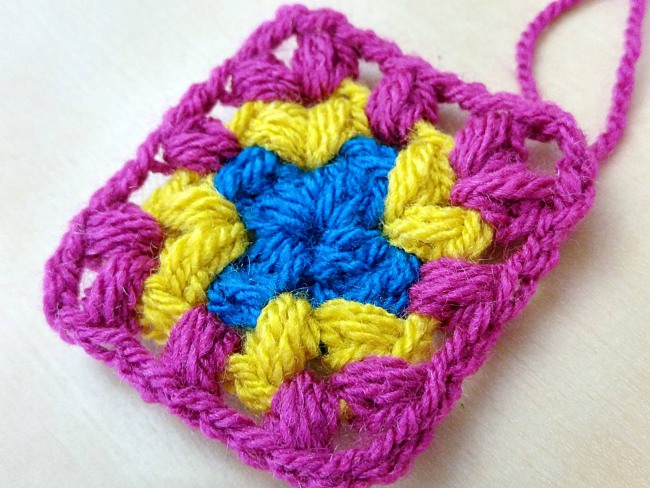
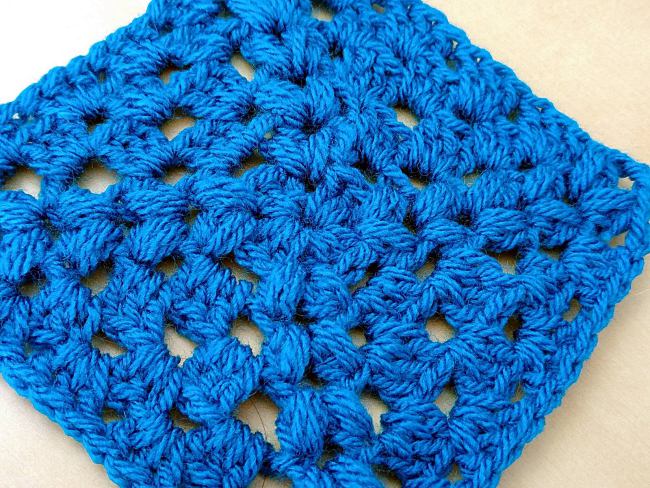
 Of course, you don’t have to do puff stitch crochet in rows — you can use the stitch to make highly textured motifs. For this three-round granny square, I used plain DC stitches for the first round, then replaced the plain DCs with puff stitches in rounds 2 and 3. Because the puff stitches are wide in the middle but narrow at the top, I found I had to add 2 chains between each puff stitch to create a neat square:
 I tried making a hexagon too, but I admit this wasn’t as successful. I think the second and third rounds work well, but I would prefer this motif to have plain DC stitches in round 4, as the hexagon doesn’t keep its shape that well with the puff stitches in the outermost round.
 In this larger granny square, I replaced only the corner stitches with puff stitches and used plain DC stitches for the sides. This added a more interesting texture to a plain, one-color motif.
I would love too do the. How do I get The video or instructions