
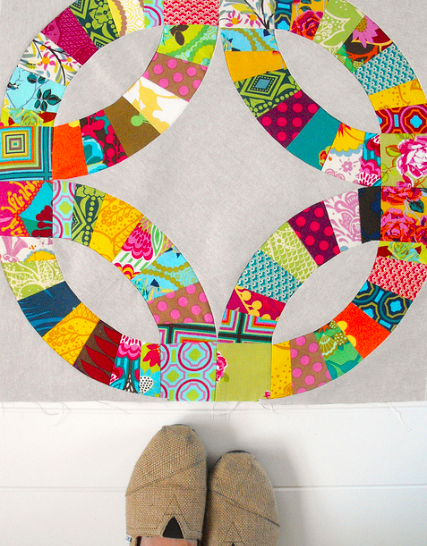
I’ve been working on quilting my Pickledish quilt lately, and I’ve been enjoying it so much! Curved piecing and quilting circles are skills that many sewists shy away from because they are intimidated, but that is unnecessary! With proper pinning and a bit of patience, sewing curves can be simple.
Here is a quick tutorial on how I like to pin and sew curves.
1. First, mark the center of both pieces of fabric by folding them in half and finger pressing the fold.
2. Lay the pieces right sides together with marked centerfolds lined up together. Pin centers together.
3. Pin one side together, raw edges aligned.
4. Pin the other side together in the same manner.
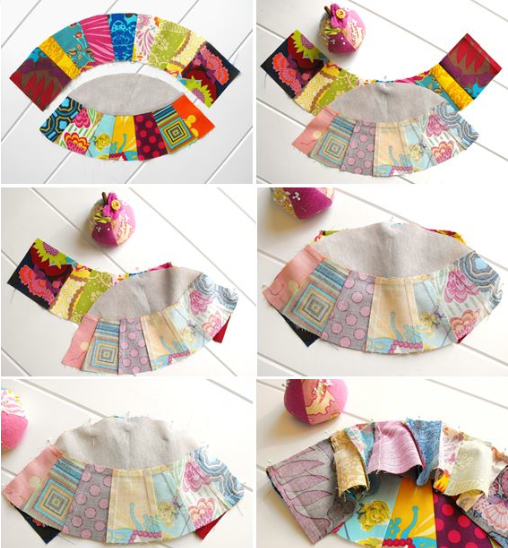
5. Working between one of the outer edges and center pin, ease the fabric into the curve, making them lay flat together. Use as many pins as you’d like to hold the fabrics tightly together. Repeat for other side.
6. Sew the pieces together slowly, backstitching at the beginning and end. Follow the curved edge and slowly pull out the needles as you approach them.
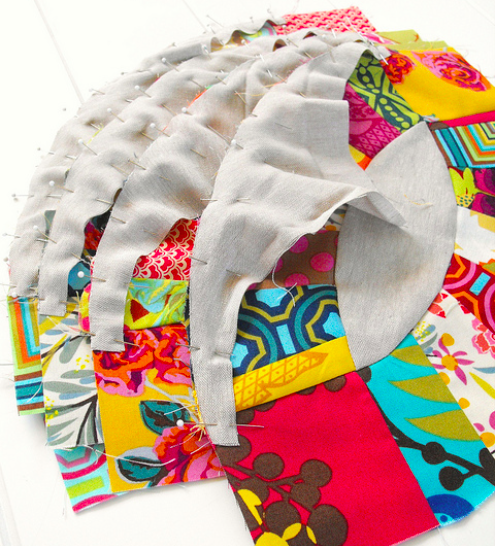
Though some quilters do not like to pin their pieces for curves and have great success without them, I prefer to use them because they provide comfort and accuracy.
If you are looking for a quilt pattern with some great curves, check out the Retro Flowers or the Mod Pop quilt patterns.
Learn how to tackle curved elements with confidence in the course Inset & Appliqué Circles by Machinewith Cheryl Arkison, and also be sure to take a look a Playing with Curves, taught by award-winning quilter and instructor Ann Petersen.
You might also enjoy this stitch and flip tutorial. Come back to the Craftsy blog on Tuesday for a fun take on quilting feathers.
Share tips, start a discussion or ask one of our experts or other students a question.
No Responses to “Curved Piecing Tutorial”