
You have to draw a curve before you can build it in wood. Including fascinating curves in furniture designs is fun, and when done well adds memorable distinction to your work.
If you’ve been shying away from including curved features in your woodwork, give it a try, even if, like me, you “can’t draw.”
Don’t fear the curve
Too many woodworkers shy away from incorporating curves in their work. True, when compared to a rectilinear piece, one featuring curves takes more time to build and involves techniques that may be unfamiliar. Similarly, some woodworkers reluctantly confine their designs to dependable, readily definable straight lines because they think they can’t draw.
The process does indeed start with drawing but fortunately there are straightforward techniques and tools that help a lot. Despite having no particular drawing talent, curves are virtually always key elements in my work.
Why draw?
With few exceptions such as incrementally produced, highly sculptural work, curves in furniture building need to be drawn before being committed to wood. You don’t want to commit expensive wood to whim. Also, a curve is often used in symmetrical components of a piece that need to match, so it needs to be produced with control.
Drawing techniques are useful at the drafting board, directly on wood that will then be sawn and shaped, and for preparing templates that will be used to produce wood parts by sawing and routing.
Freeform curves
I rely on Acu-Arc adjustable curves for most of my layouts. Made of interlocking side-by-side layers of flexible butyrate plastic, they are easily shaped to the desired curve. Most importantly, unlike standard drafting flexible curves made of a metal core covered with plastic, Acu-Arcs easily and almost automatically take on a smooth, fair curve.
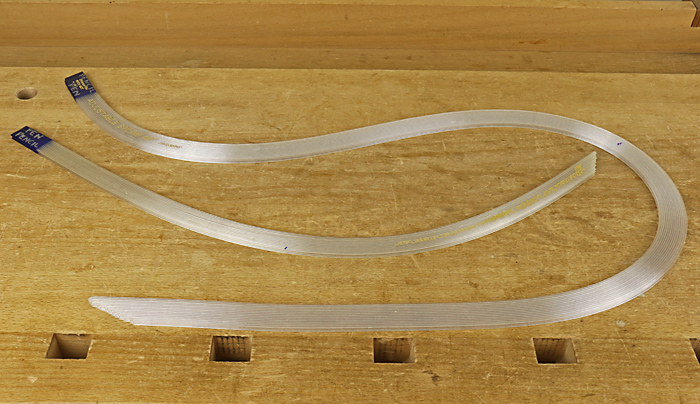
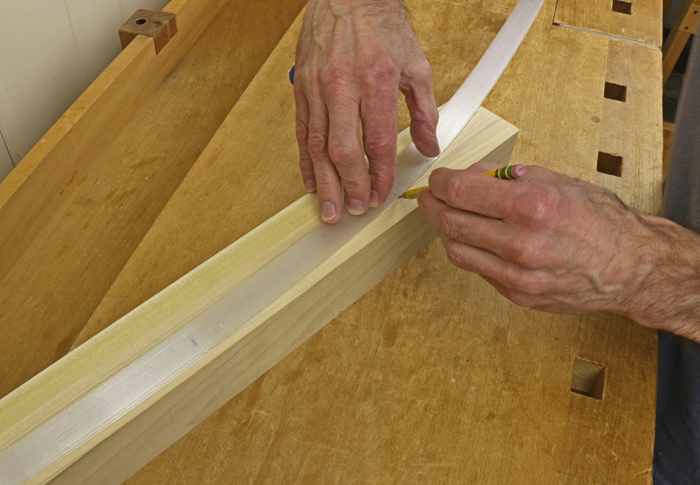
Shape the Acu-Arc, then hold it on the wood and use a pencil to trace only the section close to your hand to prevent pushing the curve out of shape. Carefully reposition your hand further down the curve, trace there, and so forth. Highly recommended, Acu-Arcs are available in lengths of 18″, 24″, 36″, 48″, and 72″.
French curves like the one shown below at top are especially helpful for drawing sharper curved sections, while ships curves, like the one in the middle in the photo, are most helpful for gradually sweeping curves. I particularly use these tools at the drafting board for scale drawings. Also in the photo is a less useful metal core flexible curve. Of course, you can freehand draw curves but I do little of this and usually only to fill in small sections of a curve. I prefer having help from drawing tools!
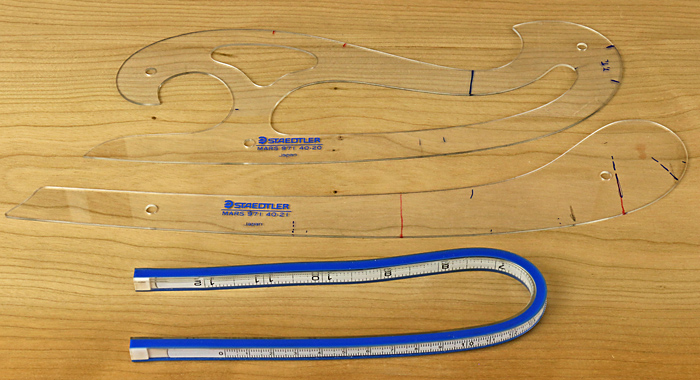
The classic method of tracing against a curved flexible lath that is secured at its ends and one intermediate point is rarely helpful for my work. The curve is defined by those three points and otherwise by the properties of the material, which may not sensitively produce the curve that is really desired.
Defined curves
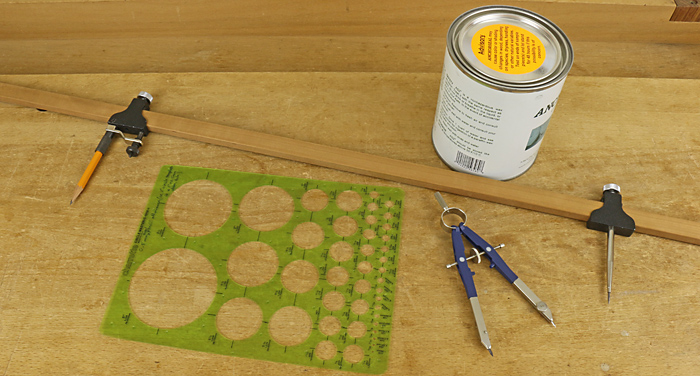
Generally, I find sections of circles to be less interesting but when they do fit the bill, a compass, circle templates, and even cans are helpful on a small scale. Trammel points on a stick, as shown below, work well as a giant compass for large-radius arcs. Small ellipses can also be drawn with templates, while larger ellipses can be drawn with the pins-and-string method in which the ends of a string are each tied to pins placed at the foci of the ellipse.
The process
Developing curved features in furniture starts with sketches. Then, develop promising ideas with more careful drawings at the drafting table, employing small-scale tools for drawing curves. The eraser gets plenty of use at this stage. Mock ups, produced especially with the aid of Acu-Arcs, help refine the design, leading to a finalized scale drawing.
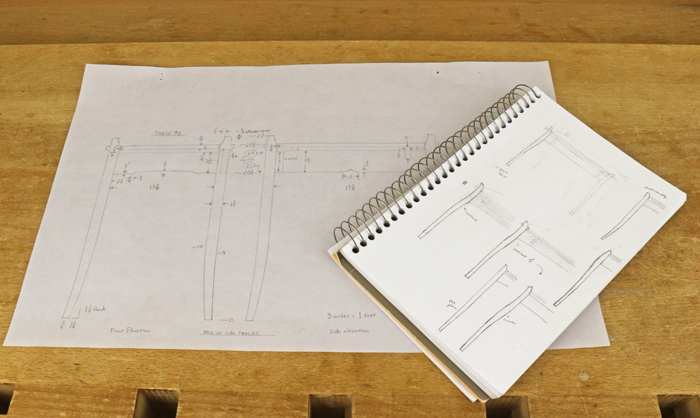
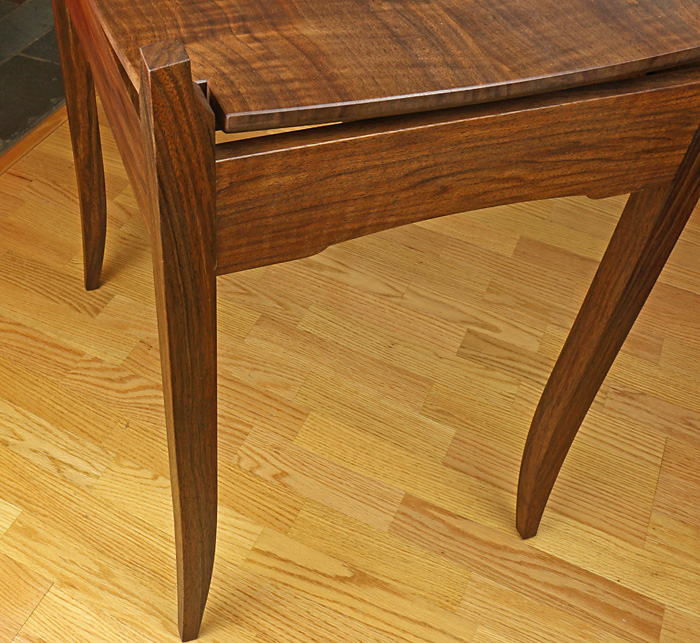
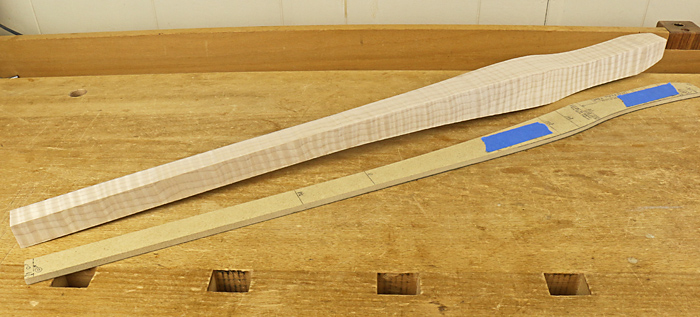
A good example of this process is designing a curvaceous table leg as shown here.
Next, define landmark measurements on the final scale drawing, such as exactly where straight and curved sections begin and end. Also measure the key points in the curve itself, such as the widest and narrowest places, or where it reverses direction. This framework gives you guidance and allows the curved components to integrate into the whole piece.
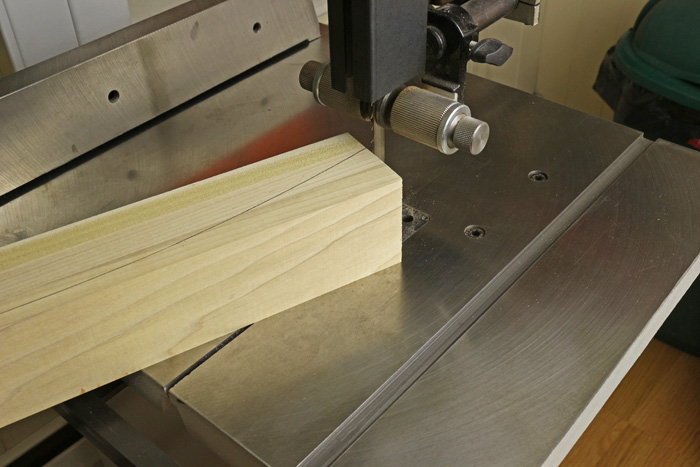
Next, make a full-size template. This template can be used to layout lines on the wood, which will then be sawn and shaped. It can also be used as a physical guide to make parts by pattern routing using a bearing-guided router bit.
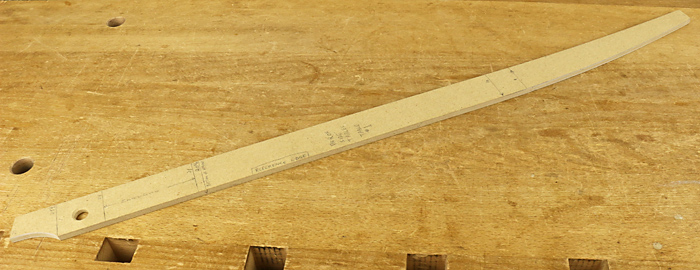
Make the template by laying out those those key measurements gathered from the scale drawing on a piece of 1/4″ or 1/2″ MDF. Then use the Acu-Arc to draw a smooth curve. Use a bandsaw, jigsaw or bowsaw to cut close to the line, and then use hand tools to carefully refine the edges right up to the line. The drawing on paper is now accurately represented in the template, which is a hard record of the curved furniture part, a leg in this case.
But how do you know the curve is “right”?
As you refine the template and later, the furniture part, you are “fairing” the curves. A fair curve is one that flows pleasingly without localized lumps and troughs. Sense this mostly with your eyes and hands. Also check the key landmarks.
A very sensitive method to check a curve is to sight along its length as shown in the photo — looking down the curve on the right side of the leg. It is remarkably easy to detect unwanted lumps and troughs, as well as to sense when the curve looks “just right.”
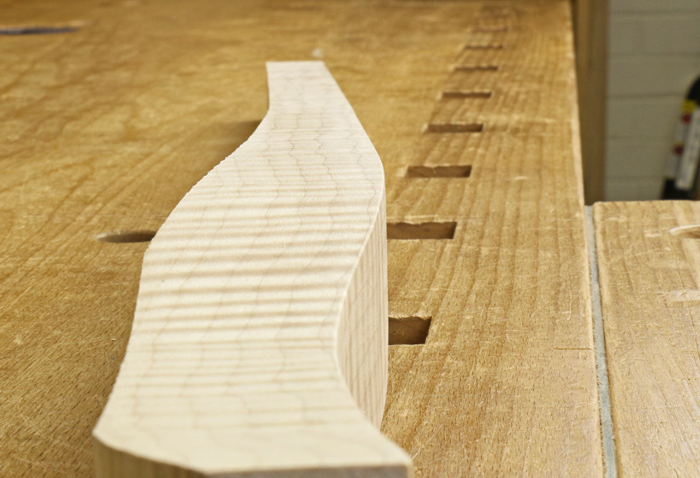
Use your fingers, too. Give your fingertips a ride on the curve. It should feel like a flowing, smooth sleigh ride without bumps or hollows. I like to first “calibrate” my fingers by swiping them on a known flat surface such as the workbench.
Ultimately, if it looks and feels right, it is right!
Share tips, start a discussion or ask one of our experts or other students a question.
No Responses to “How to Design and Build Smooth Curves in Wood Furniture”