
Do you have an item in your closet that fits you to perfection? Perhaps a skirt that hugs your curves in all the right places but is not too tight? Or a coat that allows you move your arms properly but is not swimming with excess ease? Sewing something similar is an option! Here are a few tips on how to use the ready-to-wear clothes you already own to go about choosing, adjusting and creating custom fit patterns.
Let’s start with a comparison of two button front shirts. Both are classic styles and fit the wearer nicely, but in a very different way.
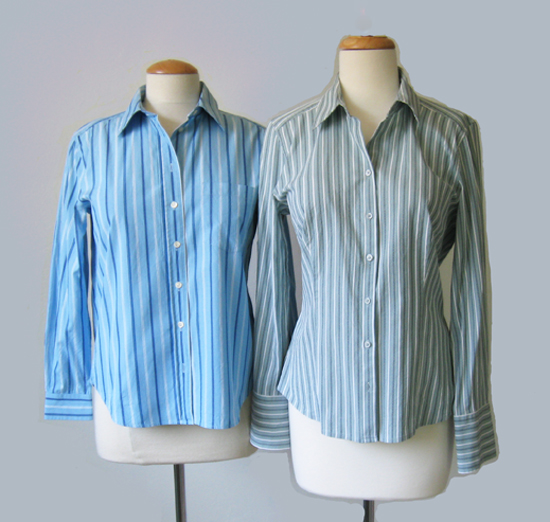
The blue striped shirt on the left is a more loose style, with bust darts and not much waist shaping. The green striped shirt on the right is quite fitted, with princess seams and a slimmer shape. Depending on the style and pattern you are working with, you can make a comparison to the actual garment measurements of existing shirts and see what adjustments are needed. This is also a great way to determine if you will be happy with the amount of ease included in a particular pattern style.
1. Compare and measure against the pattern piece
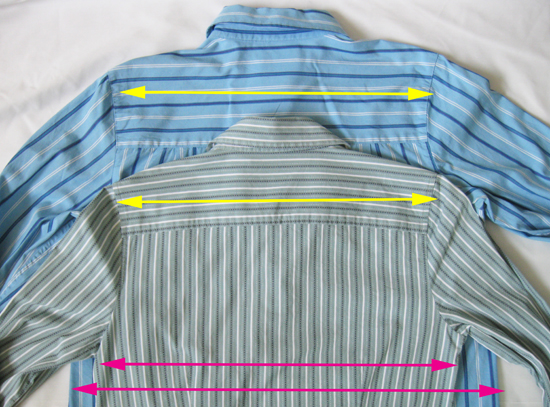
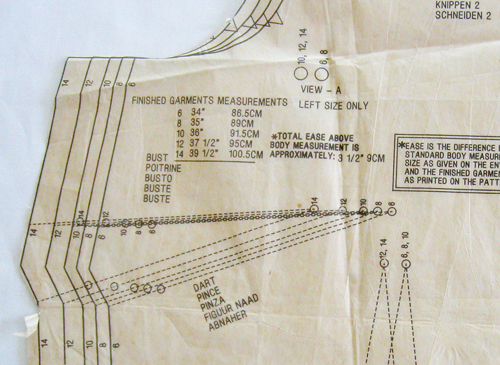
Many sewing patterns have the finished measurements marked for the various sizes so compare your ready-to-wear item’s numbers to those printed on the pattern. If you find they are quite different from what you are looking for, you can custom fit patterns, or go up or down a size at the side seam to get a more or less fitted look. Sometimes the patterns you are considering are nowhere near the comparison garment and it might be better to choose a different pattern from the start.
2. Measure in every direction
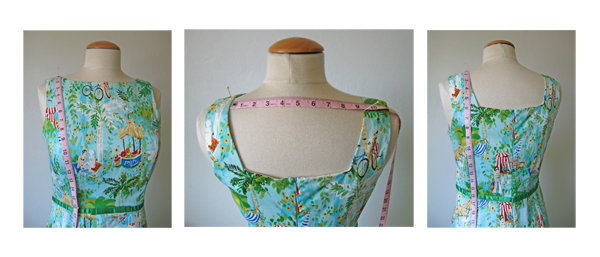
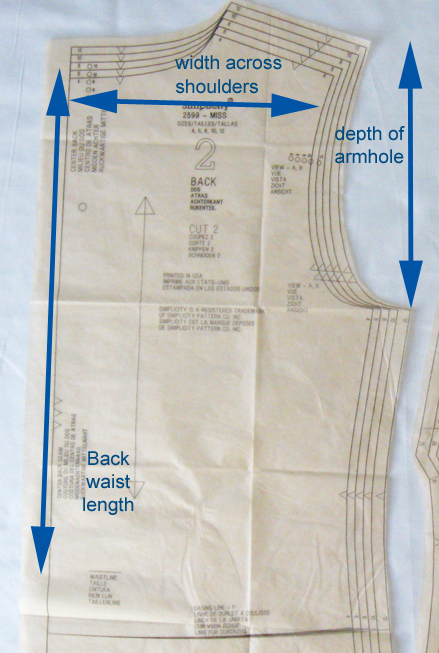
An often-overlooked pattern adjustment is bodice length. We have all tried on a dress that fits in circumference but the waist or other horizontal seams hit at the wrong spot. The waist could be too high or low, or an empire seam can creep upwards toward the bust, which is not flattering or comfortable!
Use the measuring tape in the vertical orientation and measure your existing garment from shoulder to waist, both in the front and back. Measure your pattern pieces and compare. It could be possible you need a full bust adjustment or other bodice length changes. Don’t forget to check the armhole depth — it really matters on a sleeveless dress. It’s an easy adjustment to raise an armhole on the pattern pieces before you cut your fabric and avoid that gaping or too low armhole.
3. Try a t-shirt
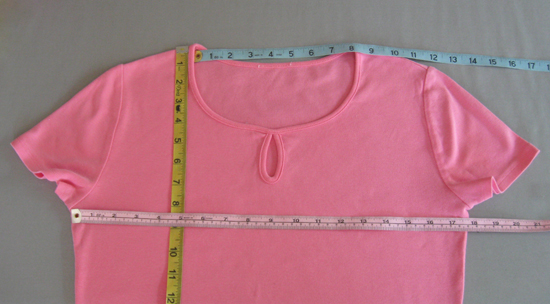
A t-shirt is the perfect garment to test the process of custom fit patterns. Sometimes the neckline of a knit garment pattern is just too wide or too low for our liking but it is difficult to know without actually sewing the pattern. You can measure the neckline width and depth on a t-shirt where you like the fit and compare to your pattern. Circumference, neckline dimensions, body and sleeve length can all be measured on a flat t-shirt and then compared to the pattern pieces. If you really love an existing t-shirt, you might consider making a pattern from a garment as well.
Learn to fit knit necklines, bodices, sleeves, skirts, pants and more in the Craftsy class Sewing Knits that Fit.
4. Check those pockets

Something as simple as pocket placement can be fixed before you start to sew. You can measure a coat or jacket you own or just place your hand around hip level and measure from the top of your shoulder to see where the bottom of the pocket should be.
An in-seam pocket on a coat or jacket is anywhere you want it to be, so don’t just go by the pattern markings, double check the placement and you will be glad you did every time you easily reach for your keys or phone instead of fishing around in a pocket that is too low.
5. Carry a notebook
Even if you sew your entire wardrobe, an occasional shopping trip is worthwhile to investigate new styles, see how a silhouette looks on you or evaluate colors that you don’t usually wear. Ask your friends if you can try on their coat or jacket and take note of the amount of ease you find comfortable. Keep notes on these measurements with sketches of the garment’s shape and style. Once you start comparing sewing patterns and ready-to-wear garments you may find some interesting adjustments and be happier with the fit.
Discover techniques clothing designers work with every day! Learn an easy method to make patterns perfectly personalized in Craftsy’s Fast-Track Fitting class with Joi Mahon.
Share tips, start a discussion or ask one of our experts or other students a question.
No Responses to “Tale of the Tape: 5 Tips for Using Clothes to Custom Fit Patterns”