
Designing furniture for clients is quite different than designing it for yourself. When I design something for my own use, I have the luxury of tinkering with it until I am satisfied. Designing for someone else requires a different focus. In this post I’ll describe some of the factors I take into account when designing a piece of furniture for a client. I’ll also comment on my process and share my design for a barstool.
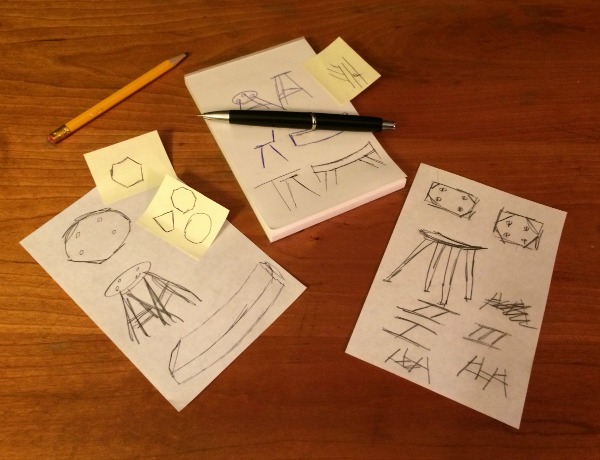
A design starts with sketching lots of ideas
Design parameters
When I make furniture for clients, I have to complete the project within a timeframe, a budget and a set of expectations for how it will look and function in the their home. Other considerations include sourcing the material, building in time to let the wood acclimate to my workshop, making sure I have the tools to complete the task and lots of other things. I want whatever I make to last a long time and exceed the client’s expectations. I want it to be something they will enjoy for years and be proud to show their friends.
Initial conversation
The process begins with a conversation about what the client needs, how it will function and how it will fit in with other items in the house. As an example, I currently have some potential clients who need a set of barstools for a kitchen island. In my first conversation with them, I confirmed that the counter of their kitchen island is the standard height of 36”. I also established how many stools the island could accommodate. Aside from these basic dimensions, we talked about woods, colors, styles, finishes, seats, legs, backs and more. The next step is to put some ideas on paper, refine them into a design and present it to the client.
Design considerations
For regular barstools, I don’t have to reinvent the wheel but I do want them to be unique. A barstool should be sturdy, durable and comfortable. I also want to differentiate my design from all the thousands of other barstools out there. A while back I made a table that had tapered, hexagonal legs. These legs are becoming a signature for my work, and I want to incorporate them in this design.
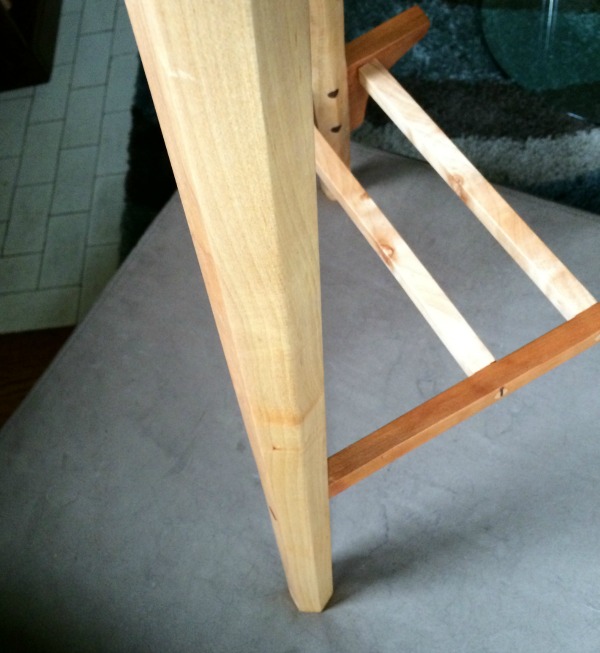
These hexagonal legs offer a subtle difference from typical round or tapered legs
Shapes and patterns
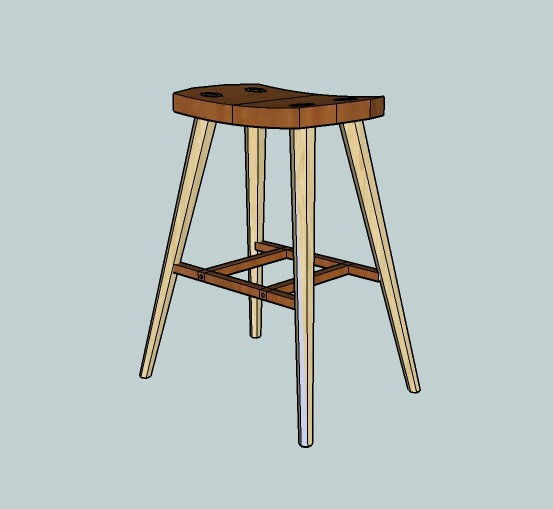
Because the legs will be hexagonal, a round or oval seat might look out of place. I thought of a six-sided seat, in keeping with the six-sided legs, but that would introduce a pointed corner that would not be user-friendly and could possibly damage other furniture. An eight-sided shape would allow the edges to be flat and would accommodate a recessed handle for the seat. The seat will have a curve similar to the Tage Frid three-legged stool I’ve been writing about. With an eight-sided seat and six-sided legs, I decided to continue the numerical pattern and make the stretchers four-sided. This decision results in stretchers that are easy to make on the table saw and can be joined with wedged tenons.
The first draft of my barstool design drawn with SketchUp
Designing in 3-D
After some rough sketches with pencil and paper, I designed this stool using SketchUp, a free 3-D drawing software. The software, which takes some practice but is fairly easy to use, allows me to pan around the stool so I can look at it from any angle. I can even add color to the surfaces based on photographs of the actual wood species I plan to use (cherry for the seat and stretchers, ash for the legs), making it even more realistic. The software has a free reader that allows my clients to see the object in 3D without having to learn how to use the software. They live a few hours away, so this is a great way to help them visualize how it will work in their home.
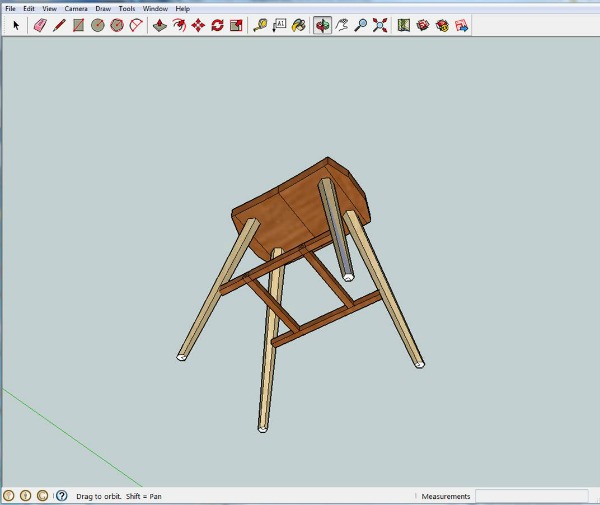
SketchUp allows you to see the design from all angles.
Making multiples
Since I am potentially making several of these stools, I need to be able to make them efficiently in batches. Having to custom fit each one would be overly time-consuming. I will build efficiency into the design by having a minimal number of parts for each stool and making the parts easy to reproduce. I have a jig to make the legs on the table saw and will make another jig to cut the curve of the seat.
Feedback
The design is still in draft form, but I’m liking it so far. I already see that the stretchers might be too thin to support a person’s weight when used as a footrest, so I will play around with different thicknesses. I’m sure I will make a few more changes based on feedback from my clients as well. When (and if!) I get the go-ahead, I will make a plan, price out the materials and get going. Finally, I’ll keep any jigs and templates I use in making these stools in case I need to make more in the future.
When the barstools are complete and delivered, perhaps my clients will ask me over for a drink to break them in.
 When designing furniture for clients, you need to finish with confidence. Take the fear out of finishing with our FREE mini-class Flawless Finishing, taught by expert furniture maker Robert Spiece, who shares the secrets for bringing out the beauty of your wood.
Share tips, start a discussion or ask one of our experts or other students a question.
No Responses to “What You Need to Know When Designing Furniture for Clients”