
 Because these blocks are so easy to make, they’re perfect for whipping up a quilt as a last-minute gift. You can use pre-cut squares of almost any size to make your blocks — the larger squares you use, the faster your quilt will come together! At the end, we’ll talk about some quilt math to help you figure out how large your blocks will be with different sized squares.
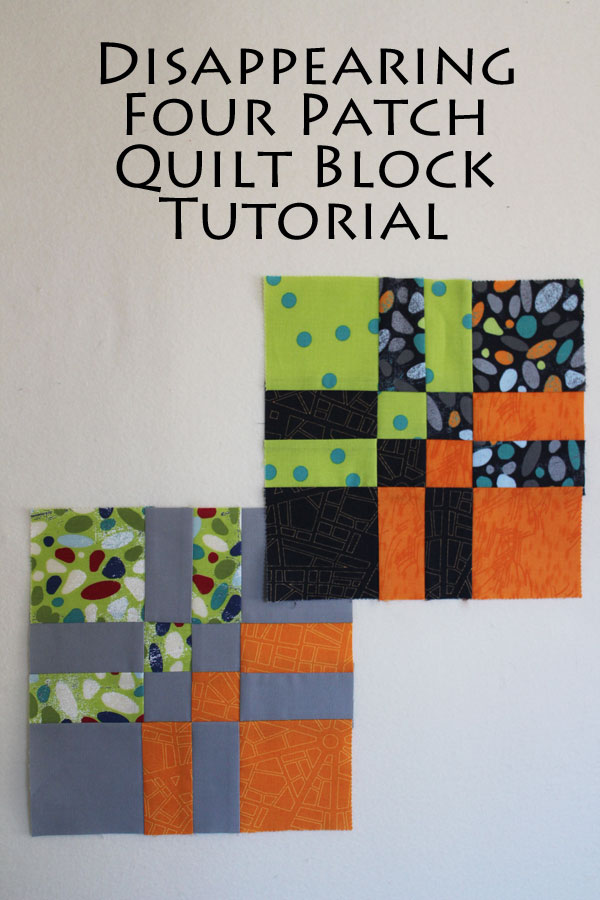
Making the disappearing four-patch quilt block
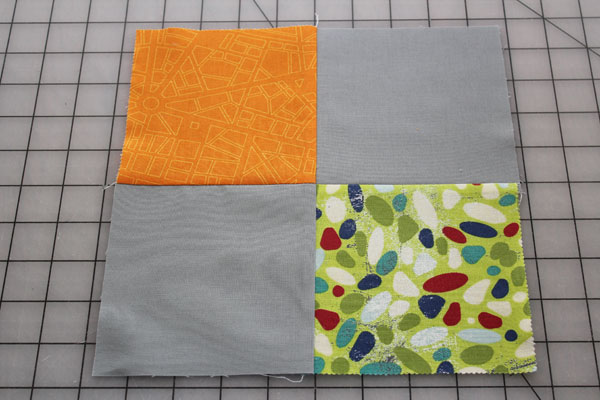
To make the disappearing four-patch block, you’ll need four equal-sized squares. Here, I’m using 5″ squares: Two solid (background) squares and two charm squares (the fabric is Barcelona by Zen Chic for Moda Fabrics).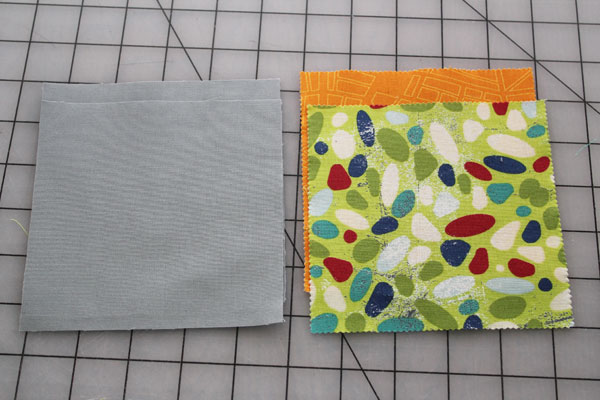
Step 1: Make the four-patch
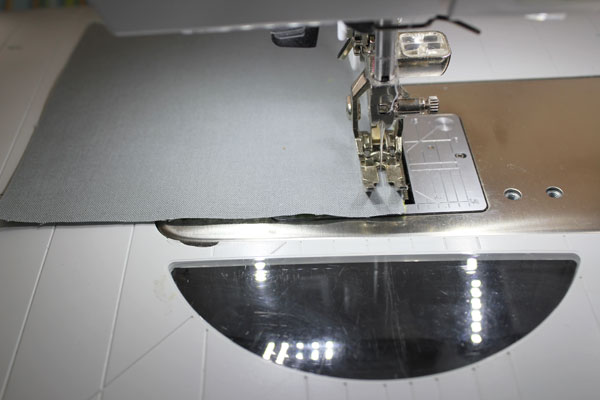
The first step is to make the four-patch that will “disappear.” First, lay out your four squares so that the two background squares are kitty corner from each other.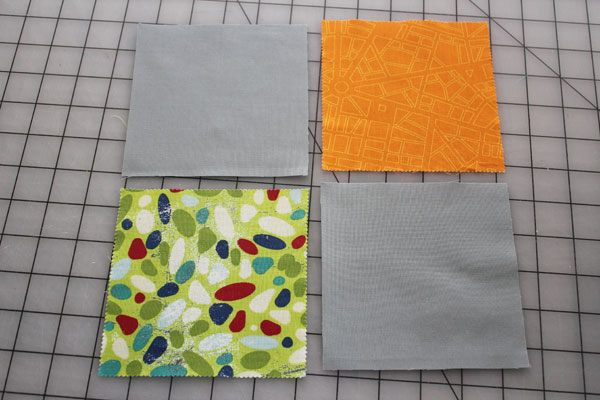 Then, stitch them together into pairs.
 Press the seams to the side, towards the background fabric. Then stitch the two pairs together to make the four-patch block.
Step 2: Preparing the disappearing act
Make four cuts into the four patch, each 1.5″ away from the center seam. You’ll have nine pieces.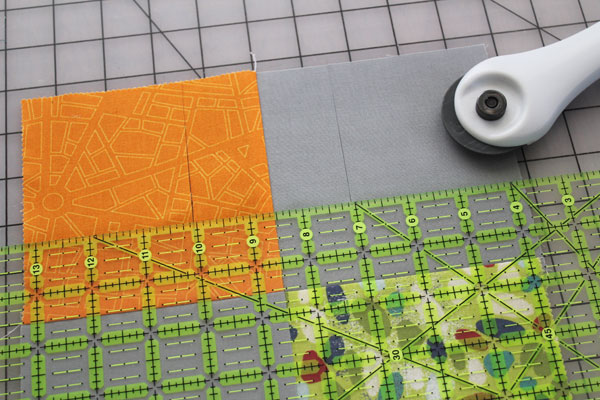
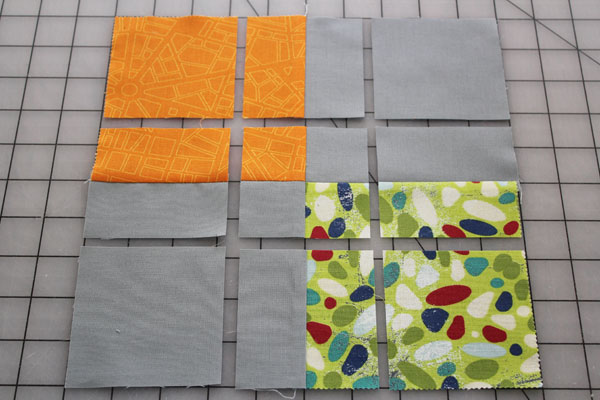 Now, turn middle piece on each side of the square 180 degrees — flip it over completely. Your block will look a little something like this.
 You still have nine pieces, but changing the orientation of four of the squares changed the look of the design entirely.
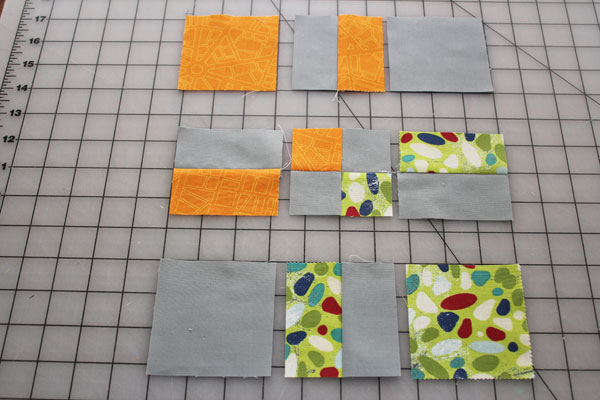
Step 3: Putting the square back together
Sew together three squares in each of the rows. The three pieces in each row will become one longer piece. Press the seams. On the middle row, press the seams out. On the outer rows, press the seams in. Then stitch the rows together into a single block.
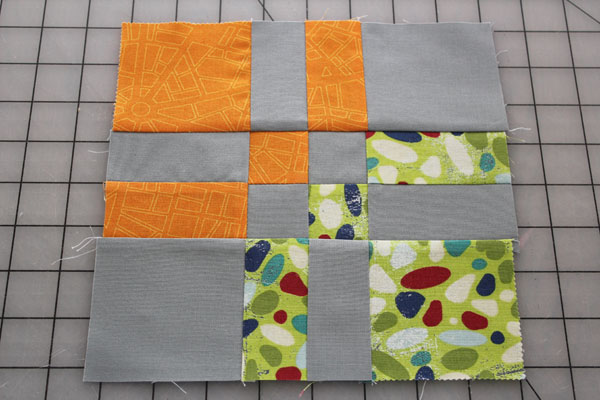 Your block is complete!
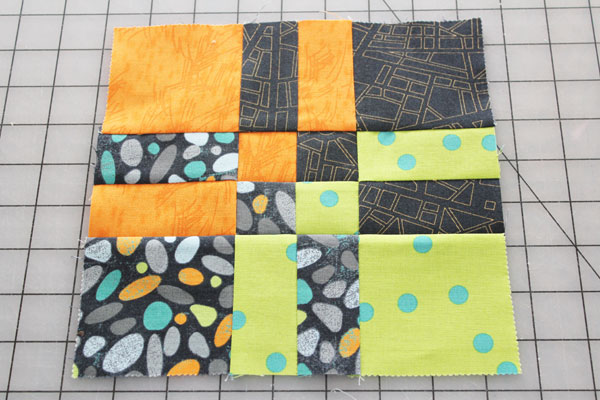
Make a scrappy disappearing four-patch
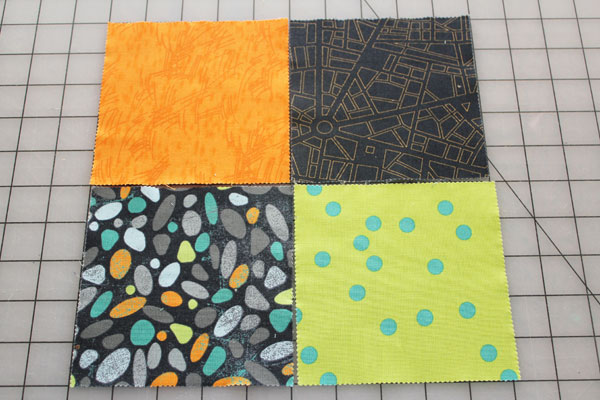
You can make this same block using four different fabrics for a more scrappy look if you like. Pick four contrasting squares from a charm pack.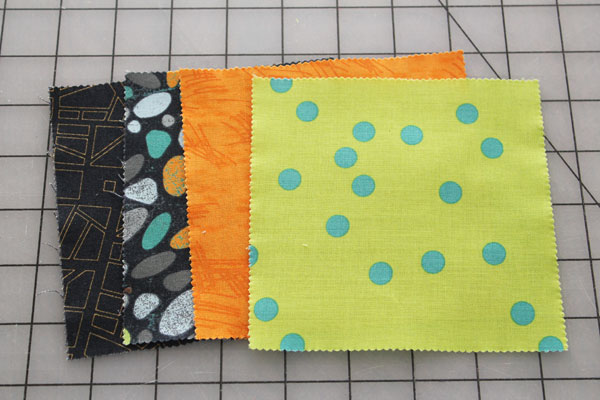 Stitch up your four patch.
 Make four cuts, each 1.5″ from the center seam, cutting the block into nine pieces. Flip the center pieces on each side.
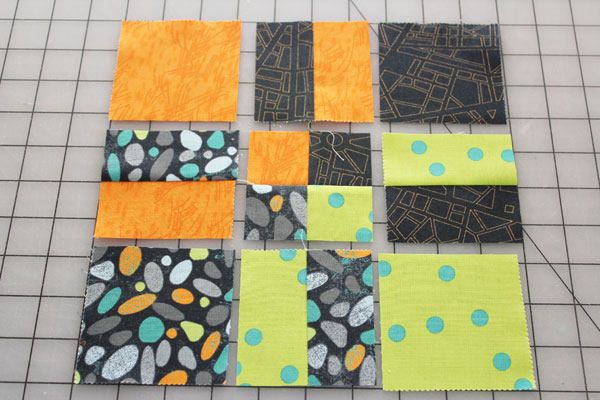 Stitch the nine pieces into three rows, then stitch the three rows into one block.
 Make as many blocks as you would like for a quilt. Square up the blocks (these will square up to 8.5″ if your seams are accurate, or 8″ if you need more room), then stitch them together to make your quilt top.
Quilt math: How big will your block be?
Want to make this block using a different size square, but you’re not sure how big the finished block will be? The quilt math is easy! Take the size of your pre-cut square, multiply it by 2, then subtract 2. In this example, we used a 5″ square. (5 x 2) – 2 = 8, so we’ll finish with an 8″ square. If you use 10″ square pre-cuts, your block will be 18″. You can also use this math to make a block the exact size you want. Just take the finished size you want, add 2 and divide by two. So, how big should you cut your squares for a 20″ block? (20 + 2) / 2 = 11. You’d need to start with 11″ squares. Curious how that quilt math works out? The fabric across one side is the length of two squares (5″ + 5″). There are three seams in each edge, and each seam takes out ½” (¼” from each fabric in the seam). And when the block is put into the quilt, each edge will lose another ¼”. That’s a total of 2″!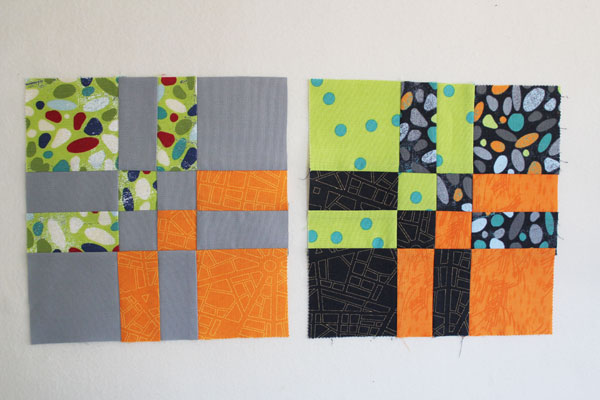 When you change the size of the original squares, you will want to consider changing the measurement you use to cut the four-patch and make it “disappear.” In most cases, you can use the same 1.5″ measurement. Just know that with different pre-cuts, like 10″ squares, you’ll get different proportions (which could look great with large-scale prints). If you’d like a more scrappy look with your 10″ precuts, you will want to increase the 1.5″ cutting measurement to 3″. If you are using smaller pre-cuts, like 2.5″ mini charms, you’ll absolutely want to decrease the cutting measurement to 3/4″. When in doubt, make a test block with scrap fabrics to check your proportions.
Share tips, start a discussion or ask one of our experts or other students a question.
No Responses to “Make This Stash-Busting Block in 3 Steps: Disappearing Four-Patch Tutorial”