One of the trickiest parts of drawing in perspective is figuring out how far apart regularly-spaced objects should be. If you’ve ever tried to draw windows on a building, the arches under a bridge, or telephone poles along a road, you’ve encountered this problem. Regularly-spaced objects should get closer together the closer they are to the horizon line, but how do you determine how close?
Here’s a way to solve the conundrum of dividing space in perspective.
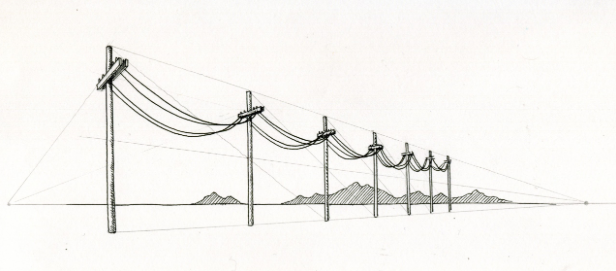
Step 1:
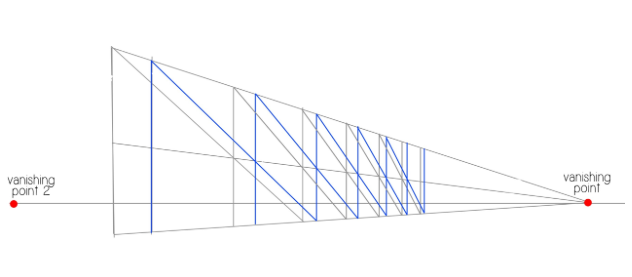
As with any perspective drawing, first draw a horizon line (H) and establish your vanishing point (VP). Draw your first object (in this case, a utility pole) as tall as you want. Then draw lines from the top and bottom of your object to the VP. Draw your second object any distance from the first, making sure it also falls between the two perspective lines you’ve drawn.
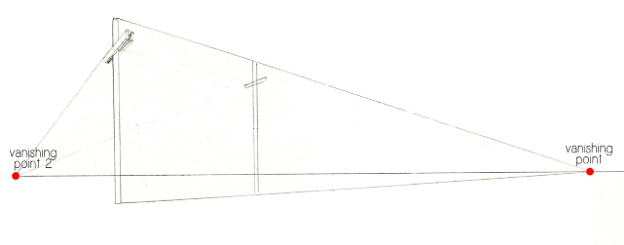
Tip: You can add a second vanishing point to determine the angle of anything perpendicular to the row of objects, like the cross-braces on the top of these utility poles.
Step 2:
Using a ruler, find the exact center of the first pole, and draw a line from that point to the main VP.
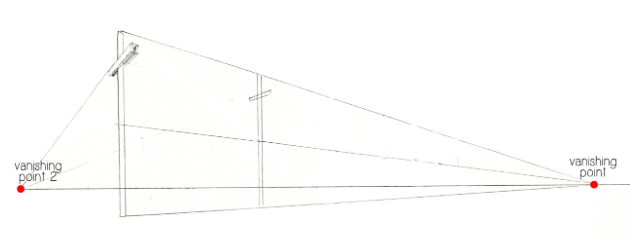
Step 3:
From the top of the first pole, draw a diagonal line through the center of the second pole until it meets the bottom perspective line. That point represents the base of your third pole, which you can now draw, making sure it doesn’t extend higher than the top perspective line.
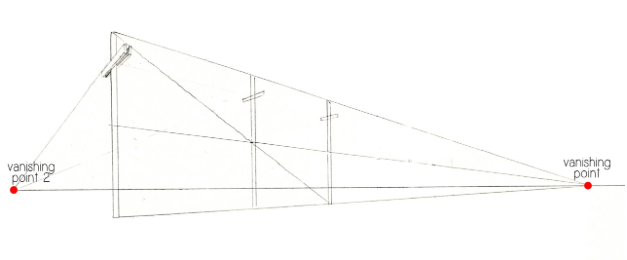
Step 4:
Continue these steps for each successive pole, as far as you’d like. The space between each pole should get smaller every time.
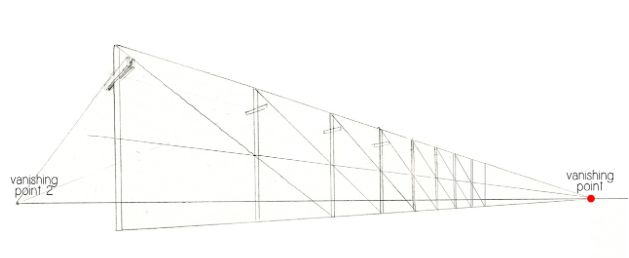
Tip: As the objects get further away, they should also get progressively skinnier. If your furthest telephone pole is just as fat as the closest, things won’t look right.
The process is a bit trickier in some situations.
Step 1:
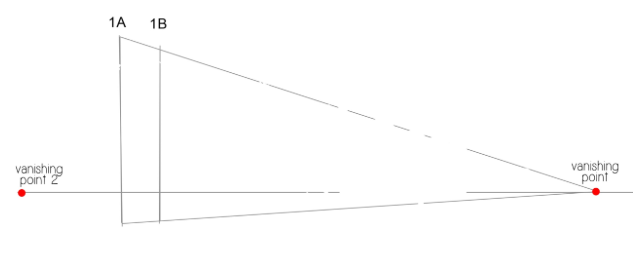
Instead of one vertical line, draw two (1A and 1B) to represent the width of the column.
Step 2:
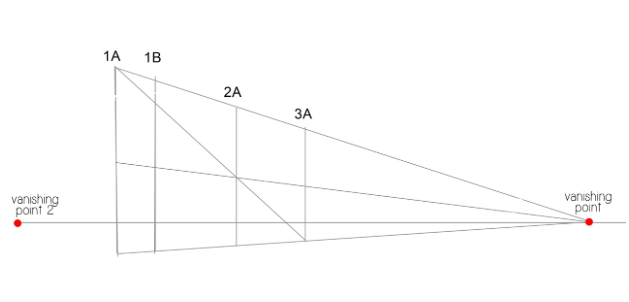
Then continue the previous steps for 1A and 1B separately. That means, start dividing space for the line 1A as you would normally, while ignoring 1B for now. Establish a new vertical (2A) for the next column, find the center of 1A and use the diagonal line method from above to find the third vertical (3A).
Step 3:
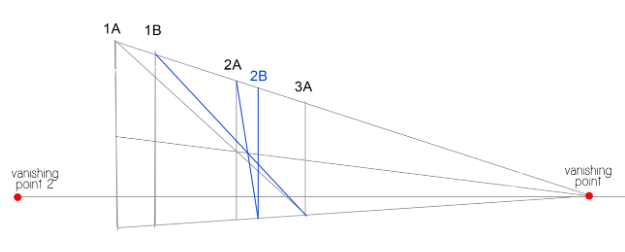
Now for the tricky part. Draw a diagonal line from the top of 1B to the base of 3A. Then draw a line from the top of 2A through the point where the new diagonal intersects the middle perspective line. Where that line hits the bottom perspective line is the base of 2B, and you have now defined the width of the second column.
Step 4:
From there, just continue on as you normally would for each set of vertical lines separately. Be careful not to confuse your A lines from your B lines!
You might also enjoy these posts on drawing a room in one-point perspective and understanding space in two-point perspective. To learn how to draw perspective accurately using simple tools and classic techniques, enroll in Perspective in Landscape Drawing with Patrick Connors.

Share tips, start a discussion or ask one of our experts or other students a question.
No Responses to “Dividing Space in Perspective Tutorial”