
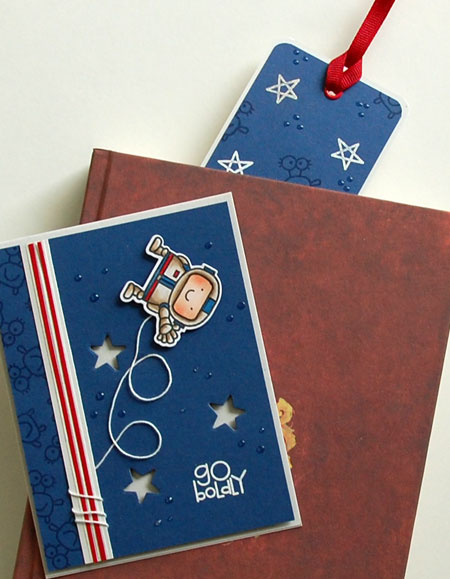
Creating a bookmark to coordinate with a handmade card can be quick and easy — and it’s a fun surprise for the recipient. Whether paired with a book or gift certificate or gifted on its own, readers of all ages will appreciate the extra thought and think of you each time it is used.
Make one of these DIY bookmarks for a quick, cute gift!
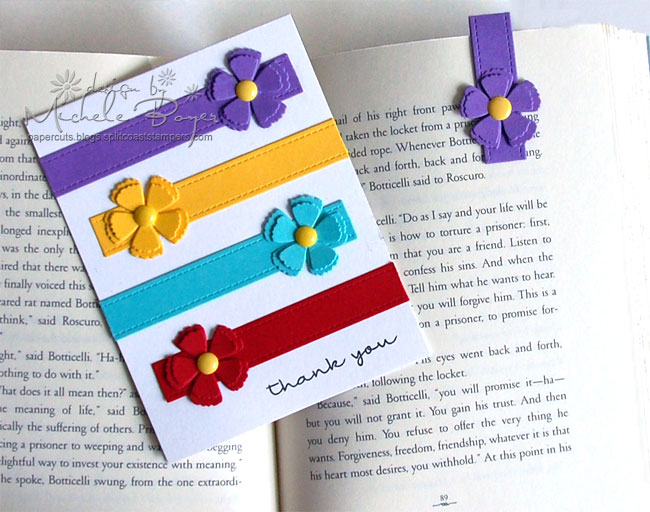
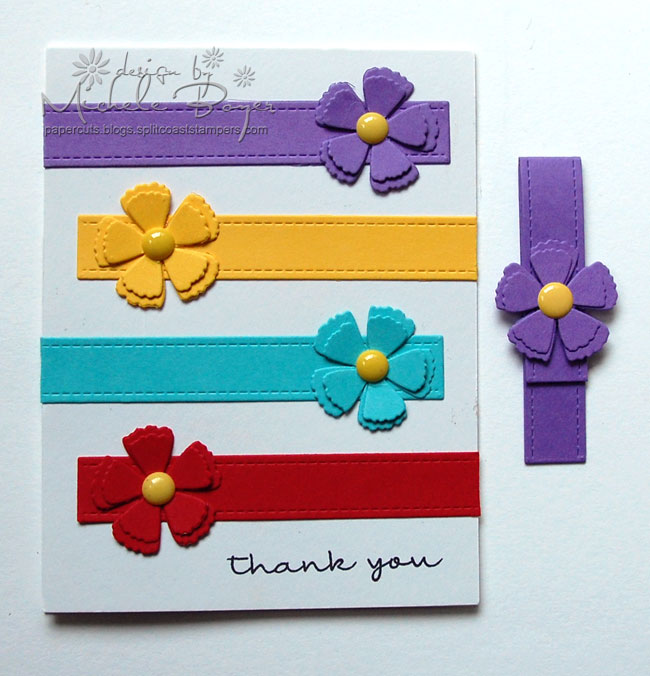
Surprise the recipients of handmade cards with a coordinating bookmark.
DIY magnetic bookmark
Surprise a friend with a magnetic bookmark. By incorporating small magnetic discs into the design, the bookmark will not only stay in place, but the recipient will surely wonder how it was created.
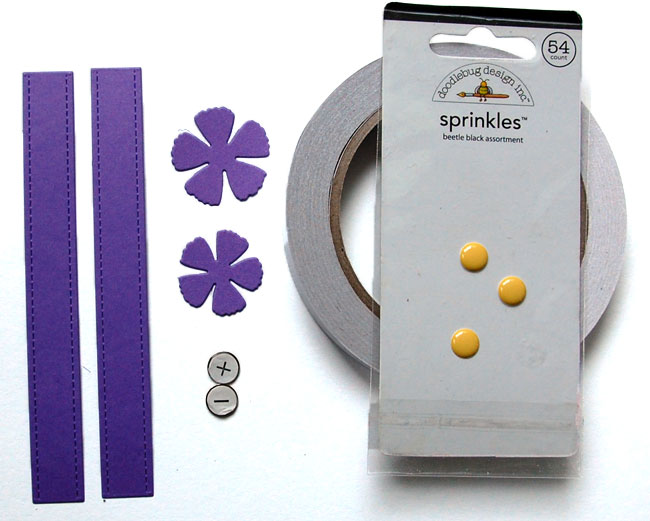
Supplies you’ll need:
- Two equal length strips of card stock
- Paper flower
- Basic Grey small magnetic discs – one positive, one negative
- Enamel dot
- Double-sided adhesive tape
- Liquid adhesive
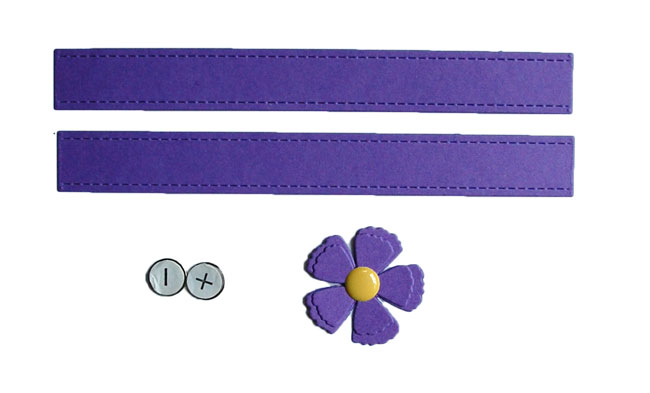
Step 1:
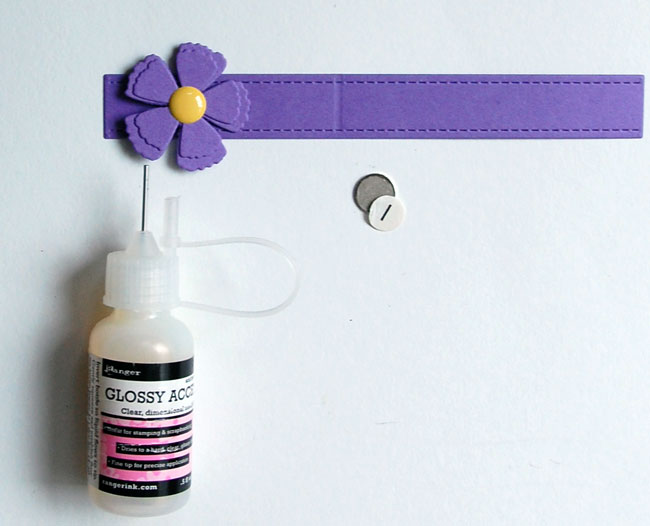
Assemble/layer the flower and adhere enamel dot to center.
Step 2:
Remove paper backing from one magnet half and adhere to center back of flower.
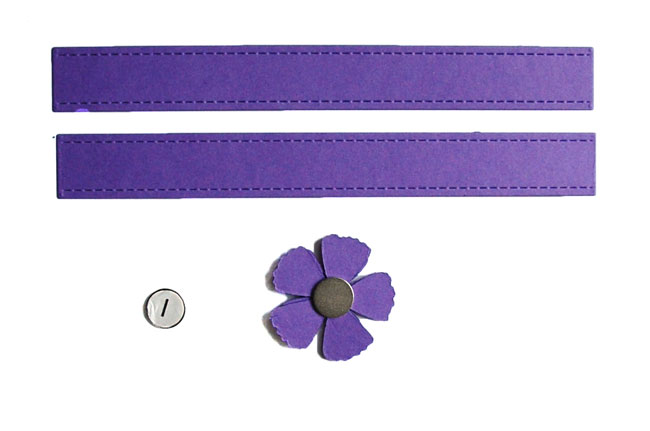
Step 3:
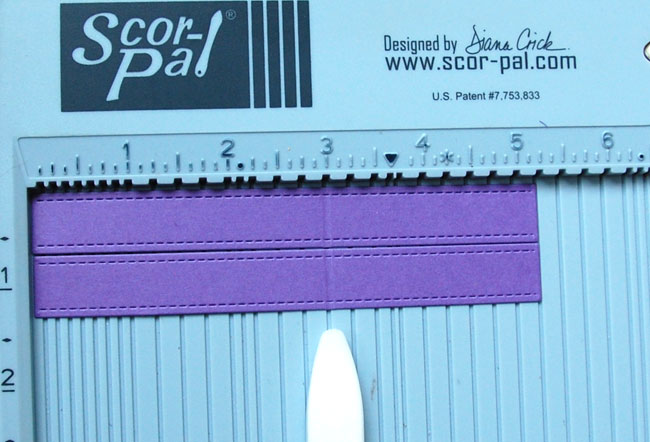
Score both card stock strips approximately 2¼” from one end.
Step 4:
Position flower near shorter side of card stock strip. Using liquid adhesive, secure flower petals to card stock strip, encasing the magnet between the card stock layers.
Step 5:
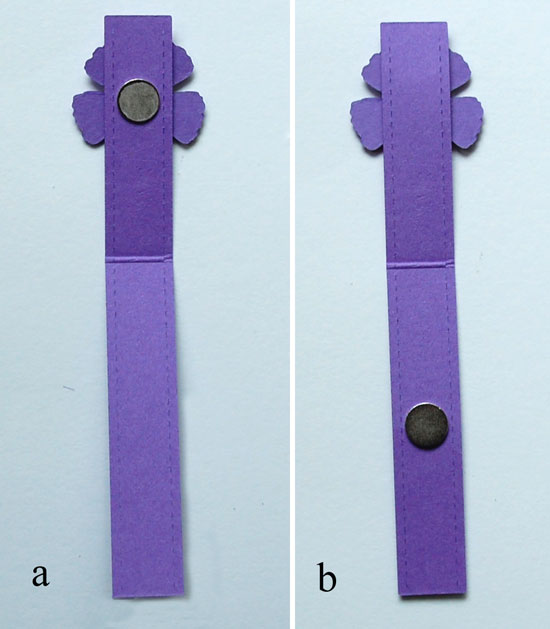
Flip card stock strip over and remove paper backing from second magnet half. Place magnet near the flower end of the strip and allow the enclosed magnet to attract the second half (a). Fold the card stock strip at score line and press over magnet area. Once opened, the second magnet will adhere to the opposite end of the card stock strip (b). By following these steps, the magnets will be perfectly aligned once the bookmark is fully assembled.
Step 6:
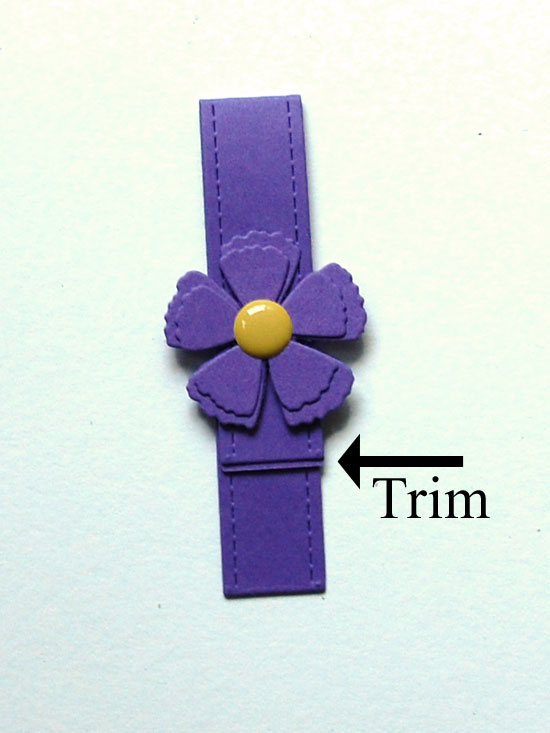
Apply double-sided adhesive tape to the back of second card stock strip. Adhere to first card stock strip, beginning at magnet/flower end. Adhere up to score line, then begin to fold the strips together, pressing firmly to secure the two together. Trim the bit of exposed bottom layer.
The card stock strip will now close with the magnets perfectly aligned.
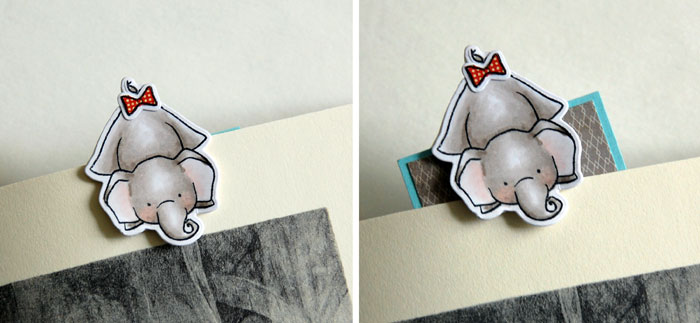
Peek-a-boo bookmark
If your card includes a character, create a DIY bookmark where the character peeks over the current reading page. Kids and adults alike will love it!
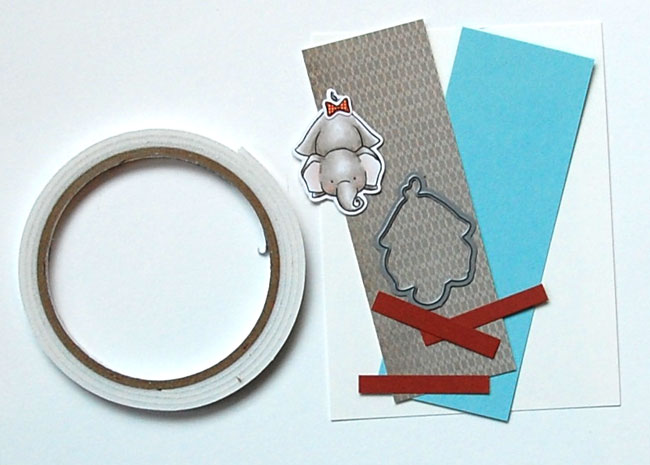
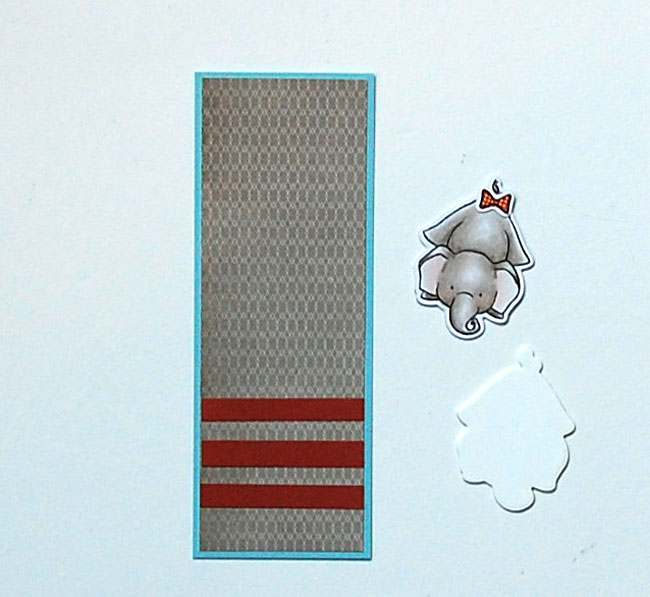
Supplies you’ll need:
- Card stock for base
- Patterned paper to fit base card stock
- Decorative strips
- Die-cut, stamped and colored image
- Foam tape
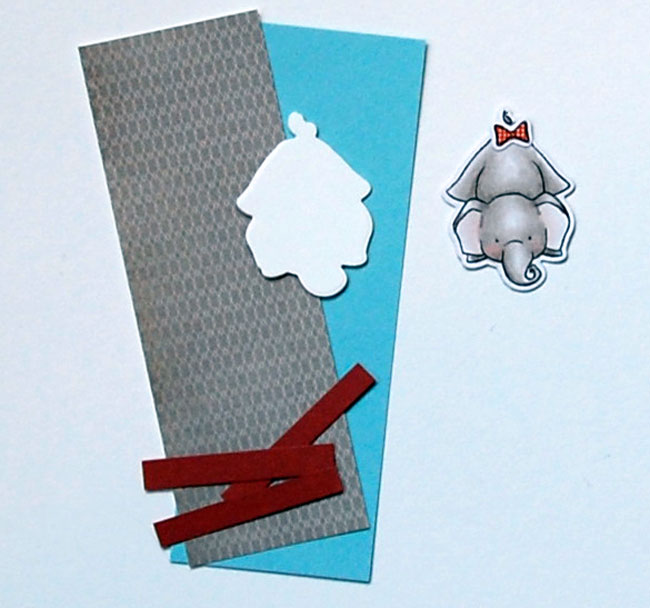
Step 1:
Die-cut three extra images from white card stock. Adhere one to the back of the colored image to increase stability.
Step 2:
Assemble base bookmark, then adhere the two extra die-cut images together.
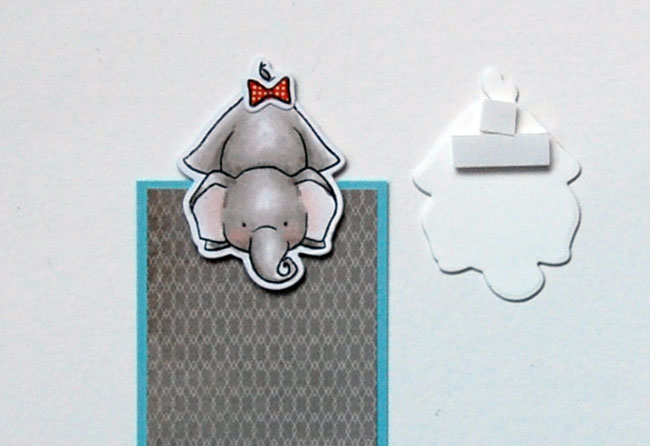
Step 3:
Determine placement of the character on the upper edge of the bookmark. With layered die-cuts beside the colored image, adhere foam tape aligned with the top edge of the bookmark to top edge of the die-cut image.
Step 4:
Remove adhesive backing and layer colored image atop foam tape. ensuring that all layers are perfectly aligned.
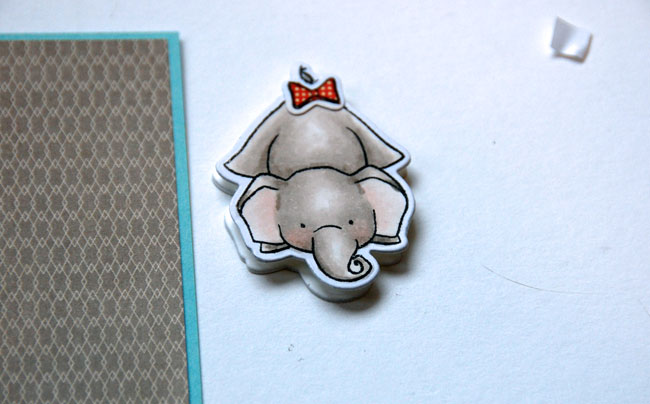
Step 5:
Apply adhesive to the back of bookmark, then insert between layers of the image. The inside back of the elephant should be adhered to the back of the bookmark. If desired, another layer of the die-cut image may be cut from the colored card stock and adhered to the back.
Emboss and gloss DIY bookmark
For an even quicker but just as impressive bookmark, emboss coordinating images to match the card.
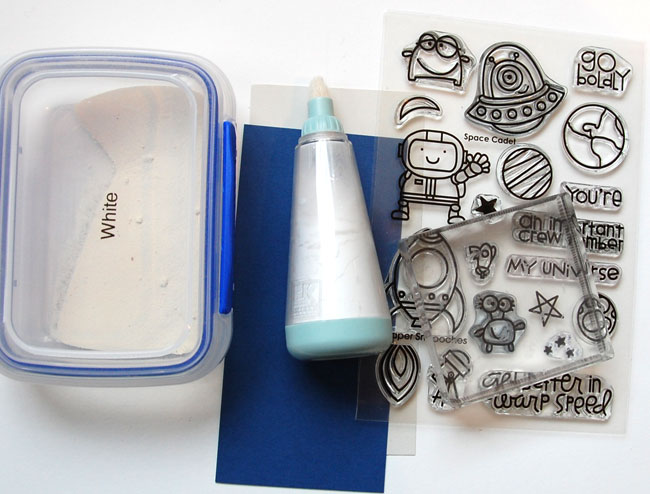
Supplies you’ll need:
- Card stock and stamps to match handmade card
- White pigment ink
- Powder tool
- White embossing powder
- Heat tool
- Adhesive remover (if needed – not shown above)
- Dark blue dye ink
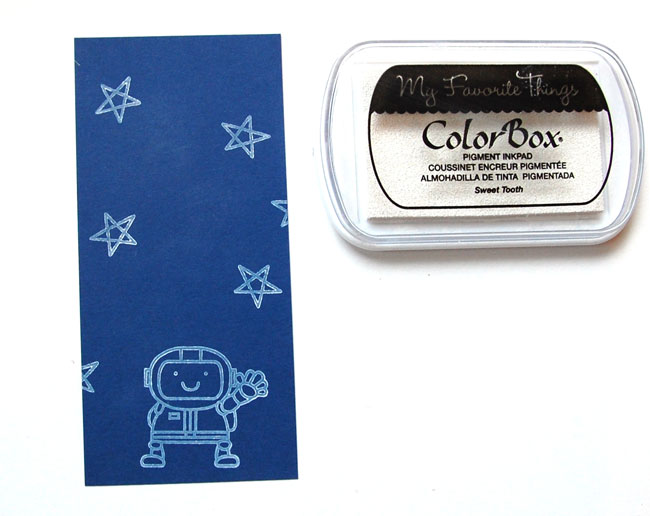
Step 1:
Using powder tool, liberally apply powder over blue card stock. Using white ink, stamp astronaut and stars.
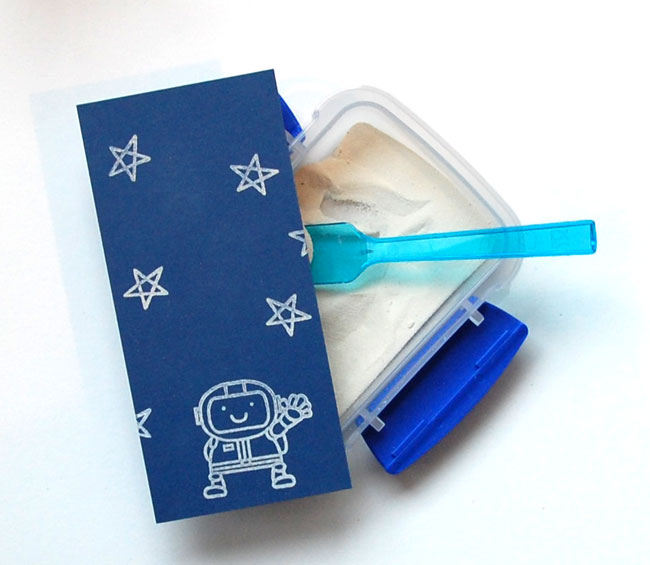
Step 2:
Sprinkle white embossing powder; tap off excess and heat emboss.
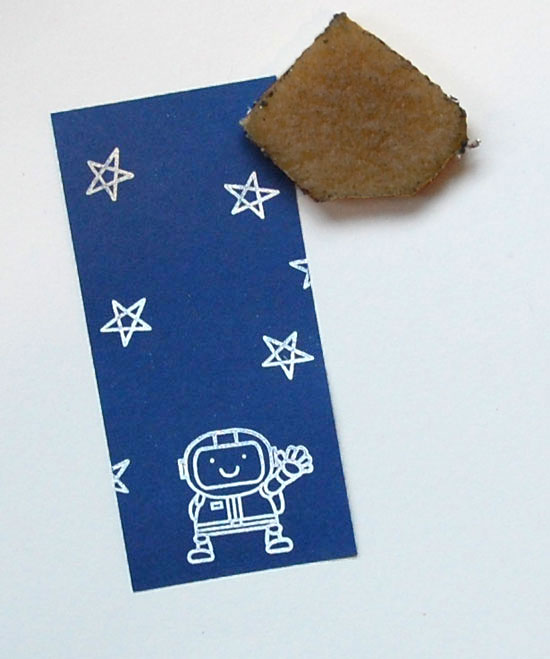
Step 3:
Once cooled, use adhesive remover to remove any excess powder (from powder tool).
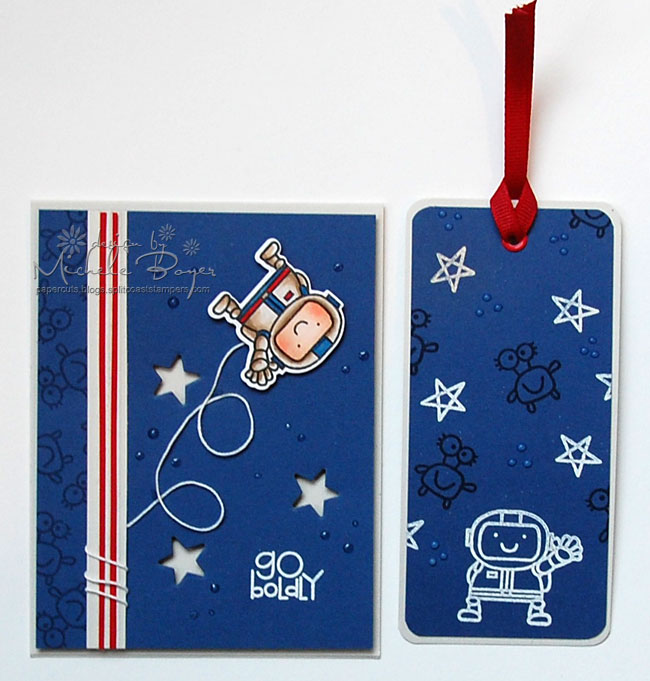
Step 4:
Stamp additional images using darker ink. Round the corners and mat onto lighter card stock. Insert an eyelet and tie ribbon. If desired, add dimensional dots using Glossy Accents.
Share tips, start a discussion or ask one of our experts or other students a question.
No Responses to “3 Quick DIY Gifts for Bookworms”