
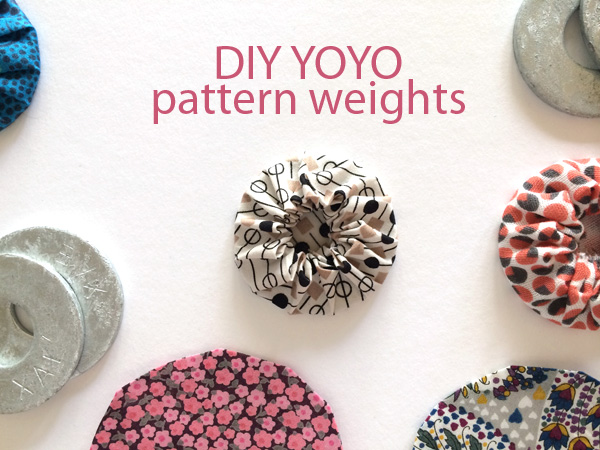
Use hardware store metal washers and fabric from your stash to create DIY yoyo pattern weights for your sewing studio. Its fun, easy and, most importantly, ensures you won’t damage your fabric!
Learn how how to make delightful pattern weights right here — free pattern template included!
Since I usually use a rotary cutter to cut my fabric, I rarely pin my pattern pieces. Instead, I use pattern weights to hold everything in place, as I cut delicately around each shape with my cutter.
I know a few sewers that use heavy metal washers from the hardware store as pattern weights, but the problem with this is that many washers are unfinished and rough around the edges, which is hazardous to your fabric. The possibility of damaging or snagging the fabric with a rough edge is too much for me. But all you need to do is cover the metal up!
There are many ways in which you could do this, but a fun and easy way is to sew a little fabric yoyo around it. You might have seen these in the past, and perhaps you have made them yourself before, but have you ever put a weight inside of one? Essentially the idea is to sew a yoyo as you usually would, but have it sized to match your purchased washer, then insert the washer into the yoyo before gathering the threads. Easy!
And to make it even easier, I have created a one-sheet printable download with five sized washer templates for you to cut out and use without having to do any fancy math. I will show you all the math below, should you like to do it the hard way, or if you have a washer of a different size than what is on the download. This is then followed by the instructions on how to put it all together.
Ready? First start by getting the pattern template. For the download, I have a template for sizes 1.75″, 1.5″, 1.25″, 1″, and .75″ in diameter.
Okay, let’s sew these up! And FYI, they make pretty awesome gifts too!
Step 1:
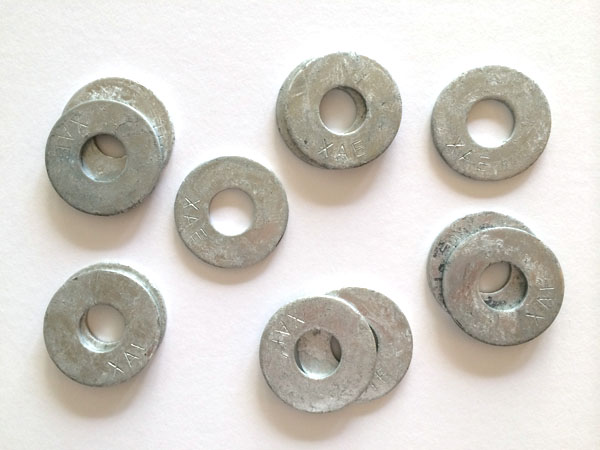
Visit your local hardware store and pick up some washers. Mine are 1.75″ wide and are substantial in weight. These come in all kinds of diameters and weights, depending on the metal used to make the washers. You want them to be pretty heavy so they will do their job and hold things down, but the size is up to you. If you cannot find washers that have a good weight, buy twice as many as you want to have, then double them up when putting them into the yoyo.
Note: We are talking about the outer ring when discussing the size, not the size of the inner circle hole.
Step 2:
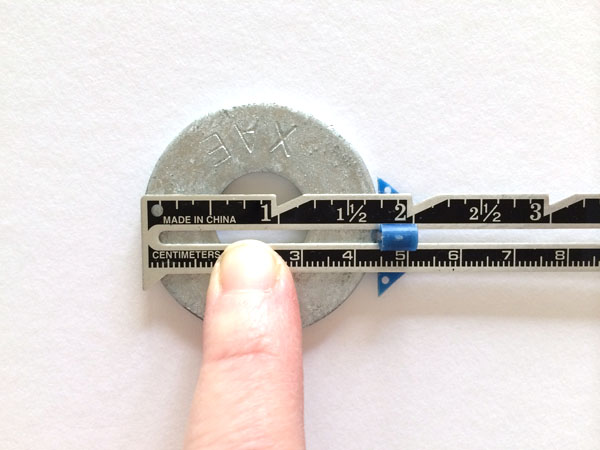
If making your own template, follow the steps for measuring the washer to create the right size fabric piece for the yoyo. If using a template from the download, simply skip ahead to the cutting fabric step. For making your own template, measure the outer diameter of your washer.
I find my seam gauge is perfect for this task. Mark down the measurement for later.
Step 3:
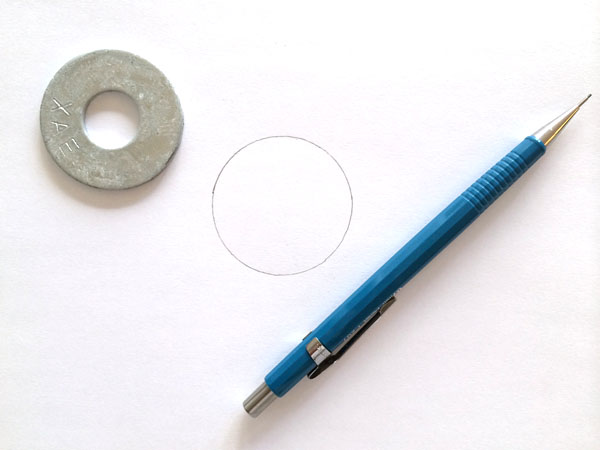
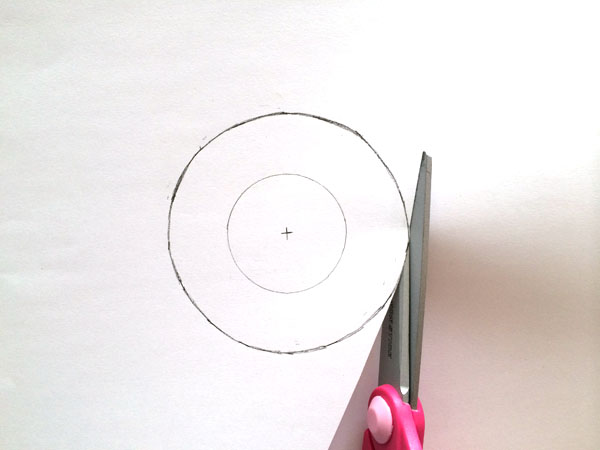
Trace around the washer onto a piece of paper using a fine point mechanical pencil, or something with an equally sharp point.
Step 4:
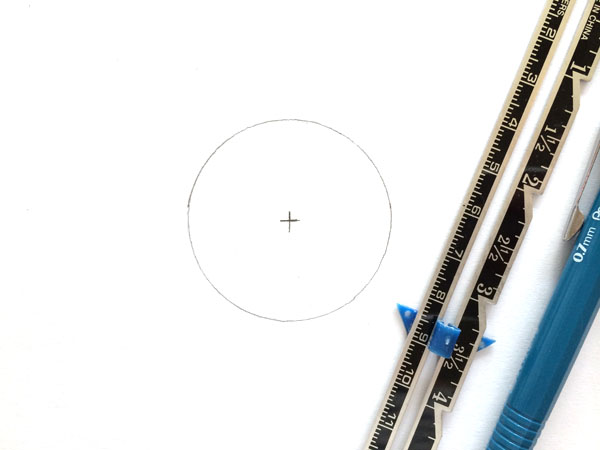
Use your seam gauge and mark a + sign at the center. Simply measure from side to side to find the vertical center, then repeat from top to bottom to find the horizontal center and mark each with a line to form the +.
Step 5:
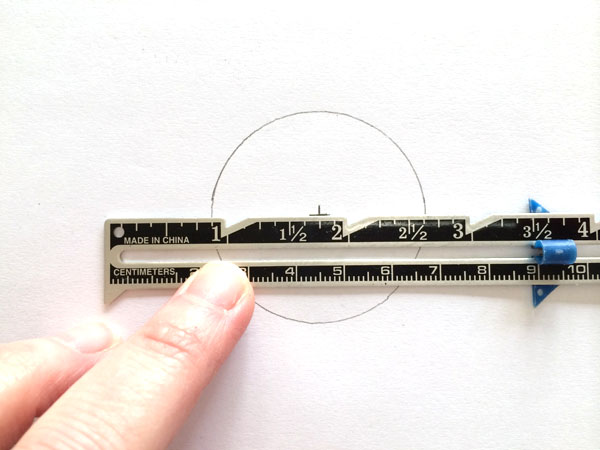
Using the + as the center pivot point, use your seam gauge and draw a line to form the outer ring. This ring, which will be the size of the fabric, needs to be double the size of the circle. So for my example, the washer is 1.75″ in diameter, so the fabric needs to be 3.5″ wide. Use the center + as your measuring point and place the 1.75″ mark at the +.
Draw a small dash at the end of the seam gauge as well as at the 3.5″ mark, forming an outer circle that is 3.5″ in diameter.
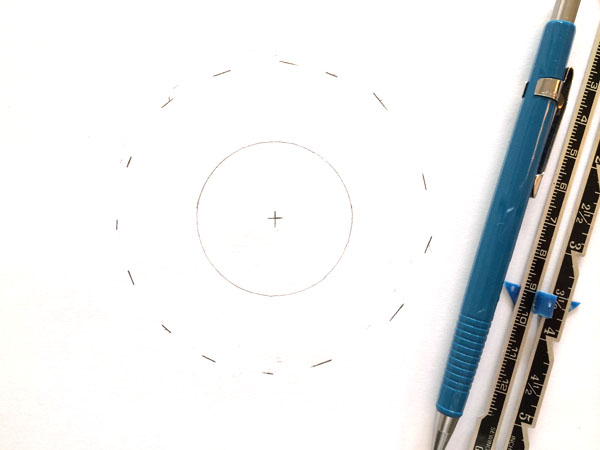
Step 6:
You should now have something that resembles the above image. The inner circle is the washer, and the outer circle is twice the diameter of the washer, which is what we will cut the fabric to be.
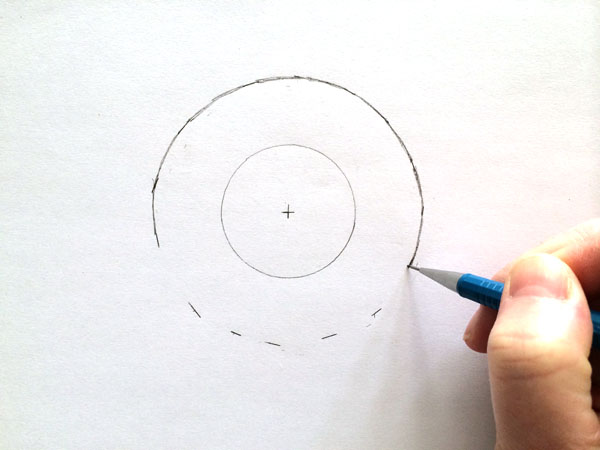
Step 7:
Connect the lines to form the outer circle. You can also create circles digitally in any size you like in a program like Illustrator, print the page out, then cut the template from the printout, if you would prefer not to draw it by hand.
Step 8:
Cut the circle out of the paper to create your template. If using the template from the download, simply cut out your desired template piece as pictured above.
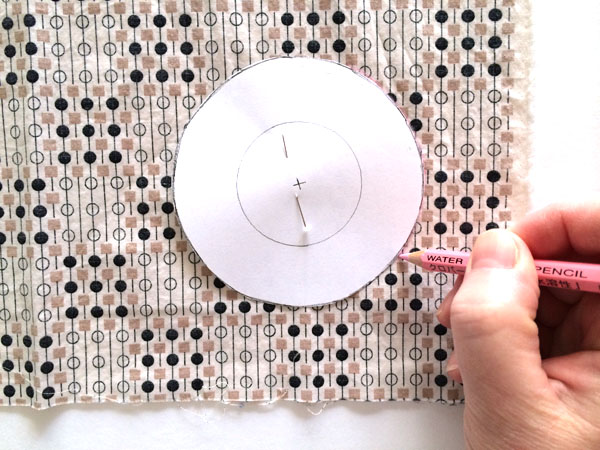
Step 9:
Pin your template to your fabric and trace around it with a water soluble marking tool. Unpin the template from the fabric and cut out around the circle with scissors or a rotary cutter.
Step 10:
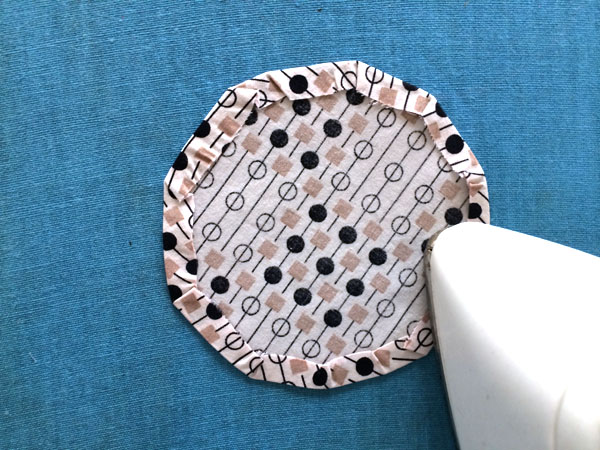
Fold the edges of the circle into the fabric, wrong sides together, and press with a hot iron. Only fold about 1/4″ or else the yoyo will no longer fit your washer. And do not worry about the circle being perfectly smooth, the yoyos turn out wonderfully even with a little tucking here and there because of the circle.
Step 11:
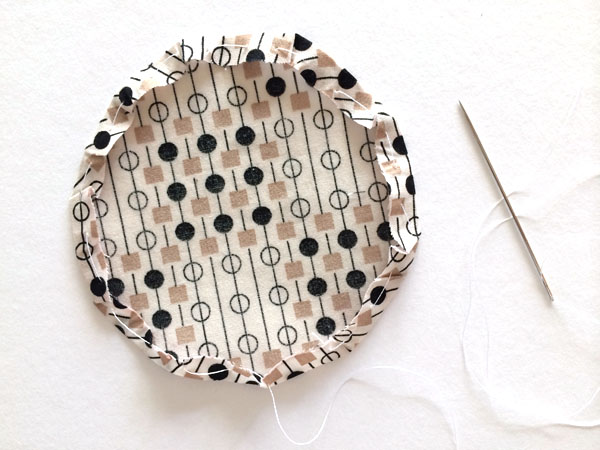
Use a hand needle and thread and sew a running stitch around the fabric, just through the fold and not catching the fabric circle.

Step 12:
Once you have sewn all the way around the circle, place the washer in the center of the fabric, on top of the wrong side. Note: you cannot see it in this photo, but the thread has not been cut and is still attached to the running stitch.
Step 13:
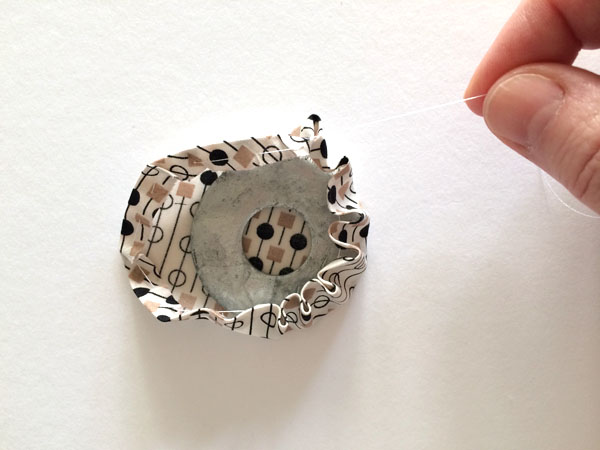
Pull on the thread you sewed the running stitch with, and gently gather up the edges of the fabric to form the yoyo.
Step 14:
Carefully continue to pull the threads until you cinch the fabric tightly around the washer.
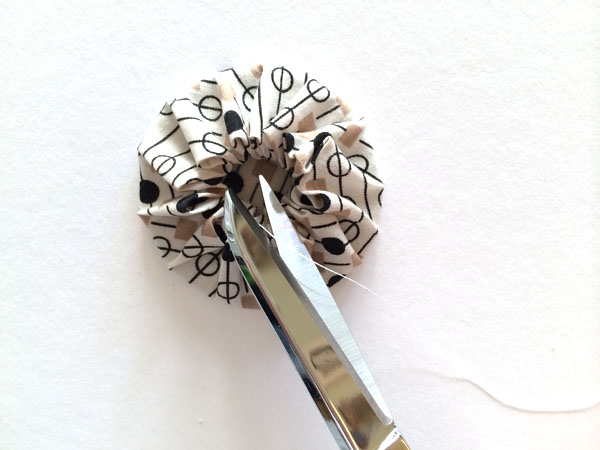
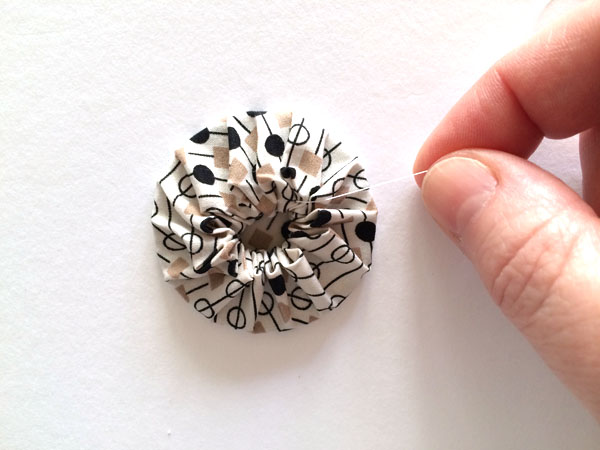
Step 15:
Knot off the thread as usual and trim off the excess thread.
Step 16:
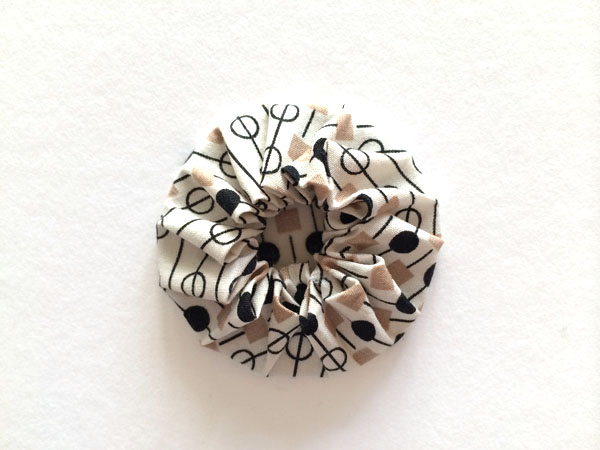
And that’s it! Seriously, aren’t they super cute? And they not only make a great gift, they are wonderful stash busters too!
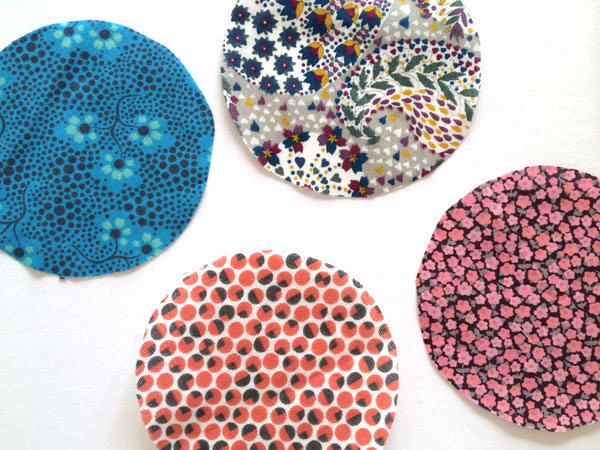
When making your collection of yoyo washer weights, think about using small prints from your stash, as I have pictured above. On the small scale of the washer, the little prints look best and make a wonderful addition to anyone’s sewing studio!
Where is the template download?