
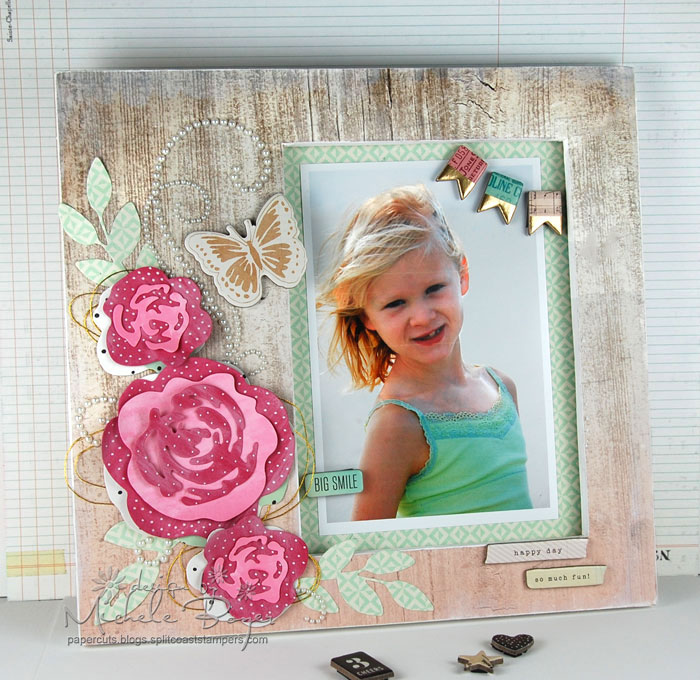
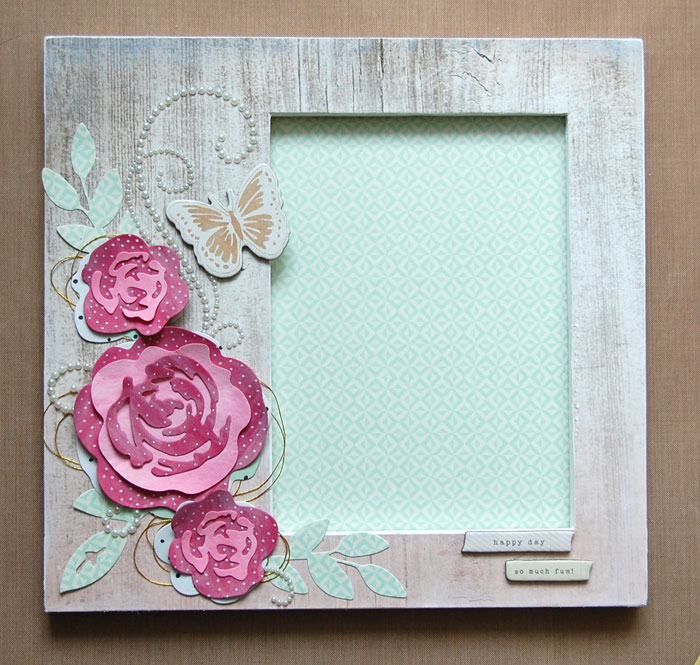
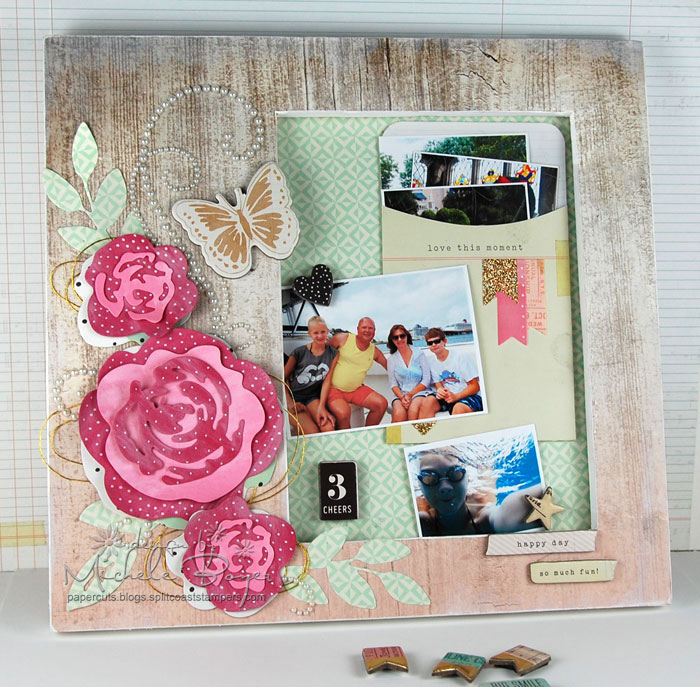
I love displaying photos of family, friends and fun times. I also like to switch the photos to keep up with growing children and new events. By creating a frame with a thin metal background and coordinating magnets, it’s easy to change photos as often as you’d like. Scroll down to see how I did it and learn how to make your own DIY photo frame.
DIY photo frame tutorial
I began with a wood frame and lots of Crate Paper product in the Confetti line. When I began my project, I wasn’t entirely sure of the exact supplies I’d use. However, in the supply list below, I’ve listed each product needed to complete the frame and magnets.
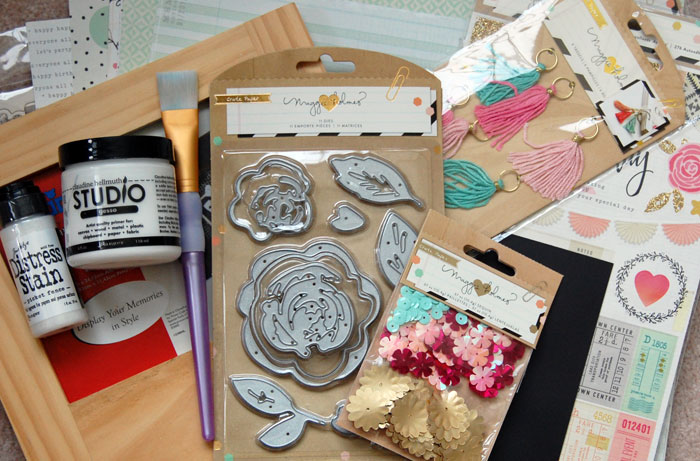
Supplies you’ll need:
- Plain wood frame (Mine measures 9 1/4″ x 9″ with a 4 3/4″ x 6 1/2″ opening)
- Gesso/paint brush
- Mod Podge/sponge applicator
- Pencil/white eraser
- Crate Paper Confetti patterned paper, dies, chipboard and embellished pockets
- Light and dark pink cardstock
- Die-cutting machine
- Ranger Picket Fence Distress Stain
- Opaque white marker
- Tin Coated Steel Metal Sheet by K&S Precision Metals
- Magnetic sheet or tape
- Mini Mister filled with water
- Pearl flourish
- Gold thread
- Adhesive
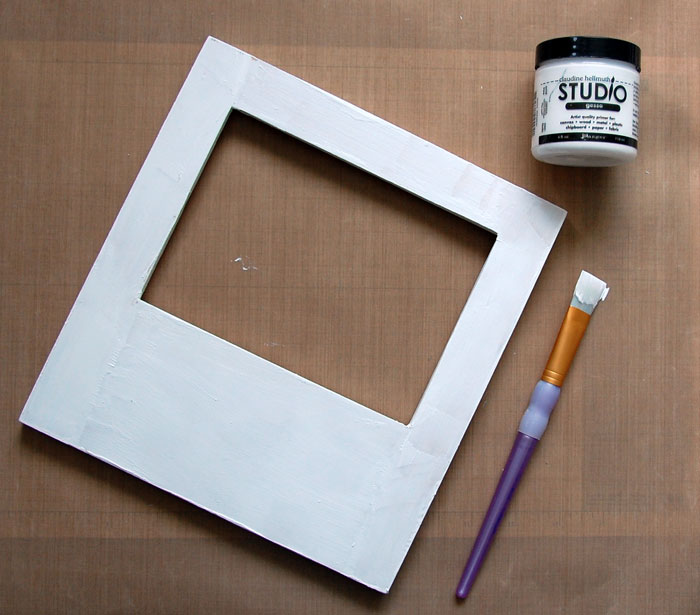
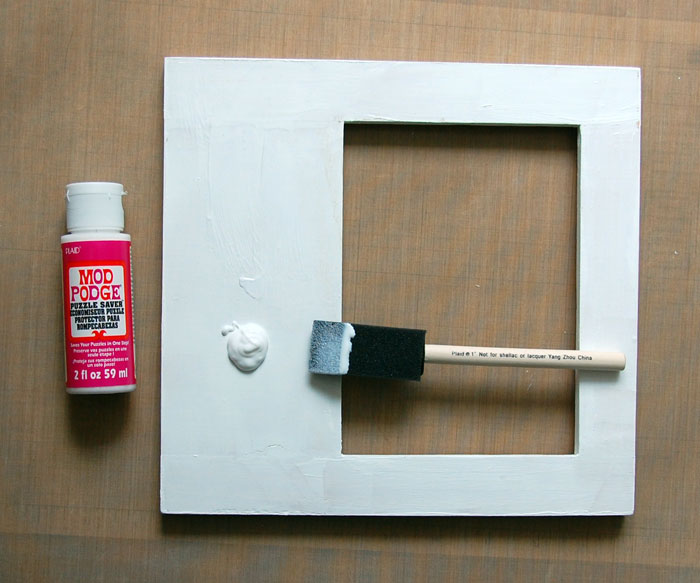
Step 1:
Using gesso and a paint brush, cover the front surface of the frame as well as the inside and outside edges. Allow to dry.
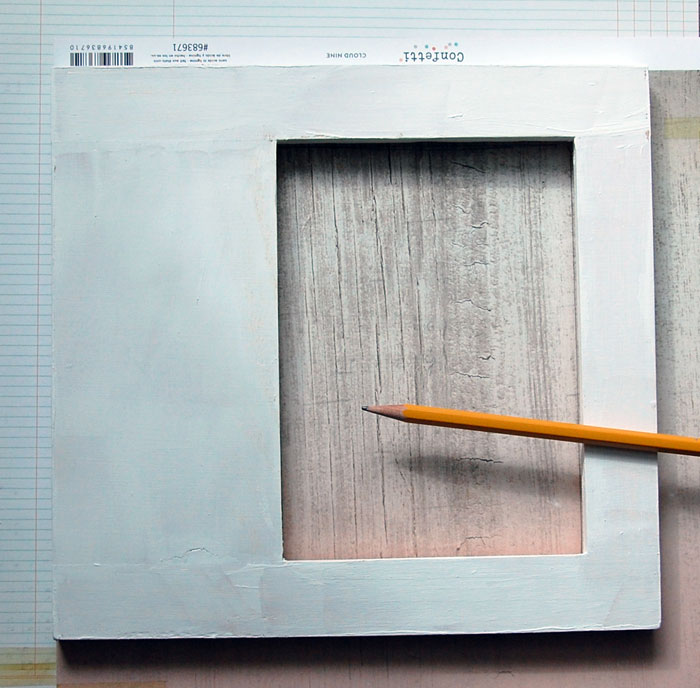
Step 2:
Using a pencil, lightly trace the outside edges of the frame onto woodgrain patterned paper. Also trace the inside edges of the photo opening. Cut paper along pencil lines. Hold paper to frame, ensuring that paper is trimmed to fit. Trim/adjust as needed.
Step 3:
Apply Mod Podge to front surface of frame and adhere woodgrain paper.
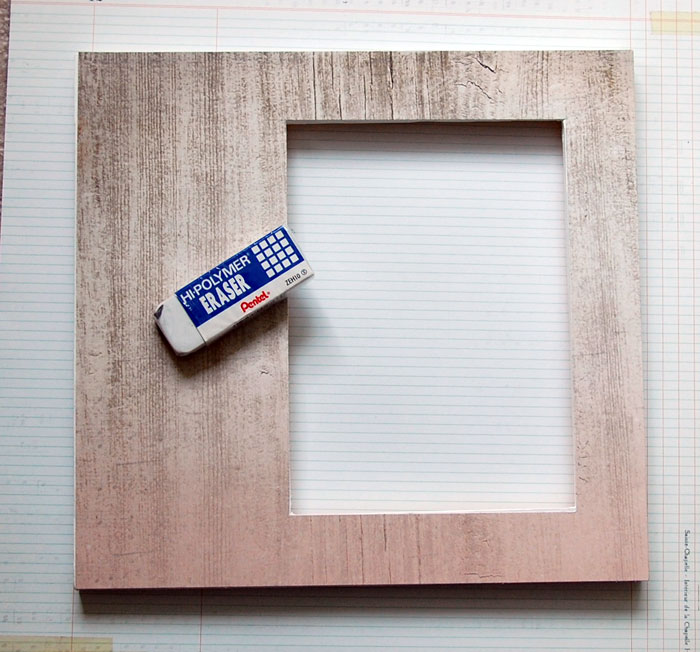
Step 4:
Using a white eraser, remove any pencil marks.
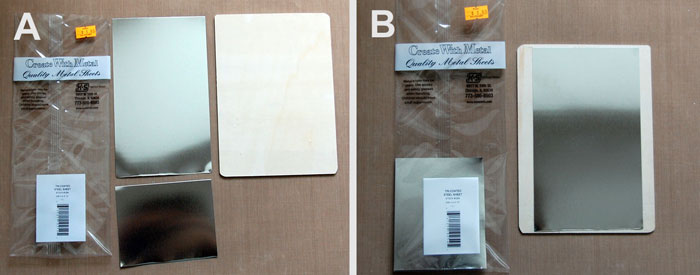
Step 5:
Cut thin metal to fit back of photo opening (A). The metal is not quite as wide as the opening, but it is close enough. Adhere metal to the wood backing (B).
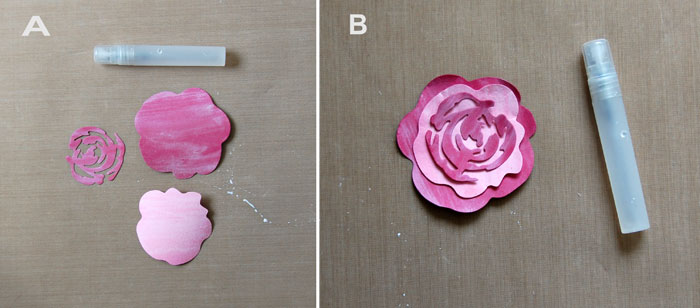
Step 6:
Die-cut pieces for one large flower, two smaller flowers and three sets of leaves. “Swipe” distress stain over flower pieces, ensuring that the same direction is used on all pieces once layered. Mist with water and lightly spread stain with fingers (A).
Adhere flower layers (B), bending larger layers a bit forward for added dimension. Once assembled, add white dots to darker pink pieces using opaque white marker.
Step 7:
Cut patterned paper to fit over metal photo backing and adhere. Secure inside frame. If necessary, add thin layers of cardboard behind the photo backing until the back fits snugly against the front of the frame.
Determine placement of flowers and leaves, and roll lengths of gold thread to be placed beneath each flower. Adhere flowers over thread and adhere additional chipboard stickers.
Adhere sections of a large pearl flourish, placing pieces around flowers and leaves.

Step 8:
To create the magnets, adhere smaller chipboard pieces to the back of magnetic paper or tape. Cut closely around each shape.
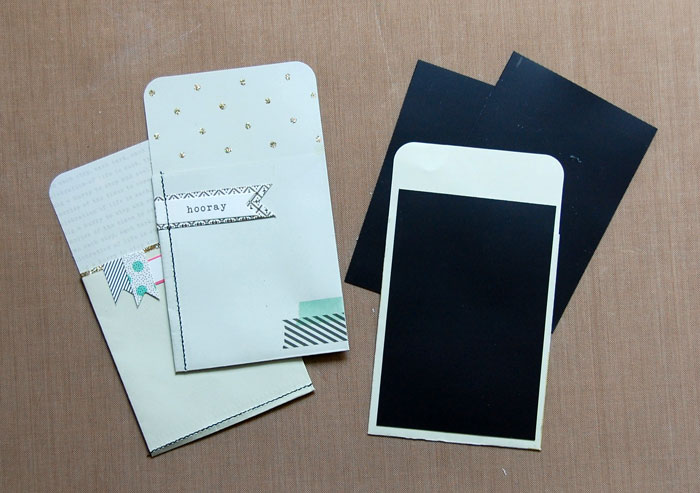
Step 9:
Adhere magnetic paper to the back of embellished pockets to hold additional photos, tickets or other small mementos.
Share tips, start a discussion or ask one of our experts or other students a question.
No Responses to “Create a Magnetic DIY Photo Frame With Coordinating Magnets”