
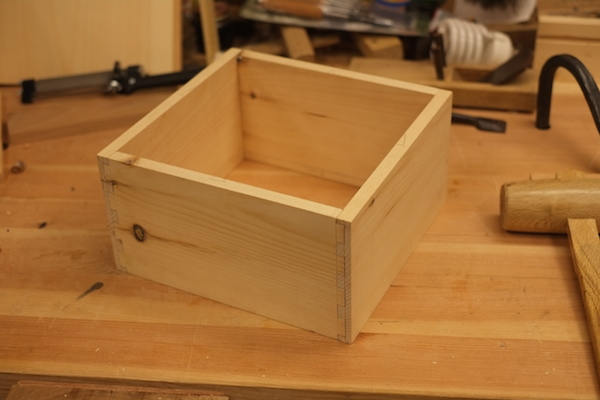
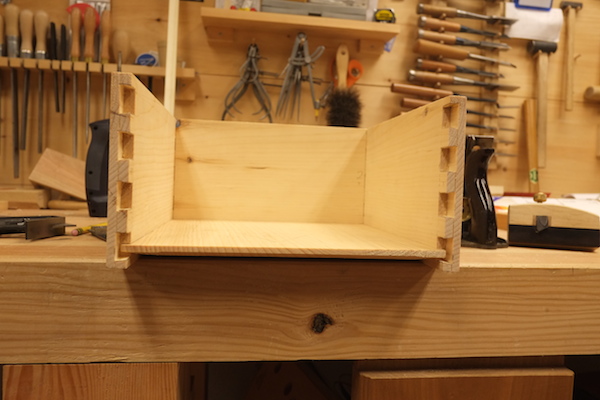
In a previous post we learned how to mark the sides of our custom-sized dovetail box for the half-blind dovetails that join the corners of the box along with the grooves that will hold the bottom of the box, as well as how to cut the dovetail joints themselves. At this point, you should be able to fit the four sides of the box together as seen below. In this post, I’ll show you how to make the grooves that will hold the dovetail box bottom and we will learn how to fit the bottom of the box into the grooves.
Step 1:
After you finish making the four half-blind dovetail joints, you will be able to fit the sides of the box together. The sides should be square. If you peek inside the box, the lines that were made to mark where the groove goes should meet up with each other.
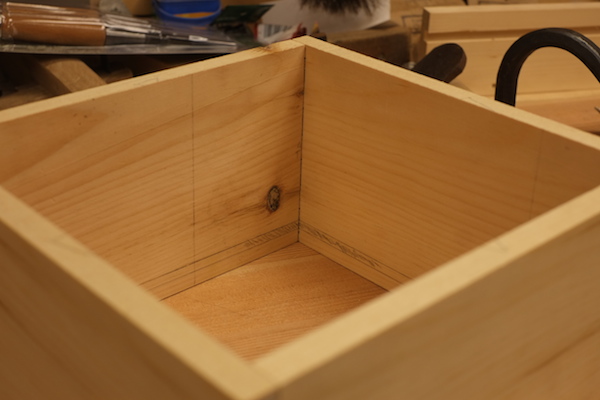
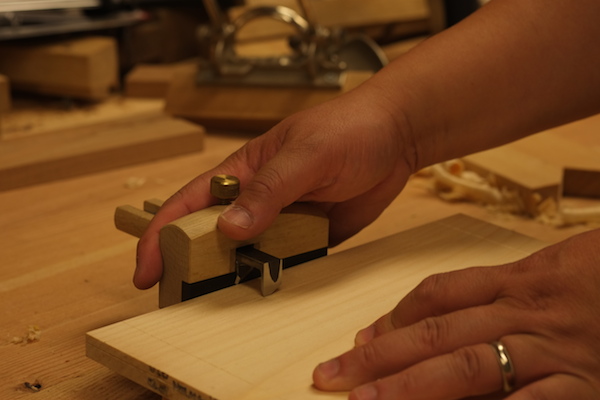
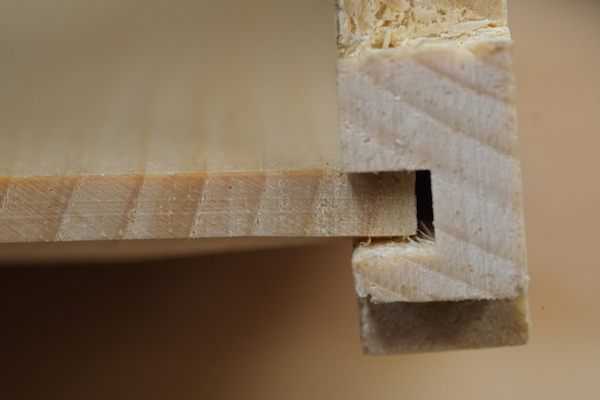
Disassemble the sides, and make the grooves using a plow plane. Here I’ve set my plow plane using a 1/4” blade that’s lined up with the guide line, and the depth stop is set to make a 1/4” deep groove. You can see that the groove comes out in the middle of the bottom tail. On the pin board, the groove will come out in one of the sockets. Do this for all four boards.
When you’re done with this step, the grooves will line up with each other when you put the sides together.
Step 2:
Now take the board that will make the bottom. Cut the board so that it is approximately the outside perimeter of the four sides of the box when fitted together. This will be bigger than the final size, but we will trim this down later.
Line up the board with the groove in one of the side pieces. Make a mark that is about the width of the groove.

Using this mark as a guide, use a marking gauge to mark a line all around the edges of this board. This represents how thin the board will be at the edges.
Step 3:
Then mark the bottom face of the board about 3/4” in from the sides on all four sides. This will serve as a guide for shaping the bottom board to fit into the groove.
Step 4:
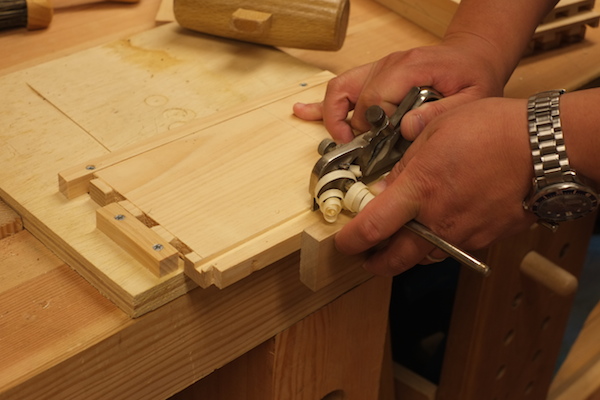
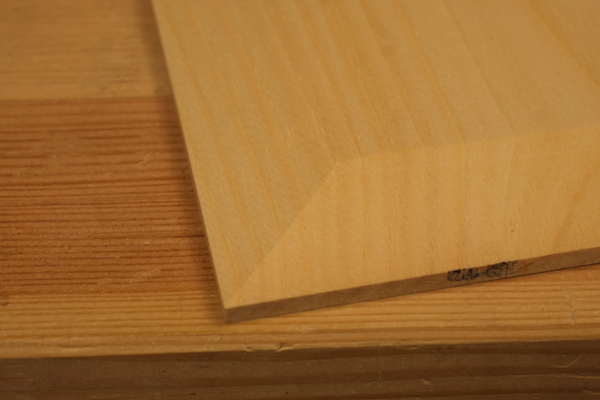
Take a plane and plane a bevel on the bottom side of the board on all four sides, trying to finish up by hitting both of the lines you just marked. You will be tilting the plane at a slight angle to do this. It’s easiest to do the two cross-grain sides first, and then the two long-grain sides. If you reach one of the marks first, just tilt the plane more in the other direction.
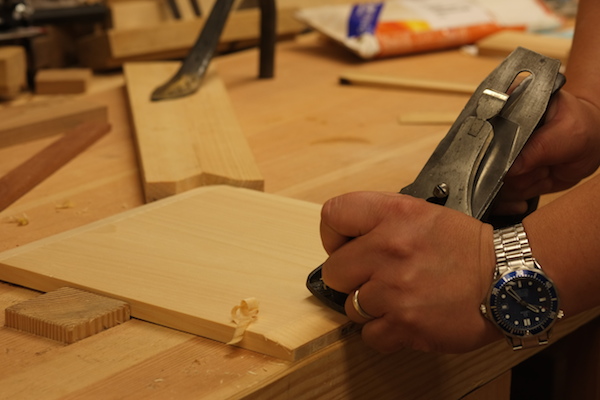
Here’s a neat tip: You know you’ve got even thickness on all sides when the diagonal line meets up with the corner of the board. If the diagonal line is off, plane that side down until the line connects with the corner.
Step 5:
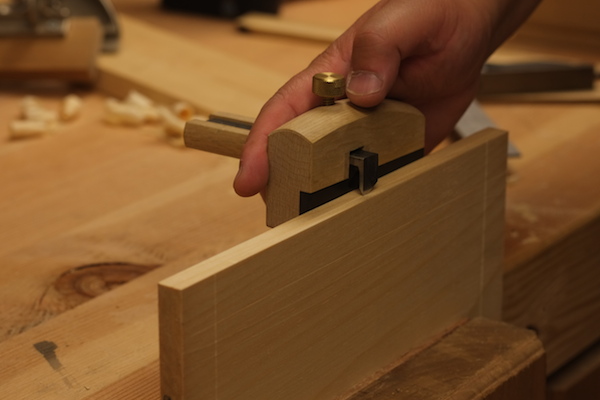
At this point the bottom board should be able to fit into the groove like this, with the bevel side facing down. The bevel should wedge into the groove. If the board is still too thick, plane away more on all four sides until it does fit. Take your time at this step, because you don’t want to make the board too thin.
Step 6:
Assemble three sides of the box, leaving one of the tail boards off. Because you marked the board based on the outside perimeter of the sides of the box, it will most likely be too wide to fit into the box. Trim the board down by an appropriate amount so that the board will fit between the grooves. Again, it’s best to sneak up on this, because you don’t want to make the board too narrow. After trimming the width of the board, the bevels will need redoing. But once the board is narrow enough, it should be able to fit into three sides like this.
Step 7:
Finally, trim the length of the board so that the fourth side can be put on. Again, you’ll have to redo the bevels, and take the time to sneak up on the fit. If all goes well, you’ll be able to put the fourth side on, trapping the bottom board in place.
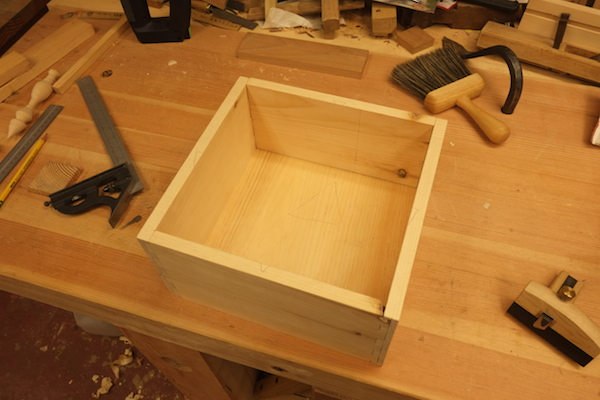
You may have noticed that the sides were a bit wobbly, but once the dovetail box bottom is fitted, the box becomes surprisingly rigid.
If you wanted an open box, you could glue up the sides at this point and be done. But don’t do that yet,
because in the next installment, we will add a sliding lid to the box.
[box type=”shadow”]
 Advance your woodworking and create three essential dovetail joints. Sign up for the online class Three Essential Dovetails, taught by expert woodworker Kyle Kwiatkowski, and achieve a variety of functional and beautiful dovetails that are sure to impress!
What makes online Craftsy classes great?

Learn for life! With lifetime access to your classes, you can watch lessons at your preferred pace and easily revisit your favorite concepts with just a click.

Kick up your feet! Enjoy classes anytime from the convenience of your home or even on-the-go with our mobile apps.

Get personalized guidance! Ask your instructor questions to receive all the answers and feedback you need to succeed.

Love it! There’s no risk in trying with our 100% money back guarantee.
Share tips, start a discussion or ask one of our experts or other students a question.
No Responses to “Guide to Making and Fitting a Dovetail Box Bottom”