
Sawing the pins is “game on” time when making dovetails by hand. You use your skills to precisely match a previously prepared part — the tails. It takes practice but you can do it, and here’s how.
And not to worry. Later in this series, I’ll show you some tricks to make some errors disappear. I may even make a few little errors myself. (You know, strictly for, ah, demonstration purposes, of course.)
Baseline strategy
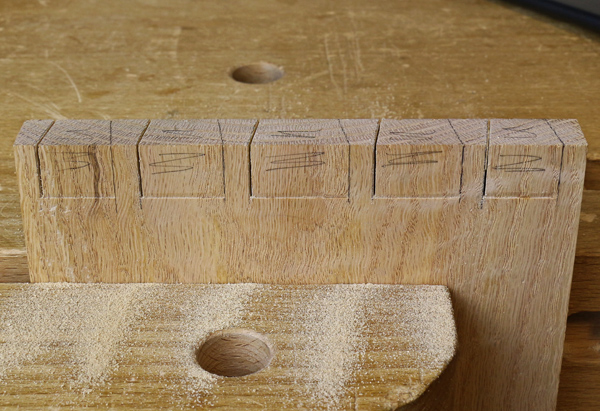
The cutting gauge is used to knife the baseline on the pin board. For this, you have a choice to make.
If the gauge is set slightly greater than the thickness of the tail board, the surfaces of the tails will end up recessed below the ends of the pins. The advantage of this method is that it allows a margin of safety in starting the saw cuts for the pins. I used it here because this curly red oak is a tough wood. However, it does create more difficulty in clamping because a specialized clamping caul, or a trick or two, will be required, as we’ll see in a later post. If you go this route, keep the gauge setting just a little bit, say 1/64″ – 1/32″, greater than the thickness of the tail board.
The alternative is to set the gauge slightly less than the thickness of the tail board. At assembly, this will make the outer faces of the tails sit slightly proud of the end grain of the pins, which will facilitate clamping. The excess thickness of the pin board is then planed away after glue up.
In any case, do all the pin boards the same way; don’t mix methods. Once again, on the outer face, I prefer to knife only where I am going to chop, as I did on the tail board. In the opening photo, notice the knifed baseline and the usual V-cuts.
Very vertical
These saw cuts are all dead vertical. Practice by imprinting into your muscle memory the feeling of the saw at 90° by gripping it (index finger forward), setting the tooth line on the bench top, and trying to find the lateral balance point. Then take some practice cuts in scrap wood.
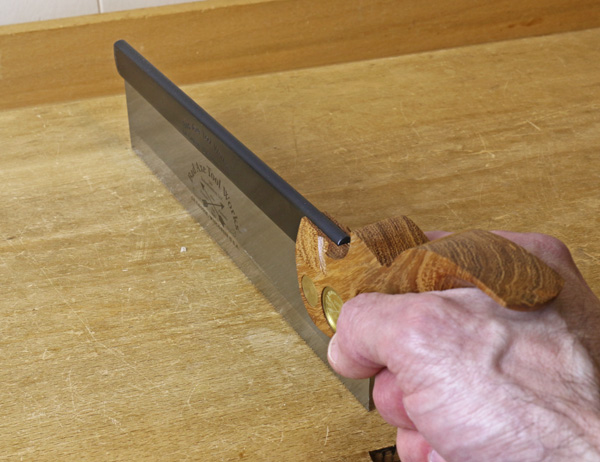
The start of the cut is critical, and here again, the best approach is “go for it,” keeping in mind the concept of one-sided tolerance, as discussed in my post on how to use a dovetail saw.
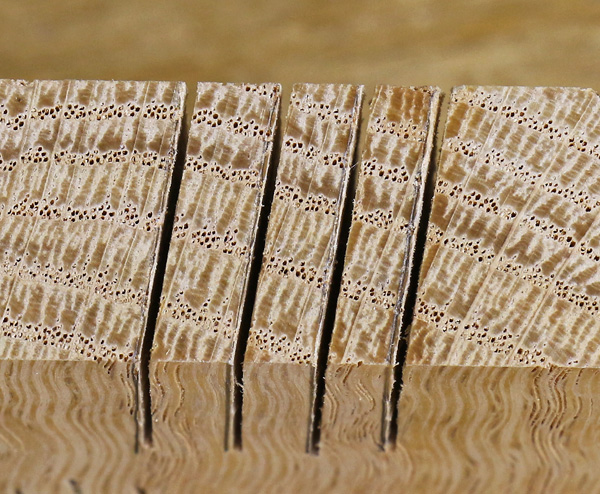
In this close-up photo of demonstration cuts above, you can see I was overly cautious and did not saw close enough to the lines.
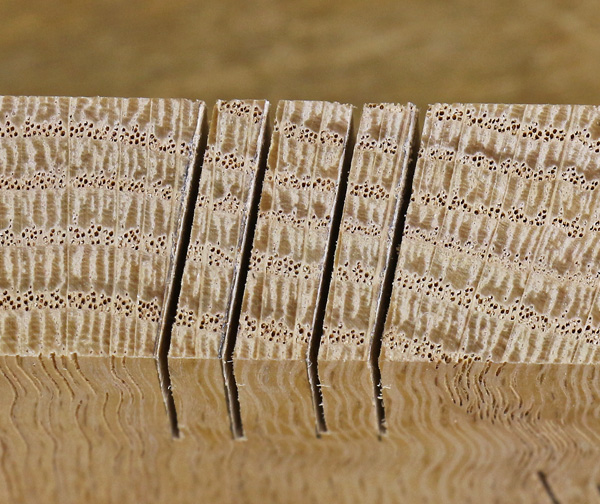
In this photo, the two cuts on the right are just right. The two on the left are just a bit cautious, acceptable perhaps, but they would produce a joint too tight and clean up work would be necessary.
Think of it this way. It’s better to make an occasional pin with a gap, which can always be fixed, than to make all of the pins too tight, each one requiring tedious cleanup work, which itself can often go astray. Furthermore, experience will tell you how to manage the particular wood species you are working with.
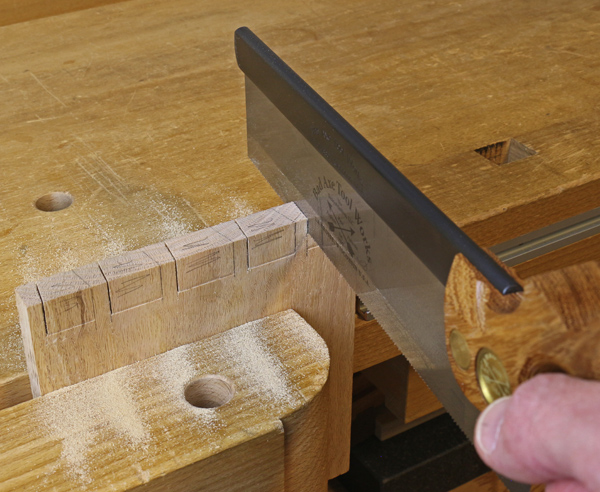
Place the pin board low in the vise, and square it to the bench surface.
Use excellent adjustable lighting. Focus your mind and body. Align your saw and shoulder so that you “face” the angled layout line; don’t hook your arm. To establish a rhythm and aid muscle memory, do all of the left-angled cuts in succession, then all of the right-angled cuts.
Start the cut on the far side of the line, using your thumb as a guide, and lay down the tooth line to form a full kerf across the end grain. Then, track the vertical line with your saw like a bloodhound on a hunt.
As with the tails, and with the same rationale, I suggest using a fret or coping saw to remove the bulk of the waste between the saw cuts.
Happy chopping
Chop the waste using the same general dovetail chisel techniques as for the tails.
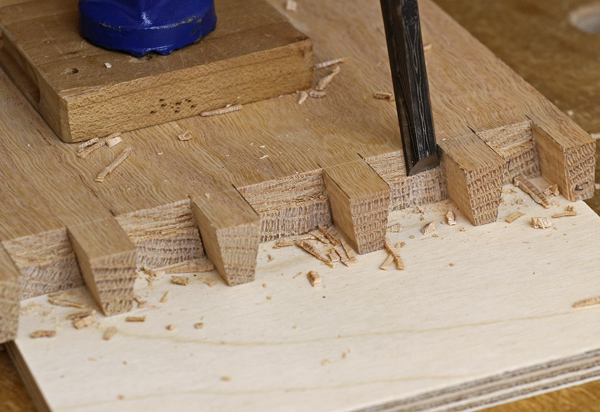
Start chopping from the inside face. After the initial light chops, the chisel is angled to accommodate the sloping socket, as shown below. Note in the photo above that the bulk of the waste has already been sawn away.
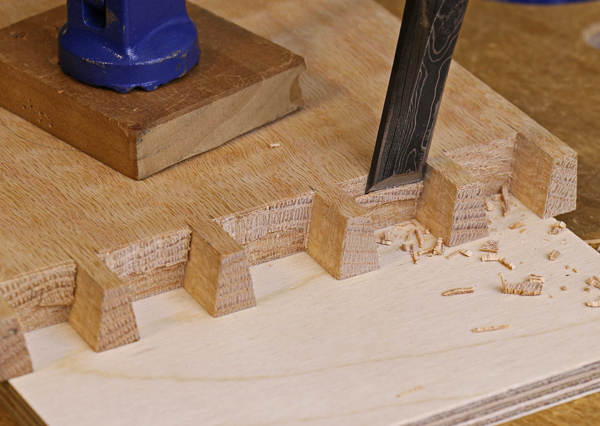
Next, do most of the chopping from the outside face, and finish from there, where there is a better view of the work. Angle the chisel as shown above. Undercut as with the tails.

Use a variety of chisels. The width of the chisel need not match the width of the socket but should exceed half its width, especially for the initial cuts. For chopping the pins, there is no need for specialized chisels with narrow or sloping side walls. Remember, you need sharp tools to do good work. Please see Wilbur Pan’s on how to sharpen a chisel and bevel edge chisels for more information
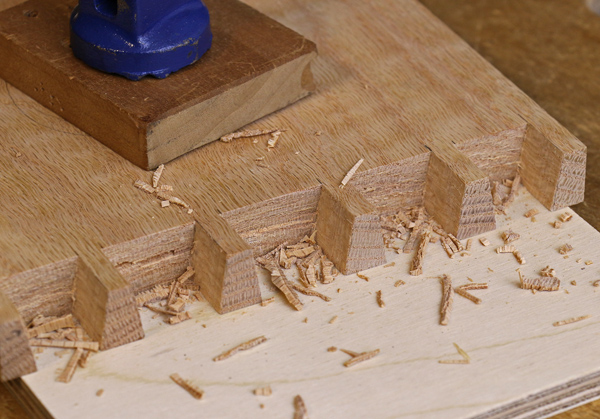
Here, the chopping is completed. The small chips are evidence of the toughness of this wood.
Be sure to come back to the Craftsy blog next Monday for the next installment of my dovetailing series, where I’ll cover fitting the joint together.
Share tips, start a discussion or ask one of our experts or other students a question.
No Responses to “How to Saw and Chop the Pins for Dovetailing”