
The great thing about drawing is the multitude of ways that you can articulate a subject through simple sets of lines. We’ve seen this demonstrated in a number of ways, and today we’ll delve deeper into the world of drawing cross-contour lines.
What is cross contouring, you ask? Well, we know that the contour is an outline. A drawing that’s expressed in this technique is made up of these outlines that reflect detailed plane changes in an object. It describes form and volume versus only outline.
We’ll go over examples of cross contour and tips for completing this style of drawing.
When I mentioned that cross contour follows the planes of a form, think of it like this: Your drawing is a topographical map, and the lines show the terrain. Some are rocky while others are flat. It all depends on your subject.
Check out drawings that I completed with cross-contour lines. You can see that the look of each limb/object varies greatly, and the lines are differ based on the texture of the surface.
Examples of cross contour
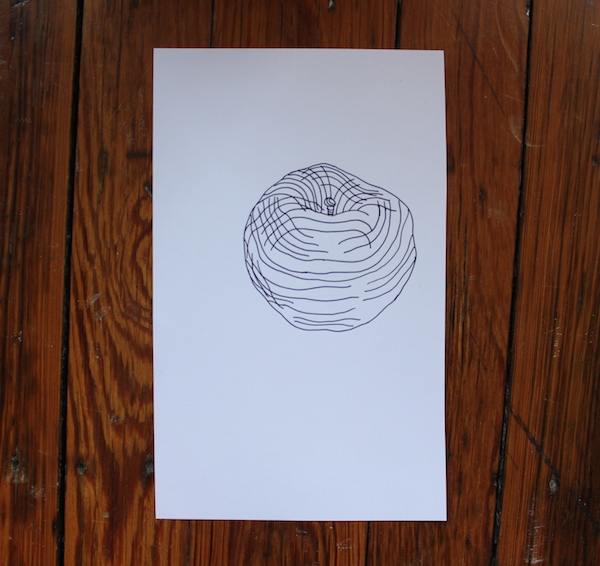
To warm up, I started with an easy subject — an apple! I’d recommend using a smooth piece of fruit, like an apple, because it’s small and doesn’t take too long to study and record, while still having some spots that are more pronounced than others. I had to look carefully to figure out where those areas were and express them in the drawing.
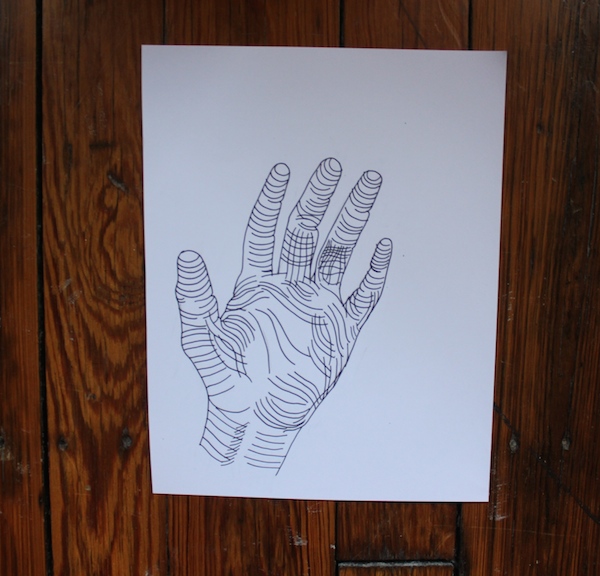
After the apple, I drew the palm of my hand. It’s another subject that’s relatively even-textured but has a lot of opportunities to articulate using cross-contour lines. If you choose to draw your hand (and why not? It’s right there!), try challenging yourself by contorting your fingers into a claw shape.
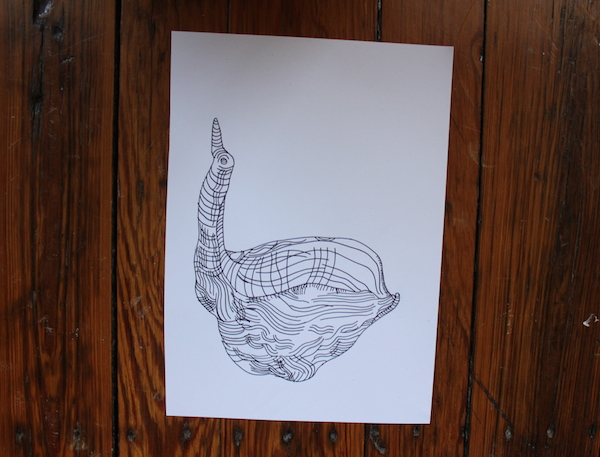
Finally, I drew a small ceramic sculpture that I’ve collected. It is deceptively difficult, as the artist didn’t create a perfectly smooth piece. The bird is bumpy in parts, and it doubles as a dish. So, I had to draw outer contours and inner contours to give the illusion of this weighty, open form. See why direction of lines is so important? You wouldn’t have known how rounded the beak and neck was if we’d used something like cross hatching.
Tips for drawing with cross-contour lines
It’s a fun challenge to create an image using the cross-contour technique. Here are a couple of my tips for tackling these drawings.
1. Imagine what you’re going to draw.
Picture the form before you make the marks. For instance, when drawing your finger, think about how round it really is. How does your other hand look when you grip it? Try to replicate those types of contours in your drawing.
2. Start with pencil.
This type of drawing lends itself well to exact, clear lines. This is why I wouldn’t recommend that your entire composition be done using graphite, as it can easily smudge. I, personally, would always go with pen and ink.
But, you don’t need to start out there. A pencil and eraser are your friend — you can go slowly, correct any mistakes, and have a solid drawing before anything is made permanent. You can use an ink pen to go over your lines afterwards. Then, erase any pencil marks you see. No one will be the wiser!
Share tips, start a discussion or ask one of our experts or other students a question.
No Responses to “Finding Form: Tips for Drawing Cross Contour Lines”