One of the best ways to draw from a photograph is the grid method.
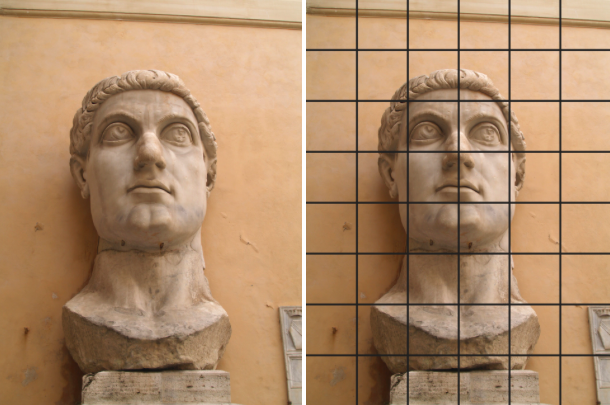
This involves drawing a rectangular or square grid on a print of the photo you want to reproduce (or in Photoshop on your computer), and drawing a grid on your drawing paper. In this way you are only copying small portions of the photo at a time, which makes it easier to keep your proportions correct. It’s also easy to scale up your photo to a much bigger drawing. Let’s try this with a photo of Emperor Constantine. I’m sure he won’t mind.Step 1:
Start by drawing a grid on the photo using a pen or marker so you can see the lines. The smaller the dimensions of the grid, the more accurate the transfer will be. For this 6×8 photo I drew a line every 1 inch. It’s important to make sure the dimensions of your paper scale accurately to the dimensions of your photo. If you have a 5×7 photo and you want to transfer it to a sheet of 9×16 paper, you are going to have to crop one or the other to make the proportions work.
Step 2:
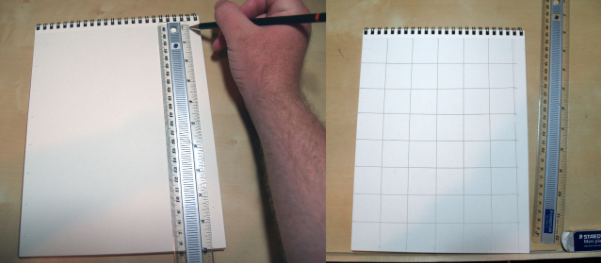
Draw a grid on your paper using a 6H or 7H, which are very hard, light pencils that are easy to erase. If you are transferring onto a sheet of 8×10 drawing paper, you must crop your paper to 7.5×10 to match the dimensions of the photo. Using that ratio, draw a gridline every 1 1/4 inches, because 10/8 equals 1 1/4. (Don’t worry, this is the only math you’ll have to do!) If you use simple multiples of your original dimensions it’s even easier.
Step 3:
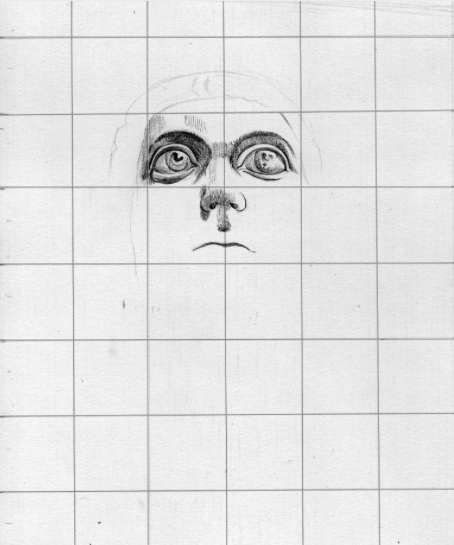
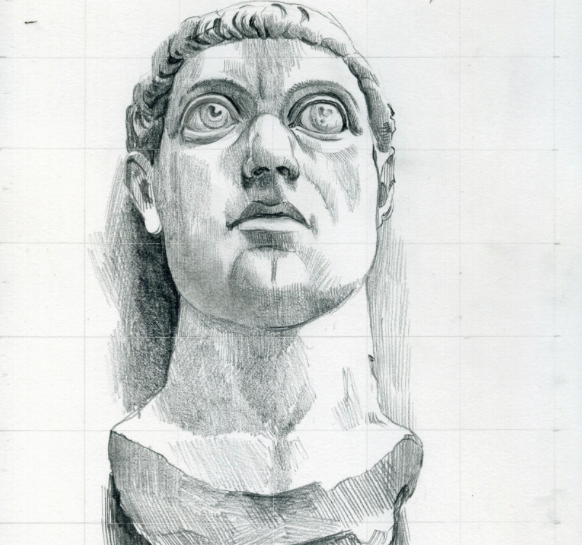
Start copying the photo one grid square at a time, using your 6H pencil to lightly sketch in lines. Then a softer pencil, such as a 4B, to make the drawing darker.
Step 4:
Work your way carefully through the drawing, methodically establishing the location of features and information before firming them up. If you find that it’s still hard to get the proportions of the details correct, subdivide your grids again, in both the photo and the drawing. The smaller your squares, the easier it is to pin down the location of information accurately.

Share tips, start a discussion or ask one of our experts or other students a question.
No Responses to “Drawing from Photographs: Tips and Tricks”