
Roll up your sleeves because it’s time to get messy! Okay, not that messy. But, we will be using our fingers to work with the versatile drawing medium, charcoal, as we work on drawing geometric shapes!
Follow along with this tutorial!
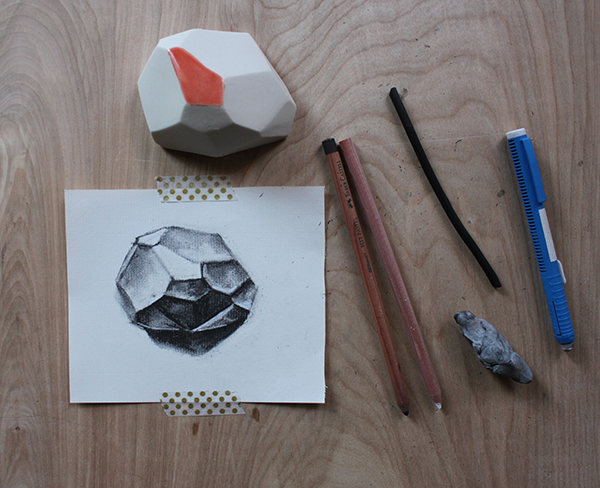
Drawing geometric shapes is a great way to learn to use charcoal. The shapes can be simple or challenging. And, best of all, they are easy to find. I bet you have something laying around your house that would work great. (I did!)
Before we begin, let’s go over the tools you’ll use for this exercise. I’ve labeled them below.
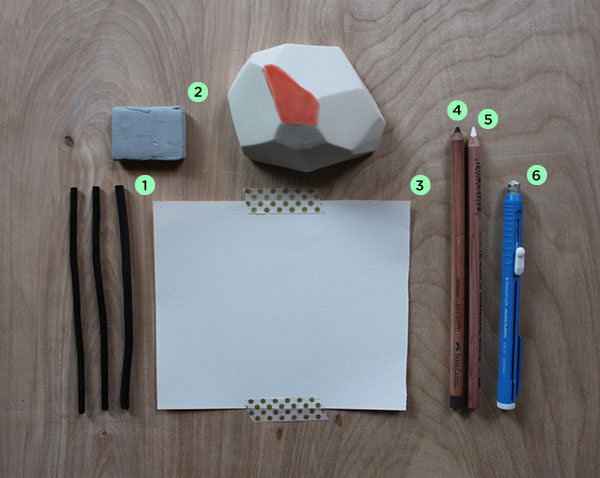
- Vine charcoal: This is a soft type of charcoal that’s perfect for light sketching and is the easiest to manipulate.
- Kneaded eraser: Not your average eraser, this is specifically made for drawing. It’s very malleable, and you can stretch it like Silly Putty. I use it for blending, too.
- Drawing paper: You can use whatever kind you like. Here, I’m drawing on Strathmore 500 Series Charcoal paper in white. It’s lightly textured, so it has a slight tooth that will hold your medium in place.
- Charcoal pencil: This is a hard type of charcoal, great for dark shadows and outlines. It’s harder to smudge (and to erase) and is typically used at the end of the drawing.
- White charcoal pencil: It’s very similar to the black charcoal pencil and is used here for fine details.
- Conventional white eraser: This is for completely cleaning up lines, or when you need to start over.
Beginning with vine charcoal
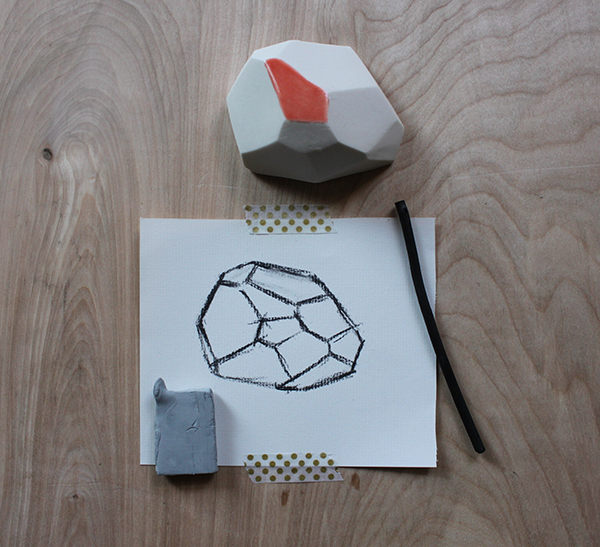
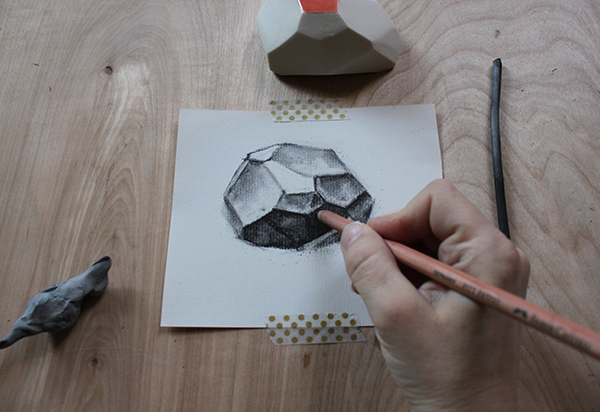
Today, I’m drawing a ceramic geometric shape in natural light. You’ll want to start by using vine charcoal to draw the outline of object. Like I mentioned earlier, this type of charcoal is easy to erase if you make a mistake, so take your time and get the sketch correct before proceeding.
Lightest values first
Once you have a drawing that you’re happy with, it’s now time to start shading. With the vine charcoal, look for areas that will need darkening. Where does the light hit your object? On mine, the faceted parts of this shape cast a lot of shadows, so I’m applying an overall tone to most areas.
Don’t feel like you have to color edge-to-edge with charcoal. This is where your fingers come in handy! Instead, draw a little bit on the paper, then use your fingers or kneaded eraser to spread and smudge. If you’ve made it too dark, don’t worry. We’ll fix it later.
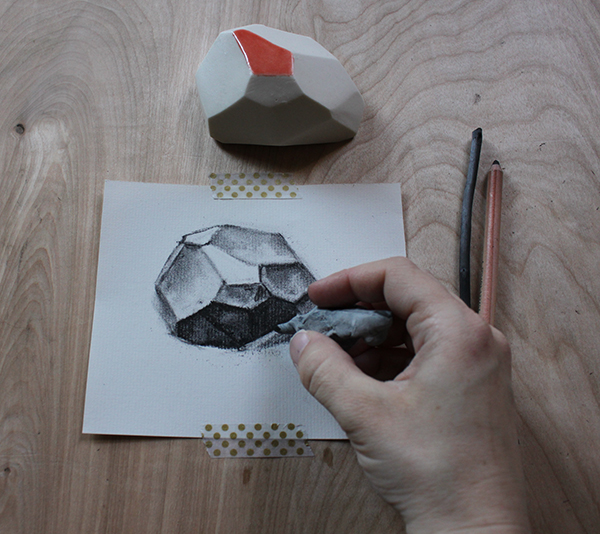
Erasing to build form
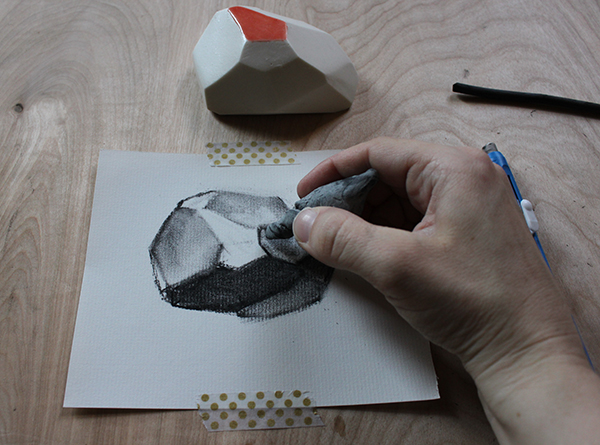
Here’s where you’ll want to grab your kneaded eraser. If you’ve never used one before, pull the thing apart. Stretch it and “warm it up” in your hands. Now, fashion it into a point and lightly graze it over your shaded areas. It will take up some pigment, but not all of it. Experiment with different pressure – see how I’m drawing with the eraser?
Cleaning up, part one
So, you’ve been going through your drawing and erasing some of the charcoal. You should now have a range of tones. Here, I’ve almost completely erased some parts of the pigment while leaving other areas untouched. It all depends on where the shadows fall.
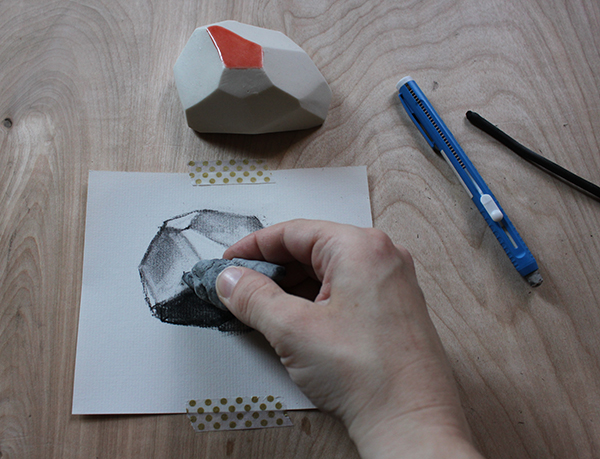
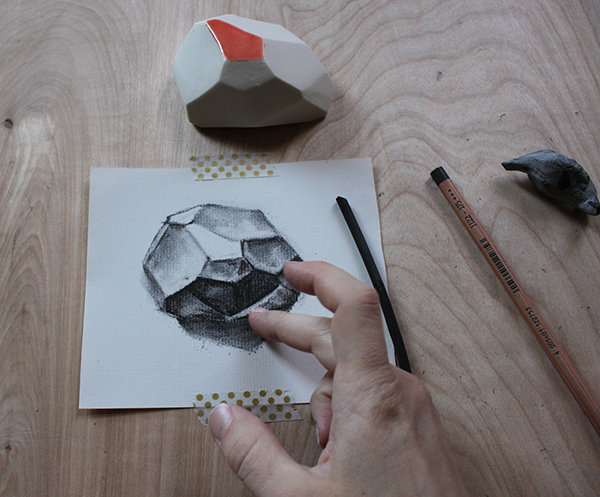
I’m about ready to transition from vine charcoal to a compressed charcoal pencil, but I want to clean up the drawing first. Gently take the kneaded eraser to diffuse the outlines of the shape that you drew. A conventional eraser will clean up any unwanted smudges or completely remove the charcoal.
Compressed charcoal to define and refine
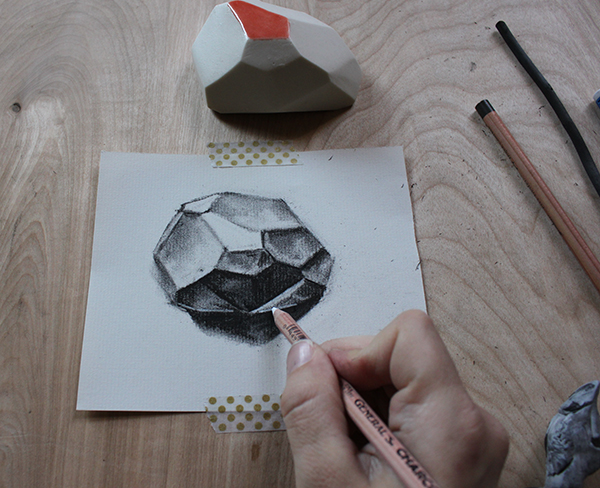
The great thing about compressed charcoal is that it’s tough. It doesn’t easily smudge or erase, so when you’re confident that you like your drawing, it’s time to get some serious marks on the page. This type of charcoal also produces a deeper, richer black that’s perfect for shading. So, go back in the shadows and draw in the darkest parts of what you see.
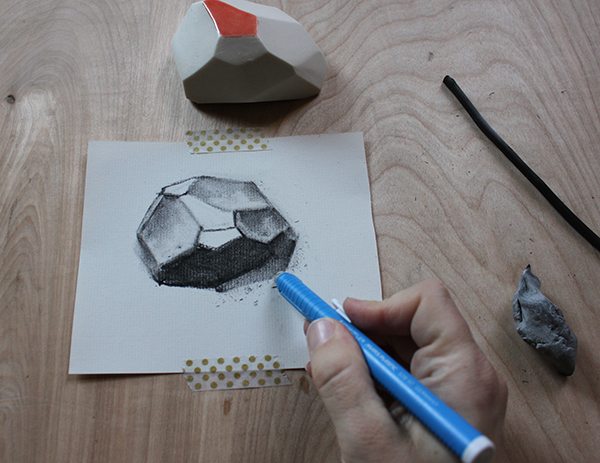
The object’s shadow
I chose to draw the object’s shadow last, but I’m going to go through the same process that I did for the actual object. Start with the process of vine charcoal, smudge and erase, and then define the shadow with the charcoal pencil.
Find more creative ways to use shadow in the Craftsy drawing class Drawing Facial Features. You’ll join published artist Gary Faigin as you discover the techniques to capturing the range and depth of human emotion in a single portrait!
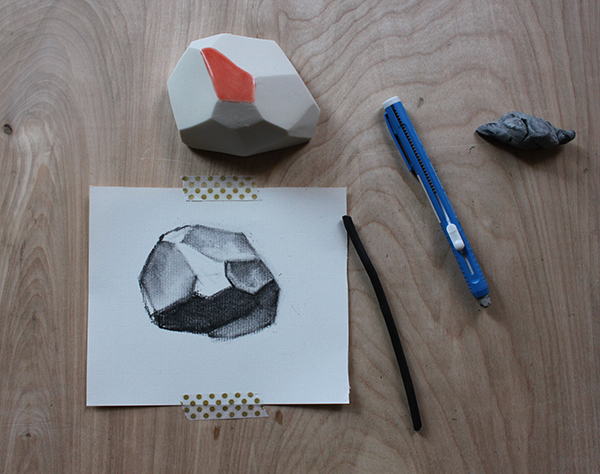
Cleaning up, part two
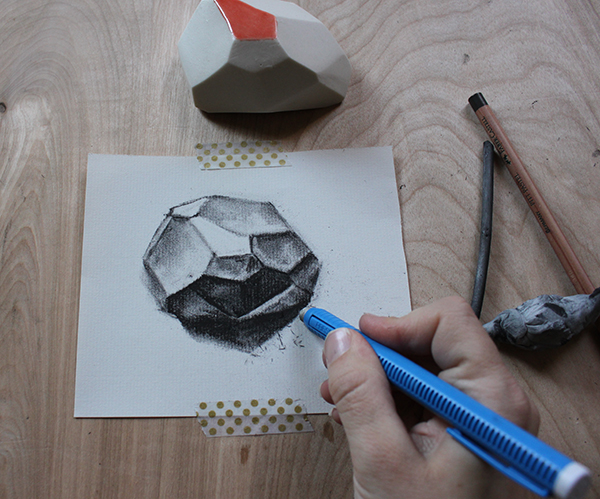
After you’ve got your drawing how you want it — you’ve defined, refined, smudged and diffused — then clean up the edges using the conventional eraser. This will make the shadows sharper and the whole drawing look more polished.
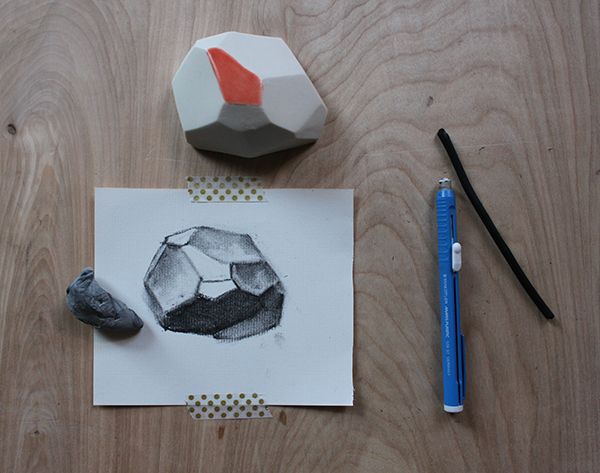
The finishing touch
You know the white pencil you saw earlier? I didn’t forget about it. I was saving it until the very end as the grand finale. After you’ve cleaned up your drawing, pick a few areas to highlight with white lines. Use it sparingly, and as a small way to enhance your overall work (not as a crutch for shading.)
Remember, drawing geometric shapes in charcoal takes practice. There are numerous tools you can use to draw with charcoal, and it’s a medium you won’t easily tire of. Sign up for a Craftsy fine art class to learn more!
Share tips, start a discussion or ask one of our experts or other students a question.
No Responses to “Using Charcoal: The Basics of Drawing Geometric Shapes”