
We know that all features of the face are important, and they all play their part in creating likeness and showing expression. But, if we were to hierarchize them, the eyes definitely take the top spot. After all, they are not called the windows of the soul for nothing. The eyes are very personal and unique to each individual. Through them we communicate much more than we realize, and they facilitate one of the most important ways in which we as humans can connect: eye contact.
Capturing eyes on paper can feel daunting but it doesn’t have to be that way. With some basic anatomical knowledge, lots of observation and this step-by-step guide you can start, or keep, practicing and notice improvement in your drawing right away.
How to draw realistic eyes
Step 1:
Just as they say that eyebrows are not twins but sisters, the eyes are not perfectly symmetrical either. Some pairs have more differences than others, but it’s very unusual to come across eyes that are exactly alike. With this knowledge, you can go against our ingrained idea of wanting to draw then exactly the same and instead observe your image or live subject in detail, trying to find the little differences between both eyes.
Is the top of the eyelid fold straighter on one eye and curvier on the other? Does the tear duct point slightly downward or upward? Studying all of these details will, not only, allow you to achieve a more realistic look, but it will also help you practice and hone your observational skills for all future drawings and paintings as well.
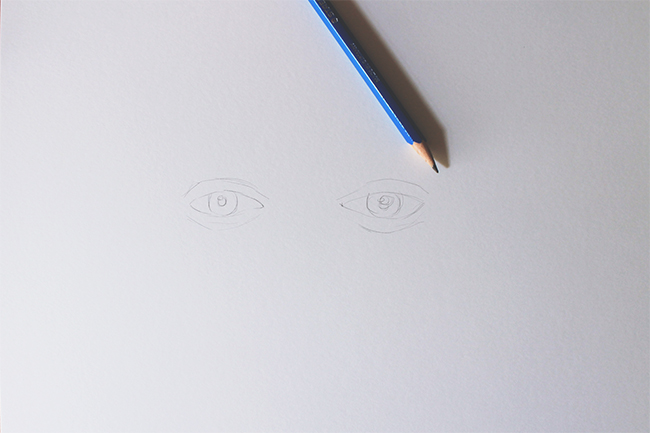
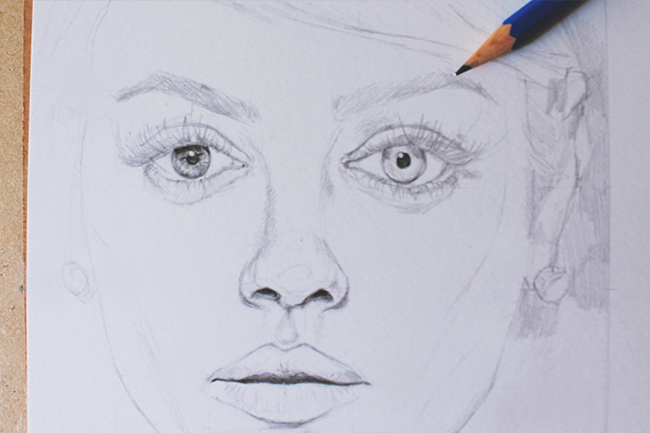
Begin with a 2B pencil and draw the basic outline of each eye, the pupil, iris and light reflection over it and the outline of the eyelids. At this point you want to keep it as simple as possible and focus on capturing the most accurate shapes possible.
Step 2:
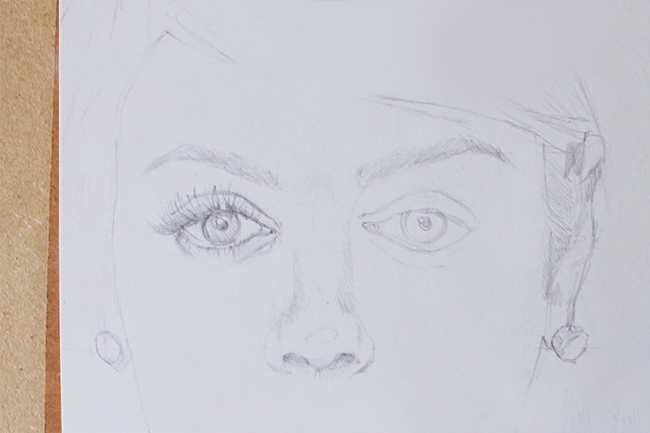
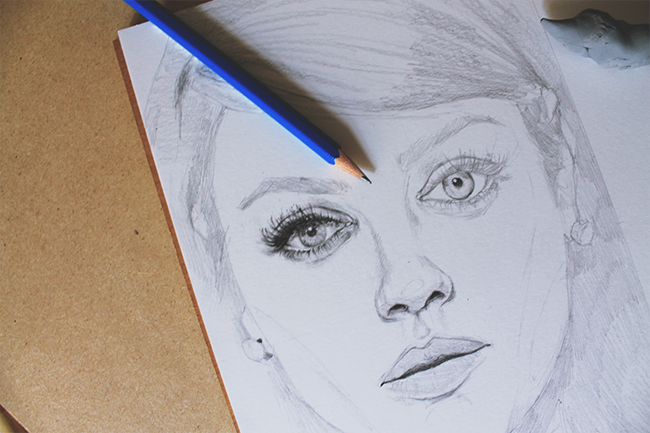
After you’ve got the basic shapes down, you want to slowly start building up your sketch with more and more details. You can now position things like the eyebrows and place the top and bottom eyelashes. Correct any shapes that might be wrong and continue to add details.
Step 3:
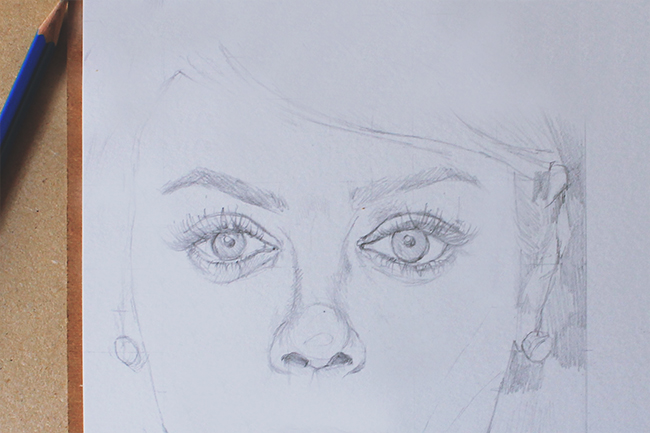
You can draw very light guidelines to help you place everything on the page and erase them afterward. You can also draw geometric shapes (like a circle on the nose) to guide you through the drawing process and help you find the curves, planes and volumes of the face. Now that you have placed all the basic features and done some slight shading it is time to build up the contrast. So, if you are happy with the positioning of all the facial features, and you want to move forward into shading, pick up a 4B pencil and let’s continue.
Step 4:
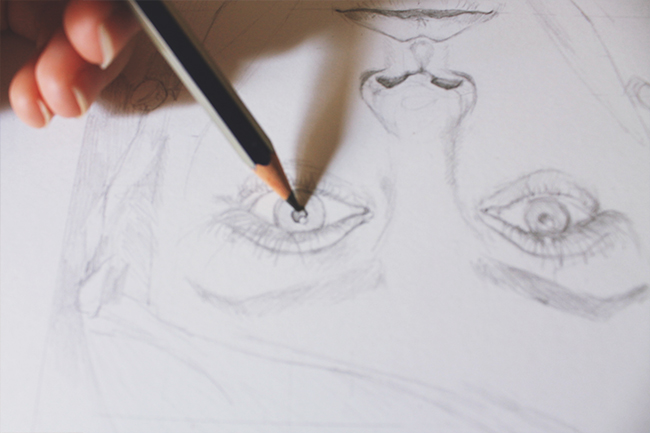
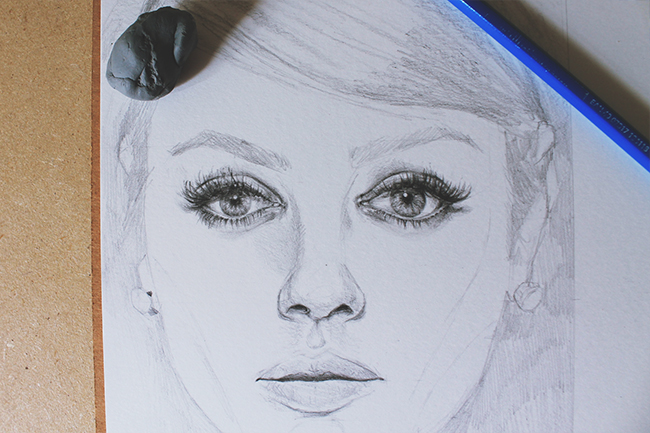
With a 4B pencil shade in the darker are of the eye, meaning the pupil. Make sure to leave an overlapping circle of white: This is the reflection from the light source, and capturing it will make the eyes look more realistic.
Now go back to your 2B pencil and draw the shadows of the eyelid and eyelashes over the iris. Also shade in the details and lines of the iris making sure you leave some slightly lighter areas on the bottom where the light hits it. From now on you will want to go back and forth between your 2B and 4B pencils creating shadows all throughout the eyes — always remembering to look closely at your model.
Step 5:
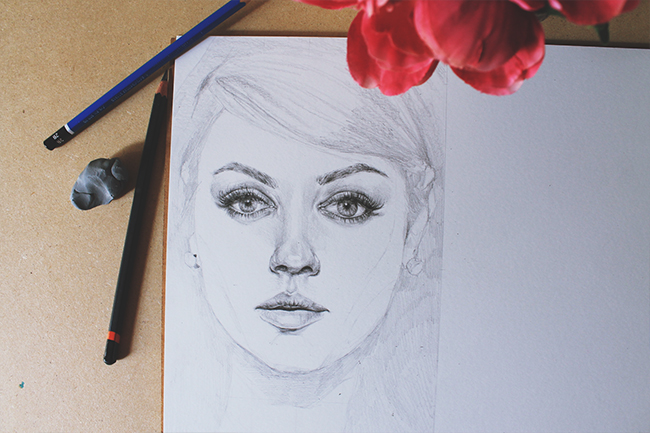
With your 4B pencil draw the details of the eyelashes and shade the top of the eyelid and fold. If your model has eye makeup and mascara you will want to press the pencil harder and draw it darker than if there were no eyeliner or mascara.
Step 6:
The white area of the eye, called the sclera, may be white in theory, but shadows from the lids and lashes will require you to add in some light shading using your 2B pencil or something even lighter, depending on the light source. This step can often be overlooked as we assume this area simply needs to remain white, but adding these shadows will help you achieve a more realistic and dimensional set of eyes.
Eyes, just like portraits, can be one of the most challenging subjects to draw. Even artists with many, many years of practice will face difficulties and find themselves unsatisfied with a portrait from time to time. Don’t let this feeling discourage you and don’t allow your internal dialogue to tell you that you just might not be good enough.
Drawing is just as much about skill and observation as it is a mental game, so the right attitude to keep practicing and pouring out drawing after drawing is what will provide you with the best results. Keep going and I promise you will surprise yourself!
Continue to improve your portrait drawing abilities with a complete drawing the face eGuide! Download and print this free guide, Drawing the Human Face: A Primer, and start rendering your own stunningly lifelike human drawings!
Share tips, start a discussion or ask one of our experts or other students a question.
No Responses to “The Windows of the Soul: Step-by-Step Guide for Drawing Realistic Eyes”