
Here are a few tips to help you draw feet accurately.
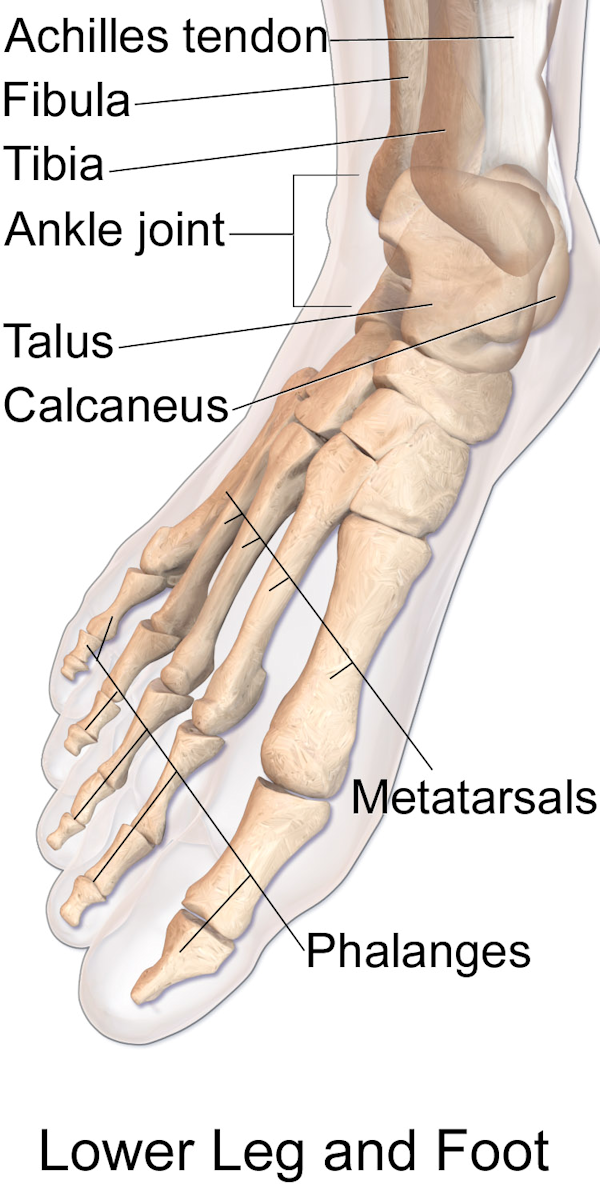
Anatomy of the foot via Wikimedia
1. Know the anatomy of the foot.
There are three main parts on the foot: tarsus, metatarsus and phalanges. Tarsus: This includes the heel and back of the foot Metatarsus: It is the middle part of the foot, made of five bones next to each other. As you can see on the picture above, the bone on the big toe side is the biggest. This group of bones also includes the ball of the foot, which is the little fat deposit under the foot situated where the toes are joining. The front part of the foot (toes and ball) is wider than the back part (the heel). The front view of the foot is a bit more difficult to draw because there is so much foreshortening. Phalanges: They form the toes, all toes have three phalanges except the big toe that has only two.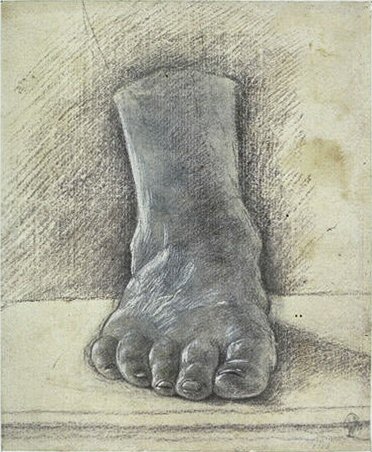
Codex Vallardi drawing by Leonardo da Vinci via Wikimedia
*Notice that the tibia is situated higher than the fibula.
2. Be familiar with the relative proportion of the foot.
We might not intuitively guess this, but did you know that the foot is about the same size as the height and width of the head or the inside of the forearm? Be sure to draw the foot using these proportions. 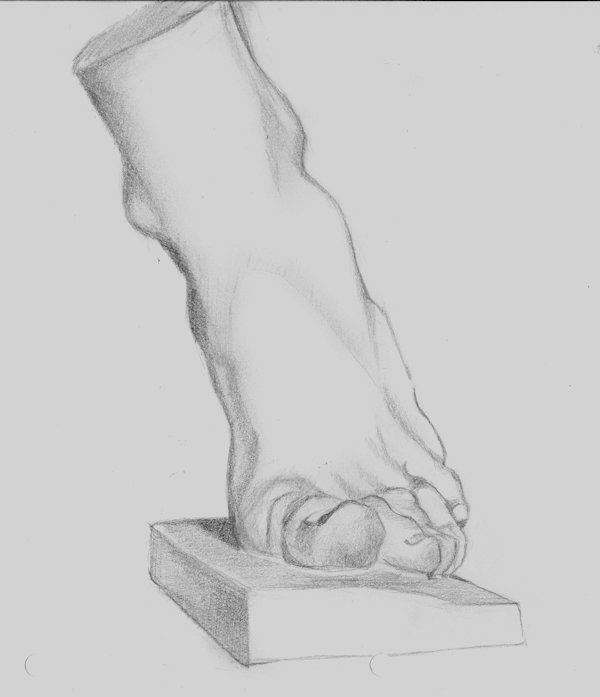
Drawing of the foot after Charles Bargue via Sandrine Pelissier
3. Simplifying the shape.
The foot from the side can be roughly simplified as a wedge with two curved blocks: one for the toes and one for the heel. Once you get a simple outline of the foot shape, you can add the masses, details, and shading. Also, remember that the heel extends beyond the back of the leg. And, the tibia and the fibula are the two bones that you can see at the ankle: The tibia is on the inside and the fibula on the outside. If you look at the foot from a front view, the tibia is situated higher than the fibula.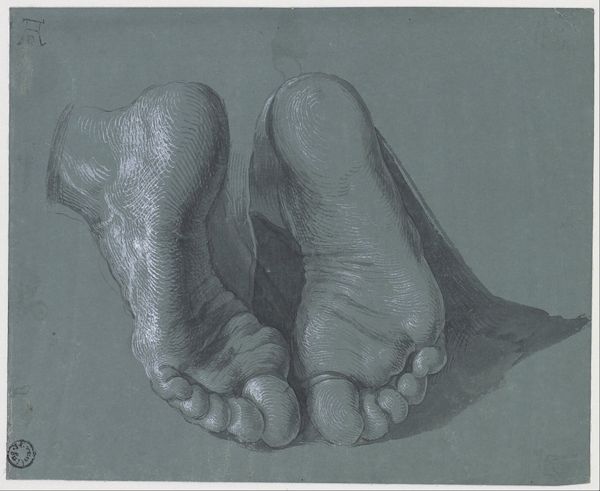
Study of Two Feet by Albrecht Dürer via Wikimedia
4. Shape perfect arches.
The sole of a foot is not entirely in contact with the ground, as any footprint will show you. On the big toe side, a large portion of inside side of the foot is not touching the ground (this is the medial arch) while the outside side is almost completely touching the ground (this is the lateral arch). The round shape on top of the foot also forms an arch called the transverse arch. Shaping these carefully when drawing the foot will help you create a more realistic rendering.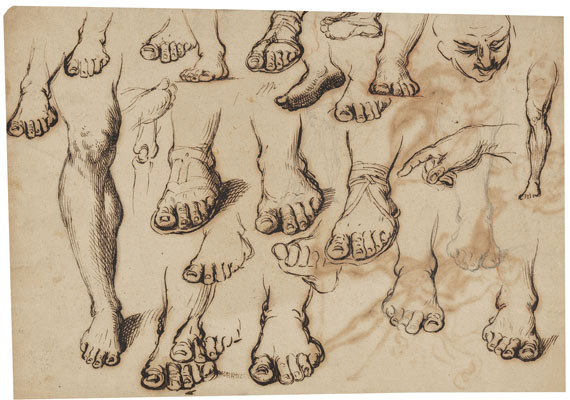
Foot studies by Giuseppe Passeri via Wikimedia
Passeri (1654 – 1714) was an Italian painter during the Baroque period.
5. Shape those little piggies!
The toes are tricky to draw as there are so many intricacies. Paying attention to these details will help you draw them more accurately:- The toes are not straight; they are bent towards the ground, except for the big toe. It can be more or less horizontal.
- The big toe, little toe and the one next to it also have a small bend inward.
- In most people, the second toe is the longest, although you can find all different foot shapes.
- There is some extra padding after the little toe on the side of each foot
- Toes seem to be longer where seen from the top of the foot compared to when seen from under the foot.
- There is a bigger space between the big toe and the second toe than between the rest of the toes.
- The toenails are wider rather than longer, and their length is about half the last phalange of the foot
- If the foot is viewed from outside, you can see almost all the toes
Share tips, start a discussion or ask one of our experts or other students a question.
No Responses to “How to Draw the Foot: 5 Things To Remember When Drawing Feet”