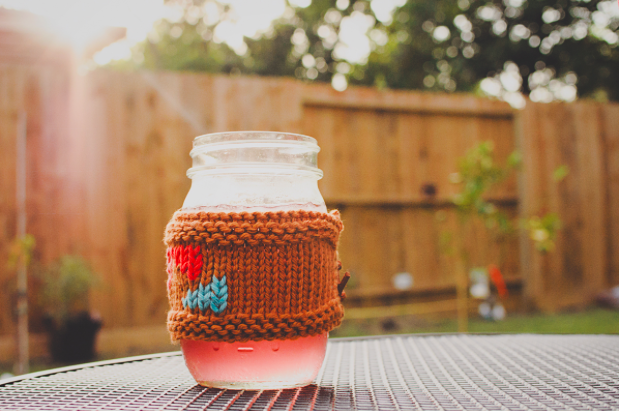
 Photo: Mason Jar Cozy with duplicate stitch.
What is duplicate stitch?
Technically speaking, it is the stitch you use when you want to add small bursts of color to your work. When your design is small and not carried across your whole project, you use the duplicate stitch. It is especially helpful when you finish and you find yourself wishing for just a little more detail. Yes! You can add it after you have finished your project. Simply put, it is an embellishing technique. You use a yarn needle to stitch over your completed fabric. You will be duplicating the stitches you already made.How can I use duplicate stitch?
Maybe you want to add a heart, some initials, or other small personalization to your latest project. You could even use it to add lines or zigzags you may not have thought about before you started knitting. It will create a double thickness for your fabric, so it is especially wonderful for adding warmth to a winter project, like on ear muffs or maybe a coffee cup cozy. I’m willing to bet even a non-knitter could use the duplicate stitch skill to add a little something to a knitted item. It is an embroidery technique, so you could use it to spruce up any knitted items you may have around. Perhaps you found some knit slippers that need a little touch of whimsy, or you want to add elbow patches to the sleeves of your new knitted cardigan; or that plain Jane knit pillow on your couch is just begging for some color. With duplicate stitch, the possibilities are endless for knitters and non-knitters alike!So, how do I duplicate stitch on my knitted work?
To duplicate stitch you will need the following materials:- Yarn needle (blunt is better, but whatever you use to weave in your ends should work)
- Contrasting color yarn in a similar or slightly heavier weight
- Your work to be stitched on
- A design graphed out on paper (or you could mark the stitches directly on your work with a water-soluble marker)
Before you begin any stitching:
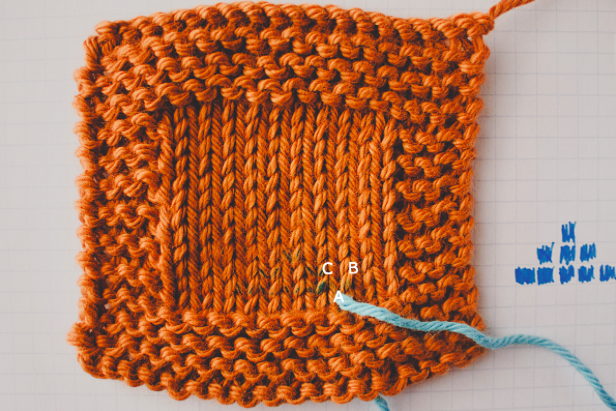
If you have been using–or your knitted item is made of–a natural fiber, I suggest blocking it. For the non-knitters, this means to wash or soak the item and then lay it flat. Pinning it is not necessary unless you want to stretch it out. This will ensure the stitches are lined up neatly for your duplicate stitching. You can either use a water-soluble marker to plan your design directly on your knitted fabric, or you can work from the knitting graph paper. If you have a large area to cover, you might want to mark the outline with your marker and then refer to the pattern for the filling. I like to start on a bottom right stitch and work across to the left and up to the top. Image #1: The three points of the knitted stitch. Notice how each stitch looks like a “V”.
Step 1:
Thread your needle and bring it up through the bottom of the “V” of your first stitch (point A).
Step 2:
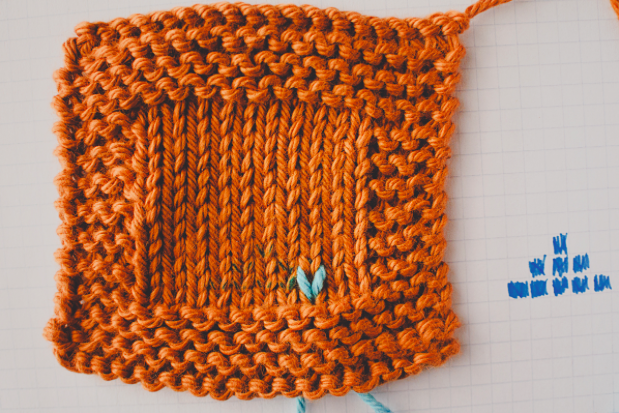
Go back through the fabric at the top right point of your “V” (B in Image #1), then up through the left point (C). You can do this in one move!
Step 3:
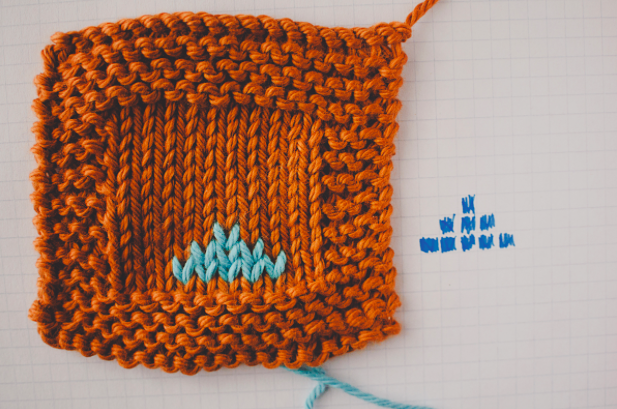
Finally, go back through at the bottom, where you began. Work the steps of the duplicate stitch for every stitch in your graphed design. It will soon become like second nature: a stitch you don’t even think about! You could even use it to weave in your ends at the end of a project; just work it on the wrong side. Notice how you are duplicating each knitted stitch. Come up at the bottom point (A in the first photo) of each stitch.
If you find yourself needing to go from left to right, just reverse the direction you stitch. Instead of going down through point B and coming up at point C, go down through C and up through B. If you are working from right to left, work the right side of the “V” first. If you are working from left to right, work the left side of the “V first. This will make your duplicate stitches look neater.
If you run out of yarn, you can attach another piece using a square knot. When you are done, weave in the ends.

Share tips, start a discussion or ask one of our experts or other students a question.
No Responses to “Duplicate Stitch Knitting Tutorial: Embellish with Hearts & More”