

Combine two of the best springtime critters — chicks and bunnies — into one aww-dorable fondant topper. The little one is practically begging to be set on top of all your Easter cakes and cupcakes!
Easter Chick Fondant Topper
Level: Easy
What You Need
Instructions
1. Make the Chick
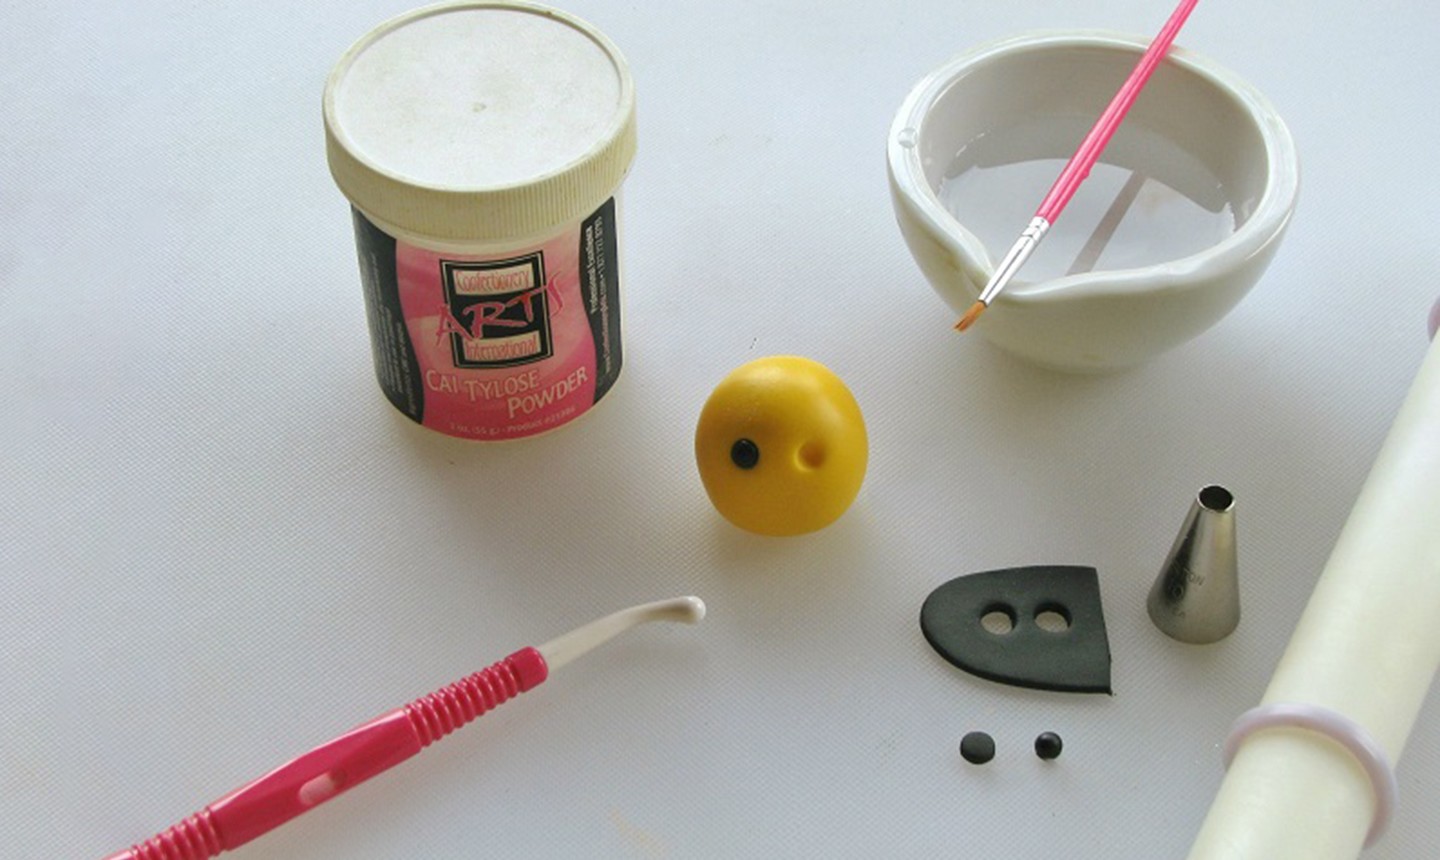
Roll yellow fondant into a ball about 1″ around.
Pro Tip: To make it a bit stiffer, add a pinch of tylose powder so the fondant dries quicker.
With a medium ball tool, make two indents for the eyes. Roll out black fondant with the rolling pin until it’s ⅛” thick. Cut out two circles with piping tip #10 and roll each into a ball. Glue both inside each eye socket with edible glue.
2. Define the Details
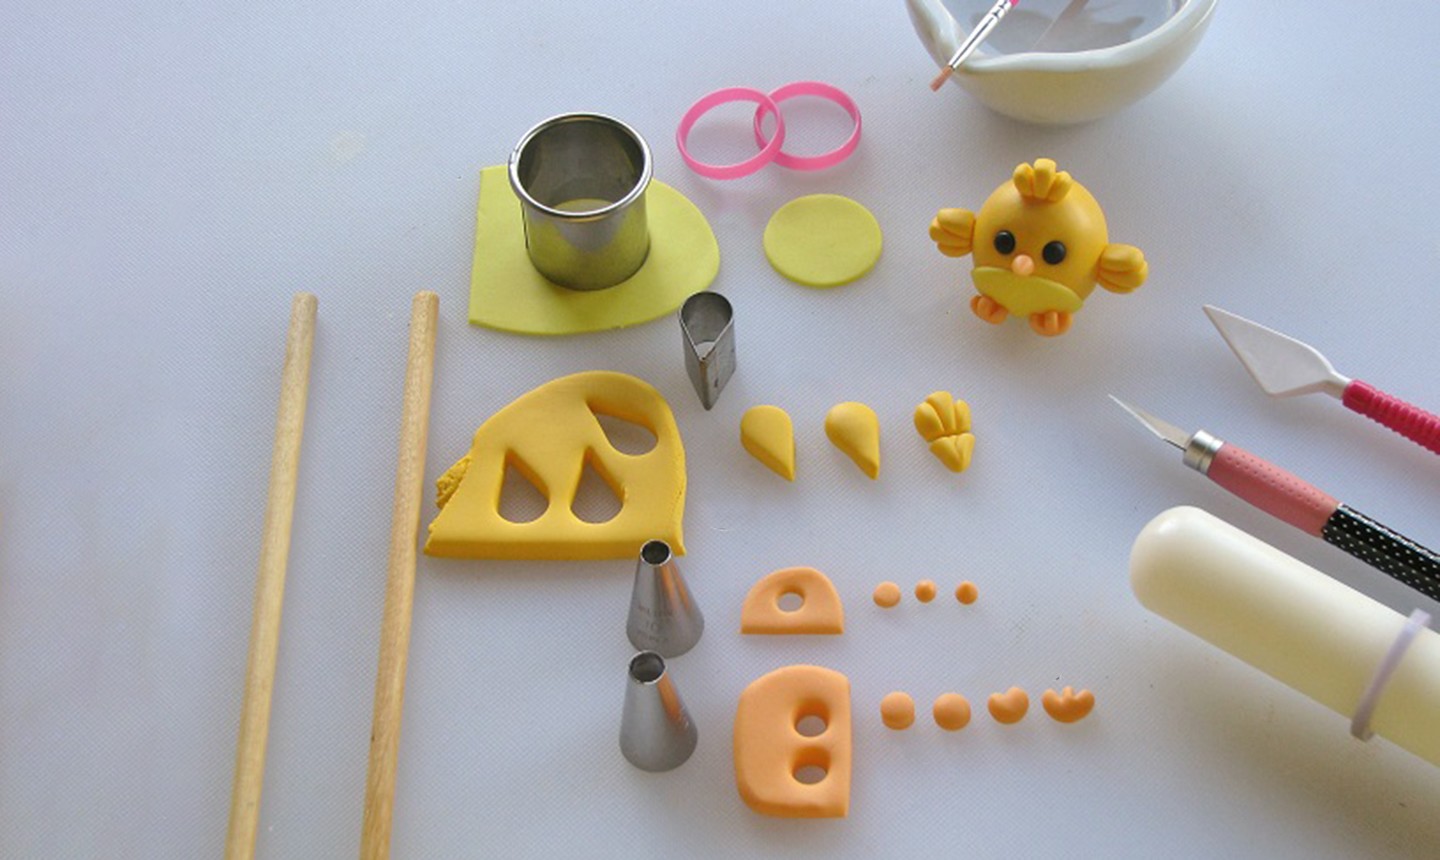
Roll out light yellow fondant until it’s ⅙” thick. Cut out a circle with the ⅞” circle cutter. Apply edible glue and press it onto the bottom half of the chick, tucking the bottom underneath.
Roll out more yellow fondant until it’s ¼” thick, using the wooden dowels as guides. Cut out three medium teardrop shapes.
To make the wings, smooth out the perimeter of one of the teardrops. Make two indents with the knife tool, starting at the center tip and moving vertically up and over the wider end of the teardrop, spacing them equally. Trim the pointed end with the X-ACTO knife and glue the wing to the side of the chick.
Repeat this process with the remaining two fondant teardrops. Glue one to the other side of the chick and set the third aside.
3. Shape the Beak and Feet
Roll orange fondant with the rolling pin until it’s ⅛” thick. Cut out a circle with piping tip #10, roll it into a ball and shape into a cone to make the chick’s beak. Glue in place just above the light yellow circle.
Roll more orange fondant until it’s ¼” thick, using the wooden dowels as guides. Cut two circles with round piping tip #12. Roll one of the circles into a ball, then use the knife tool to make two indents. Flatten it a bit with your fingers to shape it into a foot. Repeat to make the second foot and glue both onto the chick.
4. Add the Bunny Ears

Roll white fondant until it’s ¼” thick, using the wooden dowels as guides. Cut out two teardrop shapes and round out the perimeter while elongating them into a bunny ear. Make an indent on the larger end with the modeling tool.
Roll pink fondant until it’s ⅛” thick. Punch out two circles with piping tip #12 and form each into a teardrop shape. Glue the pink teardrops into the indent in the white teardrops. Cut off the pointed end with the X-ACTO knife.
Roll more white fondant until it’s ⅛” thick. Use the rolling pastry cutter to trim a strip for the headband, cutting it to a size that fits over the chick’s head. Glue the headband onto the bird, then carefully glue on the bunny ears and the final wing piece — this will be a tuft of feathers.
Pro Tip: If necessary, use tools or containers to hold up the ears as they dry.
When the chick is dry (this can take up to overnight), dip a brush in pink shimmer dust and apply rosy cheeks. You can also add a bit of shine inside the bunny ears, if desired.
Flatten the tip of a toothpick by pressing it down on your work surface. Dip the dull end of the toothpick in white soft gel paste and lightly press it on the chick’s eye. Turn the toothpick around to the pointy tip, dip it in the soft gel paste and make the smaller “glimmer” on the same eye. Repeat with the second eye.
5. Create the Base
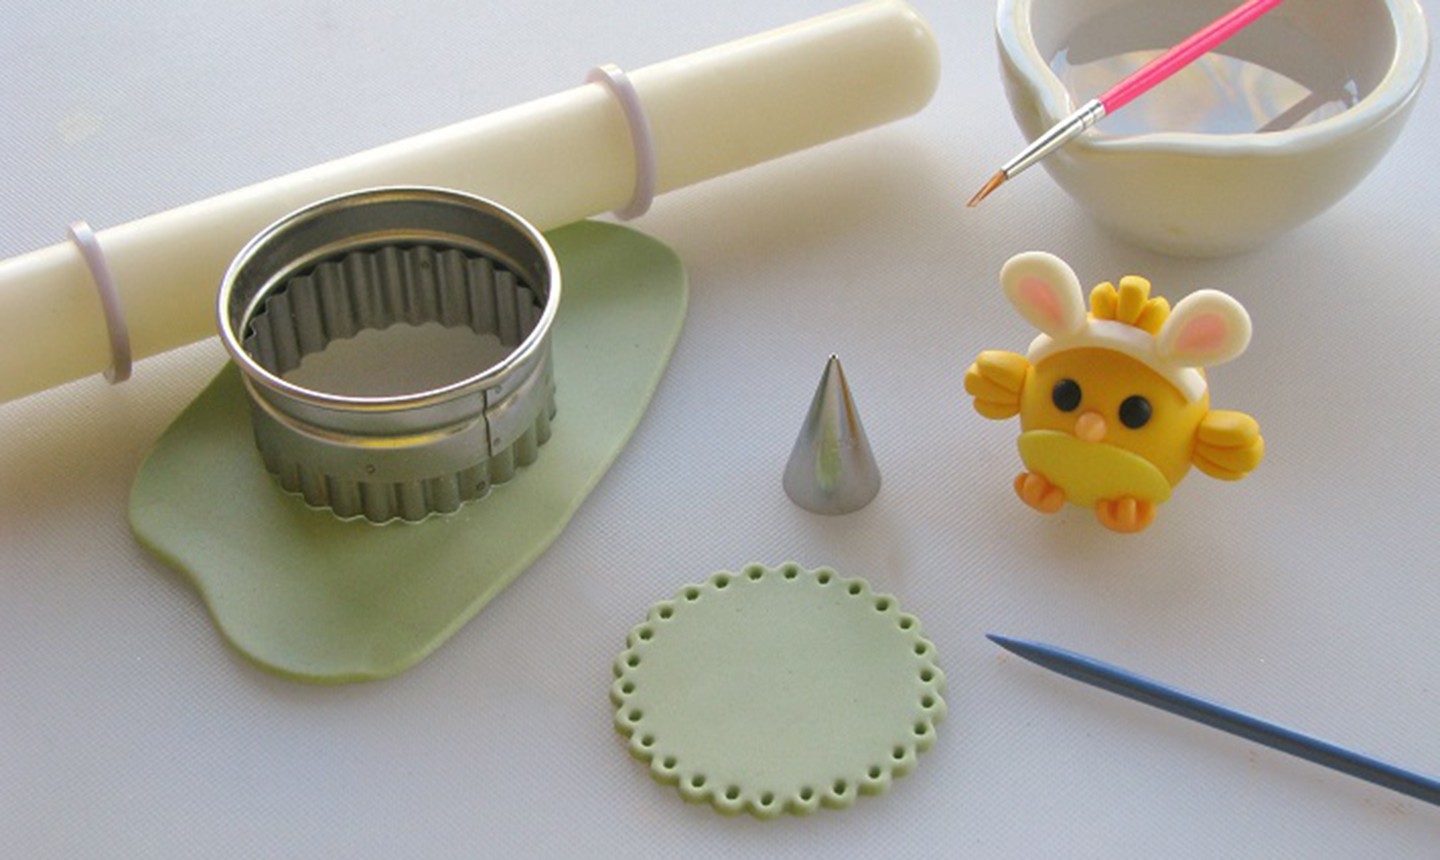
Roll light green fondant until it’s ⅛” thick. Punch out a circle with the 2¼” fluted cutter. Use round piping tip #1 to indent along the circle for a scalloped finish.
Glue the chick onto the disc. If desired, make more wing pieces in pink fondant and place them around the base as little flowers.
Allow the piece to dry completely before topping your cupcake, then serve!
Share tips, start a discussion or ask one of our experts or other students a question.
Already a member? Sign in
No Responses to “This Fondant Chick Is Ready to Top All Your Easter Cupcakes”