
Hand embroidery can be inspirational in all kinds of ways! And you can take your embroidery to the literal level of inspirational, by embroidering a favorite quote.
Do you admire the wise insights or quirky witticisms of a particular author? Do you have a pithy saying that expresses your personality perfectly? Maybe you have a loved one going through tough times and you want to encourage her with kind words or an elevating or life-enriching passage?
You can make any of these types of quotes much more personal and meaningful by taking time to write them and embellish them with needle and thread.
Today, I’ll follow up to my previous article on embroidering your own handwriting.
Learn how to embroider your favorite quote, from beginning to end.
 Photos via Needle ‘n Thread
1. Plan the layout for your embroidery on paper.
The first thing to consider is the quote itself and its purpose. If it’s meant to be serious, you might take a very straightforward approach with the design and layout, and with your color choices and stitch choices.
But let’s assume here that you want to embroider a quote that catches the eye and really makes a statement. In this case, you can mix things up a bit in the layout and be a little more exuberant with your text.
Whatever your purpose, plan a pleasing layout that fits with the quote.
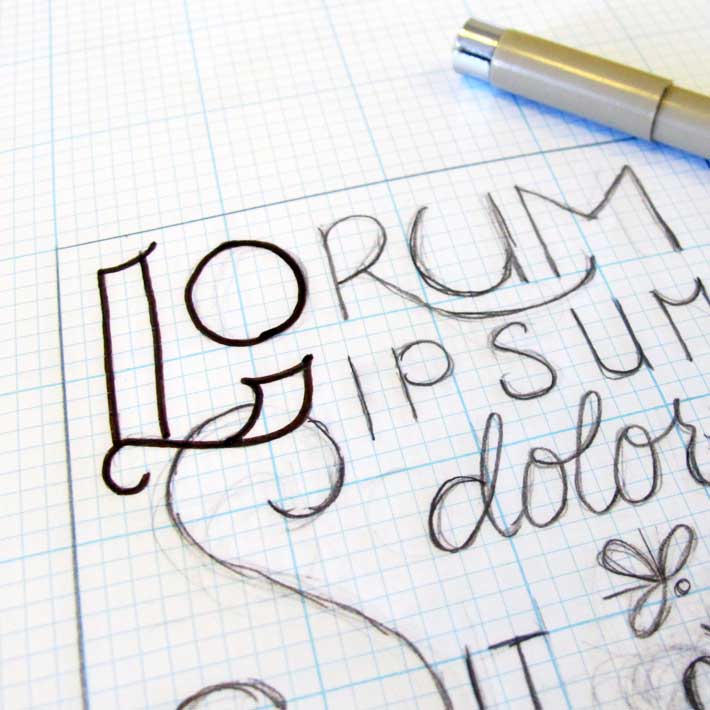
Graph paper is great for planning a layout for embroidery! I always start any design by sketching it up with pencil (and eraser). Then, I trace it onto semi-transparent graph paper, to make sure that it’s fairly balanced.
When you’re laying out a design in words for hand embroidery, think first of the size of the piece. Block out the perimeter of the design, which may or may not end up being part of the finished embroidery.
Then, sketch in your words. For a more lively presentation, combine writing styles. Print some words, script others. Don’t be afraid to mix up your writing styles – half the fun of the embroidery is mixing things up a bit!
Once you’re satisfied with the layout worked up in pencil, trace over it with a fine, dark marker, so that you can easily trace the design onto your ground fabric.
Check your spelling!
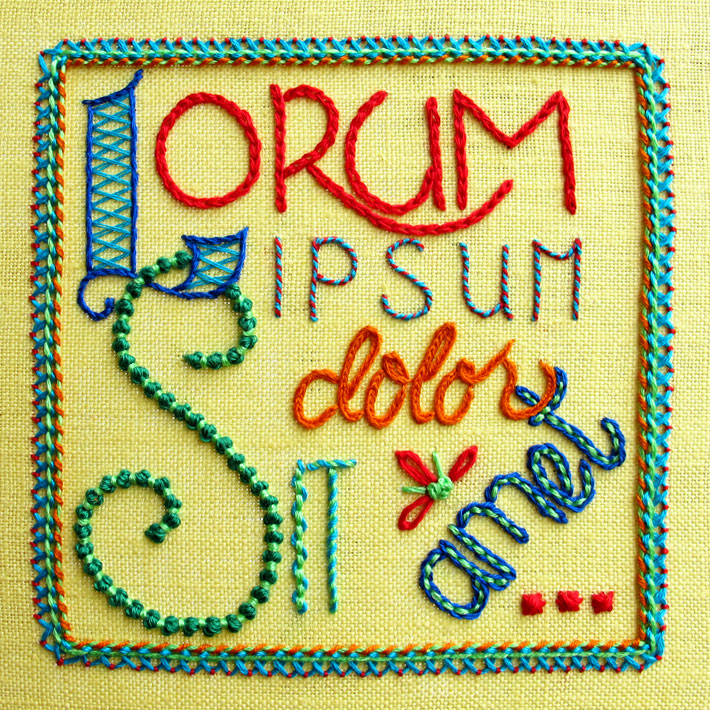
For this sample, I’ve used the beginning of the Lorem Ipsum text, which is used in publishing layouts and web design as placeholder text. Placeholder text allows those looking at the design to concentrate on the design elements, rather than on the text itself. So it’s not a highfaluting Latin quote of some sort – It’s just placeholder text, so that we can concentrate on the design and stitches.
You might notice that I spelled “Lorem” incorrectly – so let that be a lesson! Always check and double-check your spelling before you start stitching!
2. Select a ground fabric and threads.
The most forgiving ground fabric for hand embroidery is linen. You can use cottons, silk or blends, but if you’re concerned that you might be making mistakes or changing your mind while you’re stitching, your best bet is to use a decent linen suitable for surface embroidery. When you “unstitch” on linen, the fabric is less apt to show the wear and tear of removing and replacing stitches.
Select your color palette and threads before you start stitching, so that once you get going, you don’t have to stop and ponder.
You can use any type of hand embroidery thread for stitching text, really! I like to use cotton floss, perle cottons, stranded silks, buttonhole silks, and even wool when embroidering words.
3. Transfer the embroidery design.
With your embroidery fabric and threads selected, it’s time to transfer your design.
Make sure that the ground fabric is ironed well. If you’re using a pencil to transfer your design, spray starch the fabric well before ironing. That way, if you don’t cover all your lines, a lightly drawn pencil line will wash out easier if the fabric has been spray starched.
That being said, it’s easier all around if you are careful when tracing your design, so that you don’t have to worry about removing exposed design lines!
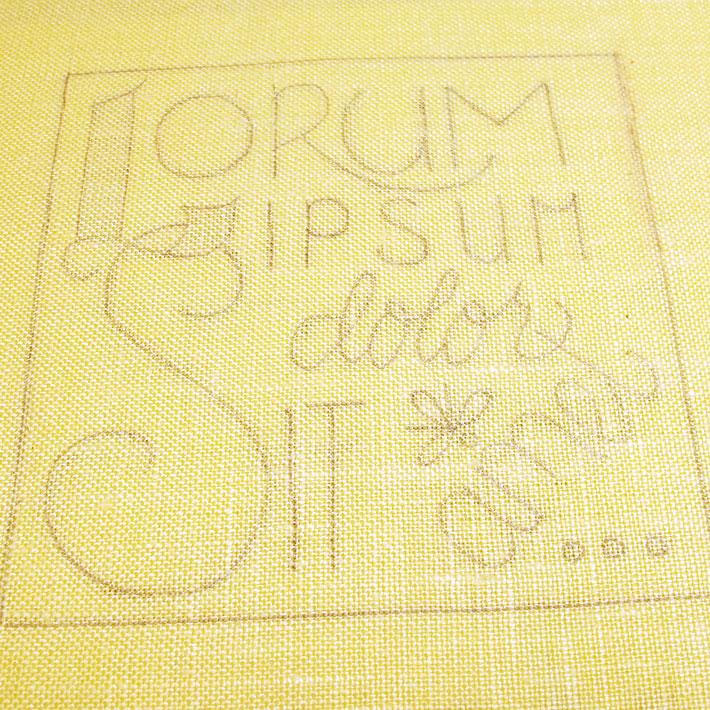
For this example, I chose a bright yellow, medium-weight linen which is easy to see through when tracing.
I taped the design onto my table top, and then taped my ground fabric over the design, so that it wouldn’t shift while I traced it.
I used a regular mechanical pencil which results in nice, sharp lines, and I traced carefully over the whole design using a light hand. You want to be able to see the design lines easily, but you don’t want to leave dark pencil lines on the fabric, that might smudge or come off on lighter threads.
Of course, you can use any design transfer method you prefer, but tracing is always quick and easy!
4. Hoop it up!
Once your design is transferred, it’s time to mount your fabric either in a hoop or on an embroidery frame.
I like to use stretcher bar frames, because they allow me to put the frame on a stand and stitch with both hands.
Whether you’re using a hoop or a frame, the key to a pucker-free end result is good tension on the fabric. You want to make sure the fabric is drum taut either in the hoop or on the frame.
Now that the project is framed or hooped up, you’re ready to stitch!
5. Stitch your quote.
If you’ve already chosen your threads, you’re good to go! Now it’s just a matter of determining which stitches to use where. You can make decisions about which stitches to use as you progress through the embroidery project, or you can carefully map them out on your original drawing before you start.
If you already have a whole repertoire of embroidery stitches at your disposal, then deciding on stitches as you go can be great fun and quite rewarding.
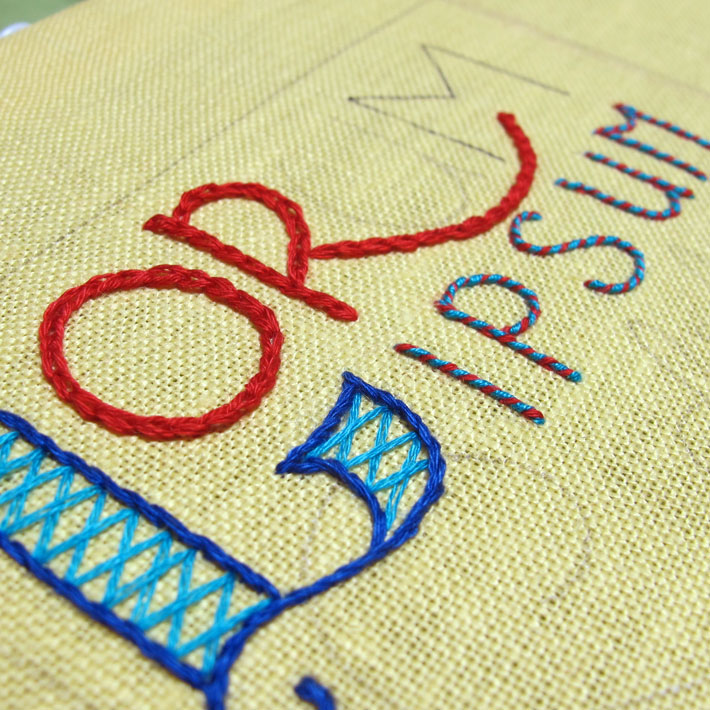
I like to use a bold, ornamental letter somewhere near the beginning of the quote.
In the photo above, I made the first letter (L) a little heavier and slightly decorative. Using two strands of floss, I filled the letter with a lattice of crossed stitches in a bright blue, and then outlined the letter with three strands of dark blue in stem stitch.
The rest of the first word, Lorum, I embroidered in chain stitch, using four strands of red floss. The chain stitch is a slightly wider stitch, and since this first word is somewhat large, a wider stitch works better here than a narrower line stitch (like stem stitch) would.
Choose stitches appropriate for the letter style.
The second word in the quote, ipsum, is drawn in smaller, fine, narrow letters, so a finer stitch looks better on that word than a heavy stitch would. I used two strands of red cotton floss for a backstitch foundation, and then I whipped the backstitches with bright blue. This combination created a nice, tight, neat line for the letters.
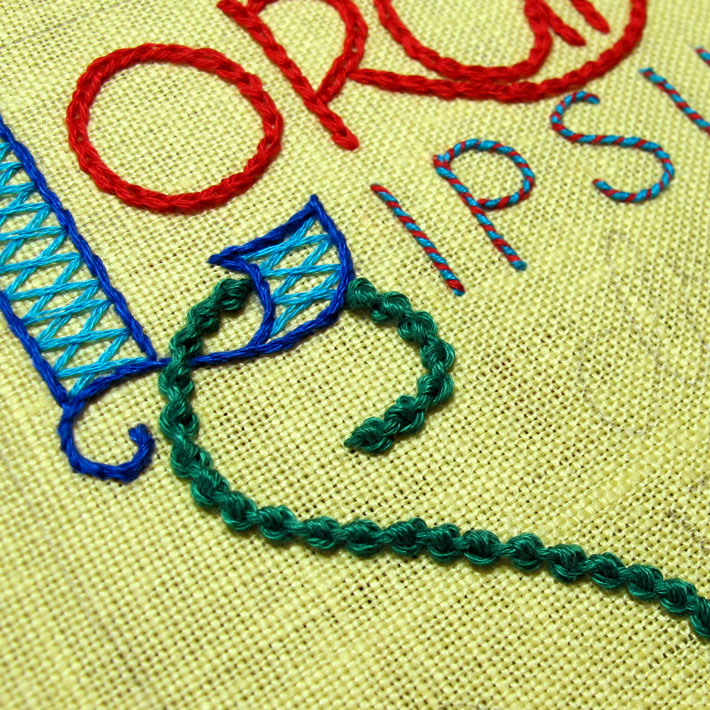
The S that interconnects with the L is a large letter, so I decided to use a heavy stitch here, with lots of texture to it.
Using all six strands of floss in dark green, I worked the Palestrina stitch on the S. This created a nice, heavy, knotted line.
6. Don’t hesitate to add texture!
Remember that one of the great things about embroidery is that it is graphic, not merely in a two-dimensional sense, but in a three-dimensional sense as well. Unlike writing on paper, with embroidery, you can really play with texture. Adding knotted stitches and changing the weight of your thread is a great way to add textured interest to your embroidered quote!
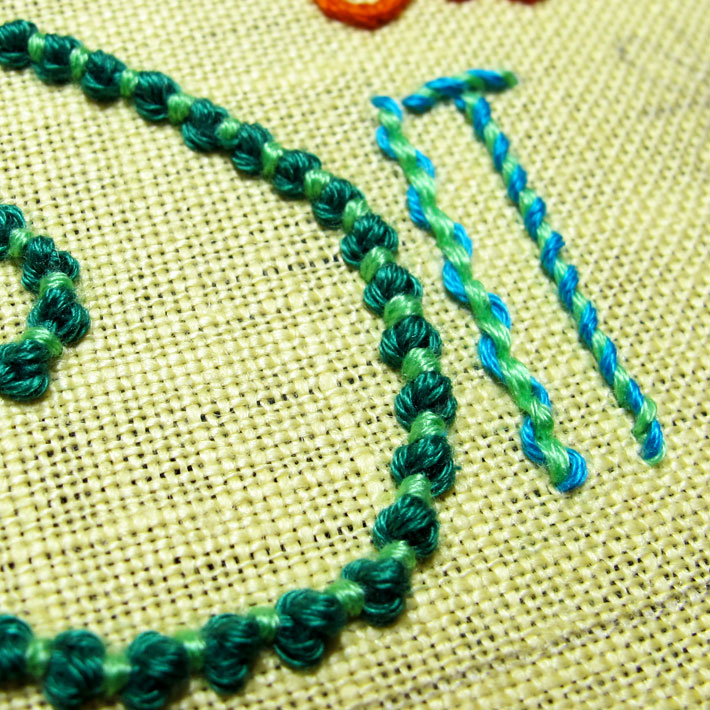
The rest of the word belonging to the S, Sit, is made up of tall, stretched, thin letters, so I embroidered these with a backstitch foundation using four strands of floss in bright green. The letter I is laced with bright blue and the T is whipped with the same bright blue.
Use couched, laced and whipped stitches for added color and interest
Notice, too, that I added bright green to the Palestrina stitch on the S, by couching between each knot on the line, using four strands of floss.
You can add color, interest and variety to your embroidery stitches by couching, whipping or lacing them with another color of thread. These techniques all work well when embroidering letters.
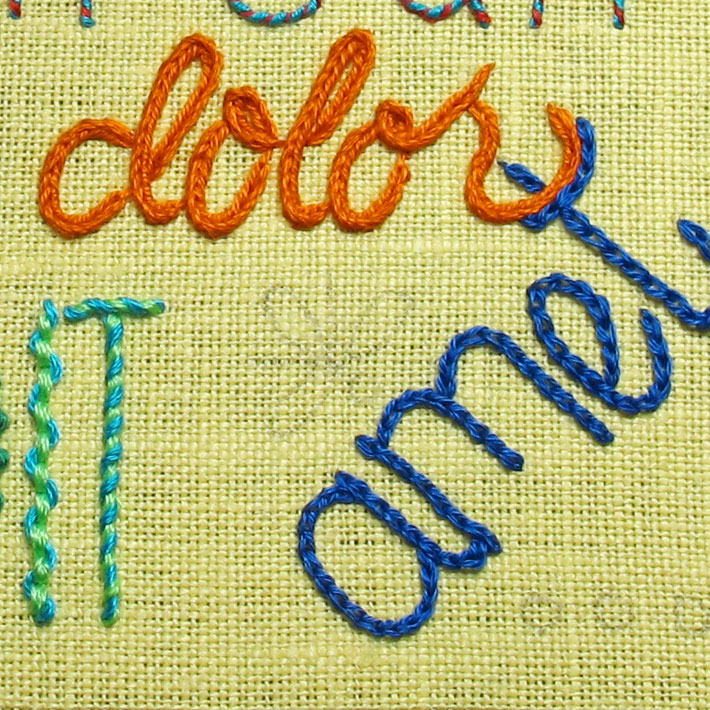
For the word dolor, I used two strands of bright orange floss to work a heavy chain stitch, which creates a smooth, compact braided line.
The last word, amet, is worked in four strands of dark blue, in chain stitch.
Allow the letters to interact with each other
Notice how the T in amet and the R in dolor mix together a little bit. Allowing the letters in the quote to interact with each other is another good way to add some interest and coherence to the finished embroidery.
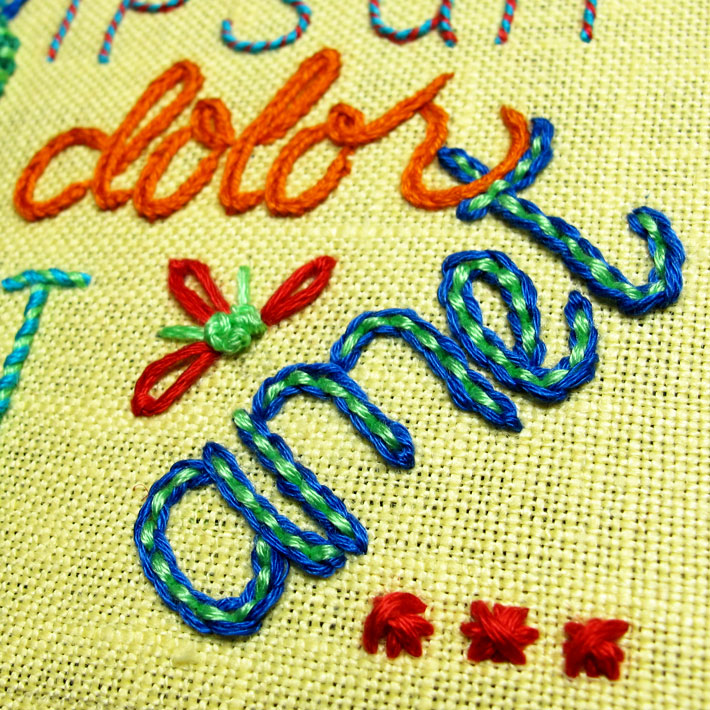
I wasn’t particularly pleased with the original amet in dark blue chain stitch. It seemed too dark and isolated to me, so I dressed it up and tied it in with the rest of the words by backstitching down the center of the chain stitch with bright green, using four strands of floss.
7. Add ornamentation.
If you have any empty space in your design, it’s ok to add a little ornamentation!
Above amet, I added a cluster of French knots in bright green, with some daisy stitches in red as a filler. Because the colors work with the rest of the quote, and because it is obviously ornamental, this little touch doesn’t distract from the finished design.
Below amet, the ellipses in red indicate that there’s more to the quote.
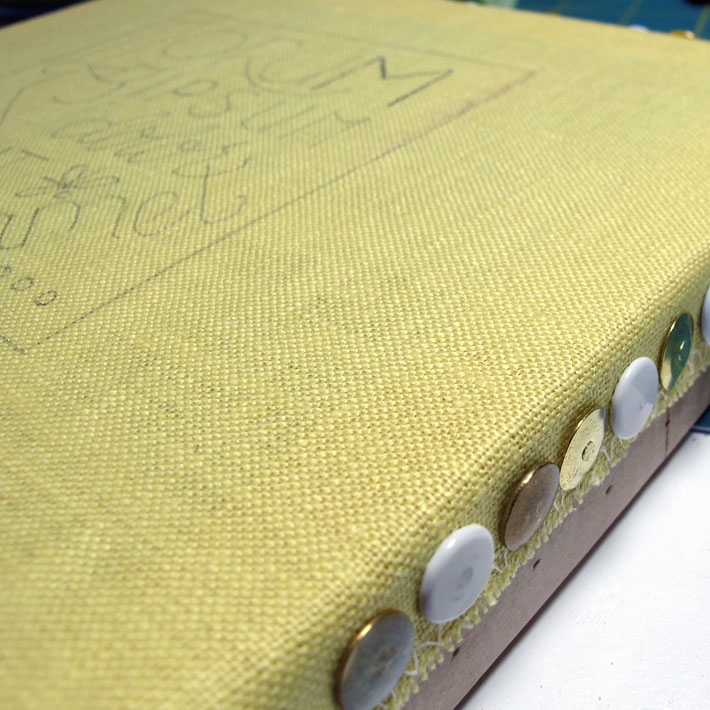
7. Finish with a decorative border.
At this point, I’ve completed all the words, so now it’s time to consider finishing the quote nicely with a border.
A border isn’t essential, but adding a decorative embroidered frame around your quote will help it look complete and neatly finished.
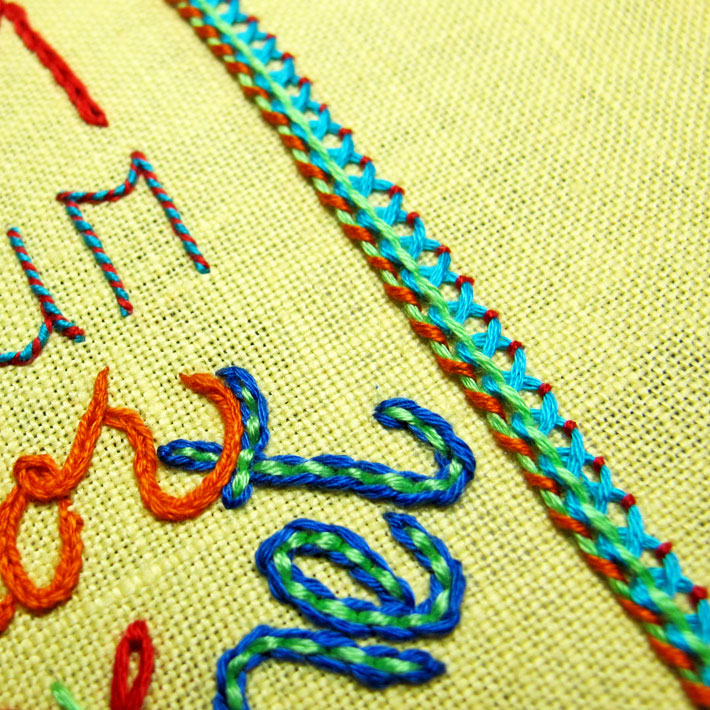
For the border, composite stitches work really well, like this composite interlaced, whipped, and tacked chain stitch band.
The border should balance the design in weight. If you’ve embroidered words that are heavy and bold, a fine, delicate border would be lost. If you’ve embroidered words that are light and delicate, a heavy, bold border would overwhelm them!
Make sure that the border balances with the rest of the embroidery, for a pleasing finish.
If you’ve combined a lot of stitches into your embroidered quote, you’ll probably realize that the whole project works up into a neat little sampler!
Embroidering a quote is a fun way to practice a lot of stitches — I hope you try it!
Is this a class?
Thanks Mary!
This is just wonderful, great colors & execution. ?What does it say? Did you use linen? Are the threads six strand or #/ pearl cottons. What is the finished size? Do you offer fonts to work with? Thanks so much, Marcia Crew