
In just a few short weeks the weather will be cooler, and we’ll be getting ready for Halloween and Thanksgiving. Now is the perfect time to plan ahead for the fall holidays.
The embroidery machine is the perfect way to make quick and easy projects now that will give you a special look for your holiday table.
Machine embroidery appliqué using die-cut shapes is a very efficient and streamlined way to embellish place mats, table runners, linen napkins and kitchen towels. One of the nicest things about machine embroidery appliqué using die-cut shapes is that it stitches up quickly and creates designs that are functional and can be used and laundered over and over.
Here are some of the projects I stitched up for the fall holidays:
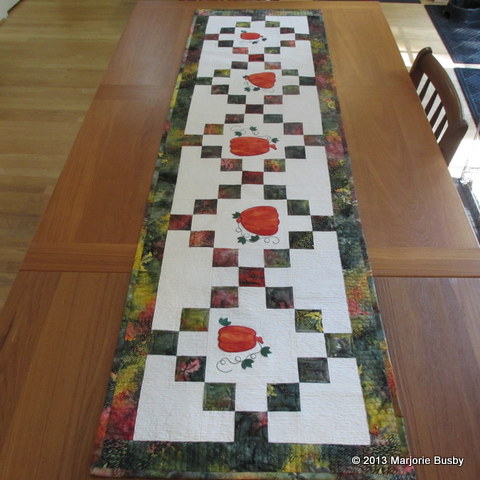
Table runner
Here is a table runner I made using the Pumpkin Good Day machine embroidery set.

Candle mat
This is a candle mat made with the Fall Medley machine embroidery set. See also a tutorial for making this candle mat.
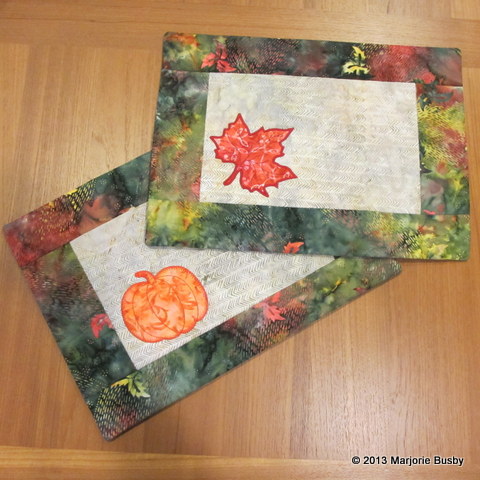
Place mats
And here are some place mats I made, also using the Fall Medley machine embroidery set.
Ready to make your own? Here’s how I did it.
What you’ll need:
- A die-cutting machine and dies as well as machine embroidery sets that match the holiday dies. (I used the Fall Medley for AccuQuilt GO! Shapes Pattern, available on Craftsy.)
- You will also need a pattern for place mats or a table runner. Craftsy has many wonderful holiday patterns available. Some of my favorites are the Falling Leaves Table Runner & Place Mats pattern, the Dancing Maples pattern and the Acorns & Oak Leaves pattern. Some of these patterns use patchwork blocks or hand embroidery, but you can always substitute machine embroidery in these patterns.
Directions:
Step 1:
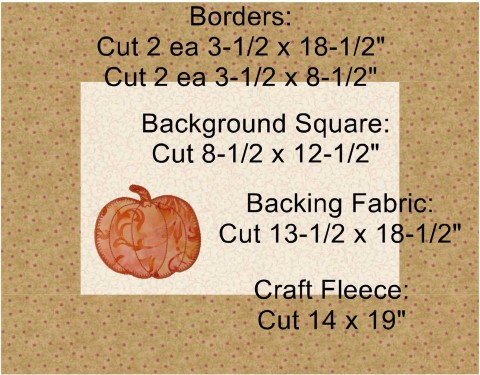
Cut an 8-1/2 x 12-1/2″ rectangle as the center. The machine embroidery design is stitched on this fabric. I usually use a larger piece of fabric and then trim the rectangle to size after the stitching is complete.
Step 2:
Stitch the side borders to either side of the center rectangle. Then stitch the top and bottom borders to the place mat.
Step 3:
Layer the craft fleece underneath the front of the place mat. Place the back of the place mat with right sides together on the front of the place mat.
Stitch all the way around with a 1/4″ seam leaving a 5-6″ opening for turning the place mat right side out.
Step 4:
Trim the thickness from the corners before turning right side out. Turn right side out and press carefully around the outer edges. Fold the opening so it’s even with the seam line and can be stitched, either with the topstitching in Step 5 or with a blind stitch by hand.
Step 5:
Topstitch around the outside of the place mat (optional).
And your place mat is finished. Enjoy.
The projects shown above take varying amounts of time, but if you start now, they are easily completed for holiday decorating.
All about appliqué
- Learn the steps for using die cut shapes for machine embroidery appliqué.
- Practice your skills with this machine embroidered appliqué project.
- Create your own appliqué design in Cookie Gaynor’s clss, Digitizing Machine Embroidery Designs
- View a step-by-step tutorial for machine embroidered appliqué using the e-stitch.
Share tips, start a discussion or ask one of our experts or other students a question.
No Responses to “Use Machine Embroidery to Dress Up Your Table With a Fall Theme”