
Even if you are fortunate enough to have never had this happen, it is only a matter of time until it does. A slight miscalculation, thread nest, needle snag or scissors snip can leave tears or holes in your embroidery stabilizer. Then what? Should you scrap the whole project and start over? Not necessarily.
Photos via Debbie Henry
The dreaded stabilizer malfunction. It has happened to almost all of us at some point in time. Stabilizers are the foundation of machine embroidery. Without proper stabilization, fabric will pucker, stitches will not align and registration will be off. Fear not, brave stitchers!
Here are 4 quick and easy fixes to save your embroidery projects from total disaster:
Use an embroiderer’s Band-Aid: Adhesive-backed stabilizer
I save scraps of adhesive-backed stabilizer for just this purpose. When a tear occurred mid-embroidery, I clipped a piece slightly bigger than the torn area, peeled back the paper, and stuck the sticky side on the back of the hooped stabilizer, making sure the front was flat and in original alignment.
From the front, you can faintly see the “bandage” at the 9 o’clock position. It did the job. The rest of the embroidery stitched out with perfect registration and both pieces of stabilizer easily tore away.
The same thing can be done to patch a hole made when peeling the paper cover away from adhesive tear-away stabilizer.
Call in backup: Add reinforcements
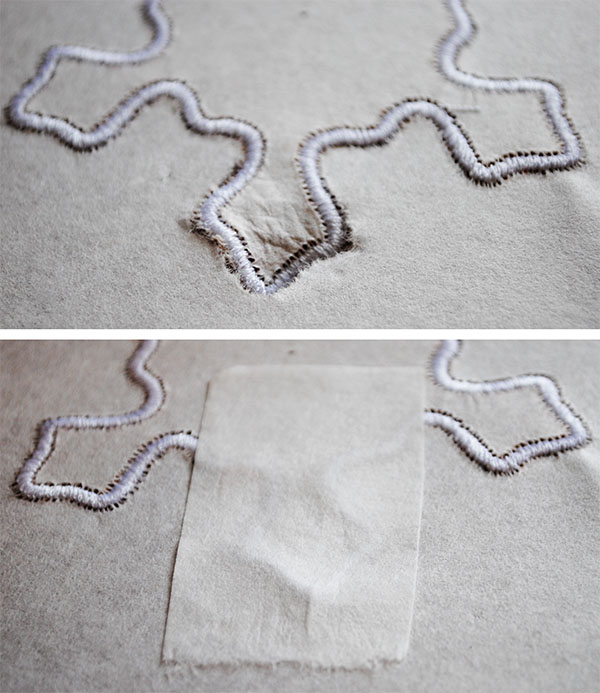
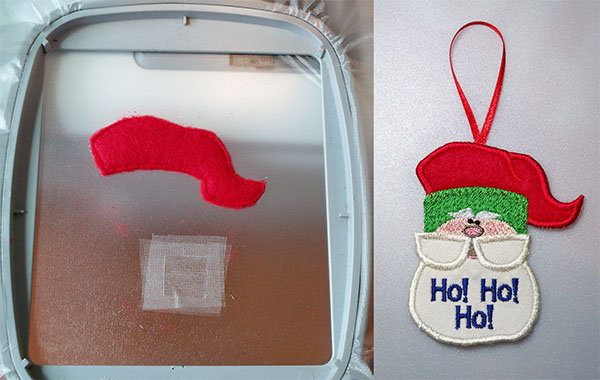
I create a lot of freestanding appliqué using heat-away stabilizer because it tears away cleanly. Satin-stitched edges, often take a toll on stabilizers, perforating them. Without a tight connection to the stabilizer, the embroidery can be sloppy and runs the risk of not stitching where it should.
To avoid total perforation, simply add another layer of stabilizer to the hoop. It can even be a scrap piece because it only needs to be slightly larger than the appliqué outline. Spray the back of the reinforcement stabilizer with temporary spray adhesive and finger-press it in place in the hoop.
You can add the extra layer of stabilizer before you begin to stitch or add it mid-embroidery if it looks like perforation may become a problem. When embroidery is complete, tear away one layer of stabilizer at a time.
Painter’s tape: Not just for walls

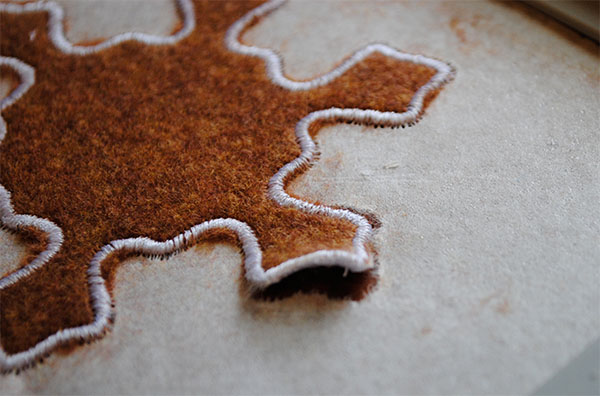
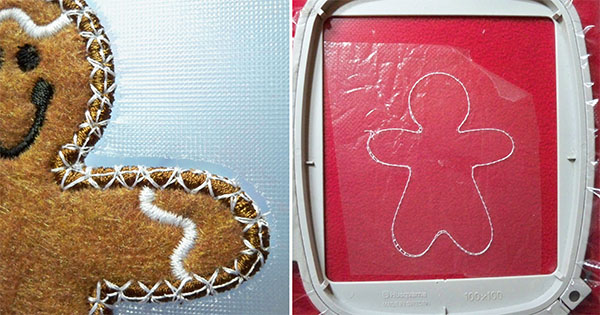
Sometimes, even with reinforcements, a snag can tear the appliqué away from the stabilizer. That is especially frustrating when you are nearly finished with the piece. In this instance, almost half of the gingerbread body pulled away from the stabilizer before the face was stitched. I just lined the body up with the torn edges and taped it in place with painter’s tape. It worked well enough to finish stitching the face.
Lick it and stick it (well, not really)
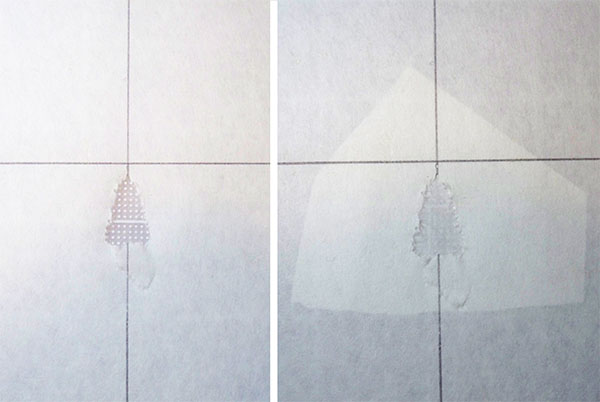
Whether you are creating freestanding appliqué, cutwork or freestanding lace, water-soluble stabilizers (WSS) can patch problem areas with the addition of a little bit of water. In the photo above, a pesky thread nest was cut away and two patches were cut slightly larger than the resulting opening. Edges of each patch were lightly brushed with water and then sandwiched on the front and back of the hooped WSS. The rest of the design stitched out with no problems.
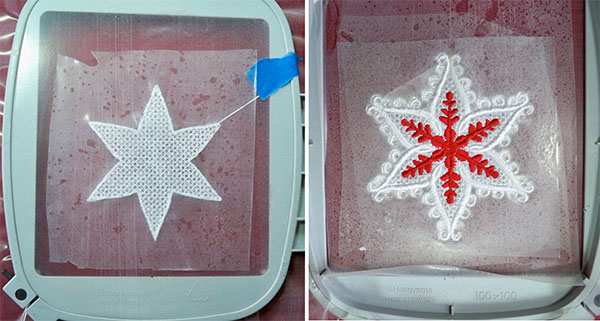
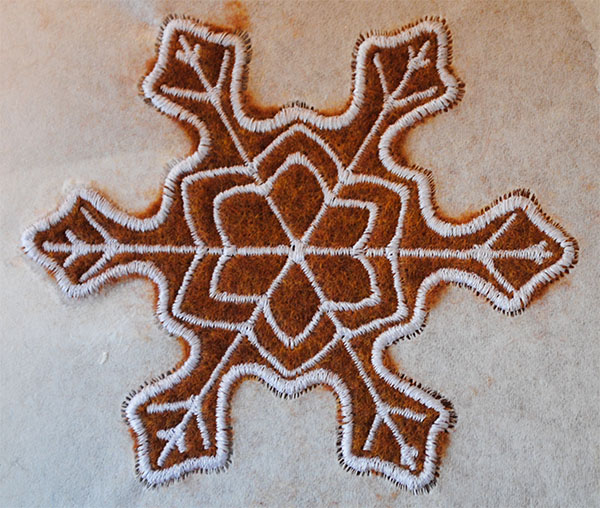
Does this look familiar? I added a reinforcement layer of WSS at the beginning and then added another layer later on to support the curls. Freestanding lace designs build thread upon thread. As the curls stitched, they tended to push downward. I was afraid they would distort or push completely through the existing stabilizer, so I added the third layer. The good thing about WSS is that it will eventually wash away. The more you add, the longer it takes, but it will disappear.
See the Craftsy tutorial for the freestanding lace star here.
I am a beginning machine quilter, with a Janome MC 400E. This is the most confusing part to me: which kinds of stabilizers to use, and when. Stabilizer is expensive, so I don't want to use more than I need. But OTOH I want a good stitch-out of my design. Is there a more advanced Craftsy course that goes into greater detail about all the various kinds - and uses! - of stabilizer?