
Exposure compensation is function that allows you, the photographer, the ability to fine-tune exposure to compensate for situations where your camera’s metering system does a poor job.
You would want to use exposure composition for different reasons.
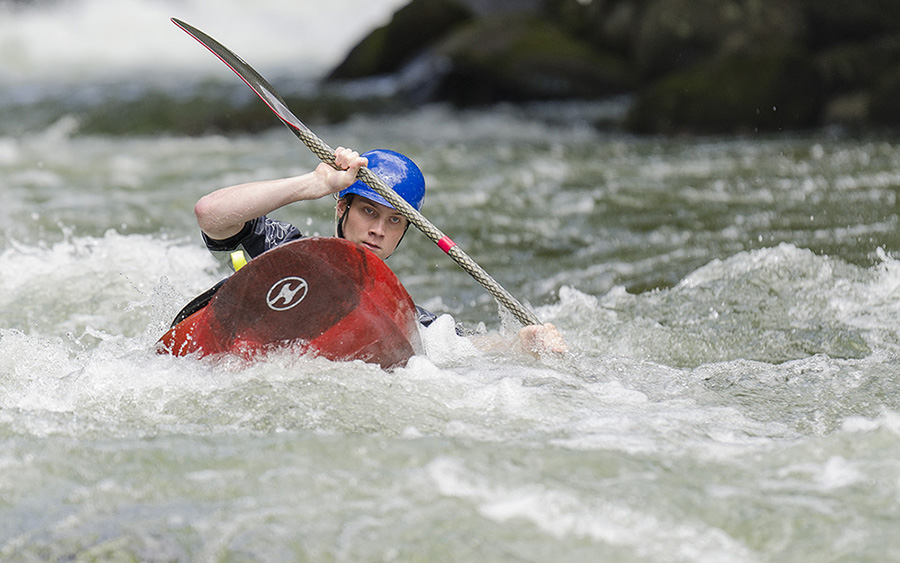
The photo above is a good example of a real-life situation of when you would use exposure composition. The crashing water was extremely bright, and the kayaker had a helmet on that cast a very dark shadow across his face. I had to use my exposure compensation to ensure that I did not either blow out the water, or make his face black. It took a few photos to get the right setting, but it was worth the effort.
Cameras are programmed to just aim for the middle of the gray scale.
A camera exposes for the middle luminance value of the scene (middle gray, 12-18% reflectance or 50% luminance), and your cameras different metering modes are just different ways of placing this mid-value by weighting where the camera meters from.
EV Compensation helps to fix this by telling the camera to expose at a higher or lower setting than it thinks is right.
For very bright settings (like the snow or beach), set an EV value as a positive number (+1/3, +1 etc). For very dark scenes, choose a negative EV number.
Now, I know what you’re thinking – that doesn’t make sense! If the subject is very bright, don’t I need to set a lower EV (negative number) to make sure the image is exposed correctly?
Well, no. It’s the opposite. It helps to think of what the resulting image will look like. In the snow, where there are lots of bright areas, the camera will choose a midpoint in the bright area, so the snow will look gray in the resulting image. To fix that and make the snow white (as it should be), we need to brighten the image. Thus we need to increase the exposure and use a positive number.
You would need to consider using exposure compensation in the following situations:
Landscape photography in bright, sunny conditions
Landscapes are usually shot at wider angles (zoomed out) and often include bright skies and dark shadows. Your camera’s estimate of the mid-value in such contrasty situations can often result in important highlight details being be lost in the sky because of that orange ball of bright light, aka the sun. To remedy this, you would darken the image slightly by reducing exposure, usually by two or three stops. This will lighten the shadows and bring those awesome colors back in the sky that drew you to the image in the first place.
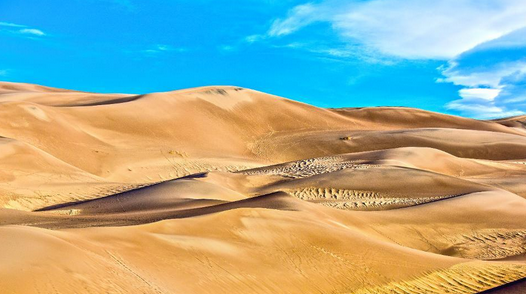 Photo via Craftsy instructor Rick Sammon
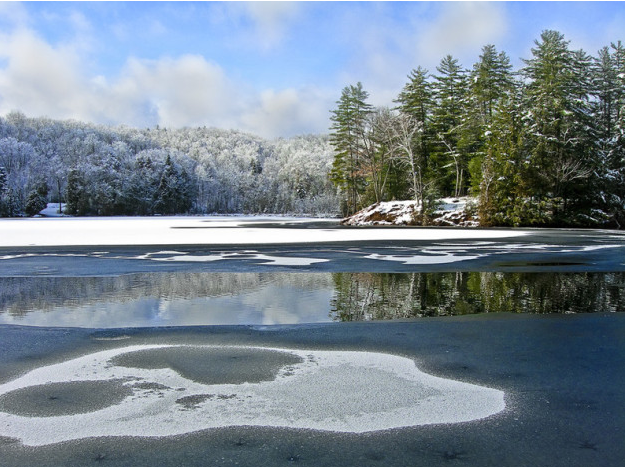
Snowy scenes
Snowy scenes are unusually white, and your camera will think this is supposed to be more toward mid-gray. Without an adjustment, your white fluffy snow comes out as pale blue. Sound familiar? To remedy this, you would lighten the image by increasing exposure by 1 or 1 1/3rd EV.
Most cameras will have an EV display in the viewfinder or on screen.
The zero in the center is where no EV compensation is applied; to the left we have -EV and to the right we have +EV, with 1/3rd EV steps between.
Depending on your camera and display settings, the EV display may only show when in use, or when compensation has been applied.
In aperture priority, shutter priority or programmed auto:
Locate your camera’s EV button (marked EV or +/- ), hold it down and scroll the relevant command wheel either +right or -left, depending on whether you wish to increase or reduce exposure (lighten or darken the image). As you scroll, the marker will move to the corresponding value on the scaled display, or the value will simply update on the single type display.
Remember to set the EV back to zero once you’ve finished taking exposure compensated shots.
Manual exposure:
In fully manual, you set the shutter speed and aperture values, and the EV display tells you how much this may differ from what the camera’s metering suggests. The EV button isn’t used, but the effect on exposure is the same.
The advantage with manually applied exposure is that you don’t have to remember to reset compensation. You do, however, have to set exposure yourself for each shot.
Share tips, start a discussion or ask one of our experts or other students a question.
No Responses to “Photography Friday: Using Your Exposure Compensation”