
I have never been much of a fan of fill-stitched machine embroidery. There is nothing wrong with it, I just prefer less stitching in the background and more fabric, like appliqué. Here is a surprisingly easy way to change heavy-fill designs into appliqué.
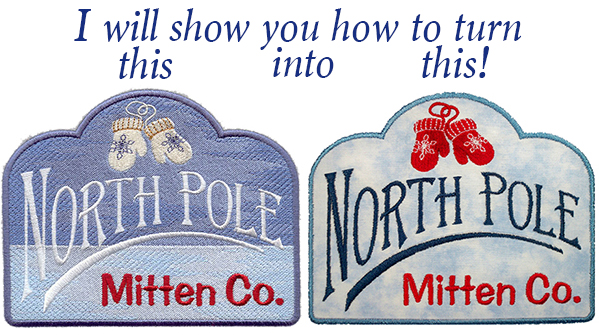
Left photo via Embroidery Library, right photo via Debbie Henry
Let’s make a fill-stitch embroidery design into an appliqué!
Preparing the design
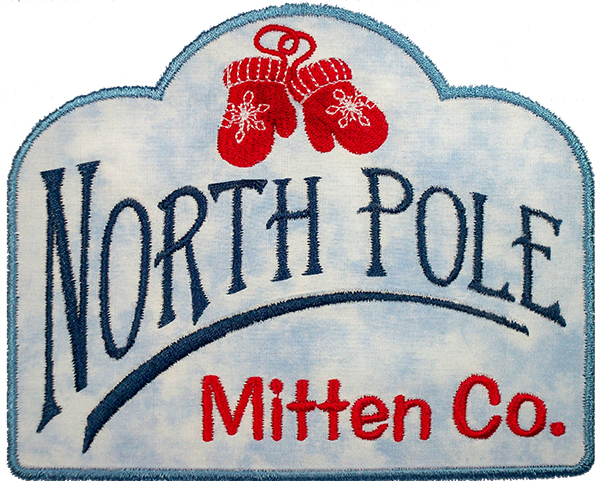
Because of the way satin stitching is digitized, this technique only works with fill designs that have a satin stitched edge. I am using the North Pole Mitten Company design, but a little bit of work needs done in design editing software first.
Step 1.
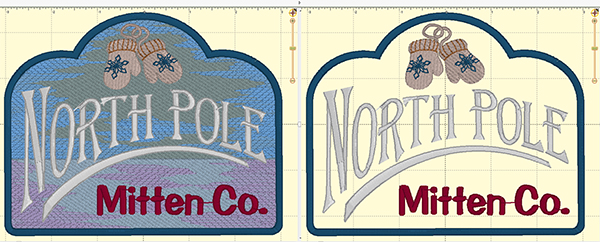
Open the design in editing software and remove any background stitching (left). Typically, you can select the background colors and delete each one, or single out the stitching sequence and eliminate sections of the design that way. When the background stitching is gone, save the design with a new file name (right).
Need help with design editing? Try Craftsy’s Elements of Design Editing Machine Embroidery with Marilyn York Reames!
Get the North Pole Mitten Company design here.
Step 2.
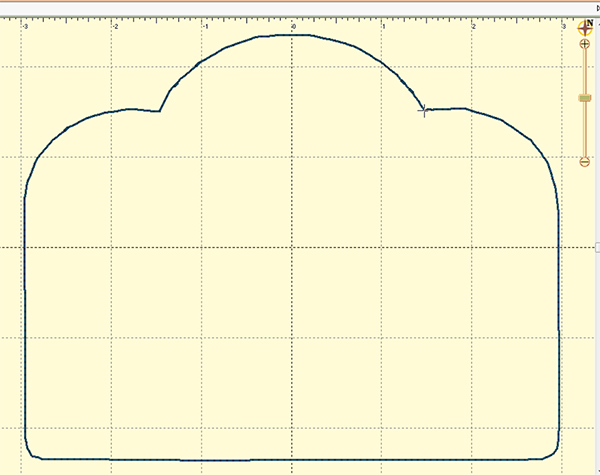
Properly digitized satin stitching includes underlay stitches, one or two rows of stitching around the perimeter to support the width of the stitches. By looking inside the design with editing software, I found I could use the the first underlay ring as what would otherwise be an appliqué placement or tack-down stitch. I “played” the stitching sequence to be sure it would work.
Step 3.
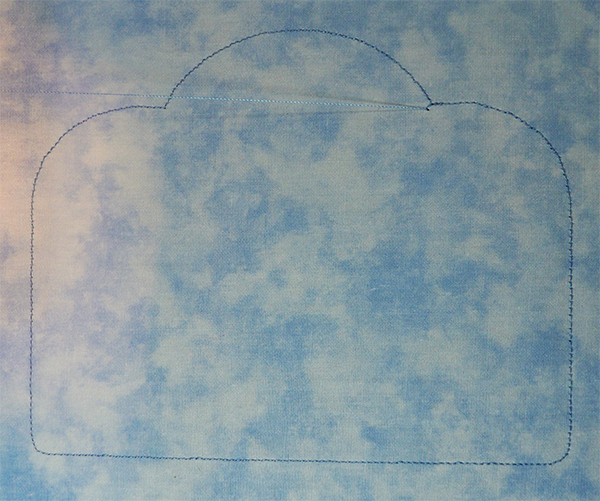
Then, I hooped water-soluble mesh stabilizer topped with a light blue marble fabric and started stitching the design. When the first ring of underlay stitching was connected, I stopped the machine and removed the hoop. It worked just like a “normal” appliqué tack-down stitch.
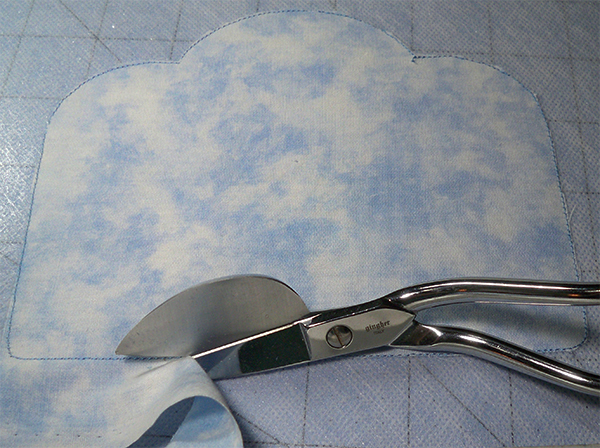
Step 4.
I removed the hoop from the machine, left everything in the hoop and trimmed the excess appliqué fabric away.
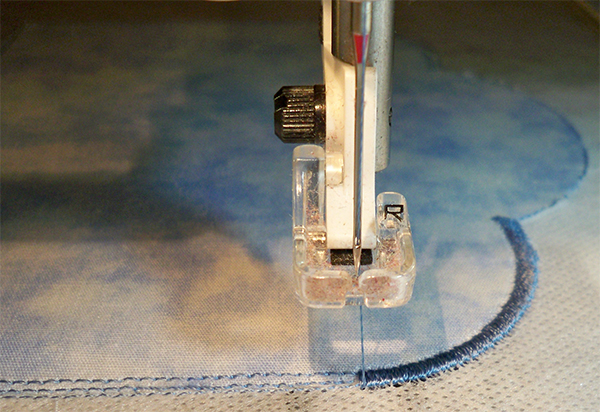
Step 5.
With the hoop back on the machine, stitching resumed. Two additional rows of underlay helped hold down the appliqué fabric before it was satin stitched.
Step 6.
When stitching is complete, remove everything from the hoop, trim away extra water-soluble stabilizer close to the satin stitches, and remove the rest with water.
I changed up the color choices a bit, but the result was a freestanding appliqué. You could also appliqué the design directly to clothing. Ideally, I could have added a back to the appliqué like I did with Baby’s First Christmas: Reversible Appliqué Ornament. A slight change in the order of stitching would have been necessary. There are so many possibilities!
Share tips, start a discussion or ask one of our experts or other students a question.
No Responses to “Creative Solutions: Turn Machine Embroidered Fill-Stitch Designs Into Appliqué”