
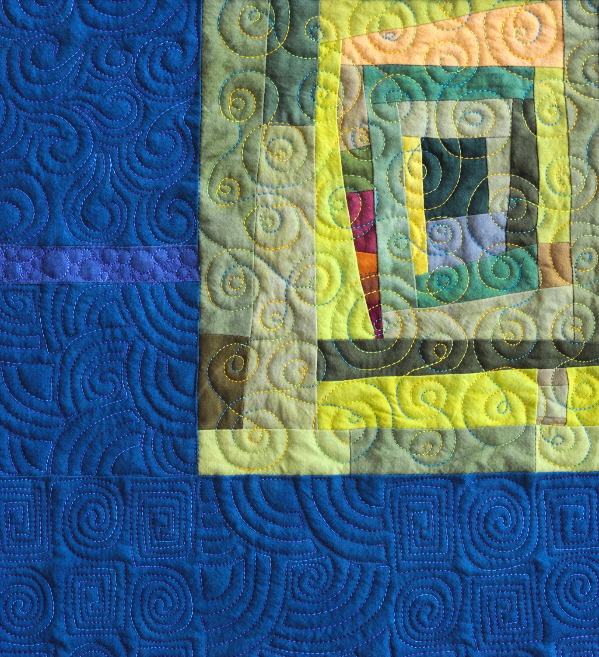
Exploring freehand machine quilting is a great way to express your creativity and make a project your own. But it can be a little intimidating at the same time. All that space to fill! How do you get started with this unfettered quilting technique?
Check out these tips to get more comfortable with freehand stitching on your home sewing machine!
Tip #1: Relax!
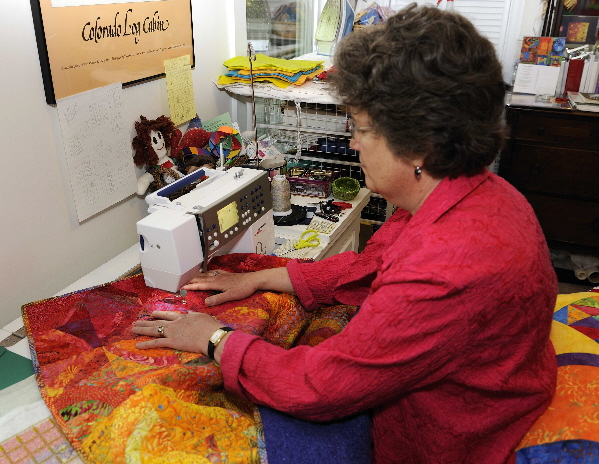
Try to get comfortable with your workspace. Unless you’re quilting a small piece, you’ll need plenty of room around your sewing machine. If you have a table with an opening that your machine drops into, that’s ideal. If not, set your machine up on a table or other surface that is large enough to hold the bulk of your quilt without it dragging on the floor.
It’s also good to have a chair that allows you to sit so that your hands make a relaxed 90-degree angle with the quilt top on the machine and your feet comfortably on the floor. The 90-degree angle is important because it allows your hands and arms to relax while you’re working. If you feel your shoulders rising up to your ears, sit back and take a break before starting again.
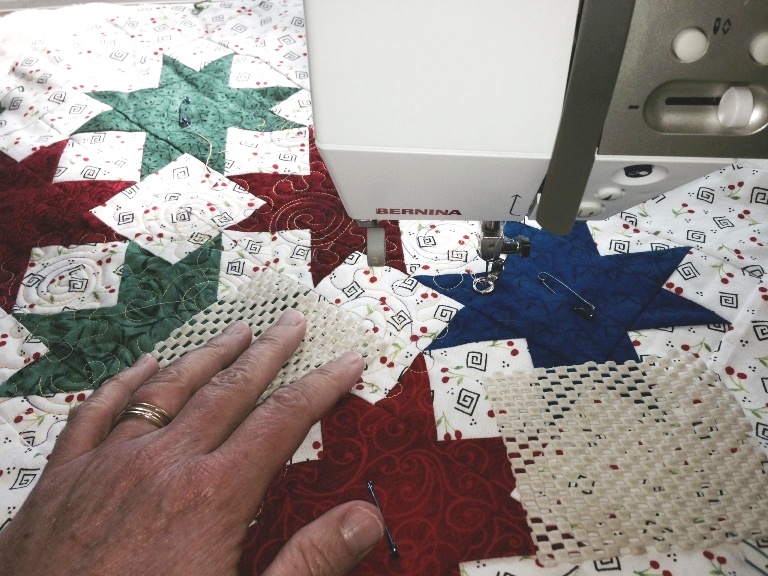
Tip #2: Make your fingers “sticky.”
I use 3″ squares of rug backing to help anchor my fingers while I’m freehand stitching at the machine. The squares are slightly “sticky” and help keep my fingers relaxed. You could also use quilting gloves or plastic finger tips from the office supply store, anything that allows you to hold the quilt stable without grasping. If you’re clutching at the quilt while you’re stitching, it’s much more difficult to get nice even stitches.
Tip #3: Use a darning foot.
A darning foot with an open toe doesn’t put downward pressure on the quilt, which allows the needle to move any direction you choose. Also, you may choose to lower the feed dogs on your machine, so the backing fabric isn’t being pulled forward as you stitch. With no pressure on the top of the quilt from the foot, and no pulling on the bottom fabric, you are in complete control of the stitch.
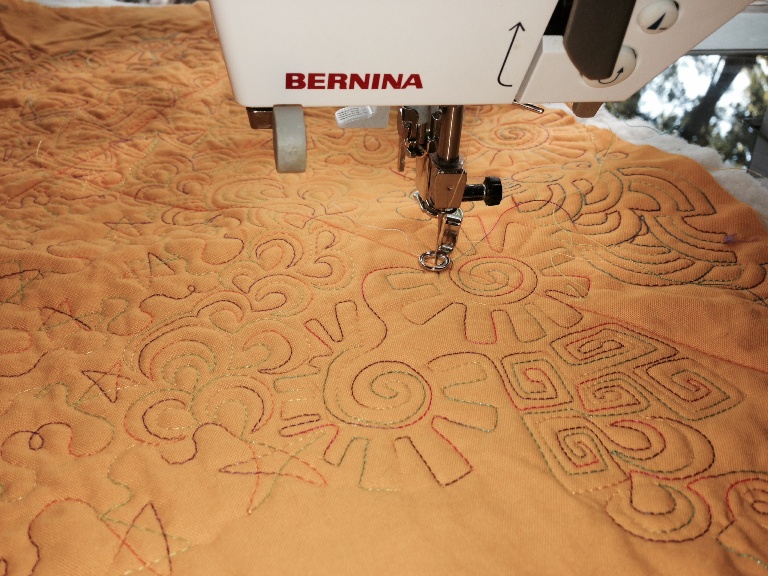
Using a darning foot for freehand quilting
Tip #4: Get the speed just right.
Successful freehand machine quilting depends on coordination between your hands (moving the quilt to create the design you’ve chosen) and your foot on the pedal (controlling how fast the machine goes). If you press down too hard on the pedal and the machine goes too fast, you get tiny, cramped stitches. If you go too slowly, you can get larger stitches than you want or even skipped stitches. The trick is a “just right” speed that allows you to move the quilt evenly to stitch the design. Think of it like you’re drawing with your needle and thread.
Tip #5: Know it won’t be perfect.
Give up trying to be perfect. Many quilters are intimidated by freehand machine quilting because they’re afraid their stitches won’t be perfect. Guess what? They won’t! Even though machine quilting is done on the machine, it is largely a hand-driven process, and your stitches won’t always be exactly the same size.
The key to success is not to stop every time you think you’ve made a mistake. Chances are good that when the entire top is quilted, small bobbles won’t be obvious. Keep going, even if the stitch isn’t exactly what you planned. Then when the top is finished, go back over it carefully to see if you can find any glaring mistakes. If they jump out at you at that point, then fix them. If not, they become part of the charm of the piece!
Hi, I have always hand quilted but I have to many ideas and not enough time to finish them all. What stitch length is used? And is a darning foot the best to use? What about stencils for quilting patterns? What class can I take to learn all the beginning tips? Thank you
Hi, i am looking to start freehand quilting. I have always hand quilted but I have to many ideas and not enough time to finish them all. What stitch length is used? And is a darning foot the best to use? What about stencils for quilting patterns? What class can I take to learn all the beginning tips? Thank you