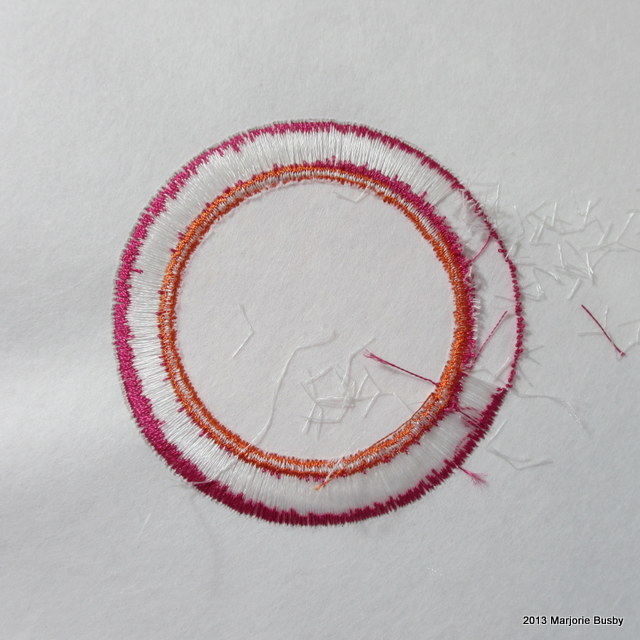
Making fringe using the embroidery machine opens up some unique three-dimensional opportunities for all kinds of projects from art quilts to embroidery on clothing. And it is so easy to do!
There are designs in every genre that incorporate this fringe technique. You will find everything from sophisticated flowers with fringed centers to adorable appliqué fringed animals.

Let me show you how easy it is to do machine embroidery with fringe.
The basic structure of machine embroidery fringe is created with a very wide satin stitch of up to about 10 mm. The wide satin stitch is then anchored on one side with a narrower running stitch, satin stitch, or a fill. When the embroidery is complete, it is turned over to the back side of the stitching, and the bobbin stitches are clipped close to the anchor stitches, about 1/8″ from the anchor stitches. The remaining bobbin thread is removed by plucking it out with fingers or blunt tweezers. The embroidery is turned to the right side and the satin stitches are pulled to the top to create the fringe.
Note: You will find varying instructions for making fringe. Some suggest having the tension balanced top and bottom for the wide satin stitch, and other instructions will tell you to leave the tension in the regular embroidery machine default. For the work shown below, I used the tension in the default. My preference is for a cutaway stabilizer, but if used carefully, a tear-away stabilizer would also work. I used a 40 wt polyester thread, but a nice 40 wt cotton or rayon thread would also work as well.
Below is a photo tutorial of the steps I used in creating a “flower” made as an appliqué circle that is fringed around the edge. I have added this as a FREE pattern on Craftsy so that you can try out this technique for yourself.

Step 1:
Stitch the placement line for the appliqué circle.

Step 2:
Fuse the appliqué circle inside the placement line.
Step 3:
Stitch the wide satin around the appliqué shape.

Step 4:
Stitch the inner anchor stitches and turn to the back and clip the bobbin stitches.

Step 5:
After bobbin stitches are removed, use a blunt object to pull the fringe to the top.

Step 6:
Ready to be spritzed with water and fluffed.
You will see that the fringe has a slight crease in the edges where it was attached to the bobbin thread. You can spritz the fringed threads with water and fluff and it will remove that crease, and you will have a beautiful appliqué “flower.” Many projects use the fringe for the flower center. Some designs use fringe as animal “fur” while others use the fringe as accents such as water under a pirate ship or grass in a meadow.
Ready to begin? Explore some wonderful fringed projects from many different sites that sell machine embroidery:
- Fringed machine embroidery flowers
- Fringed flowers on alphabet
- Pirate ship with fringe machine embroidery design
- Fringe animal friends
- Cheerleader


Thank you for the clear explanation. I've never bothered to try to find out how to do this because it looked like it would be way too complication. It is amazingly simple to achieve.