
All images via Erin Bakes
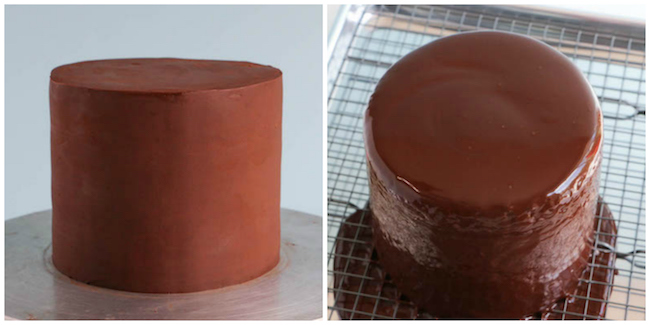
Spread vs. poured ganache
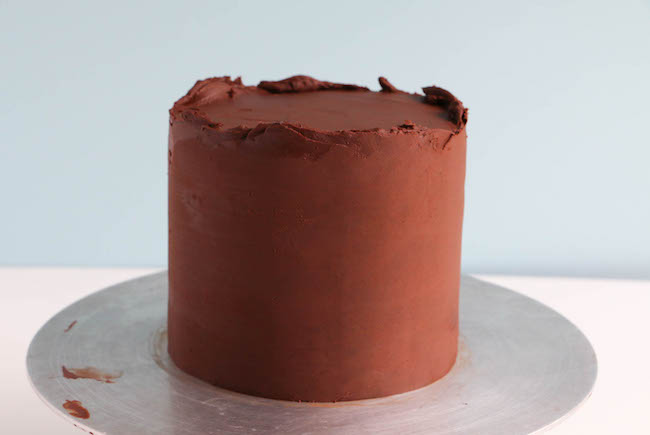
When cooled, ganache acts much like buttercream. Spread ganache, as shown above on the left, has more of a matte finish and set up very firm, making it an ideal base for fondant. Poured ganache, on the right above, creates a thin, glossy shell around the luscious cake beneath it.How to use poured ganache
What you need:
- 12 ounces dark chocolate (62% or higher), chopped
- 2 cups heavy cream
- 1 tablespoon light corn syrup (or honey)
- 6″ round cake that has been assembled, crumb coated, and thoroughly chilled
- Drip rack
- Rimmed cookie sheet
- Ladle (optional)
Step 1:
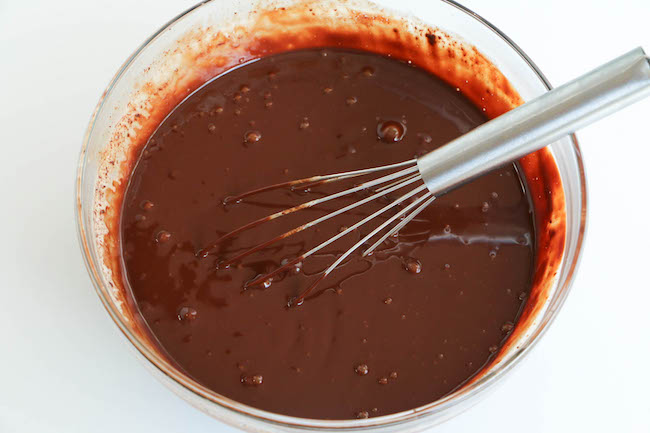
Place the chopped chocolate in a medium bowl and set aside. In a small sauce pan over medium-high heat, add the heavy cream and corn syrup. (Corn syrup or honey give this version of ganache its elasticity and shine.) As the mixture comes to a boil, remove the pan from the heat.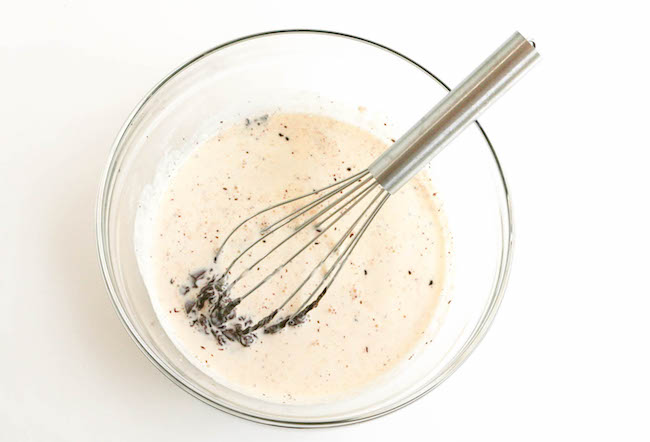 Pour the mixture over the chocolate and whisk until combined.
Step 2:
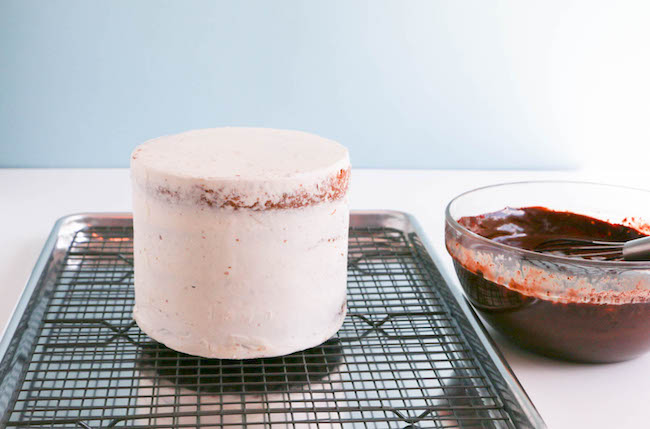 Place the crumb coated and chilled cake on a drip rack set on top of a rimmed cookie sheet. It’s important the cake is very cold — the warm ganache will cause the buttercream to soften a little. If it’s soft to begin with, this will leave your cake finish looking a little lumpy and pitted.
Step 3:
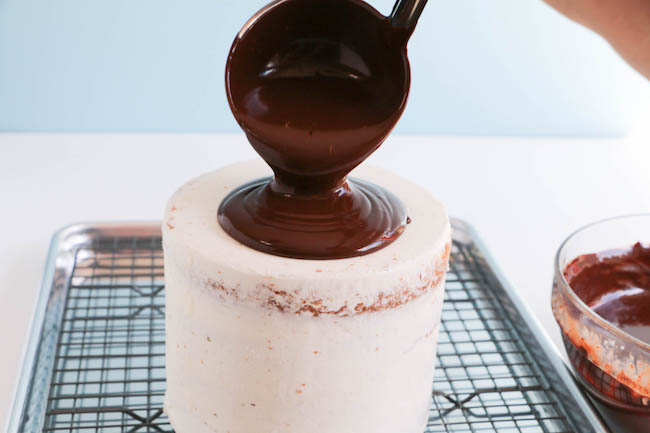
 Using a ladle, pour a large amount of the ganache over the the top of the cake. Start in the center of the cake and swirl the ganache toward the edges and down over the sides of the cake.
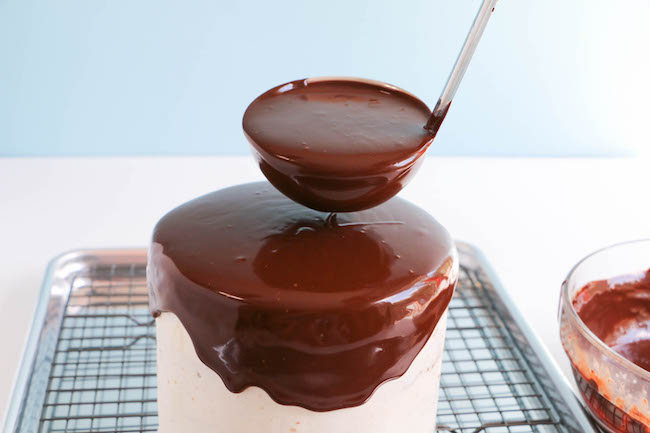
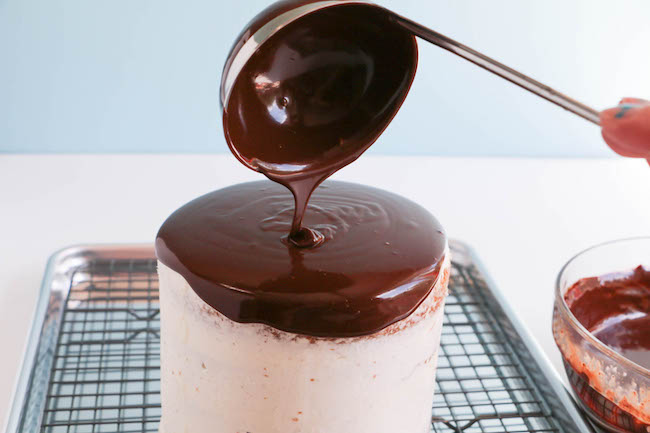
 Immediately pour a second ladleful of ganache over the cake to insure the sides are completely covered.
A ladle is my tool of choice for this job, because the rounded bottom is perfect for gently pushing the ganache over the edges of the cake. If you don’t have a ladle, you can pour the ganache using a spouted measuring cup, then push the ganache over the edges of the cake with an offset spatula.
Give the tray a gentle tap against your work surface to release any air bubbles that may have formed in the ganache.
Immediately pour a second ladleful of ganache over the cake to insure the sides are completely covered.
A ladle is my tool of choice for this job, because the rounded bottom is perfect for gently pushing the ganache over the edges of the cake. If you don’t have a ladle, you can pour the ganache using a spouted measuring cup, then push the ganache over the edges of the cake with an offset spatula.
Give the tray a gentle tap against your work surface to release any air bubbles that may have formed in the ganache.
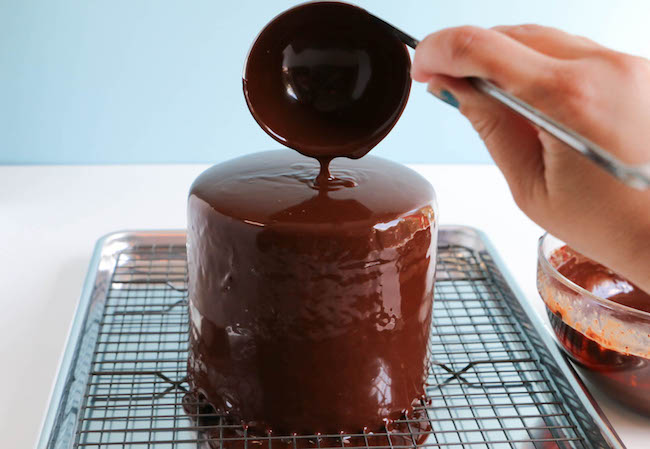
Step 4:
Carefully slide an offset spatula under the cake board and use it to help lift the cake from the drip rack and onto a cake stand or platter. Store the cake either in the fridge or at room temperature, depending on the kind of filling you used. Try not to touch your finish until it’s time to cut the cake. A poured ganache finish marks up very easily.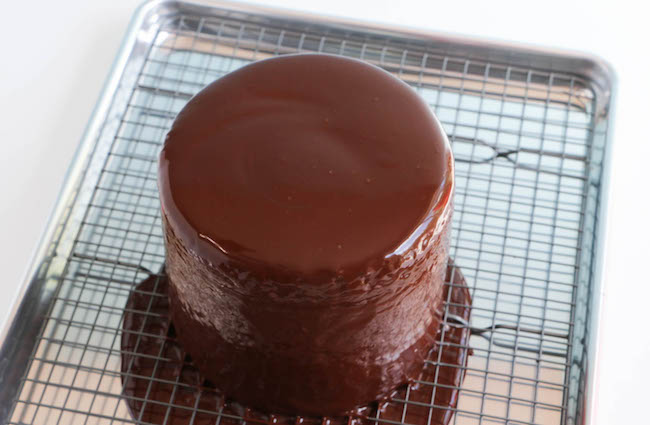
How to use spread ganache
What you need:
- 16 ounces dark chocolate (62% or higher), chopped
- 2 cups heavy cream
- 6″ round layer cake (crumb coat optional)
- Turntable
- Icing spatula
- Offset spatula
- Bench scraper
Step 1:
Follow the same process as in Step 1 above, but use the chocolate and cream ratios listed here. Press plastic wrap against the surface of the ganache and allow it to cool at room temperature until it is similar in thickness to peanut butter, a few hours to overnight. Alternatively, place the ganache in the fridge until it reaches the same consistency, about an hour. If the ganache firms up past the point of being spreadable, place it in the bowl of a stand mixer fitted with the paddle attachment. Beat until the ganache is a spreadable consistency, just a minute or two.Step 2:
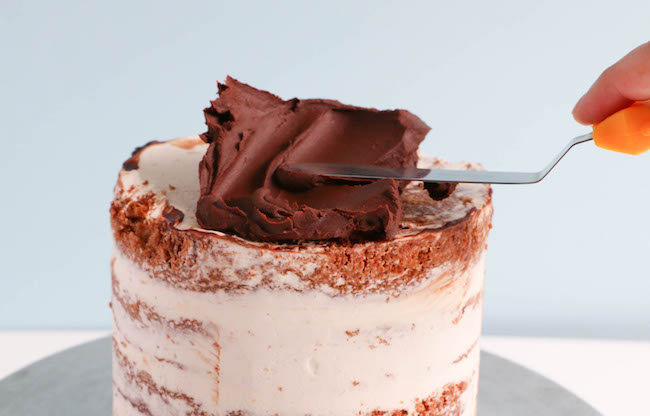 Place a large dollop of ganache on top of the cake. Use an offset spatula to spread the ganache over the surface of the cake. Use a large icing spatula to spread ganache all around the sides of the cake.
Step 3:
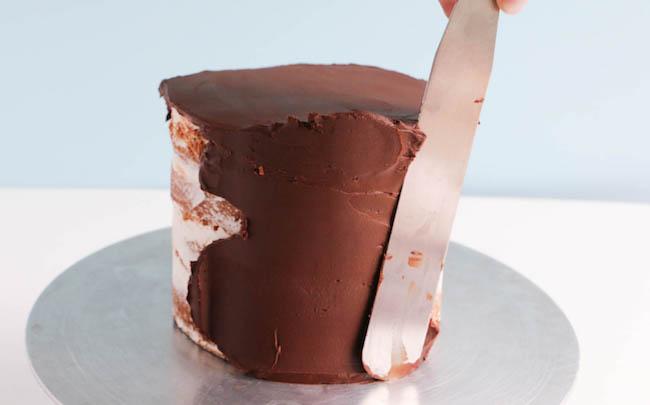
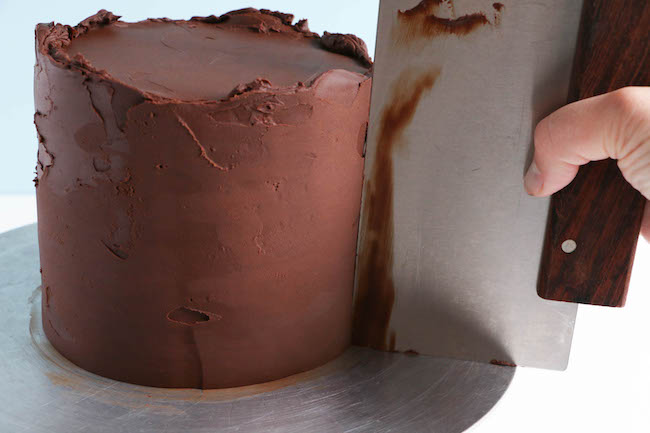 Use a large icing spatula or bench scraper to smooth the sides of the cake. Dip the scraper in warm water and dry it with a paper towel every so often to clean and warm the blade.
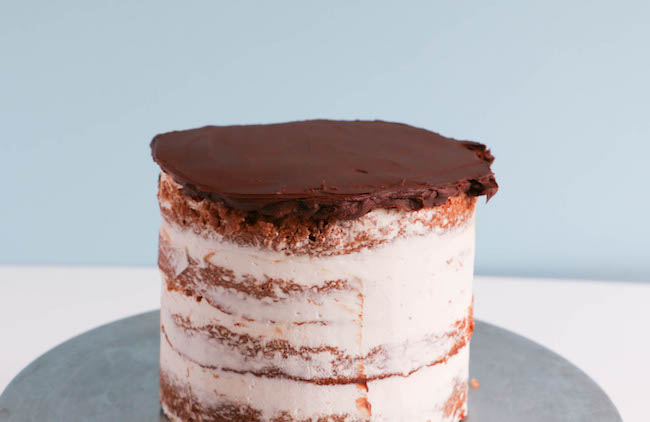
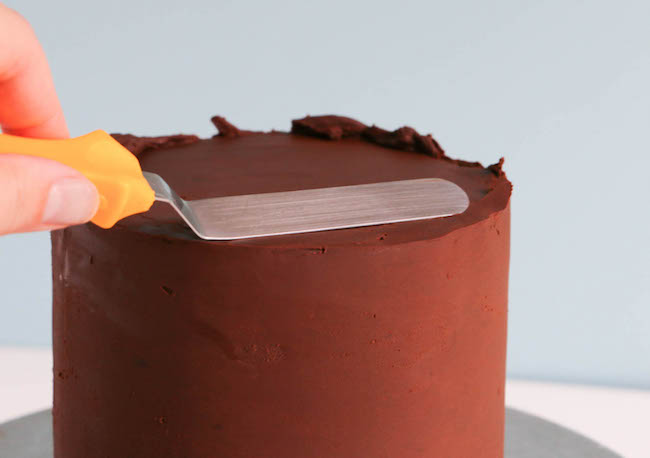 Once the sides are as smooth as you’d like them to be, use an offset spatula to clean up the top edges of the cake. Hold the blade of the spatula so that it’s horizontal with the top of the cake. Use the spatula to pull the excess ganache up and away over the top of the cake.
Dip the spatula in warm water as needed. Be sure to dry the blade before using it on the cake. Water can cause ganache to discolor or “bloom.”
Once the sides are as smooth as you’d like them to be, use an offset spatula to clean up the top edges of the cake. Hold the blade of the spatula so that it’s horizontal with the top of the cake. Use the spatula to pull the excess ganache up and away over the top of the cake.
Dip the spatula in warm water as needed. Be sure to dry the blade before using it on the cake. Water can cause ganache to discolor or “bloom.”
Step 4:
Carefully slide an offset spatula under the cake board and use it to help lift the cake of off the turntable and onto a cake stand or platter. Store the cake either in the fridge or at room temperature, depending on the kind of filling you used. Refrigerate your cake until it’s completely firm if you plan on adding a layer of fondant.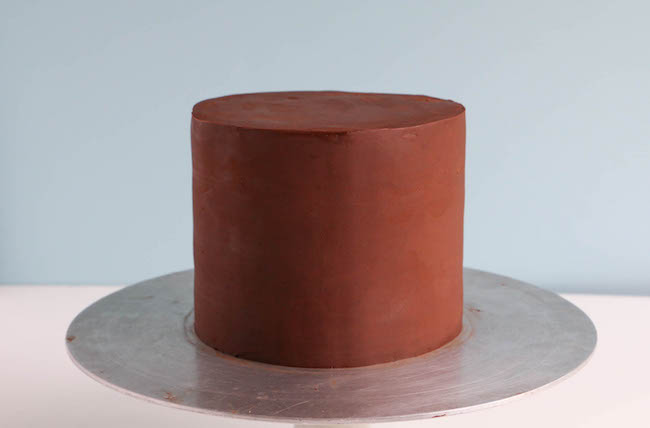
Once the cake is crumb coated, the ganache is applied and the cake is wrapped with fondant, can it be refrigerated? If so, for how long? Thank you