
Have you ever completed your gardening tasks and noticed your prize clippers are nowhere to be found? Perhaps they were even left rusting away somewhere in a garden bed. If you’ve been there, you know the importance of keeping your garden tools at easy reach. Use your sewing skills to make some handy accessories for yourself or the gardener in your life.
Here are a few garden sewing patterns for useful accessories and a quick step-by-step tutorial for sewing a holder for your garden clippers.
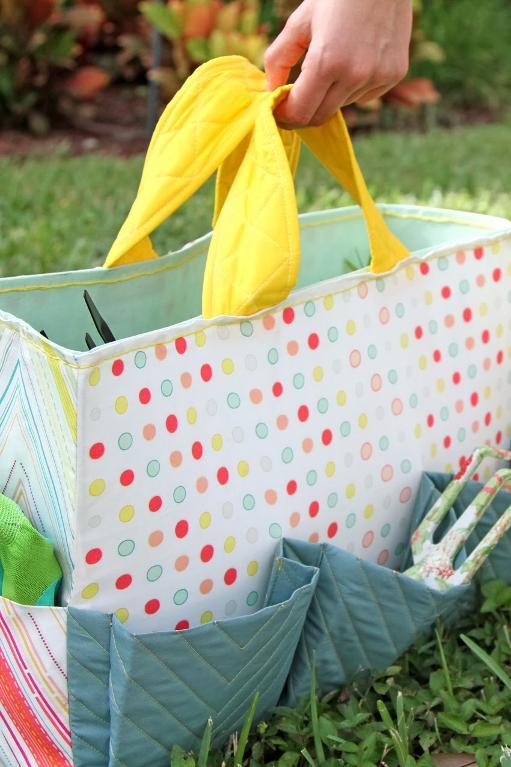
Hana Garden Bag via Craftsy member Pat Bravo
Garden bag
Start with a garden tote bag, perfect for carrying clippers, seed packets and even a 6-pack of annuals.
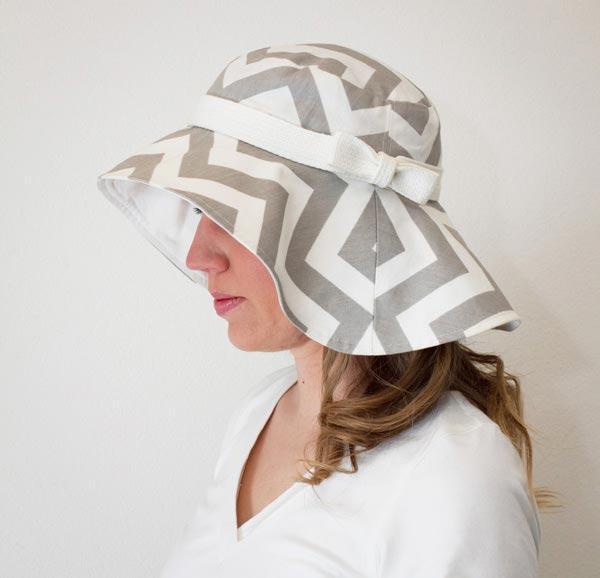
Floppy Brim Hat Pattern via Craftsy member Gina Renee
Sunhat
Be sure to keep the sun at bay. A garden hat is a must for some sun protection.
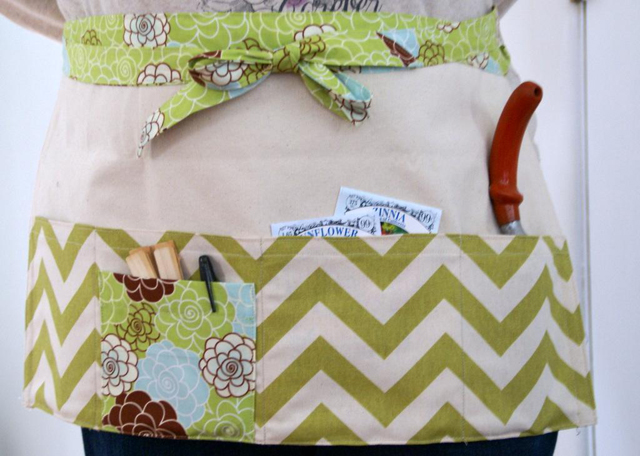
Springy Garden Apron via Craftsy member L M Designs
Garden apron
Keep everything at hand and sew a gardening apron, perfect for garden markers, seed packets and even sunglasses or your phone.
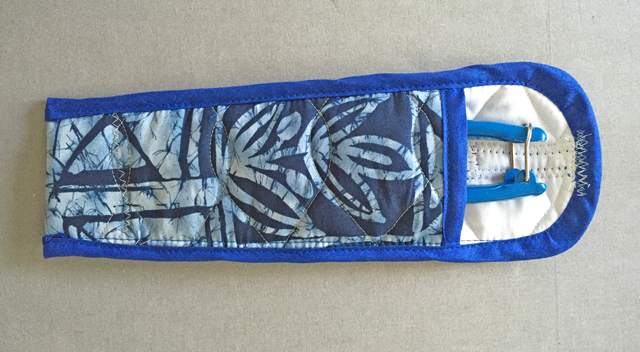
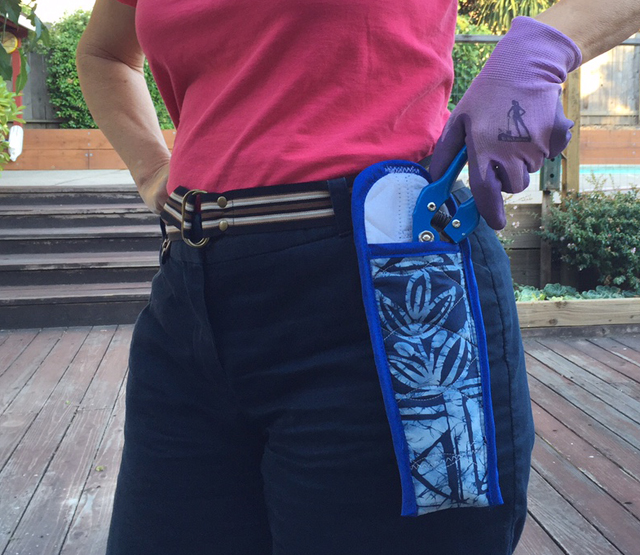
Sew a custom-sized holder for your garden clippers
If you are like me and need those extra-sharp clippers at the ready then make a holster for your pruning shears. It can be custom-sized for your shears and even machine washable!
Step 1. Trace your shears
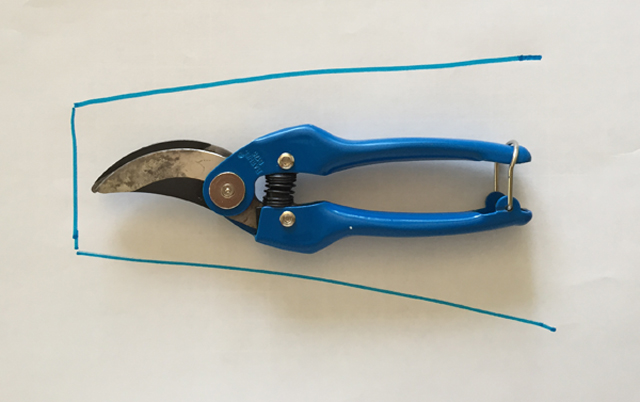
Trace a rough outline of your pruning shears on paper. You don’t want the holster to be too long, it is actually best if the top of the shears pokes out a bit so you can access the handles.
Step 2. Cut out the fabric
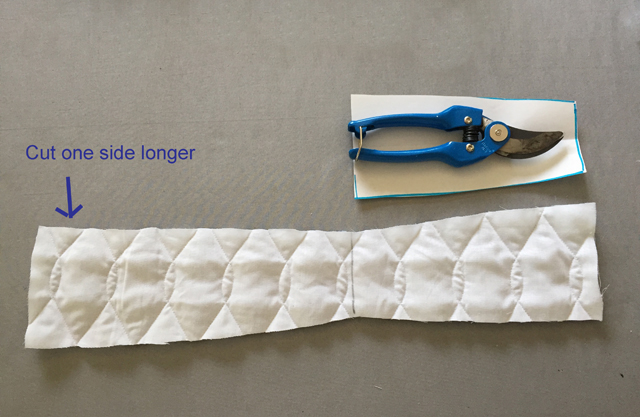
Cut out your fabric. Pre-quilted fabric works really well for this project and you only need a small piece. If you don’t have any pre-quilted fabric, heavy denim or twill fabric also will work. You can double it up to make it a bit thicker if needed. Note that you will cut the fabric folded in the middle and cut out one end about 2-3 inches longer than the other, this is where it will attach to your belt.
Step 3. Add a leather reinforcement
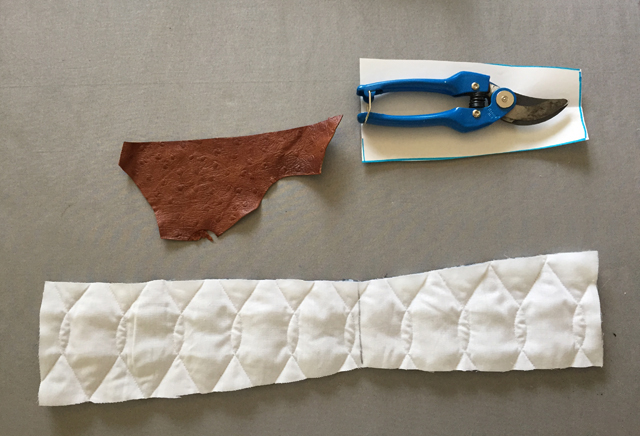
Garden shears are sharp so a good way to make a fabric holder last longer is to add some leather at the bottom where the point will rest. Sewing leather is quite easy and you can do it on a regular sewing machine. Use a size 90 or denim needle and a longer stitch length. Here I used a scrap of leather leftover from another project, but you can recycle an old handbag or wallet for this purpose.
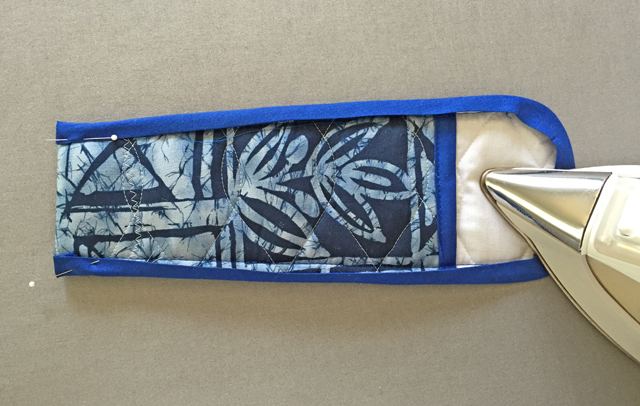
Trim your leather scrap so it covers the area where you will fold the fabric, and have it continue up about 2 inches on either side of that fold line. Stitch it to the fabric all around the edge. It’s important to stitch all the edges so that when you put your shears in the holder the tip will go between the leather sections. At this time apply seam binding to the short edge of the shorter side as pictured, since the edges will then be enclosed in the rest of the seam binding.
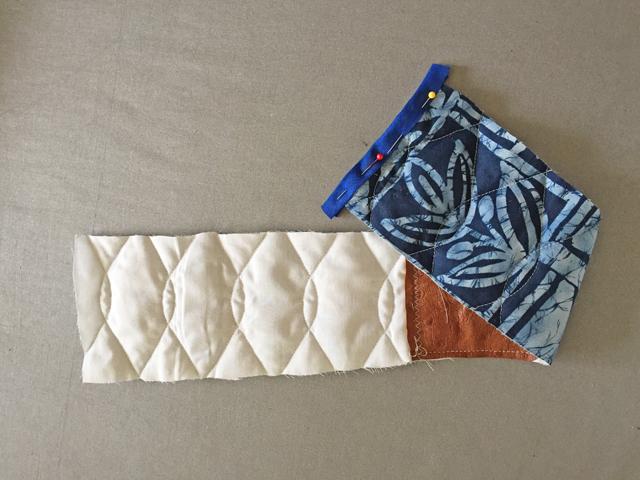
Step 4. Apply the binding
Fold the quilted fabric at the center fold line and pin together. Apply seam binding all around to finish off the edge. For this project, using the double-width bias binding works well. Start by sewing along the crease line on the binding placing it on the edge of the holder.
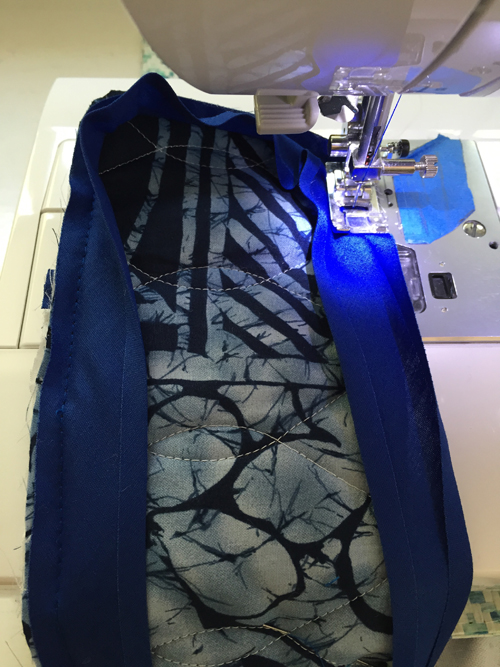
Step 5. Finish the edge
Fold the bias binding over to enclose the raw edges and topstitch down.
Step 6. Add some velcro
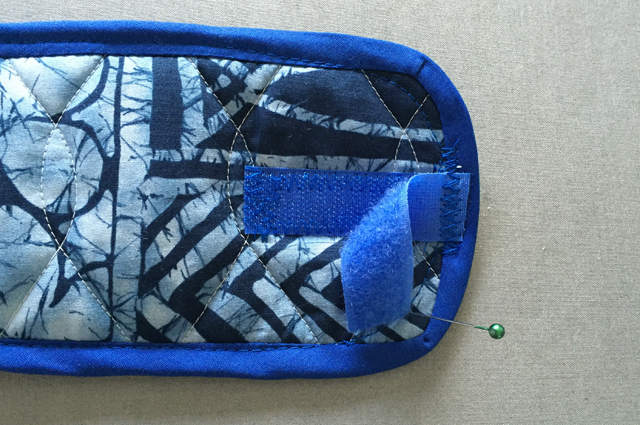
Sew Velcro strips on the upper back portion of the holder so you can attach it to jeans or a belt. Sewn vertically as shown, they affix to a belt but if you aren’t a belt wearer, you can sew the Velcro horizontally and attach it to a belt loop. Another option is to sew two large vertical buttonholes so that you can attach it to a belt without Velcro.
Now it’s time to get out there and do some gardening. Those tomatoes won’t pick themselves!
Share tips, start a discussion or ask one of our experts or other students a question.
No Responses to “Gifting for Green Thumbs? Stitch These Handy Accessories for Gardeners”