
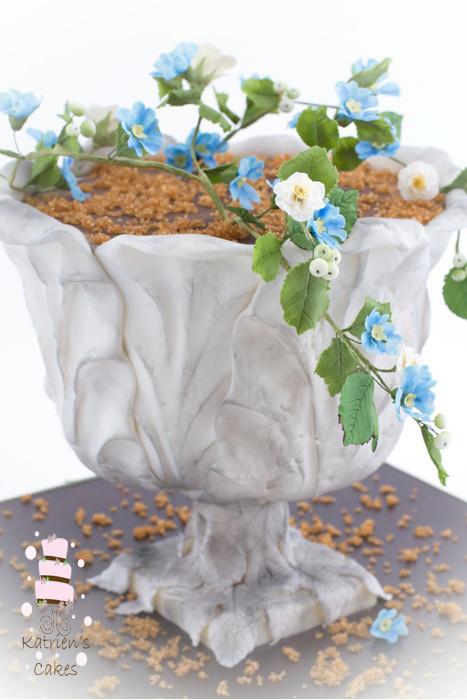
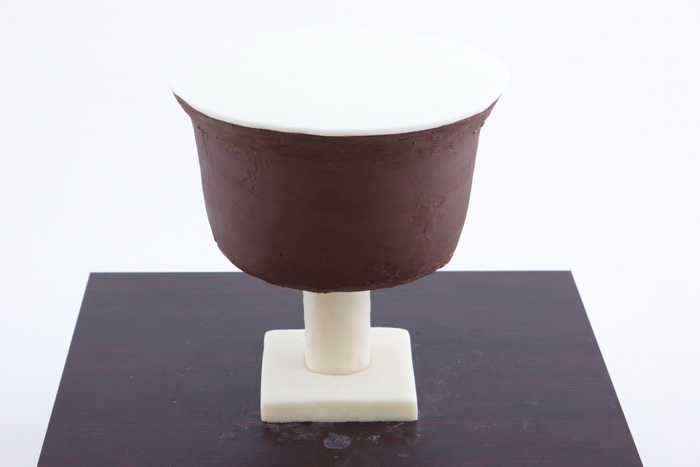
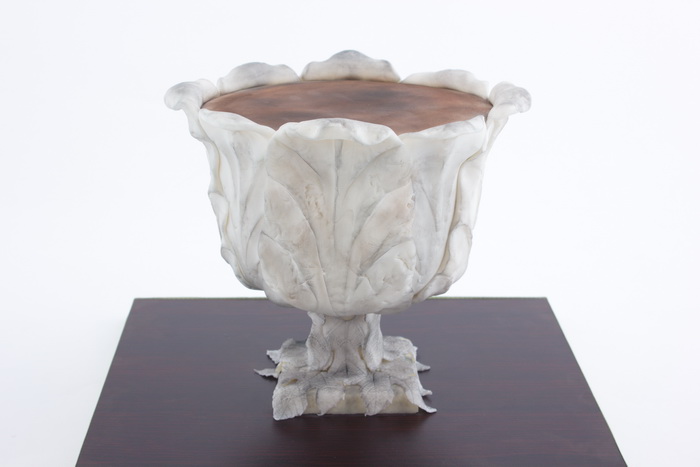
This gravity-defying 3-D cake will suit anyone who loves gardening or antiques. Use an inner support structure to create a large bowl on top of a footed pedestal. Decorate the urn with a quick dry brushing technique to give it an antique finish that will make your decorative container resemble a vintage French garden urn.
In this step-by-step garden-themed cake tutorial, you will learn how to carve, shape and decorate your cake to look like a real garden urn!
Photos via Katrien’s Cake
Materials:
- Two round 8″ (20 cm) cakes each 2″ (5 cm) high
- 3 cups (750 ml or 27 fl oz) ganache or buttercream icing to fill the cake
- 2 – 3 cups (500 – 750 ml or 18 – 27 fl oz) ganache to coat the cake
- Smooth apricot jam, sugar syrup or piping gel
- ± 4 pounds 7 ounces (2 kg) white fondant or white sugar paste
- ± 1 pound 7 ounces (650 g) white modeling chocolate
- Corn starch (corn flour)
- 14″ x 14″ (35 cm x 35 cm) square board
- Wooden dowel of 1″ (2.5 cm) in diameter and 4″ (10 cm) long
- Hot glue gun
- Two 6″ (15 cm) round boards
- Melted chocolate
- Pastry brush
- One A4-sized sheet of paper
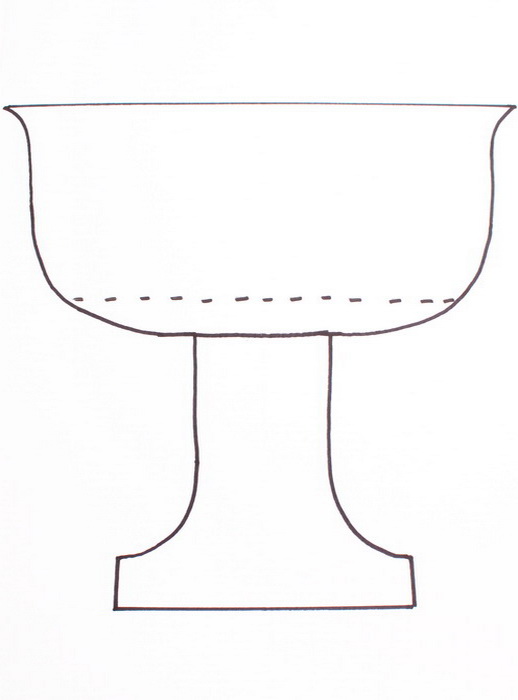
- Bowl template
- Scissors
- Serrated knife
- Palette knife
- Round cutter of 1 2/3″ (4 cm) in diameter
- Rolling pin
- Cake smoothers, acetate or a small ball of leftover fondant
- Teaspoon
- Black, brown and gray edible dusting powder
- Large paintbrush or unused blusher brush
- Grape leaf cutters and veiner
- Small piece of foil
Instructions:
Step 1:
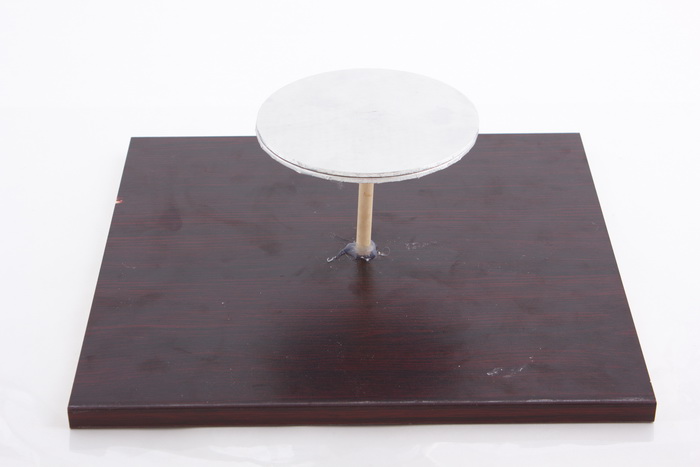
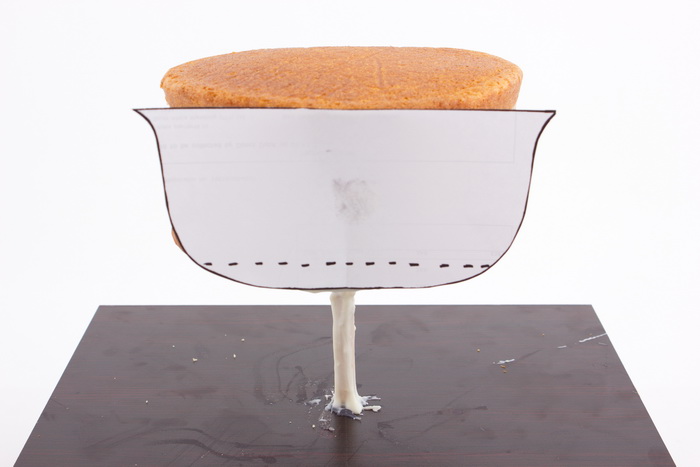
Make an inner structure to make this cake gravity-defying. Drill a hole in the center of a square board but do not drill through all the way. Squeeze hot glue into the hole and place the wooden dowel inside, holding it in place until the glue starts to cool, and it feels secure.
Drill a hole through the center of one of the small round boards. Place the board over the dowel. Squeeze glue onto the top of the dowel and on the board and then place the other round board on top of the dowel pushing the round board underneath up to the top board. Hold the boards tightly so that they attach to each other and the dowel. Place a leveler on the top of the boards to make sure that they are level before the glue sets completely.
 Step 2:
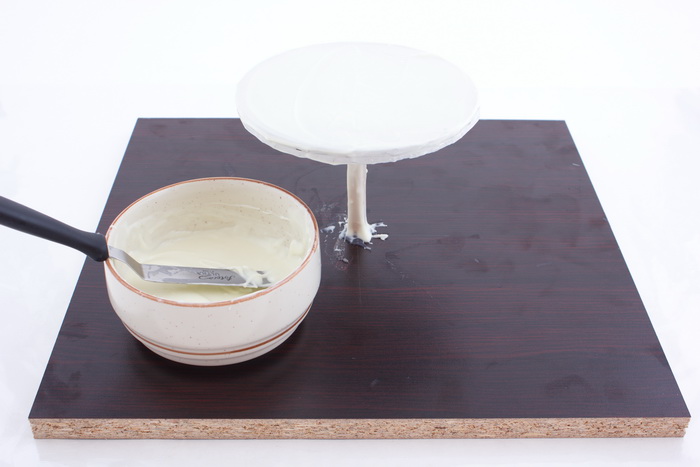
Brush the dowel and boards with melted chocolate to make the inner structure safe for food.
 Step 3:
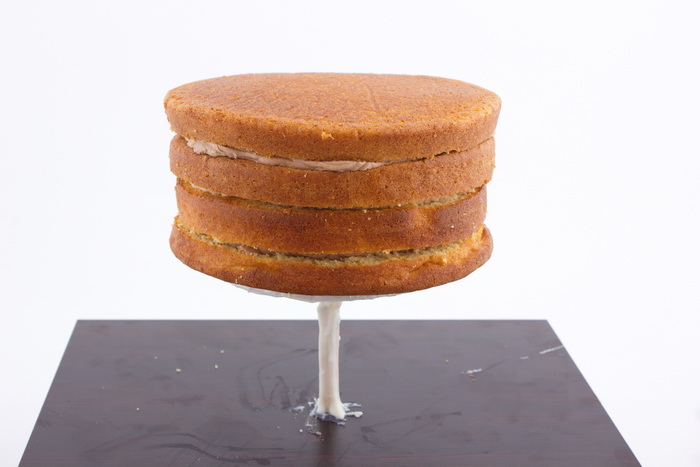
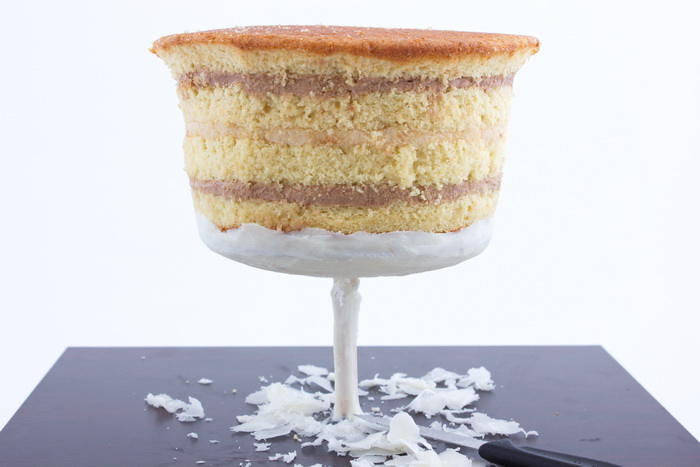
Divide each cake layer and stack them on top of the boards with filling in between the layers.
Step 4:
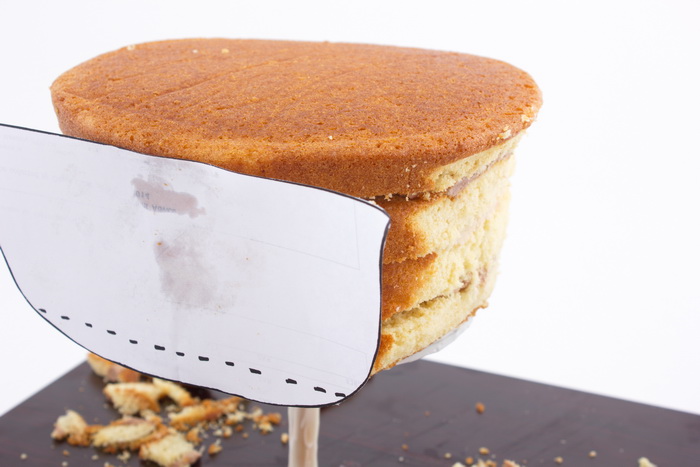
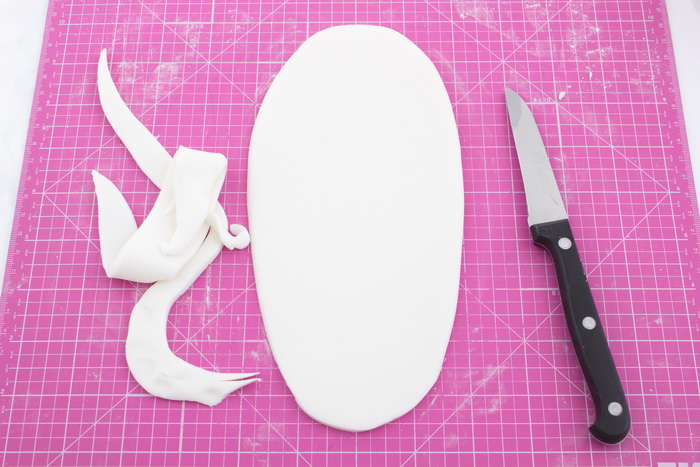
Enlarge and copy the template shown in the photograph onto an A4-sized paper. Cut out the bowl part of the template with scissors.
 Step 5:
Place a small dollop of ganache or icing on the back of the template and stick it on the front of the cake. Carve the sides of the cake with a serrated knife following the template.
 Step 6:
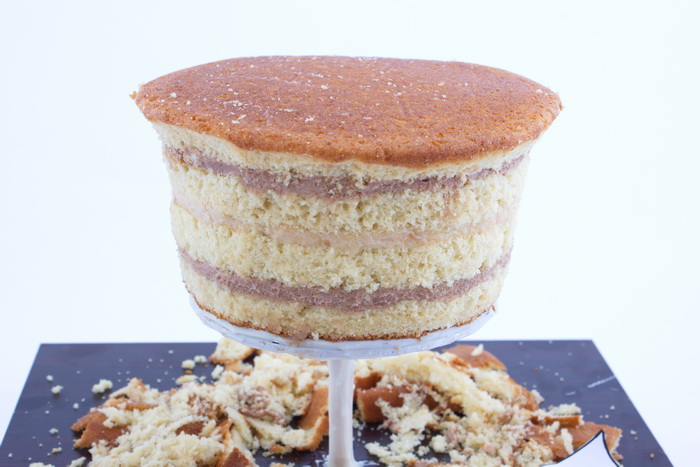
Place the template against each side of the cake and carve the cake following the template until it looks like a rounded bowl.
If you would like to know more about using templates and carving cakes, sign up for the online Craftsy class Advanced Cake Sculpting: Bobbleheads with Mike McCarey.
 Step 7:
Knead and soften some of the modeling chocolate in your hands and then press small piece against the bottom of the boards. If you are scared that the modeling chocolate might fall off, you could attach the first layer with melted chocolate if preferred. Keep on placing pieces of modeling chocolate underneath the bowl until it looks slightly rounded. Wait a few minutes for the modeling chocolate to set. Use your serrated knife to carve the modeling chocolate into a rounded shape, holding the template against the cake to help guide you.
 Step 8:
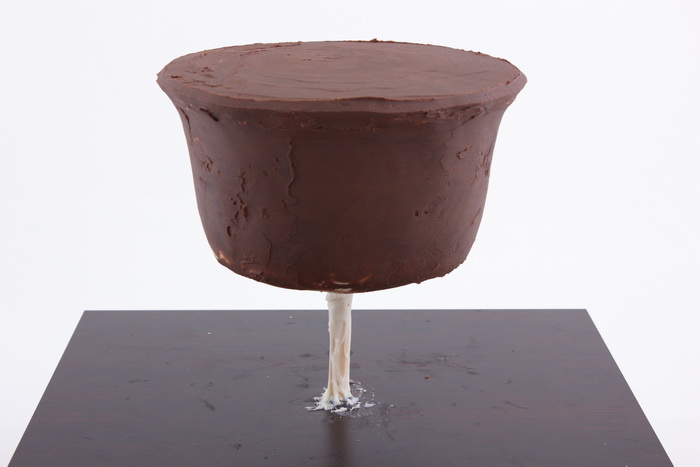
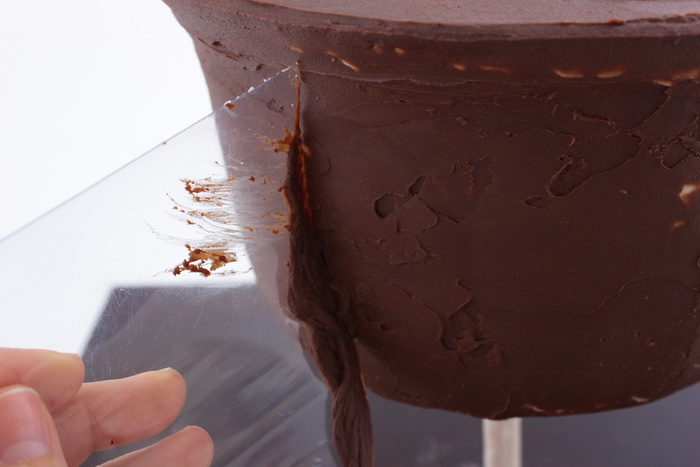
Coat the cake with ganache using a palette knife. When you have coated the whole cake with ganache, use a piece of acetate to scrape and smooth the rounded part of the bowl.
Dip the palette knife into hot water and wipe it off with a clean cloth. Smooth the ganache with the hot palette knife. Place the cake in the refrigerator for 15-20 minutes for the coating to set or leave the cake to stand overnight in a cupboard.
 Step 9:
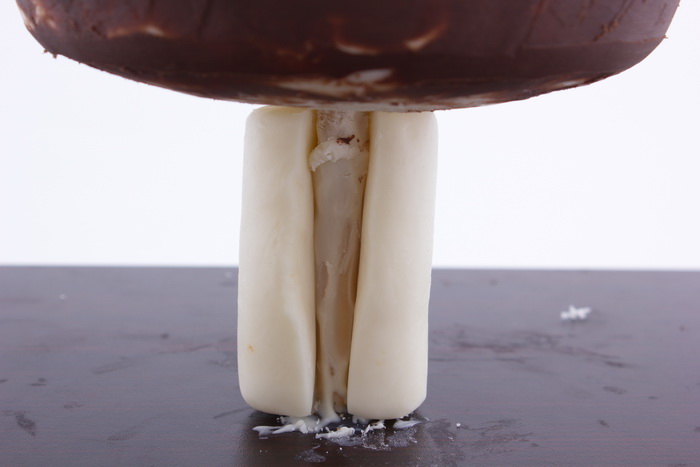
To make the pedestal for the urn, roll 5 1/4 ounces (150g) of modeling chocolate into a thick cylinder. The cylinder should measure 1 2/3″ (4 cm) in diameter and ± 3″ (7.5 cm) long or as long as the visible piece of dowel underneath the bowl.
Cut through the length of the cylinder to the center and pull the sides apart to open it up.
 Step 10:
Place the opened cylinder around the dowel and press the sides together to close the gap. Rub the seam with your finger so that it fades slightly.
 Step 11:
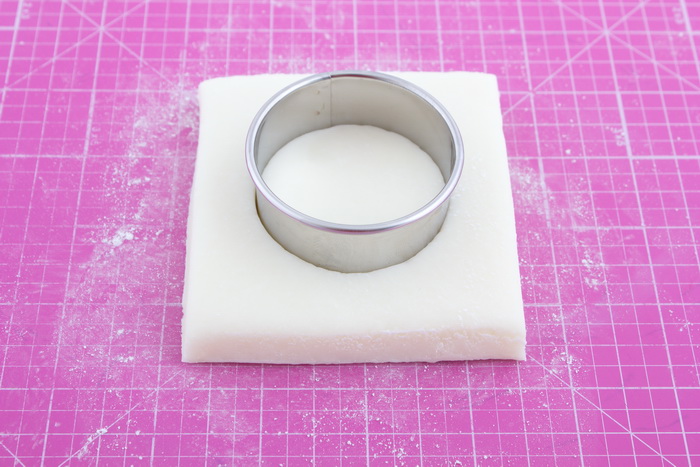
Make a foot for the pedestal by rolling out 9 ounces (250g) of modeling chocolate to ± 1/2″ (1 cm) thick. Cut it into a square of 4″ x 4″ (10 cm x 10 cm). Cut out a circle from the middle of the square using a 1 2/3″ (4 cm) round cutter.
Step 12:
Cut through only one of the four sides of the square and place it around the pedestal.
 Step 13:
Brush smooth apricot jam, sugar syrup or piping gel over the surface of the cake for the fondant to adhere to the cake.
 Step 14:
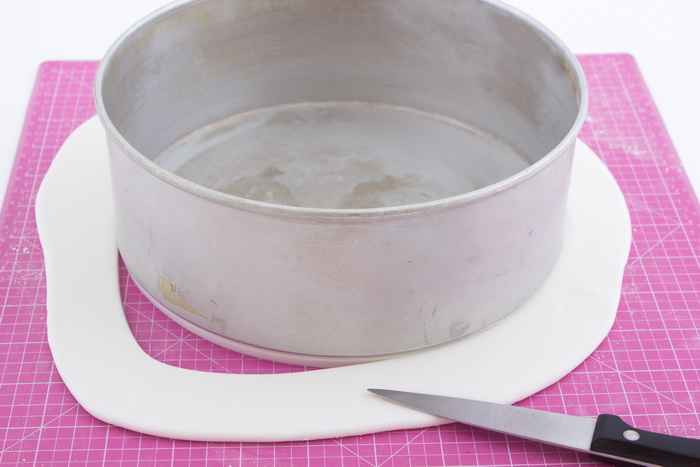
Roll out 10 3/4 ounces (300g) of fondant, on a small amount of cornstarch (corn flour). Roll it to about 1/6″ (4 mm) thick.
Place the cake tin that you used to bake your cake in on the rolled out fondant, as a guide to cut out a round disc.
Lift the fondant circle with a rolling pin or your hands and place it on top of the cake. Lightly smooth the fondant with a cake smoother, piece of acetate or a ball of leftover fondant, making sure that it reaches the edge of the bowl everywhere.
 Step 15:
Measure the height of the bowl from the top of the pedestal to the top edge of the bowl and add about 2″ (5 cm) to the measurement. My bowl measured 9″ (22 cm) high.
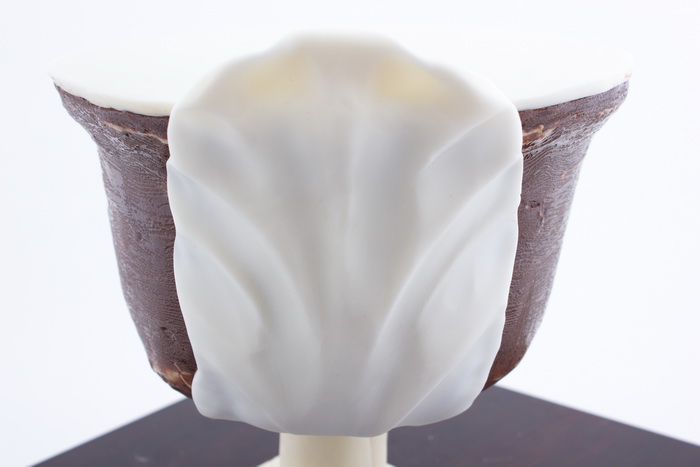
You will need to make eight “shell” shapes each 4″ (10 cm) wide and 9″ (22 cm) long to cover the sides of the bowl.
Make one “shell” at a time. Roll out a piece of fondant keeping the upper third part of the fondant to about 1/2″ (1 cm) thick and the bottom two-thirds to about 1/6″ (4 mm) thick. Cut it into a long oval shape using the measurements above.
 Step 16:
Soften the edges of the long oval by rubbing it with your finger. Using a teaspoon, press into the fondant and then drag the teaspoon downwards to indent it with rounded grooves. Repeat this a few times until the oval resembles a shell.
 Step 17:
Lift the shell onto the side of the bowl, lightly rubbing over the fondant to attach it to the cake. Make sure that a lip of about 2″ (5 cm) extends over the top edge of the bowl. Press the fondant onto the bottom of the bowl, against the cake, so that it adheres well. If the fondant stretches slightly, cut off the excess where the bowl and the top of the pedestal meet.
 Step 18:
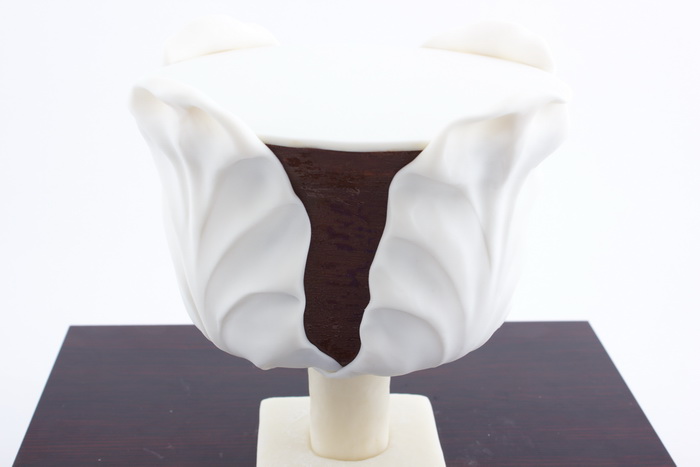
Make three more shells and place them opposite one another on the sides of the bowl.
 Step 19:
Make four more shells and place them opposite one another, overlapping the first set of shells. If any of the shells does not stick properly to the cake, brush smooth apricot jam, sugar syrup or piping gel on the cake or on the back of the fondant pieces.
Carefully and with a light touch, bend the top lip of each shell so that it curls backwards.
 Step 20:
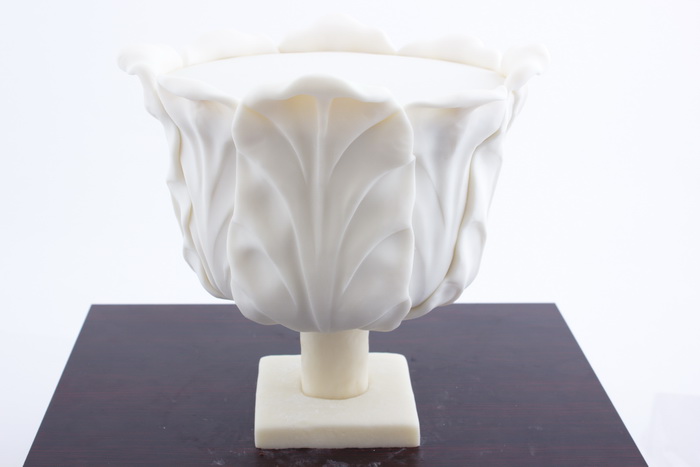
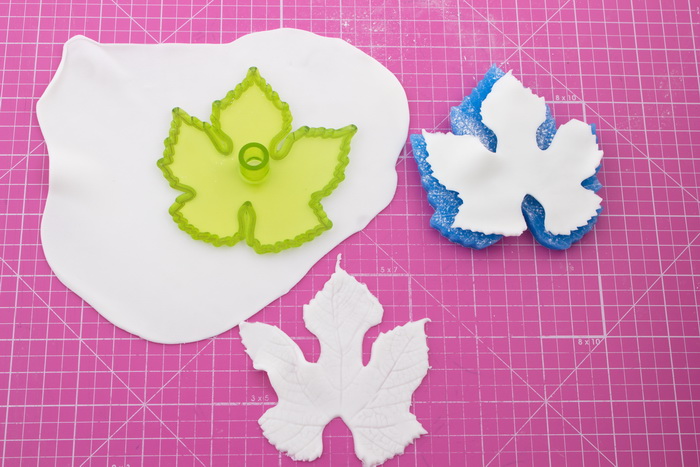
Roll out some of the leftover fondant until thin and cut out grape leaves with a cutter. Vein the leaves with a grape leaf veiner.
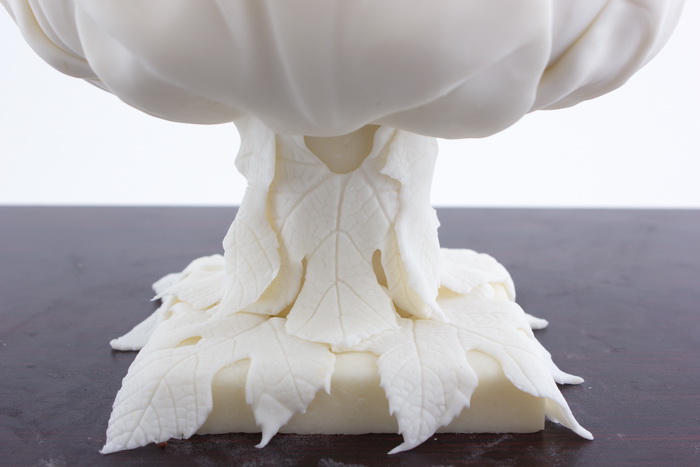 Step 21:
Attach the leaves, in a random pattern, to the foot and pedestal using apricot jam, sugar syrup or piping gel.
 Step 22:
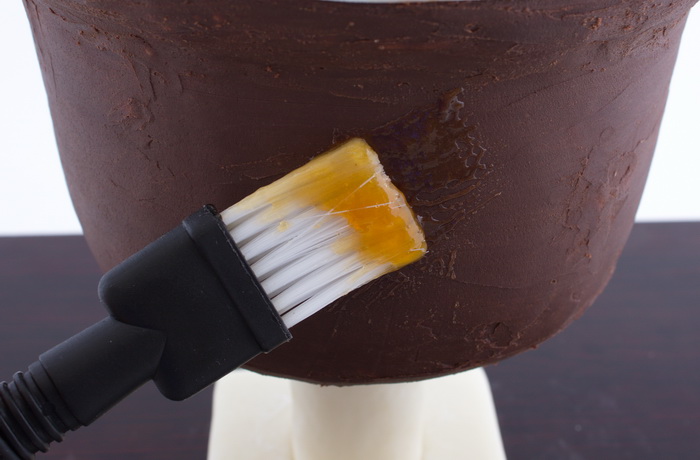
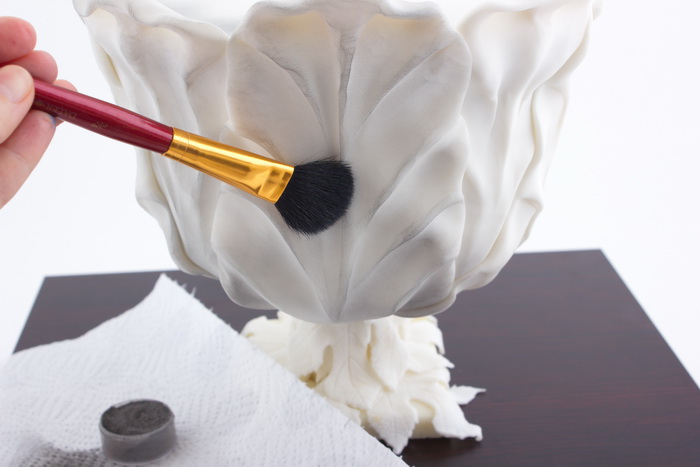
To give the urn cake a vintage, antique finish, dry brush gray dusting powder on the urn with a paintbrush or unused blusher brush, concentrating to color any protruding areas. Brush on a tiny bit of black dusting powder to highlight some areas.
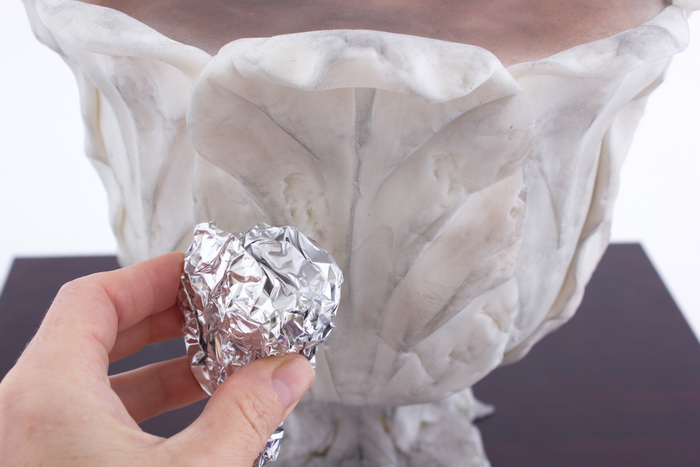 Step 23:
Take a piece of foil and scrunch it up into a ball. Press the foil into the fondant shells here and there on the bowl, to give the urn an aged look.
To learn how to make structures for cakes check out the fabulous online Craftsy class Gravity-Defying Cake Designs with Lauren Kitchens.
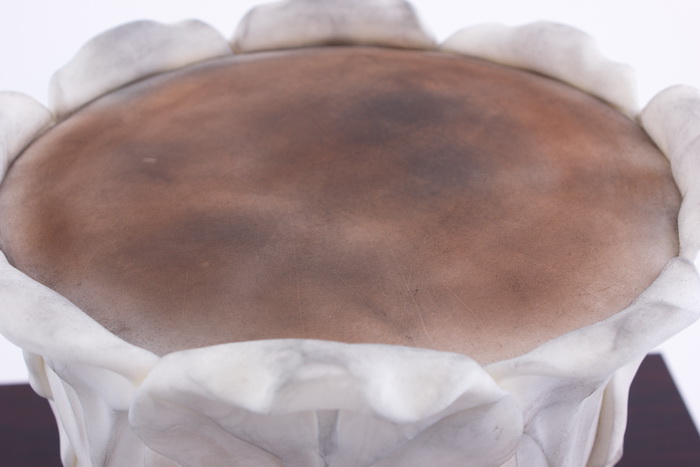
Step 24:
Brush the top of the bowl with black and dark brown dusting powder so that it looks like soil. If preferred, sprinkle soft brown treacle or Demerara sugar on top of the bowl and around the pot to create loose soil.
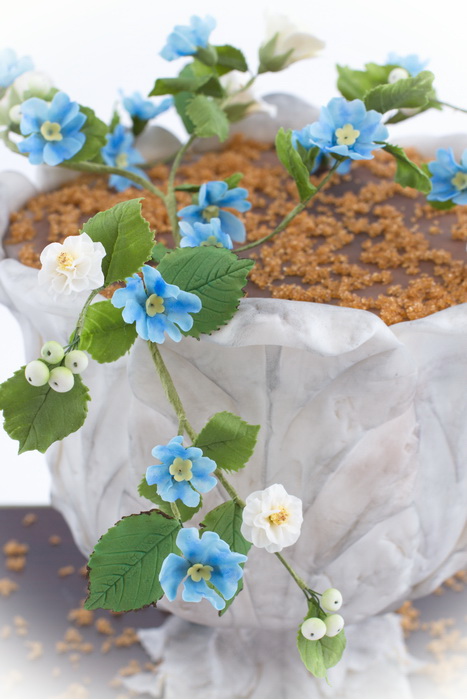
I added a climbing sugar arrangement of forget-me-nots that I learned to make in the Craftsy class Decorating in Three Dimensions with Maggie Austin.
Share tips, start a discussion or ask one of our experts or other students a question.
No Responses to “Bring Your Garden Inside by Creating a 3-D Garden-Themed Cake”