
Gathering fabric can seem like a tedious sewing task. The standard method for gathering fabric is to sew two or three parallel lines of basting stitches within or straddling the seam allowance, and then pull on the tails of the bobbin threads to gather the fabric. This works fine most of the time, but what if you have a really long piece of fabric that you want to gather or you’re working with a thicker fabric like cotton sateen? The basting line method can be time-consuming and the threads can very easily snap, forcing you to start all over again.
The good news is, by learning how to gather fabric with your serger, you can sew gathers into your fabric in less than half the time of the standard baste-and-tug method. There is no need to buy a new gathering foot because all you have to do is change a few settings on your serger. Ready? Let’s get gathering!
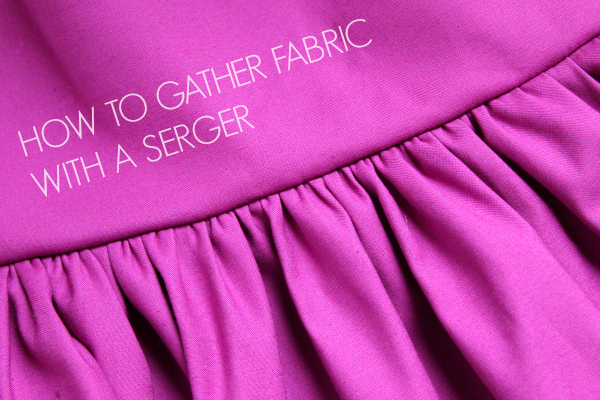
Cut your sewing time in half with this simple method for gathering with a serger!
Quick note before you begin:
This method works in an opposite manner as the basting method because you gather the fabric as you serge and then loosen the gathers to fit your garment as needed (i.e. gathered skirt to a flat waistband). This is unlike the basting method, in which you typically tighten the gathers to fit. This means you should test out your gathers on scrap fabric first to make sure it gathers tightly enough on your serger. If the gathers are too loose after serging, it will be more difficult to tighten them.
Step 1:
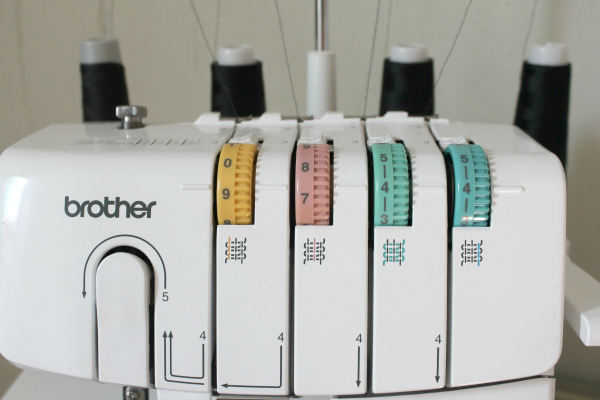
The first step is to set up your serger for four-thread overlock. The tightest gathers will occur if there are two needles engaged instead of one. Once you have threaded your serger properly, tighten the tension of the two needles (NOT the upper looper or lower looper), which are typically the two leftmost dials. For this particular project, my skirt fabric was cut to be almost three times the width of the waistband, so I needed to gather the fabric very tightly.
I increased the needle tension as high as it would go, which on my Brother 1034D serger is at a “9” tension. After some trials, I found I achieved best results if my left needle is at “9” and the right needle is more like a “7” tension. The loopers were left at default tension, which for my machine is a “4”:
Step 2:
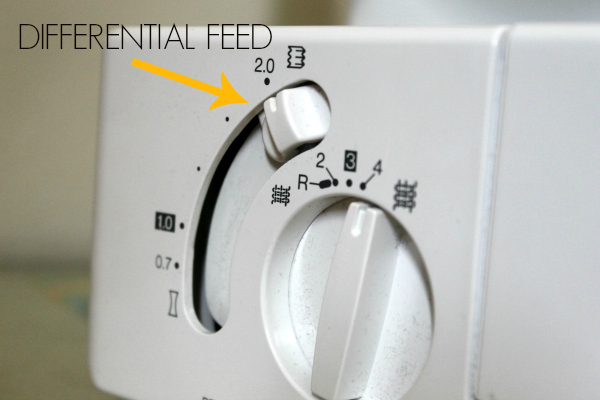
Next, tighten the differential feed if you are able to. The serger has two sets of feed dogs, one in front of the other; the differential feed controls the ratio at which these feed dogs move the fabric under the presser foot. A higher differential feed — in this case, a “2” — will move the first set of feed dogs twice as fast as the second set, which gathers up the fabric. Conversely, a lower differential will move the first set of feed dogs more slowly, which stretches out the fabric.
Here I’ve set it to the highest ratio possible:
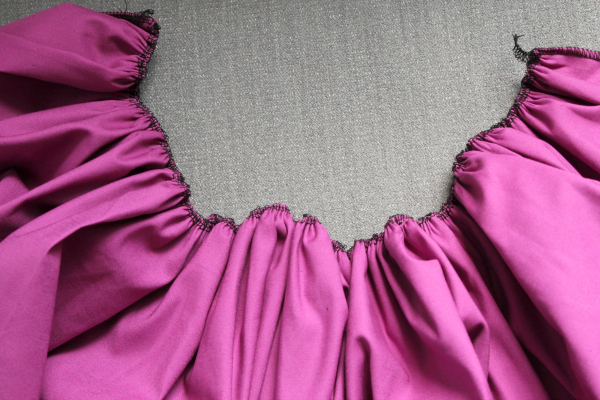
Step 3:
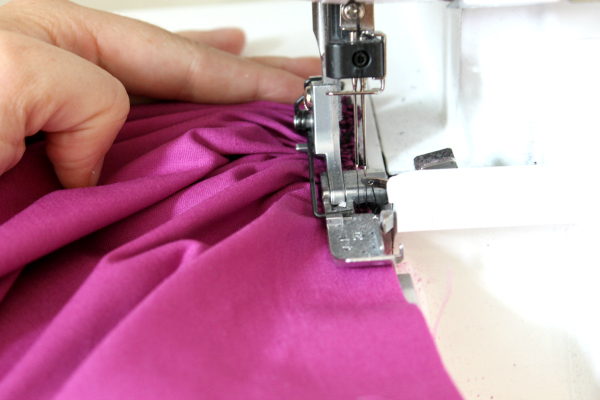
Now, all you have to do is serge along the edge of the fabric and the machine will do the gathering work for you. Keep in mind that the serger will gather along the edge, so you may need the adjust your seam allowance first or serge so the knife cuts off part of the seam allowance if it is 1/2″ or larger. Make sure the left needle of your serged seam does not extend past your desired seam allowance because the threads will then be exposed on your garment.
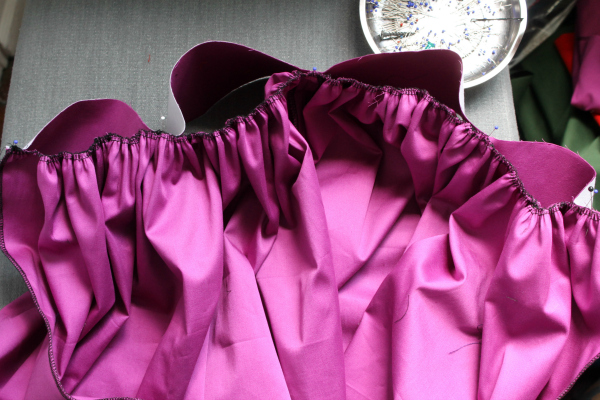
Step 4:
If you are attaching the gathers to a flat piece of fabric, it helps to have marked the gathered fabric and the flat fabric into fourths so it’s easier to match up the points and distribute the gathers evenly. Below, I have matched the quarter marks and then gently loosened and distributed the gathers so they match the length of the flat fabric. Lots of pins help secure the gathers.
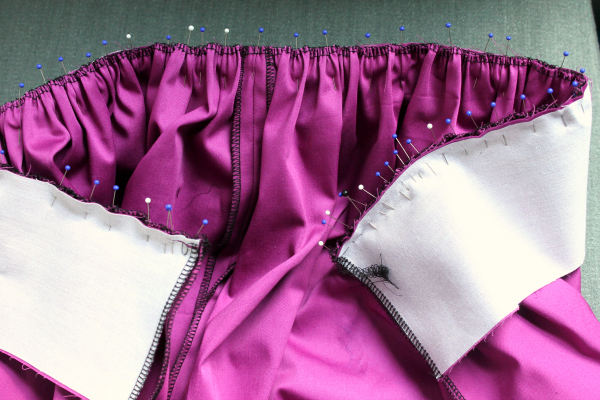
Step 5:
When you sew the gathers to the flat fabric on your sewing machine, it helps to have the gathered side facing up so you can make sure the gathers aren’t folding over or falling under the seam allowance. Be sure your needle sews right below the serged seam.
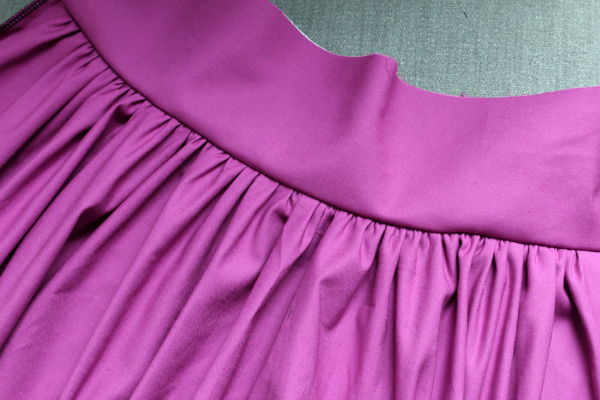
And that’s it! A relatively fast and easy way to densely gather fabric.
Loving how easy your serger makes things? Then don’t stop here — learn more! Discover expert tricks and techniques for mastering your serger in the online Craftsy sewing class Beginner Serging.
Just bought the Bernina L890. Still learning the machine, have not stitched anything yet.