
When there are so many type of pigments out there, why paint with oil paints? The benefits are tremendous!
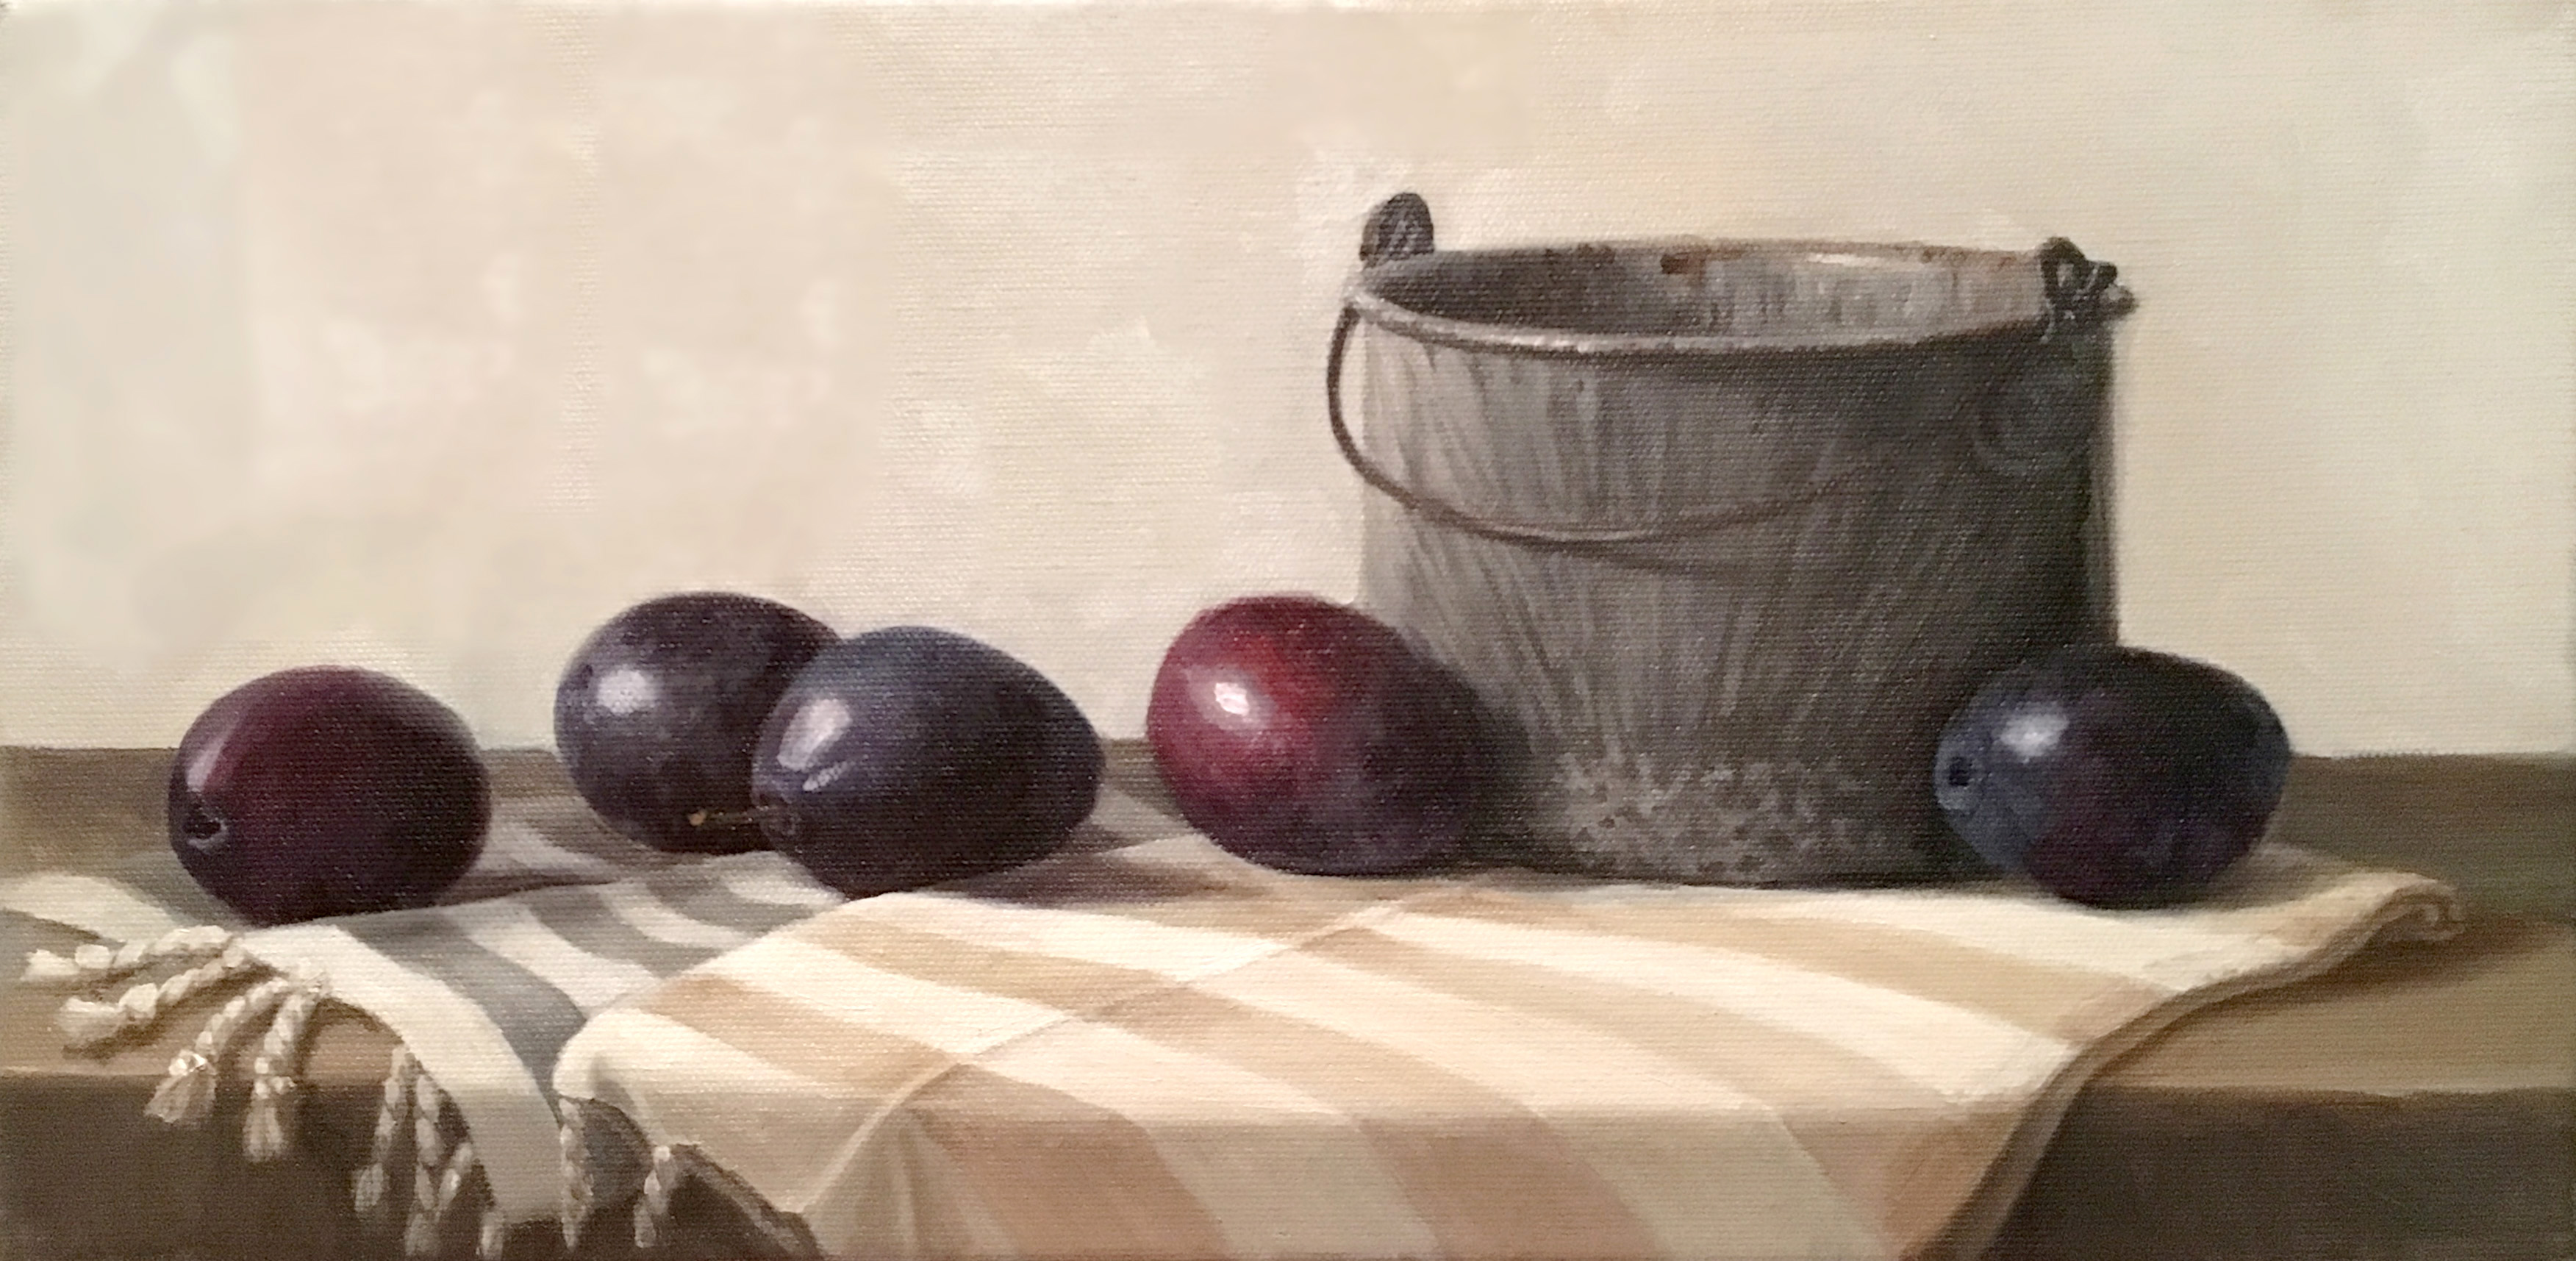
Plum Line by Dorothy Lorenze
Compared to other media, oil paints offer:
- Slower drying time. This gives you more time to blend colors or manipulate the paint.
- Greater opacity. Because of this, areas can be re-painted to correct details or alter the composition.
- Workable consistency. The viscosity of oil paint allows for layers, thicker application and textured brushstrokes, if desired.
- Durability. Oil paint holds up against light better than some media and can last longer than other media.
Start by getting the right supplies
Don’t break the bank if you’re just starting out, but buy the best quality materials you can afford. It’s often true that less expensive paints and brushes are harder to work with.
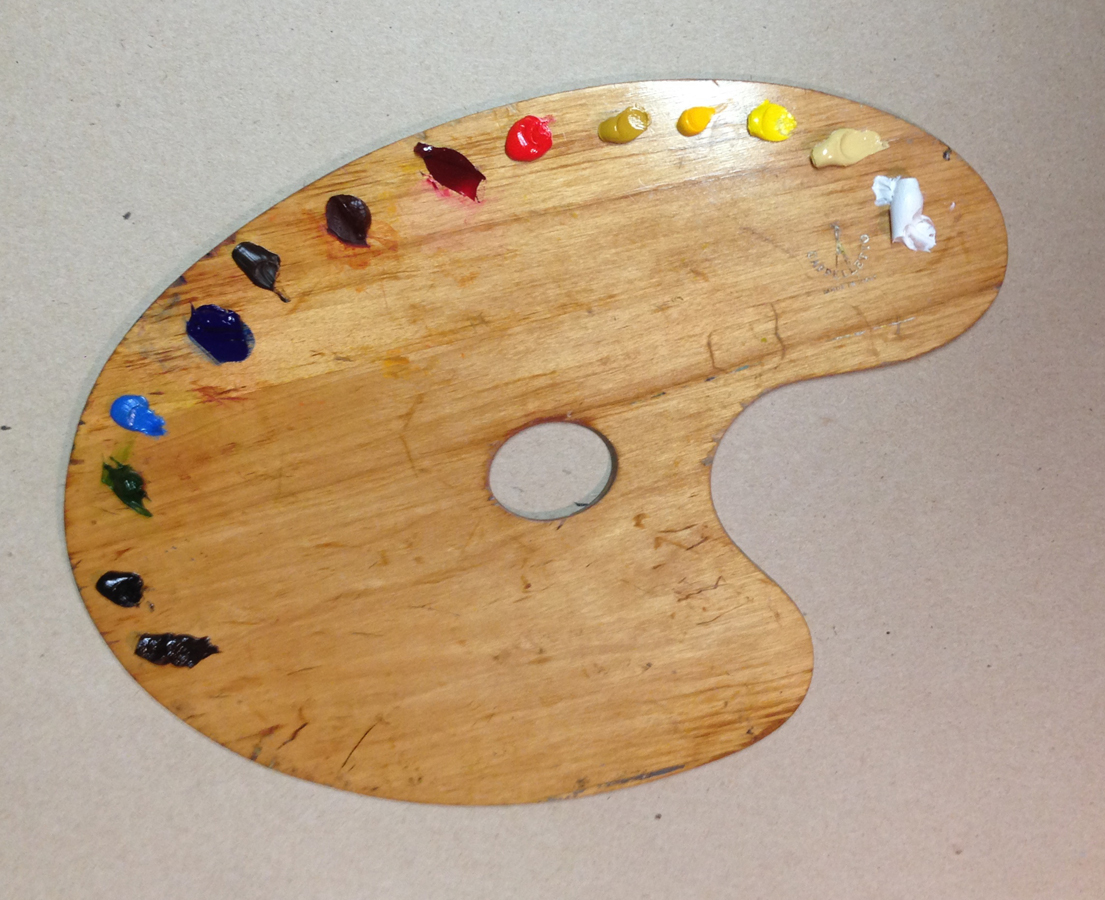
Paint colors
I recommend you get basic colors to start and create others by mixing. Here’s a good starting list of oil paint colors:
- Ivory black or lamp black
- Ultramarine blue
- Cerulean blue or Cerulean blue hue
- Burnt umber
- Alizarin crimson
- Cadmium red or Cadmium red light
- Burnt Sienna or transparent oxide brown
- Raw umber
- Yellow ochre
- Cadmium yellow or lemon yellow
- Titanium white
- Greens can be mixed from blues and yellows, but permanent green light, sap green are helpful for landscapes
Specific pigments cost more than others (particularly cobalt and cadmiums). Some of these expensive colors are also available as “hues,” which are less expensive because there’s less concentration of pigment.
Canvas or prepared boards
Use linen canvas rather than cotton, which may deteriorate over time If you prefer a smoother surface you can try boards. Select either professionally prepared panels or cut your own birch or Masonite and prime the canvas with four coats of gesso.
Mixing palette
You can find plenty of information on selecting oil painting palettes here. In sum, there are three main types to choose from:
- Paper palettes are disposable pads of waxy paper that can be thrown away after a single use.
- Glass palettes are easy to clean with a palette knife or razor blade.
- Wood palettes that are lightweight are easy to hold while painting, and the wood color provides a neutral background.
Brushes
You’ll need various sizes of bristle and sable brushes, mostly mid-size but also a few small and at least one large. More brush information is available here. To get started, pick up:
- Bristle brushes, for heavier application or textured strokes
- Sable or soft, synthetic, sable-type brushes for finer blending and greater control
Solvent or paint thinner
These materials are used to clean brushes and thin your paint. Store your solvent in a tightly covered jar and keep it handy for thinning paint and helping clean brushes.A few common types include:
- Turpentine is a common solvent, but it’s a hazardous material that could cause short-term or long-term health effects. (Turpenoid is an “odorless” product, but still hazardous.) Use with ventilation.
- Mineral spirits are similar to turpentine in terms of toxicity. The odor is reduced, but not the hazardous qualities. Use with ventilation.
- Lavender spike oil or rosemary oils are safe gaseous oils for thinning oil paint and clean up.
Toning your canvas
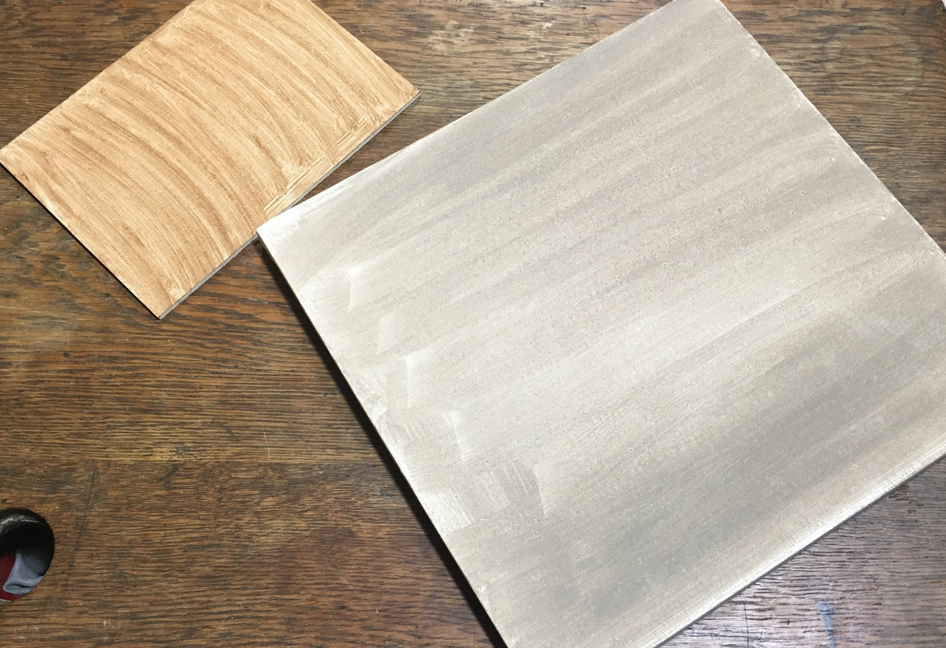
toned canvas samples: burnt umber at left and grey on the right
Many painters like to begin with a toned canvas because the white surface of canvas can be daunting! Beginning with a toned surface also makes it easier to gauge comparative darks and lights. Highlights are important to the composition, and if the canvas is white, they are harder to visualize.
To tone, you’ll lightly cover your surface with a thin coating of paint (such as raw umber).
Squeeze some raw umber onto your palette and mix with a bit of solvent to create a fairly thin wash. Use a large, soft brush to cover your canvas then wipe with a soft cloth (old T-shirts work well) for an even, smooth layer of medium tone.
It’s fine to be able to see some of the canvas show through. Allow this to dry for 15-20 minutes.
Setting up your palette
While your toned canvas is drying, squeeze paints onto your palette in more-or-less rainbow order, as with the darkest neutrals near their more saturated, neighboring colors. For example Yellow Ochre is a duller and darker yellow than the brighter Lemon Yellow. This placement makes it easier to find what you need and the darkest version of each color is nearby.
Planning a painting
Before beginning to paint, plan out your composition. Whether it’s a still life or landscape, you need to know how and where elements will fit on your canvas.
Consider where the center of interest will fall. It often works well to place the center of interest at an intersection of two lines that are a thrid from the edges of the canvas (this is called the rule of thirds).
Time to get painting!
When your toned canvas is dry to the touch, you can begin painting!
Direct or indirect painting
Alla prima, or “direct” painting is what most oil painters (especially beginners) prefer, as it involves painting wet into wet paint. The opposite is “indirect” painting, which can take a bit more experience, patience and understanding of the qualities of paint.The challenge for direct painting is in trusting that it’s OK for adjacent areas to be wet when they’re painted. We tend to think that one area of paint should be dry before painting beside it — but that’s not necessarily so for oil paint. Wet paint allows strokes be softened and blended which is part of the intrinsic character of oil painting.
The painting process
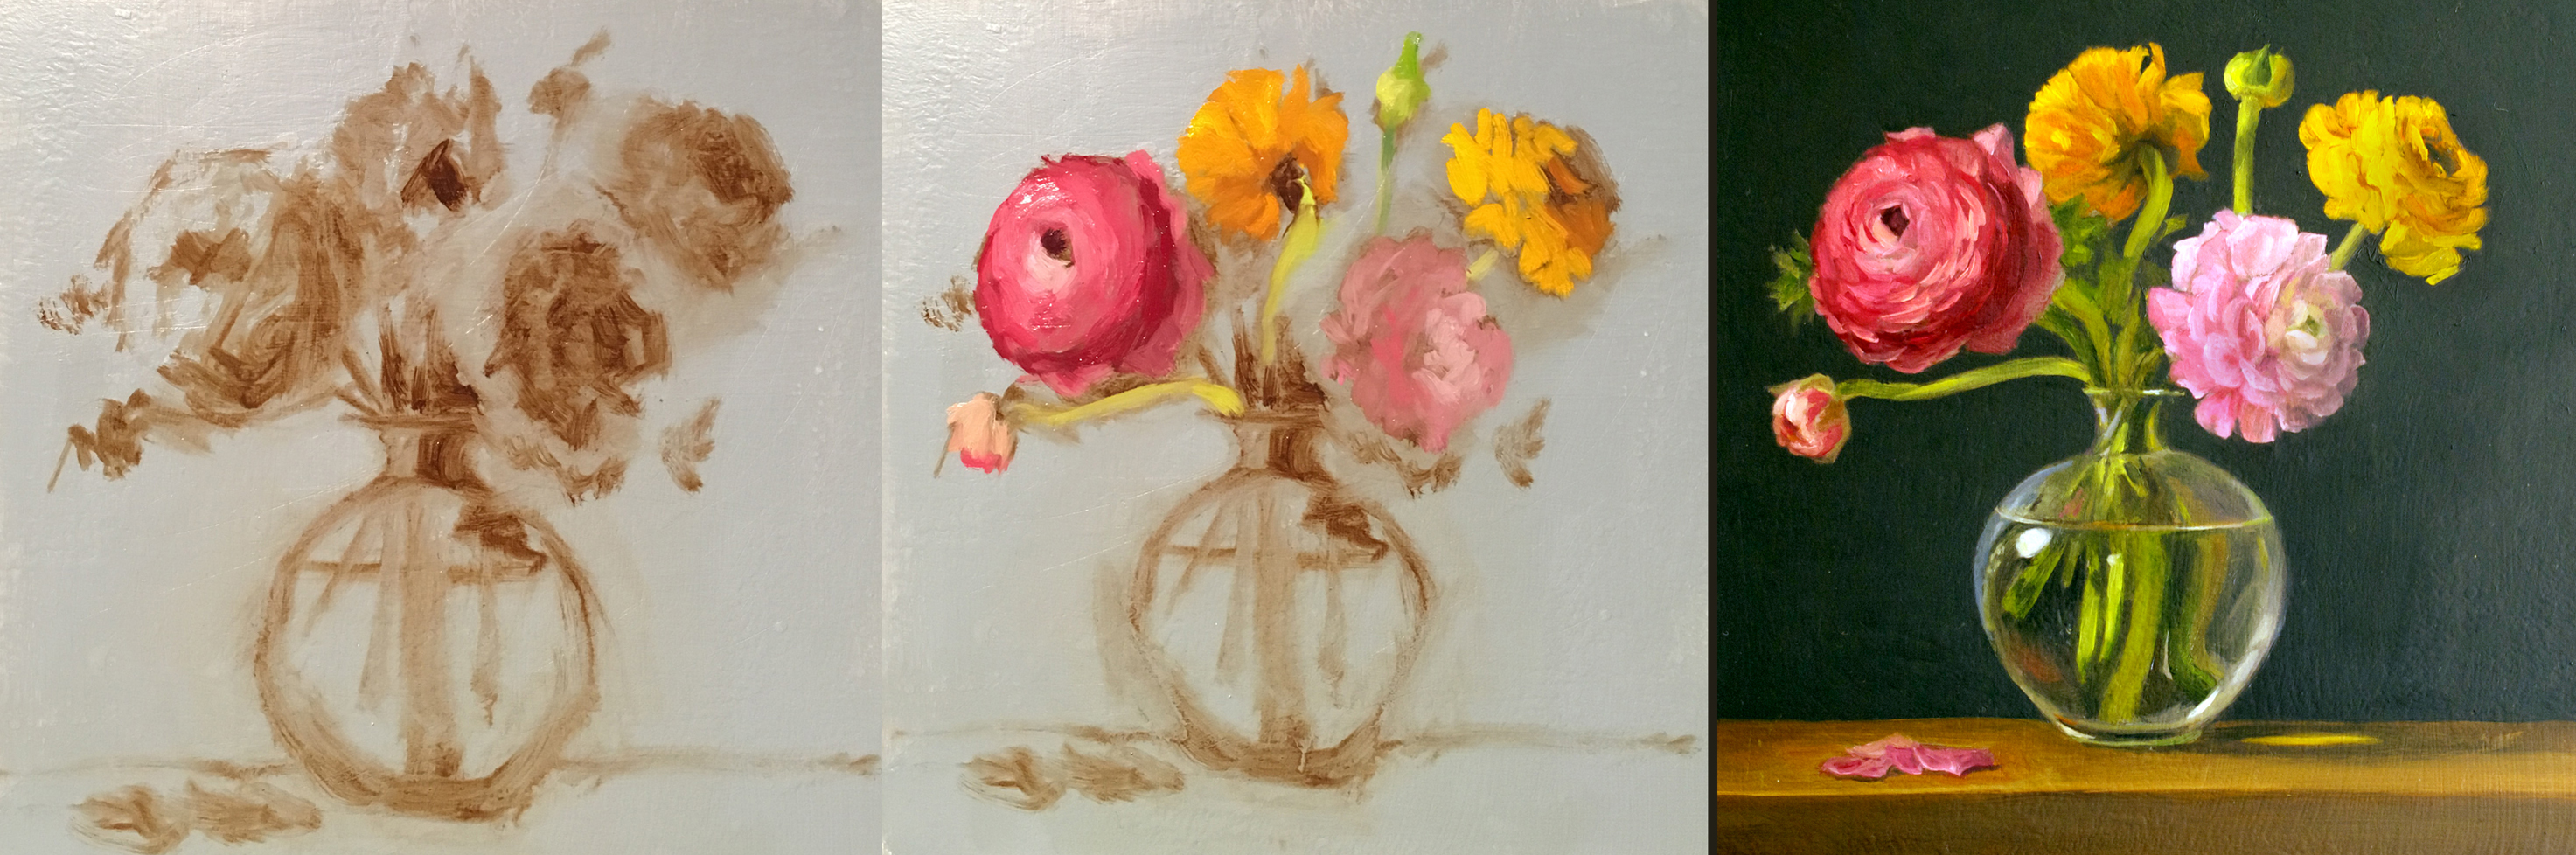
In the group of images above, you can see a very abbreviated look at the painting process:
- The painting is first laid out with thinned burnt umber.
- Next, local color (color of the actual objects) is added in a general way.
- Then, skipping many brushstrokes, you have the the final painting.
Compositionally, you can see that the lightest pink blossom is placed at an intersection of thirds and the fallen petals are balanced by a spot of light transmitted through the clear glass bowl on the right.
Selecting your subjects
Of course, you will want to paint subjects that speak to you, especially because you’ll spend a good bit of time on whatever you choose. It will surely be more meaningful — and more fun — if it’s something you love.
But it’s a good idea to consider a simple still life to start. Still life subjects include many elements: color, form, light, shadow and texture. You can choose a subject that explores those elements and learn a great deal as you tackle them. Do keep it simple to begin with so you can focus on getting to know the paint itself rather than obsessing over details.
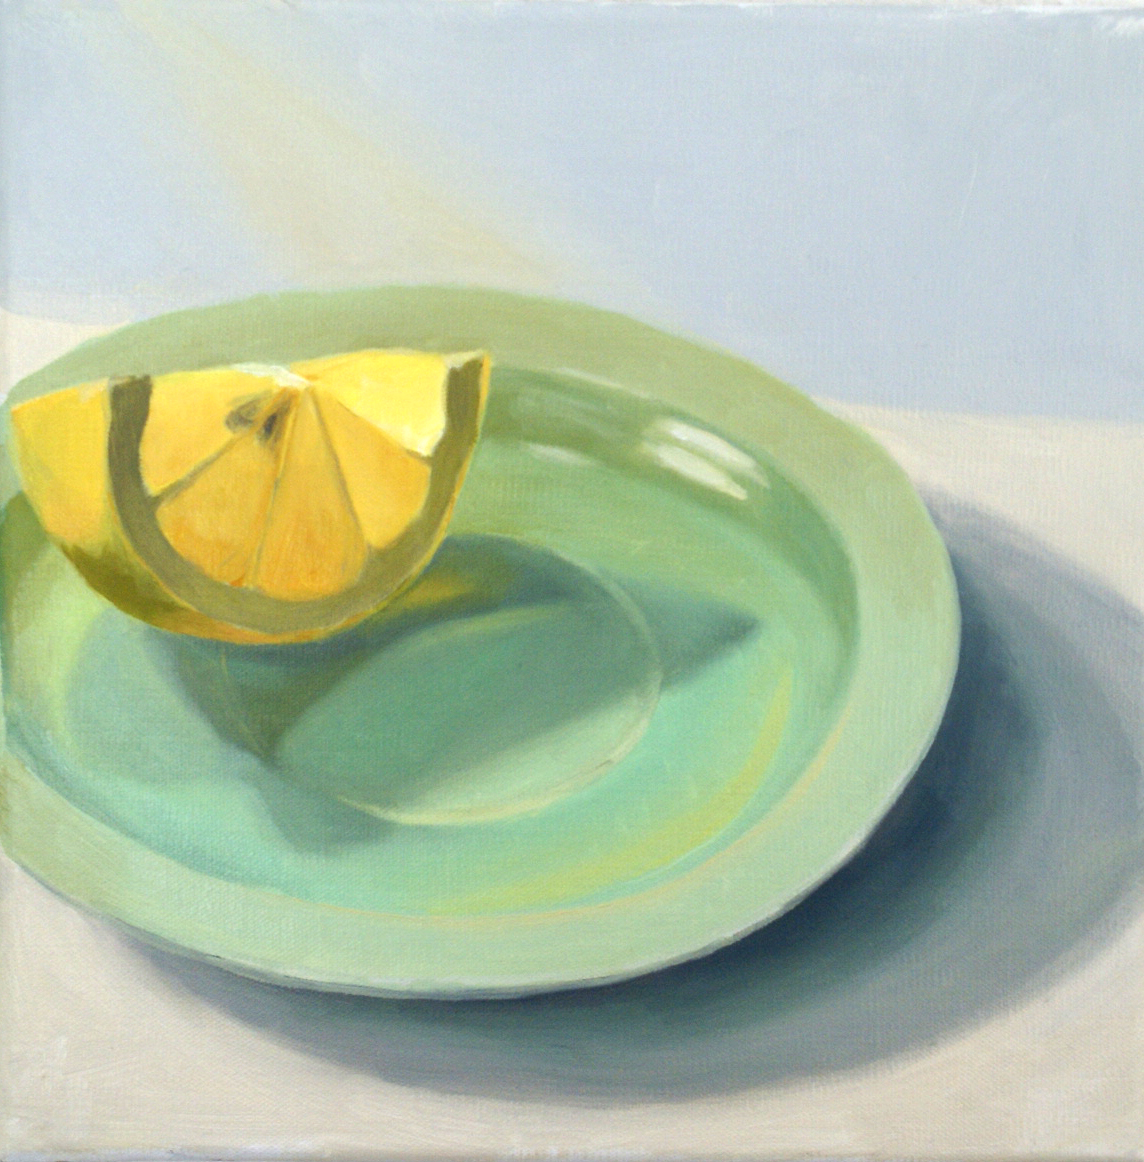
Lemon Light by Dorothy Lorenze
For this painting, “Lemon Light,” my interest was the light glowing through the lemon wedge. The bright airiness of that lit segment is actually achieved by graying down the “white” pith of the lemon skin, compared with the yellow of the bright, juicy segment.
Although this is a very simple composition, it provided interesting challenges in translucency, reflection and color in unexpected places. This is what I love about painting still life!
What subjects will pique your interest as you explore oil painting? The more time spent observing your subject the more beauty you will see – even color in the shadows! Get started and have fun!
Share tips, start a discussion or ask one of our experts or other students a question.
No Responses to “Getting Started With Oil Paints (A Beginner's Guide)”