
I admit that I get a bit anxious as glue-up time approaches because all my work is literally coming together, permanently, so this is not a time for mistakes. The key to ease and success is to have all your ducks in a row so the event goes off smoothly.
Prepare cauls
In this dovetail project, the joint was marked out to leave the pins and tails proud of the surfaces, thereby wisely giving some margin for error in starting the saw cuts. Note that this is not always done, and sometimes is counterproductive, such as in drawer making.
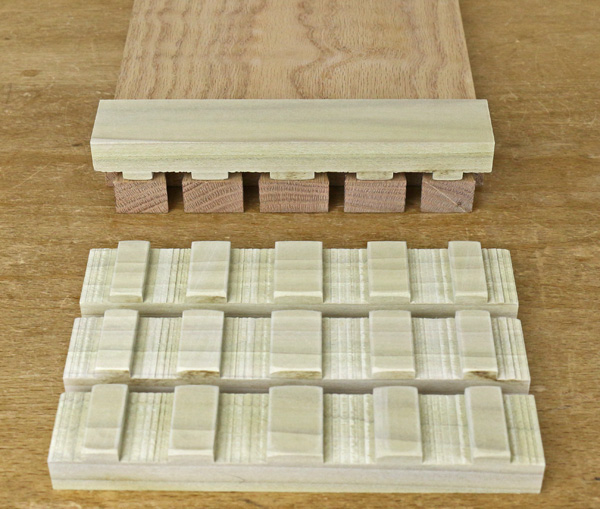
Because the end grain of the pins will protrude, the most reliable approach is to make specialized cauls that apply pressure to the tails while clearing the pins. It’s worth the 20 minutes it takes to make these.
Make these castellated cauls by first crosscutting a 3/4 – 1″ thick dressed board, about 6″ wide, of medium-soft wood, such as poplar, to a length equal to the width of the project parts. Then, mark and cut 3/16″-deep dados slightly wider than, and aligned with, the widest part of the pins, as shown below. Rip 1 1/4″-wide strips and round over all corners on the inside face with sandpaper.
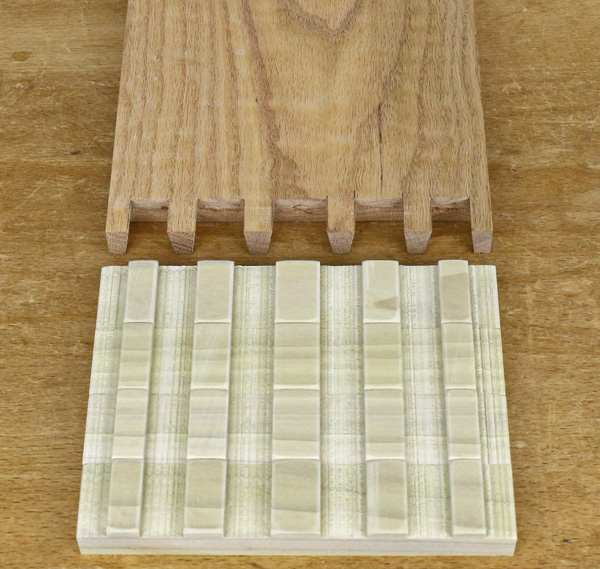
As demonstrated below, each caul is thus configured to apply pressure only on the tails and will allow the ends of the pins to protrude between them as the joint is driven home.
Check over the tail and pin boards one last time for any errant bits of wood that might prevent the joints from fully closing. Clean up as needed.
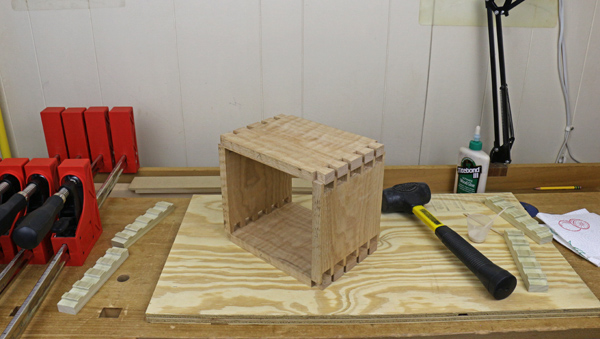
Below is an overview of the little box with lots of dovetails that I am making for this instructional series. All the principles would be the same if this was a 5′ x 3′ cabinet carcass. Remember, in the previous post on fitting dovetail joints together, all the joints were dry fit two-thirds to three-quarters of the way home, and so I am confident everything will come together.
Glue and time
Once the glue is applied, time is critical. Glue that has begun to skin over before the joints are assembled will not hold well and may cause the parts to seize when only partially assembled — a woodworking disaster. Minimize the time between starting to apply the glue and starting assembly.
So, get all tools and materials ready! Put some glue in a cup, have a few applicators ready, along with clamps and supports, paper towels and cauls. Summon a bit of your inner NASCAR pit crew.
Here are two strategies for applying the glue quickly.
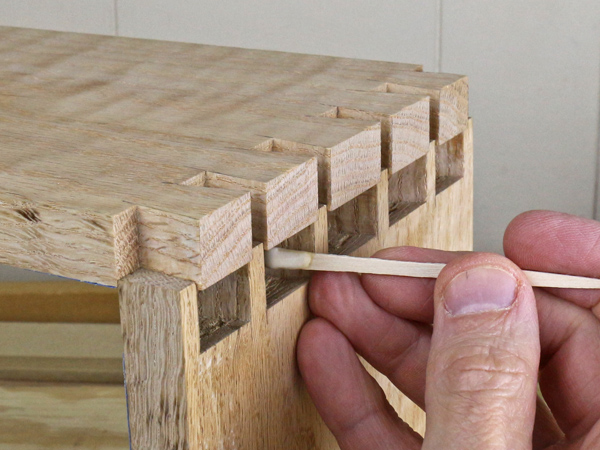
One, which I learned from the teachings of Chris Becksvoort, and am demonstrating below, is to engage all the joints just enough to stay together and poke the glue only onto the walls of the pins.
It may be awkward to repeatedly get in those spaces, so another approach is to apply the glue to the joint surfaces while the parts are separate. Sometimes this can get a bit sloppy and slippery as the parts are then engaged. The choice comes down to how easy it is to handle the parts — I prefer to pre-engage larger work.
Bring ’em home
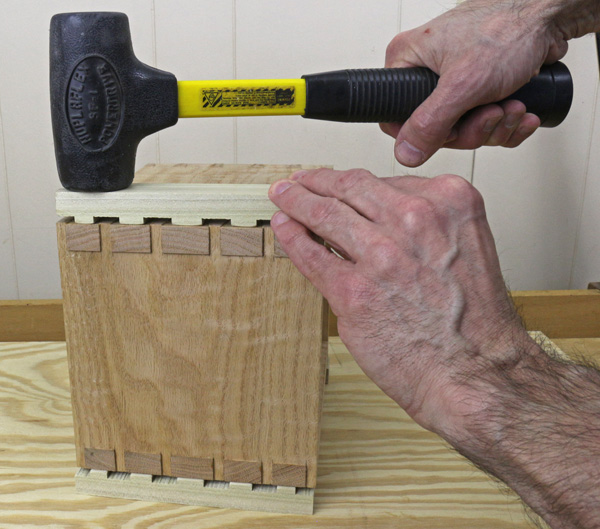
At glue-up, dovetail joints go together mostly with mallet blows. I recommend using a dead blow mallet, about 26 oz., with a non-marring rubber face. This can deliver gentle taps, but packs a serious wallop if needed, all without bounce back. Remember, as the joints approach closing, use the cauls, top and bottom, as I am doing in the opening photo, because the pins will start sticking up.
Dovetail joints often oddly seem to resist closing with mallet blows that last sliver of an inch to where the tails are fully seated with no gap on the pin baseline. (Perhaps this is a rebound effect.) At this point, clamps are the best be to fully close the joints. Therefore, I rehearse a setup with parallel jaw clamps and the cauls, as shown below, before starting the glue-up.
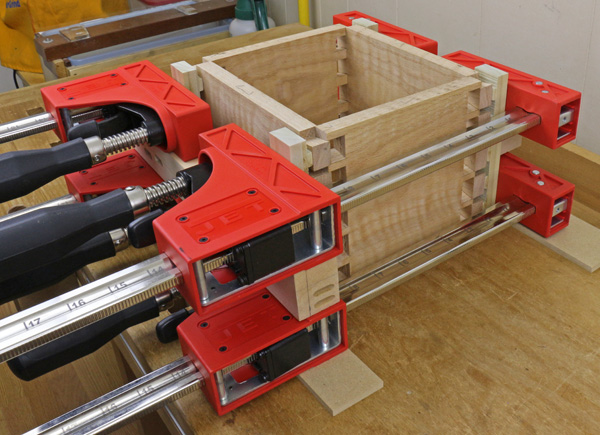
A small carcass with relatively thick parts, such as this one, will almost always glue up square. All those careful early steps in making flat stock, accurately square ends and edges, and precise layout are now paying off. Despite this, larger carcasses or ones with thinner parts, such as drawers, may distort into a slight parallelogram. In these situations, a second reason to use clamps at the close of the process, is their ability to correct an out-of-square carcass. (Though a full discussion of this is beyond our scope here, the basic trick is to reset the clamps to squeeze slightly along the longer diagonal of the parallelogram, as determined by using pinch rods.)
In summary, prepare all materials, think through and rehearse the process, and then work quickly from the moment the first bit of glue is applied. Tap the joints together to near completion, and finish up with clamps while checking for trueness.
Next week, we’ll cover cleaning up, fixing mistakes and feeling good about it all.
question...do you recommend yellow wood glue or liquid hide glue?