
If you ask a woodworker what tool he or she would love to have more than any other, the answer would probably be a board stretcher. You could use a board stretcher for those times you need a board that is, say, 12” wide, and you only have one that is 10” wide.
Unfortunately, a board stretcher doesn’t really exist. But what does exist is the ability to glue up narrow boards into wider ones. In this post, we’ll learn show you how to do this in four easy steps.

A quick how-to for gluing up panels
Step 1: Arrange the boards
You could take any two boards and glue them together to make a wider one. But if you don’t pay attention to the grain pattern of the boards, you might wind up with a grain mismatch that can be jarring to the eye.
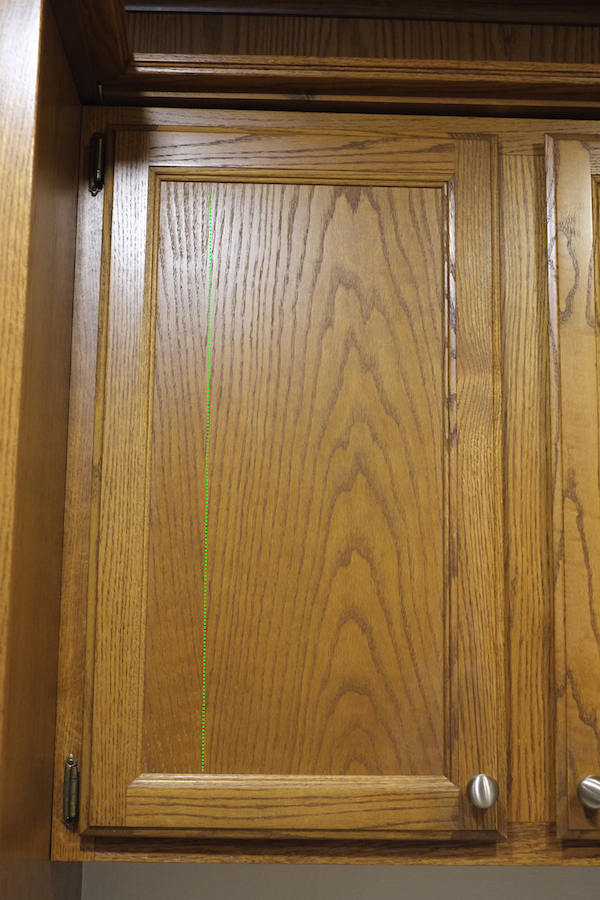
In the example above, the glue line is where the green dotted line is. The arch of the grain is way off center, and the lines at the glue line angle toward each other, making it clear where the glue line is.
Instead, take the time to make sure that the pattern of the boards you are gluing up will result in a pattern that is pleasing to the eye. You can have a mirror image of the grain, or a repeated pattern of the grain, or you could position the grain on the boards so that it is very difficult to tell where one board begins and the other ends. For this glue up, I decided to go with a mirror arrangement. You will be able to tell where the boards come together, but it will be symmetric, which will look better than the off-center glue line in the photo above.
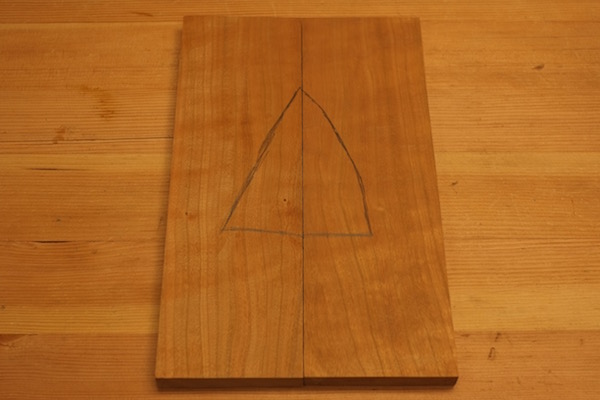
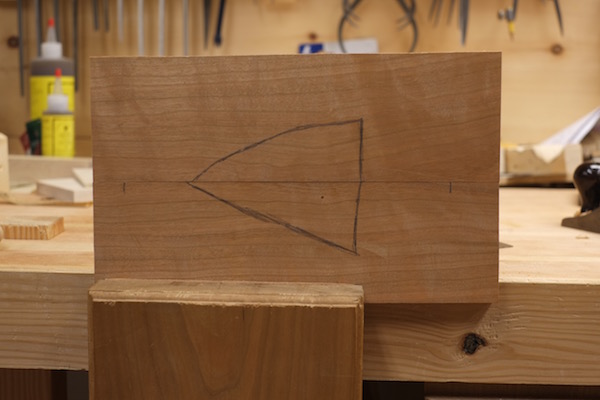
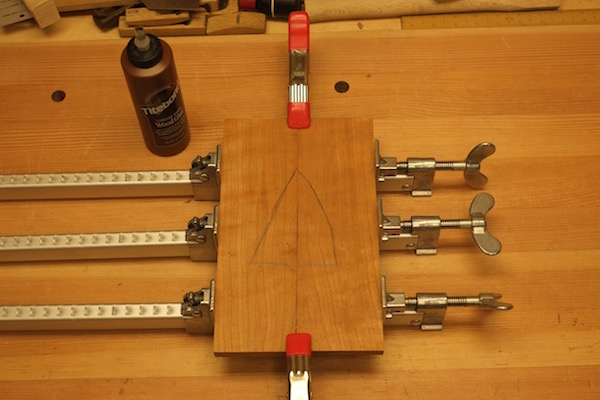
However you decide to arrange your boards, mark them with a large triangle so that you can position the boards in the same arrangement when it comes time to glue them up. Normally, I would not make the sides of the triangle this dark and thick. This was done to make it clearer in the picture.
Step 2: Prepare the edge
To glue up the panels, the mating edges needs to be very straight. There are a number of ways to do this, but for this article we will use a hand plane to clean up the edge. The first thing to do is to take a jointer plane with the blade set for a fairly fine shaving, and to make shavings starting about 1/2” to 1” from the near end of the board, and stop about the same distance short of the far end. By doing this, you will deliberately create a hollow along the edge of the board.

Once you have done this, take the plane and make passes along the entire edge. At first, you will get a shaving at the beginning and the end of the stroke, with a gap in between. Those shavings will get longer and the gap will get shorter, until you take a shaving that is continuous from end to end. At this point, the edge should be perfectly straight.
Repeat the process with the edge on the other board. Make sure you check the triangle marking to make sure you are preparing the right edge.
Step 3: Test the fit
With one board in the vice with the planed edge facing up, balance the other board on top of it so that the marks you made earlier line up. You should not see any gaps of light. Move the top board around a little. You should feel like the two boards are sticking together along the length of the edge. If you notice that the top board is pivoting about a spot, that part of the edge is a little high. Take a pass with your plane over the high spot to correct it and test again.
Step 4: Glue up and clamping
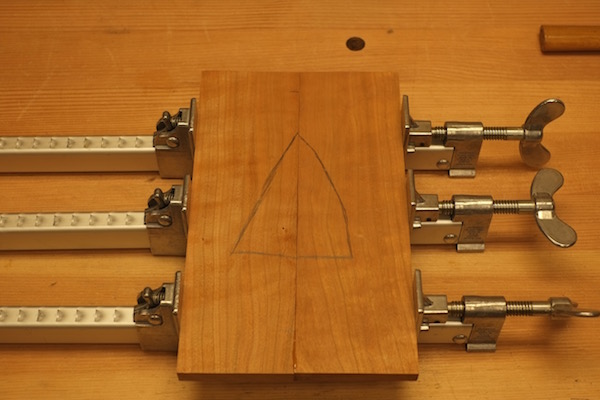
Although you can glue up the panels with a variety of clamps, I like using these aluminum bar clamps for this job.
To start, lay the boards down, using the marks to line them up. Then turn the boards on their outside edge so that the mating edges are facing up. Spread a thin line of glue down the edges of both boards, and use a spreader to spread out the glue evenly. You can even use a scrap piece of wood for this. Lay the boards flat again and line up the marks. Then tighten the clamps, going from one to the other to apply pressure evenly.
Sometimes the ends of the panel will become uneven as you apply the clamp pressure. If this happens, you can apply a clamp to keep the boards even. In the picture below, I’m using some spring clamps for this. C-clamps also work well.
Let the glue dry according to the type of glue you are using. If some glue squeezes out from between the joint to the faces, let the glue dry for about an hour so that it is not quite completely dry, and then scrape it off.
Once the glue is dry, take your new wide board out of the clamps. You may have to do some planing or sanding to completely even out the board, but this shouldn’t take too long.
At the end, you’ll have a wide board, ready for use, with a pleasing grain pattern to look at. And you’ve eliminated the need for a board stretcher, to boot.
You might also enjoy our post on different types of wood glue.
Share tips, start a discussion or ask one of our experts or other students a question.
No Responses to “Gluing Up Panels in 4 Easy Steps”